
Discover the Joy of Oreo Milkshakes!
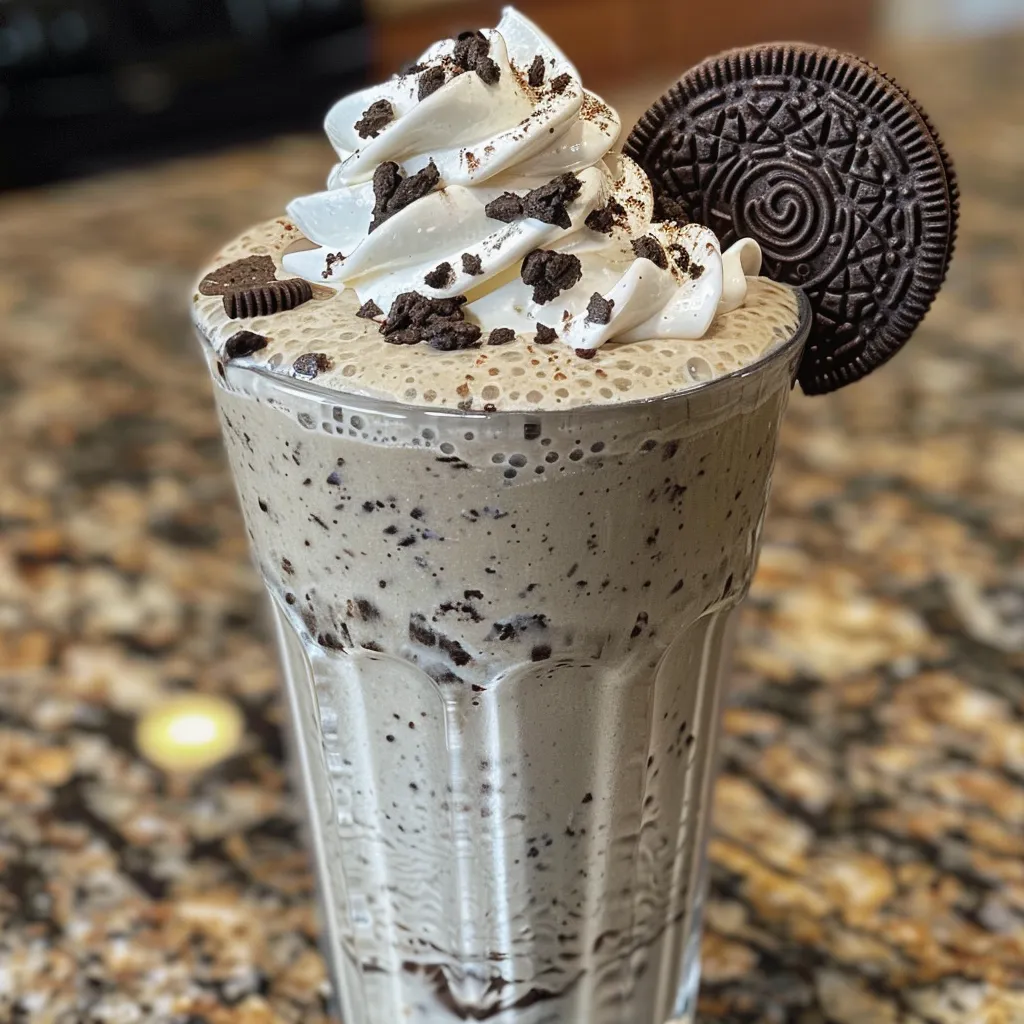
Are you ready to dive into a delightful world of flavor? This recipe for an Oreo Milkshake is not just any sweet treat; it’s a creamy, dreamy experience that will have you smiling from the first sip to the last crumb. Combining crunchy Oreo cookies with rich vanilla ice cream and a splash of whole milk, this milkshake is perfect for any occasion. Whether you’re celebrating a special moment or simply indulging in a cozy night in, you won’t want to miss out on this deliciousness!
Let’s get started on this Oreo Milkshake adventure that promises to be a hit with kids and adults alike!
Why You’ll Love This Recipe
- Quick and Easy: With just a few simple steps, you can whip up this milkshake in under 10 minutes.
- Customizable: Feel free to play around with the ingredients to suit your taste preferences or dietary needs!
- Perfect for Any Occasion: Whether it’s a hot summer day or a cozy winter night, this milkshake is always a hit.
- Kid-Friendly Fun: Get the little ones involved in the blending and garnishing process for a fun family activity.
- Indulgent Treat: Who can resist a creamy, dreamy dessert topped with whipped cream and chocolate?
Ingredient Breakdown
Let’s take a closer look at the ingredients that make this Oreo Milkshake a true delight:
- 8 Oreo cookies: The star of the show, these cookies provide that iconic flavor and crunch.
- 2 cups vanilla ice cream: Creamy and smooth, this is the base of our milkshake.
- 1 cup whole milk: Adds the perfect consistency, making it easy to sip through a straw.
- 1/2 teaspoon vanilla extract: A little extra flavor goes a long way in enhancing the overall taste.
- Whipped cream and chocolate syrup: For that luxurious topping that brings it all together.
- Extra Oreo cookies (optional): For garnish and an extra crunch! These are perfect for those who want to take their milkshake to the next level.
Pro Tips for the Perfect Oreo Milkshake
To ensure your Oreo Milkshake turns out absolutely divine, keep these tips in mind:
- Crushing Oreos: Use a plastic bag and a rolling pin to crush the Oreos finely, or pulse them in a blender for a quick option.
- Adjust Consistency: If your milkshake is too thick, add more milk a little at a time until you reach your desired thickness.
- Chill Your Glasses: For an extra frosty treat, chill your glasses in the freezer for about 10 minutes before serving.
- Experiment with Flavors: Try using different flavored ice creams or adding peanut butter for a different twist!
- Blend in Layers: For a more visually appealing shake, layer the crushed Oreos in between blending to create a marbled effect.
- Use High-Quality Ingredients: The better the ingredients, the tastier your milkshake will be!
- Don’t Overblend: Blend just until combined to keep some Oreo chunks for texture.
- Garnish Generously: Don’t hold back on the whipped cream and chocolate syrup—it’s part of the fun!
Common Mistakes and Troubleshooting
Even the best home cooks can run into some hiccups! Here are a few common mistakes and how to avoid them:
- Milkshake Too Thin: Add more ice cream to thicken it up. Start with a couple of scoops and blend again.
- Too Thick: If it’s too thick to sip easily, gradually add more milk while blending until you achieve the right consistency.
- Messy Serving: Use a wide straw and serve with spoons for easy enjoyment and no mess!
- Not Enough Flavor: If you find the flavor lacking, a pinch more vanilla extract or a splash of chocolate syrup can enhance the taste significantly.
Oreo Milkshake Variations
Why stick to just one flavor when you can have a whole world of possibilities? Check out these fun variations to try:
- Mint Oreo Milkshake: Substitute regular Oreos with Mint Oreos for a refreshing twist.
- Chocolate Peanut Butter Oreo Milkshake: Add 2 tablespoons of peanut butter to the blender for a nutty flavor.
- Cookies and Cream Milkshake: Use cookies and cream flavored ice cream for an extra creamy treat.
- Vegan Oreo Milkshake: Swap the ice cream for coconut or almond milk ice cream and use plant-based milk.
Storage and Make-Ahead Instructions
This Oreo Milkshake is best enjoyed fresh, but if you want to make it ahead of time, here’s how:
- In the Fridge: Store any leftover milkshake in an airtight container in the fridge for up to 24 hours. Be sure to give it a good shake before serving.
- In the Freezer: You can freeze the milkshake, but it will harden. Let it sit at room temperature for a few minutes before serving.
Frequently Asked Questions
Have questions? We’ve got answers! Here are some common queries about making Oreo Milkshakes:
- Can I use other types of cookies? Yes! Feel free to experiment with any cookie you love.
- How can I make this milkshake healthier? Use low-fat ice cream, almond milk, or skip the whipped cream.
- Can I add alcohol for an adult version? Absolutely! A splash of Baileys or Kahlua would be delicious.
- What’s the best way to blend? A high-speed blender works best for a smooth consistency.
- Can I make it without a blender? While a blender is recommended, you can crush the Oreos finely and mix by hand, but it may not be as smooth.
- How many servings does this recipe make? This recipe yields about 2 generous servings.
- Can I make it dairy-free? Yes! Use dairy-free ice cream and milk alternatives.
- How long does it take to prepare? It takes about 10 minutes from start to finish!
Nutritional Tips and Dietary Adaptations
Whether you’re counting calories or just looking to make healthier choices, here are some suggestions:
- Low-Calorie Option: Use light ice cream and skim milk for a lighter version.
- Gluten-Free Option: Use gluten-free Oreos to make this treat safe for those with gluten sensitivities.
- Protein Boost: Add a scoop of protein powder to turn this into a post-workout treat.
Essential Equipment for Making Oreo Milkshakes
To make this milkshake, you’ll need the following equipment:
- High-speed blender: For the smoothest consistency.
- Measuring cups and spoons: To ensure accurate ingredient measurements.
- Thick straw or spoon: For easy sipping and enjoying.
- Plastic bag and rolling pin: For crushing Oreos, although a food processor also works great!
Serving Suggestions
When it comes to serving your Oreo Milkshake, presentation is key!
- Layered Look: Add crushed Oreos to the bottom of the glass before pouring in the milkshake for a beautiful layered effect.
- Fun Straws: Use colorful or themed straws to make the experience even more fun!
- Side Treats: Serve with extra cookies or chocolate-covered pretzels for a fun snack pairing.
Now that you have the ultimate guide to making the best Oreo Milkshake, it’s time to get blending! Don’t hesitate to experiment with flavors and toppings—after all, cooking should be a joyful adventure. Cheers to your delicious creation and the sweet smiles it brings!

Oreo Milkshake
Ingredients
Cookies
- 8 pieces Oreo cookies
- 2 cups vanilla ice cream
- 1 cup whole milk
- 0.5 teaspoon vanilla extract
- for topping Whipped cream and chocolate syrup (for topping)
- extra Oreo cookies for garnish, optional
Instructions
- Place Oreo cookies in a bag and crush them.
- Add milk, ice cream, and crushed Oreos to a blender.
- Blend until smooth, then add vanilla extract.
- Pour into glasses, top with whipped cream and chocolate syrup, and garnish with whole Oreos if desired.


