
Welcome to the World of Homemade Chocolate Bars!
Have you ever dreamed of crafting your own chocolate bars right in your kitchen? With just a handful of ingredients and a sprinkle of creativity, you can turn that dream into a delightful reality! Making homemade chocolate bars is not only fun but also incredibly rewarding. In this comprehensive guide, we’ll explore everything from the basics to advanced techniques, ensuring every bite is a celebration of flavor and joy.
Why You’ll Love This Recipe
When it comes to homemade chocolate, the possibilities are endless! Here are just a few reasons to get excited about making your own chocolate bars:
- Customizable flavors: Experiment with your favorite ingredients, like mint chocolate or chocolate coconut, to create a bar that’s uniquely yours!
- Healthier options: Control what goes into your chocolate by using wholesome ingredients like coconut oil and pure maple syrup.
- Simple process: With minimal cooking skills, you can easily whip up delicious chocolate bars that are sure to impress.
- Fun for everyone: This recipe is perfect for kids and adults alike, making it a great activity for family bonding.
- Gift-worthy creations: Share your homemade chocolate bars with friends and family—they make wonderful gifts!
Gather Your Ingredients
Let’s dive into the essential ingredients for making your own chocolate bars:
- 1/4 cup cacao or cocoa powder: This is the star ingredient! Choose cacao for a raw, rich flavor or cocoa powder for a milder taste.
- 3 tbsp coconut oil: This healthy fat adds creaminess and helps the chocolate set.
- 3 tbsp pure maple syrup, honey, or agave: Sweeten your chocolate naturally. For a sugar-free option, consider using a sugar substitute.
- Optional extracts and add-ins: Feel free to get creative with cocoa nibs, chia seeds, or other fun additions!
How to Make Your Chocolate Bars

Ready to get cooking? Follow these simple steps to create your homemade chocolate bars:
- Warm the coconut oil: If your coconut oil isn’t already melted, gently warm it until it’s liquid.
- Mix the ingredients: In a mixing bowl, combine the melted coconut oil, cacao or cocoa powder, and your chosen sweetener. Stir until well blended and thick.
- Pour into molds: Transfer the mixture into a flat container or your favorite chocolate molds. Spread it evenly.
- Chill until solid: Place your chocolate in the fridge or freezer until it hardens, usually about 1-2 hours.
- Enjoy or store: Once your chocolate bars are solid, you can enjoy them right away or store them in the fridge for later!
Pro Tips for Perfect Chocolate Bars
Here are some expert insights to elevate your chocolate-making game:
- Use high-quality cacao: The better the cacao, the richer your chocolate will taste.
- Experiment with sweeteners: Different sweeteners can change the flavor profile, so don’t hesitate to try various options!
- Add a pinch of sea salt: This enhances the chocolate flavor and adds a delightful contrast.
- Try different molds: Use fun shapes or create your own by pouring into silicone molds for a unique touch.
- Mix in nuts or dried fruits: A handful of almonds or cranberries can add fantastic texture and flavor.
- Don’t rush the chilling: Allowing the chocolate to chill slowly will yield a better texture.
- Store properly: Keep your chocolate bars in an airtight container to maintain freshness.
- Make it a family affair: Get everyone involved in the fun of making chocolate!
Common Mistakes and Troubleshooting
Even the best cooks have mishaps! Here are some common issues you might encounter and how to fix them:
- Chocolate won’t harden: Ensure your mixture is thoroughly blended and chilled long enough. If using a mold, check it’s not too thick.
- Texture is grainy: This usually means the cacao powder wasn’t mixed in well. Try using a whisk for a smoother blend.
- Flavor is too strong or too weak: Adjust the amount of sweetener or cacao to match your taste preferences.
- Chocolate breaks when cutting: Let it sit at room temperature for a few minutes before cutting for a smoother slice.
Explore Flavor Variations
Dive into the world of flavors! Here are some exciting variations you can try:
- Mint Chocolate Bars: Add a few drops of peppermint extract to your chocolate mixture for a refreshing twist.
- Raspberry Chocolate Bars: Mix in dried raspberries or swirl raspberry puree into the chocolate before it sets.
- Nutty Chocolate Bars: Fold in chopped nuts like pecans or hazelnuts for added crunch.
- Spicy Chocolate Bars: Incorporate a dash of cayenne pepper or chili powder for a surprising heat!
Storing and Make-Ahead Instructions
Wondering how to keep your chocolate bars fresh? Here’s what you need to know:
- Refrigeration: Store your chocolate bars in an airtight container in the fridge for up to 2 weeks.
- Freezing: For longer storage, freeze your chocolate bars for up to 3 months. Just be sure to wrap them individually!
- Make-ahead: You can prepare the chocolate mixture a few days in advance and keep it in the fridge until you’re ready to pour it into molds.
Frequently Asked Questions
Here are some questions that often come up when making homemade chocolate bars:
- Can I use different oils?: Yes! Coconut oil is preferred for its texture, but other oils like avocado can work too.
- Is this recipe vegan?: Absolutely! As long as you choose a vegan sweetener, this chocolate is plant-based.
- Can I make this without cacao?: You can try using carob powder instead, but the flavor will be different.
- What if I don’t have molds?: No worries! Just use a lined baking dish and cut the chocolate into bars once set.
- How can I make it more chocolaty?: Increase the amount of cacao or cocoa powder in the recipe.
- Will my chocolate melt in the sun?: Yes, homemade chocolate isn’t tempered like store-bought, so keep it cool!
- Can I use flavored extracts?: Definitely! Vanilla, almond, or orange extracts can add delightful notes.
- Are there any allergens?: Always check the labels of your ingredients, especially if serving to others!
Nutritional Insights and Dietary Adaptations
Your homemade chocolate can fit into many healthy eating plans:
- Low sugar: By using sugar alternatives, you can lower the sugar content significantly.
- Gluten-free: All ingredients can be gluten-free, making it safe for those with gluten sensitivities.
- Dairy-free: This recipe is naturally dairy-free, perfect for lactose-intolerant individuals.
Recommended Equipment
To make this chocolate-making experience as smooth as possible, here’s what you’ll need:
- Mixing bowl: For combining your ingredients.
- Measuring spoons: Precision is key for perfect chocolate!
- Chocolate molds: Silicone molds work best for easy release.
- Whisk or spatula: To smoothly blend your chocolate mixture.
- Storage container: Keep your creations fresh in an airtight container.
Serving Suggestions
Once your chocolate bars are ready, here are some fun ways to enjoy them:
- Pair with fruits: Enjoy with strawberries or bananas for a delicious treat.
- Ice cream topping: Crumble over your favorite ice cream for an indulgent dessert.
- Chocolate charcuterie board: Serve alongside nuts, dried fruits, and cheeses for a stunning presentation.
Conclusion: Get Creative in the Kitchen!
Making your own chocolate bars is a delightful way to express your creativity and indulge your sweet tooth! Whether you keep it classic or venture into unique flavor combinations, the joy of crafting your own treats is truly satisfying. So grab your ingredients, invite a friend into the kitchen, and let’s make some magic happen! Remember, it’s all about having fun and enjoying the process. Happy chocolate making!
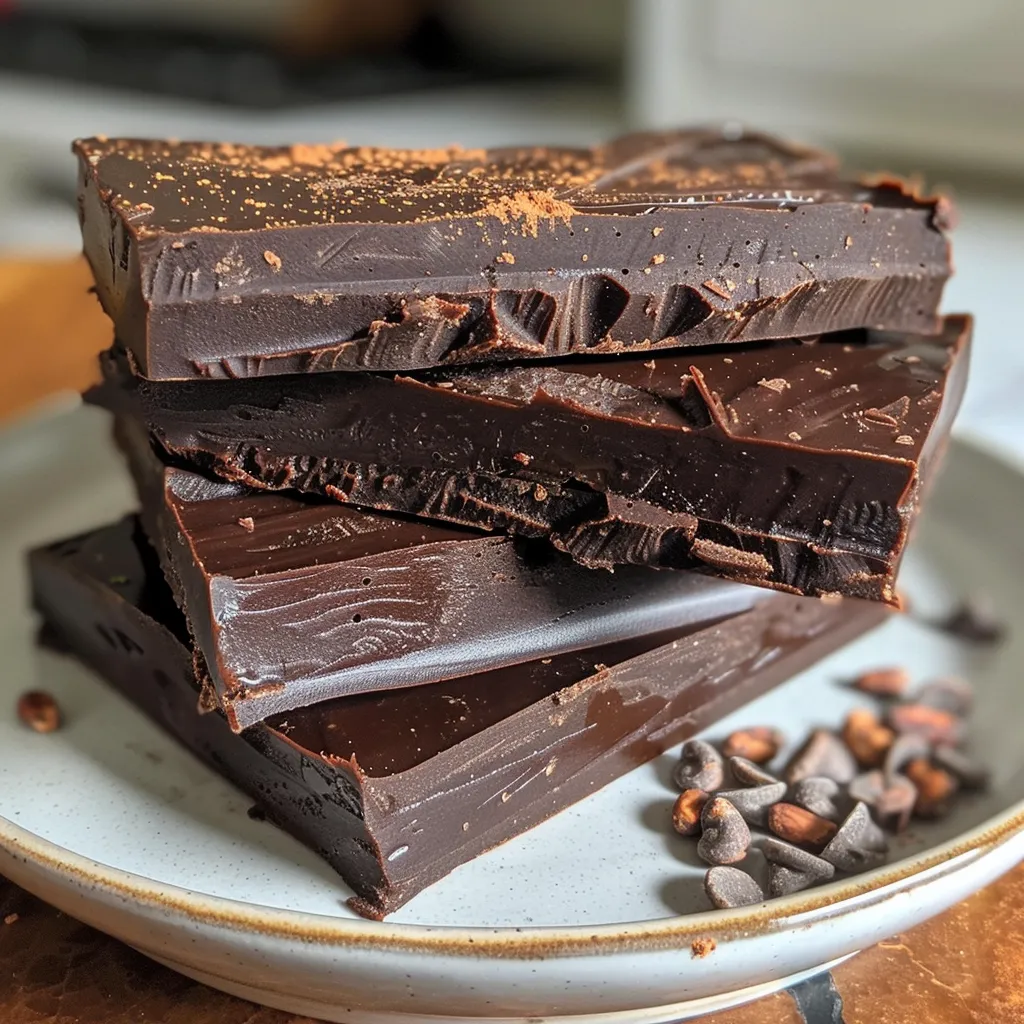
Homemade Chocolate Bars
Ingredients
Main
- 0.25 cup cacao or cocoa powder
- 3 tbsp coconut oil
- 3 tbsp pure maple syrup, honey, or agave ((A sugar-free option is written out above))
- optional extracts, cocoa nibs, chia seeds, or other add-ins
Instructions
- Gently warm the coconut oil if not already melted.
- Combine all ingredients in a bowl and stir until thick.
- Pour mixture into a flat container or molds, then chill until solid.
- Once hardened, store in the fridge or freezer.
- Optional: melt the bars again for chocolate sauce.


