
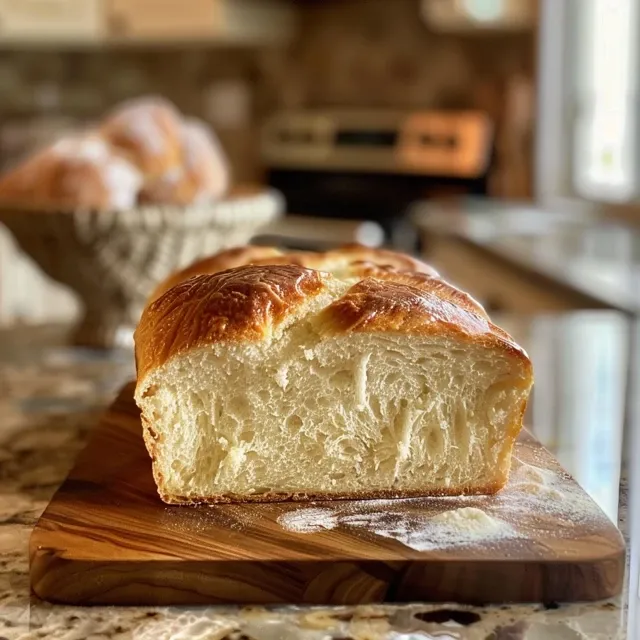
Welcome to Your Homemade Bread Adventure!
Are you ready to embark on a delightful journey of baking homemade bread? Whether you’re a seasoned pro or a kitchen newbie, this bread recipe is designed to make the process not only easy but also incredibly enjoyable. With just a handful of simple ingredients, you can create a warm, comforting loaf that fills your home with the irresistible aroma of freshly baked bread. In this comprehensive guide, we’ll explore everything from the ingredients needed to troubleshooting tips, ensuring you feel confident and inspired every step of the way.
Why You’ll Love This Recipe
This homemade bread recipe is a must-try for several reasons:
- Simple Ingredients: You probably have most of them in your pantry already!
- Kid-Friendly: Perfect for getting the little ones involved in the kitchen.
- Customizable: Add your favorite herbs, spices, or toppings to make it your own.
- Great for Any Occasion: Whether it’s a family dinner, special occasion, or just a treat for yourself, this bread fits every moment.
- Freezing Friendly: Make extra loaves to enjoy later—perfect for busy weeks!
Ingredients You’ll Need
Gather your ingredients before we dive into the baking process. Here’s what you’ll need:
- 2 cups warm water (474g): The warmth helps activate the yeast. Aim for 105-115°F.
- 1 Tablespoon active dry yeast: This is the magic ingredient that makes your bread rise.
- 1/4 cup honey or sugar (85g honey, 50g sugar): This feeds the yeast and adds a touch of sweetness.
- 2 teaspoons salt: Enhances the flavor of your bread.
- 2 Tablespoons oil (30 ml): Adds moisture and helps create a tender crumb.
- 4 – 5 1/2 cups all-purpose or bread flour (500g-688g): The base of your dough—adjust as needed for consistency.
How to Make Homemade Bread
Let’s get started on our bread-making journey! Follow these steps to create your very own delicious loaf:
Step 1: Proof the Yeast
In a large bowl or stand mixer, combine the yeast, warm water, and a pinch of honey or sugar. Allow it to rest for 5-10 minutes until it becomes foamy. This step is essential to ensure your yeast is active!
Step 2: Add Core Ingredients
Once foamy, add the remaining honey or sugar, salt, oil, and 3 cups of flour to the mixture. Stir to combine.
Step 3: Build the Dough
Add another cup of flour and mix. Gradually keep adding flour until the dough pulls away from the sides of the bowl. The dough should be slightly sticky but manageable.
Step 4: Knead the Dough
Mix or knead the dough for 4-5 minutes until it becomes smooth and elastic. This is where the magic happens, so give it a little love!
Step 5: First Rise
Cover the bowl with a clean kitchen towel or plastic wrap and let the dough rise in a warm place until it doubles in size, which usually takes about 1 1/2 hours.
Step 6: Prepare the Pans
While the dough is rising, grease your loaf pans to prevent sticking.
Step 7: Shape the Loaves
Once the dough has risen, divide it into two portions and shape each into a loaf. Place them in the prepared pans.
Step 8: The Second Rise
Cover the loaves again and let them rise for another 45 minutes to 1 hour, or until they are about 1 inch above the pans.
Step 9: Bake to Perfection
Preheat your oven to 350°F (175°C). Bake the loaves for 30-33 minutes until they are golden brown on top. You can tap the bottom of the loaf; if it sounds hollow, it’s done!
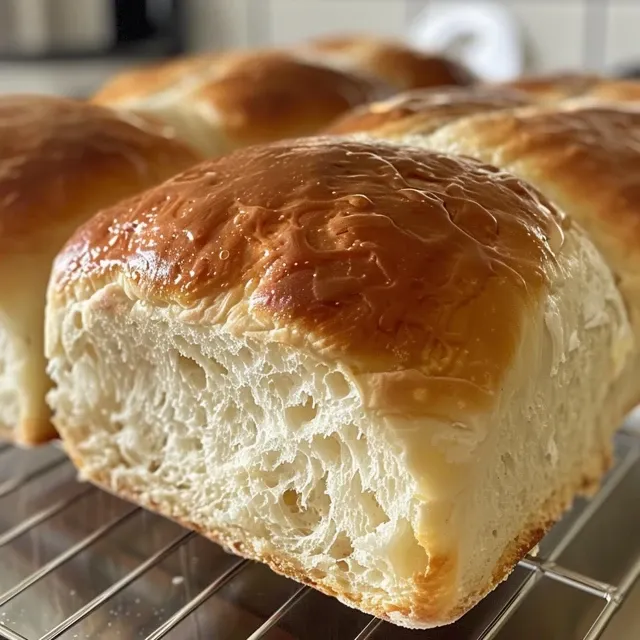
Step 10: Cool and Finish
Remove the loaves from the pans and let them cool on a wire rack. Store them in a plastic wrap or a bread box to maintain freshness.
Pro Tips for Perfect Homemade Bread
To help you achieve the best possible results, here are some expert insights:
- Measure Flour Correctly: Spoon flour into your measuring cup and level off with a knife—this prevents adding too much flour.
- Room Temperature Ingredients: Make sure any ingredients that need to be at room temperature are not cold; it helps the dough rise better.
- Don’t Over-Knead: Knead just until the dough is elastic and smooth; over-kneading can lead to tough bread.
- Experiment with Flour Types: Try using whole wheat or bread flour for different textures and flavors.
- Use a Kitchen Thermometer: Check the internal temperature of your bread; it should be around 190°F (88°C) when done.
- Let It Rise in a Warm Place: If your kitchen is chilly, preheat the oven for a minute, then turn it off and place the dough inside to rise.
- Egg Wash for Shine: Brush the loaves with an egg wash (1 egg beaten with a little water) for a shiny crust.
- Cool Completely Before Slicing: This helps maintain the structure of the bread, preventing it from becoming gummy.
Common Mistakes and Troubleshooting
Even the best bakers make mistakes! Here are some common pitfalls and how to avoid them:
- Dense Loaf: This can happen if your yeast is expired or if you added too much flour. Always check your ingredients!
- Flat Bread: If your dough doesn’t rise, it might be due to cold ingredients or not enough warmth. Ensure your kitchen is warm enough for rising.
- Too Crusty: If the crust is too hard, try covering the loaf with foil halfway through baking.
- Sticking to the Pan: Always grease your pans well, or use parchment paper for easy removal.
Variations to Try
Once you’ve mastered this basic recipe, feel free to get creative! Here are some fun variations:
- Herb and Cheese Bread: Add fresh herbs and shredded cheese for a savory twist.
- Garlic Bread: Mix in minced garlic and spread with garlic butter before baking.
- Whole Wheat Bread: Substitute half of the all-purpose flour with whole wheat flour for a heartier loaf.
- Sweet Cinnamon Bread: Add cinnamon and sugar to the dough and swirl it for a delightful breakfast treat.
Storage and Make-Ahead Instructions
Here’s how to keep your homemade bread fresh:
- Room Temperature: Store in a bread box or wrapped in plastic wrap for up to 3 days.
- Freezing: Slice the bread, wrap tightly in plastic wrap, and place in a freezer bag. It can last up to 3 months.
- Reheating: To refresh frozen bread, let it thaw at room temperature and then warm it in a 350°F oven for 10-15 minutes.
Frequently Asked Questions
Let’s address some common questions about homemade bread:
- Can I use instant yeast instead of active dry yeast? Yes! Just mix it directly with the dry ingredients.
- What if my dough is too sticky? Gradually add more flour until it reaches the right consistency.
- How can I tell when my bread is done? Insert a thermometer; it should read 190°F (88°C).
- Can I make this bread without a stand mixer? Absolutely! Just mix by hand and knead on a floured surface.
- What can I do with leftover bread? Use it for sandwiches, toast, or make croutons!
- Can I add ingredients like nuts or dried fruit? Yes! Just fold them in after the first rise.
- How do I make my bread rise faster? Place it in a warm, draft-free area or use the oven trick (preheated and turned off).
- Is homemade bread healthier than store-bought? Often, yes! You control the ingredients without preservatives.
Nutritional Tips and Dietary Adaptations
For those looking to make dietary adjustments:
- Gluten-Free: Use a gluten-free flour mix and add xanthan gum as needed.
- Low Sugar: Reduce the amount of honey or sugar, or use a sugar alternative.
- Vegan Option: Substitute oil for butter and skip eggs in any variations.
Essential Equipment Recommendations
To make the process easier, here’s a list of useful tools:
- Stand Mixer: Makes mixing and kneading a breeze.
- Mixing Bowls: A set of different sizes is handy for all your mixing needs.
- Loaf Pans: Standard 9×5 inch pans work best for this recipe.
- Kitchen Thermometer: Ensures your bread is perfectly baked.
- Mixing Spoon: A sturdy wooden spoon is great for combining ingredients.
Serving Suggestions
Now that your bread is ready, here are some delicious ways to serve it:
- With Butter: Spread a generous layer of butter on warm slices.
- Toast: Perfect for breakfast with jam or avocado.
- As Sandwiches: Use for classic sandwiches or paninis.
- For Dipping: Serve with olive oil and balsamic vinegar for dipping.
Conclusion
You’ve made it to the end of your homemade bread adventure! I hope this guide has inspired you to knead, rise, and bake with confidence. Remember, cooking is all about joy and experimentation, so don’t be afraid to play with flavors and techniques. Your journey in the kitchen is just beginning—happy baking!
Homemade Bread Recipe
Ingredients
Dough
- 2 cups warm water ((474g))
- 1 Tablespoon active dry yeast
- 1/4 cup honey or sugar ((85g honey, 50g sugar))
- 2 teaspoons salt
- 2 Tablespoons oil ((30 ml))
- 4 - 5 1/2 cups all-purpose or bread flour ((500g-688g))
Instructions
- Mix yeast, warm water, and a pinch of honey; let sit 5-10 min until foamy. Add remaining honey, salt, oil, and 3 cups flour; mix.
- Add more flour gradually until dough pulls away from bowl sides. Knead for 4-5 min until smooth.
- Let dough rise until doubled, about 1.5 hours. Shape into loaves, place in greased pans.
- Cover and let rise 45 min to 1 hour until 1 inch above pans. Preheat oven to 350°F (175°C).
- Bake for 30-33 min until golden brown. Cool before slicing.