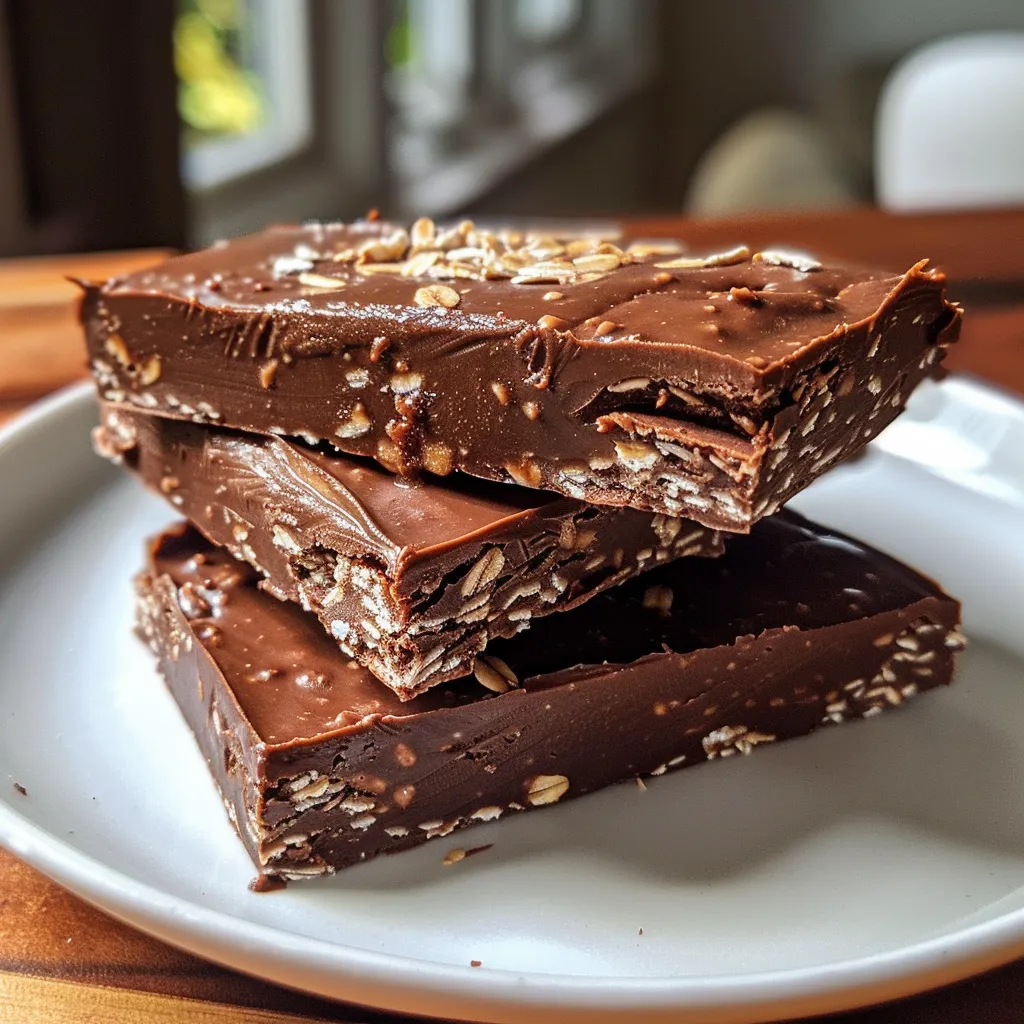
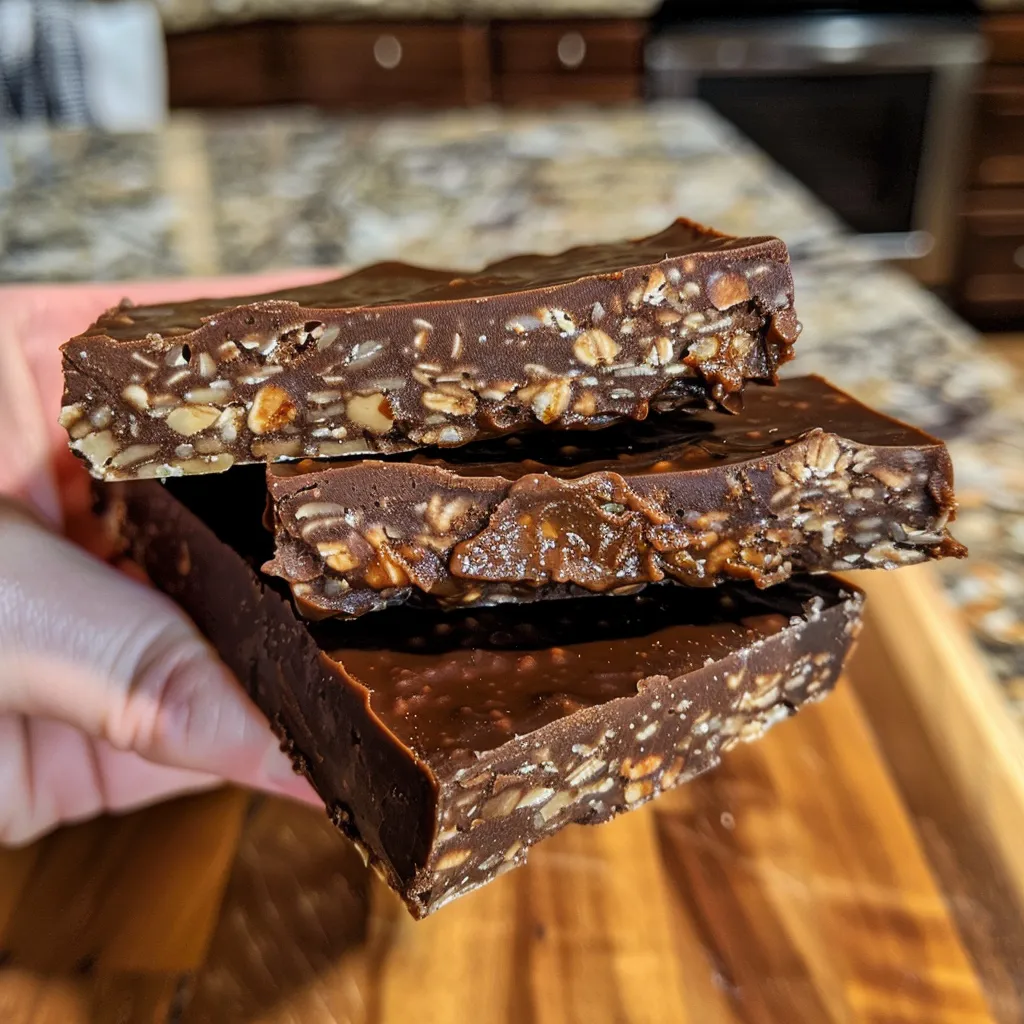
Welcome to Your New Favorite No-Bake Treat!
If you’re looking to indulge in something delicious yet nutritious, you’ve come to the right place! Today, we’re diving into the world of no-bake protein chocolate bars. These bars are perfect for busy days, post-workout snacks, or even a sweet treat to satisfy your cravings. Let’s unleash your inner chef and whip up something amazing together!
Why You’ll Love This Recipe
This recipe isn’t just another snack; it’s a game-changer! Here’s why you’ll fall head over heels for these no-bake protein chocolate bars:
- Quick and Easy: With just a few simple steps, you can create a delicious batch in no time—perfect for when you need a snack fast!
- Nutritious Energy Boost: Packed with protein and healthy fats, these bars provide sustained energy without the crash.
- Customizable: Feel free to mix and match ingredients to suit your taste or dietary needs. Want to add some crunch? Toss in your favorite nuts!
- No Baking Required: No oven? No problem! These bars set in the fridge, making them a hassle-free treat.
- Kid-Friendly: Get the little ones involved in the kitchen! It’s a great way to teach them about healthy snacks.
Ingredients You’ll Need
Let’s gather our ingredients! This recipe is all about simplicity, using whole foods that you probably already have in your pantry.
- Protein Powder: ½–¾ cup. The star ingredient that packs a protein punch! You can use whey, casein, or a plant-based option.
- Natural Peanut Butter: ½ cup. This adds creaminess and flavor. Feel free to substitute with almond or cashew butter for a nut-free option.
- Rolled Oats: ¾ cup. They provide texture and fiber. For a gluten-free version, make sure to use certified gluten-free oats.
- Honey or Maple Syrup: ¼ cup. A natural sweetener to bind everything together and add sweetness.
- Cocoa Powder: 2–3 tbsp. This gives the bars their chocolatey goodness. Use unsweetened for a healthier option.
- Coconut Oil: 2 tbsp, melted. It helps with binding and adds a hint of tropical flavor.
- Milk of Choice: 2–4 tbsp. This helps adjust the texture to your liking. Almond, soy, or oat milk works beautifully.
- Optional Add-ins: Dark chocolate chips, chopped nuts, shredded coconut, or a pinch of salt for an extra flavor boost.
Step-by-Step Instructions
Ready to get cooking? Let’s follow these simple steps to create your no-bake protein chocolate bars!
- Mix the Dry Ingredients: Grab a mixing bowl and dump in the dry stuff. Start with the oats, protein powder, and cocoa powder. Stir it up so no weird cocoa clumps ambush you later.
- Add the Sticky Ingredients: Scoop in the peanut butter, pour in the honey or maple syrup, and drizzle the melted coconut oil. Yummy already, right?
- Combine: Mix like you mean it using a sturdy spoon or spatula. You want everything to be well incorporated!
- Adjust the Texture: If the mixture feels too dry, slowly add milk, one tablespoon at a time, until it’s thick but pressable.
- Fold in Extras: Now’s the time to fold in any fun extras like chocolate chips, nuts, or a pinch of salt.
- Press and Chill: Transfer the mixture into a lined pan using parchment paper. Really press it down so it holds together well.
- Chill Out: Pop the pan in the fridge for at least 1–2 hours until firm. This is the hardest part—waiting!
- Slice and Enjoy: Once they’re set, slice into bars. Try not to eat them all at once!
Pro Tips for Perfect Bars
Want to ensure your no-bake protein chocolate bars turn out perfectly? Here are some expert insights:
- Use Fresh Ingredients: Always check the freshness of your ingredients, especially the protein powder and nut butter.
- Experiment with Flavors: Don’t be afraid to add spices like cinnamon or vanilla extract for a flavor twist.
- Make Ahead: These bars can be made in advance and stored for a quick snack throughout the week.
- Storage Matters: Keep them in an airtight container in the refrigerator to maintain freshness.
- Texture Control: Adjust the amount of milk based on your desired texture—less for a denser bar, more for a softer one.
- Involve the Kids: Let them help mix and press the bars; it’s a fun activity that encourages healthy eating!
- Perfect for Meal Prep: Double the batch and store some in the freezer for longer-lasting snacks.
- Wrap Individually: For easy grab-and-go snacks, wrap each bar in parchment paper or plastic wrap.
Common Mistakes and Troubleshooting
Even the best chefs make mistakes! Here are some common issues and how to fix them:
- Too Crumbly: If your mixture is too crumbly, try adding a little more honey or milk to help it bind.
- Bars Won’t Set: Make sure to chill them long enough. If they’re still soft, pop them back in the fridge.
- Too Sweet: If you find your bars too sweet, reduce the amount of honey or maple syrup next time. You can also add a pinch of salt to balance the flavors.
- Sticking to the Pan: Always line your pan with parchment paper to make removing the bars easier.
Recipe Variations
Mix things up with these fun and flavorful variations:
- Chocolate Mint: Add a few drops of peppermint extract for a refreshing twist.
- Nutty Banana: Mash a ripe banana into the mixture for added sweetness and flavor.
- Trail Mix Bars: Incorporate your favorite trail mix ingredients like seeds, dried fruit, and nuts.
- Spicy Chocolate: Add a dash of cayenne pepper for a spicy kick that contrasts beautifully with the chocolate.
Storage and Make-Ahead Instructions
These bars are perfect for meal prep! Here’s how to store them:
- Refrigerator: Keep in an airtight container in the fridge for up to one week.
- Freezer: For longer storage, wrap bars individually and freeze for up to two months. Just let them thaw in the fridge before eating.
Frequently Asked Questions
Got questions? We’ve got answers!
- Can I use other nut butters? Absolutely! Almond butter or sunflower seed butter are great alternatives.
- How do I make them vegan? Use maple syrup instead of honey and choose a plant-based protein powder.
- Can I add protein powder to smoothies? Yes! These bars are also great crumbled over yogurt or blended into smoothies.
- What if I don’t have cocoa powder? You can skip it or substitute with carob powder for a different flavor.
- How long do these bars last? They’ll stay fresh in the fridge for about a week and in the freezer for up to two months.
- Can I use quick oats? While rolled oats are recommended for texture, quick oats can work in a pinch.
- What’s the best way to cut the bars? Use a sharp knife and let the bars sit at room temperature for a few minutes to soften slightly.
- Can I make these bars gluten-free? Yes! Just ensure you’re using certified gluten-free oats.
Nutritional Information
These bars are not just delicious; they’re also packed with nutrients! Here’s a quick breakdown:
- Protein: Each bar contains around 12g of protein, making them perfect for recovery after workouts.
- Healthy Fats: The peanut butter provides healthy fats that keep you feeling full longer.
- Fiber: With oats and added nuts, these bars are a great source of dietary fiber.
Equipment Recommendations
To make this process even smoother, here’s a list of tools you’ll need:
- Mixing Bowl: A large bowl is perfect for combining all your ingredients.
- Measuring Cups: Accurate measurements ensure your bars turn out just right.
- Spoon or Spatula: A sturdy utensil helps mix the ingredients well.
- Parchment Paper: For easy removal of the bars from the pan.
Serving Suggestions
Here are some fun ways to enjoy your no-bake protein chocolate bars:
- On the Go: Perfect for a quick snack before or after a workout.
- With Coffee or Tea: Enjoy these bars alongside your favorite hot beverage for a delightful treat.
- As a Gift: Wrap them up and share with friends or family as a thoughtful homemade gift!
Conclusion
These no-bake protein chocolate bars are not only incredibly easy to make but also a delicious way to fuel your day. With endless possibilities for customization, you can make them your own. Whether you’re a seasoned chef or a kitchen newbie, I hope you feel inspired to try this recipe. Remember, cooking is all about having fun, experimenting, and enjoying delicious food! Happy snacking!
Protein Chocolate Bars Healthy No Bake
Ingredients
dry ingredients
- 0.5 cup protein powder
- 0.75 cup rolled oats
- 2 tbsp cocoa powder
wet ingredients
- 0.5 cup natural peanut butter
- 0.25 cup honey or maple syrup
- 2 tbsp coconut oil, melted
- 2 tbsp milk of choice (adjust for texture)
optional add-ins
- to taste dark chocolate chips, chopped nuts, shredded coconut, pinch of salt (add as desired)
Instructions
- Mix dry ingredients: protein powder, oats, and cocoa powder.
- Add peanut butter, honey, and melted coconut oil; stir well.
- Gradually add milk until mixture is thick and pressable.
- Fold in optional extras like chocolate chips or nuts.
- Press mixture into a lined pan, chill for 1-2 hours, then cut into bars.