

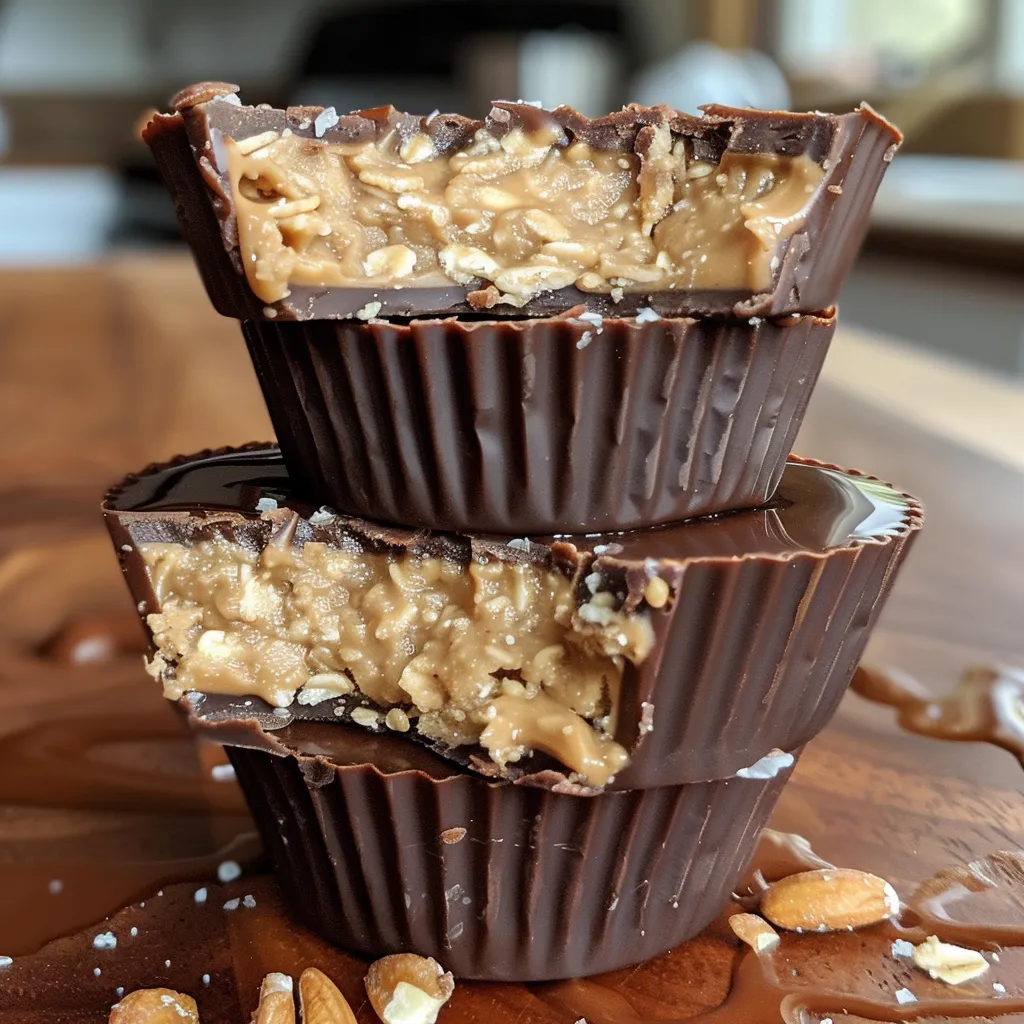
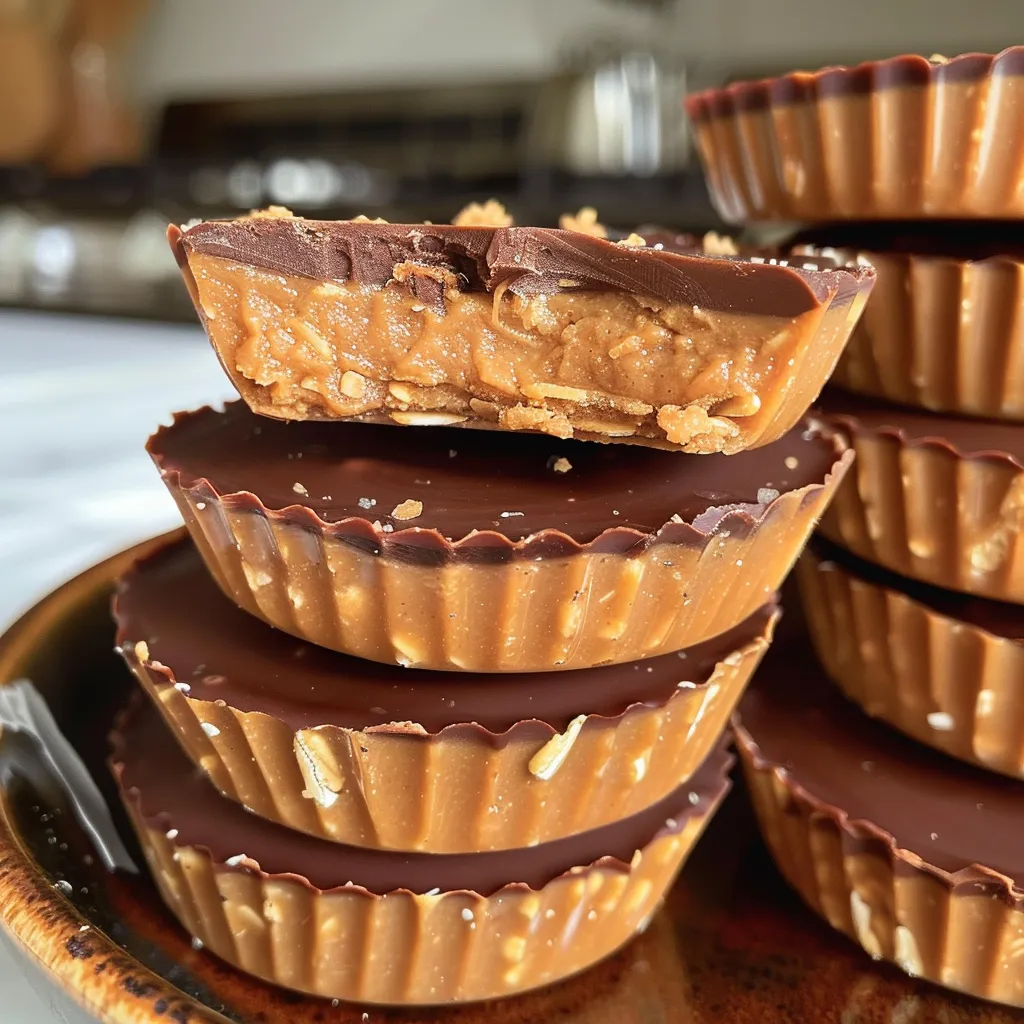
Discover the Joy of No-Bake Peanut Butter Protein Cups
Welcome, my fellow food enthusiasts! Today, we’re diving into a delightful treat that’s perfect for any time of the day—no-bake peanut butter protein cups! If you’re looking for a way to satisfy your sweet tooth while keeping your nutrition on track, you’ve stumbled upon the right recipe. These cups are not just easy to whip up; they’re also packed with protein, making them a guilt-free snack or a post-workout boost!
In this article, we’ll explore why you’ll love this recipe, break down the ingredients, share expert tips, and even offer some fun variations. Ready to get started? Let’s go!
Why You’ll Love This Recipe
- Quick and Easy: With just a handful of ingredients and no baking required, you can have these delicious cups ready in no time!
- Protein-Packed: Each cup is loaded with protein to help you stay full and fuel your day.
- Customizable: Whether you prefer honey or maple syrup, crunchy or creamy peanut butter, this recipe is adaptable to your taste!
- Healthy Indulgence: Satisfy your sweet cravings without the guilt—these cups are made with wholesome ingredients!
- Perfect for Meal Prep: Make a batch ahead of time and store them in your fridge for quick, on-the-go snacks!
Ingredient Breakdown and Substitutions
Let’s take a closer look at the ingredients that make these no-bake peanut butter protein cups so fantastic:
- 1 1/2 cups peanut butter (creamy): The star ingredient! You can also use almond or cashew butter for a nutty twist.
- 1 cup protein powder: Any flavor will work! If you’re looking for a plant-based option, choose a vegan protein powder.
- 1 cup rolled oats: These add great texture! You can substitute with quick oats or even ground oats for a smoother consistency.
- 1/3 cup honey or maple syrup: Sweeten to your liking! Use agave syrup for a vegan alternative.
- 2 tbsp coconut oil (melted): This helps bind everything together. If you don’t have coconut oil, melted butter works too.
- 2 tbsp cocoa powder: Optional, for those who want a chocolatey layer!
- 1/4 tsp salt: Enhances the flavors—don’t skip it!
- 1 tsp vanilla extract: Adds a lovely depth of flavor.
- 4 oz dark chocolate: For topping! You can swap this with carob chocolate if you prefer.
- Chopped nuts or sea salt: Optional garnishes for that extra crunch and flavor!
Essential Equipment
Before we get cooking, here’s a quick list of what you’ll need:
- Mixing bowls: One large for the dry ingredients and one smaller for the wet ingredients.
- Rubber spatula: Perfect for folding the mixture without losing any goodness!
- Measuring cups and spoons: Accuracy is key in baking!
- Muffin tin: Standard 12-cup muffin tin or silicone molds work great for this recipe.
- Double boiler or microwave: For melting the chocolate easily.
Step-by-Step Method to Make Your Cups
Ready to make these delicious peanut butter protein cups? Follow these simple steps:
- In a large bowl, combine 1 cup protein powder, 1 cup rolled oats, and 1/4 tsp salt. Whisk briefly to remove clumps.
- In a separate bowl, stir together 1 1/2 cups peanut butter, 1/3 cup honey (or maple syrup), 2 tbsp melted coconut oil, and 1 tsp vanilla until silky and homogenous.
- Add the dry mix to the wet mix in two additions. Use a spatula to fold; press and mix until a firm, slightly tacky dough forms.
- Line a standard 12-cup muffin tin with paper liners or use silicone molds. Scoop roughly 2 tablespoons of dough into each cup and press down to form a flat base.
- If adding a chocolate topping: melt 4 oz dark chocolate with 1 tsp coconut oil in a double boiler or microwave. Spoon a tablespoon of melted chocolate over each pressed base.
- Refrigerate the tray for at least 30–45 minutes until cups are firm to the touch.
- If desired, sprinkle with flaky sea salt, chopped nuts, or a light dusting of cocoa before the chocolate fully sets.
- Enjoy chilled or at slightly below room temperature. Transfer to an airtight container with parchment between layers for storage.
Pro Tips for Perfect Peanut Butter Cups
- Mix thoroughly: Ensure the peanut butter and sweetener are well combined for a smooth texture.
- Customize sweetness: Taste your mixture before portioning out; adjust sweetness by adding more honey or syrup if desired.
- Press firmly: When forming the cups, press the dough firmly into the molds to avoid crumbling later.
- Experiment with toppings: Try adding shredded coconut or chopped dried fruit on top for added flavor!
- Store smart: Keep them in an airtight container in the fridge for up to two weeks, or freeze them for longer storage.
- Check consistency: If the mixture seems too dry, add a splash of water or milk to help bind it.
- Be patient: Let them chill thoroughly before removing from the molds for easier handling.
- Use quality chocolate: A good quality dark chocolate will enhance the flavor of your cups significantly.
Common Mistakes and Troubleshooting
Even the best of us can make a mistake in the kitchen! Here are some common pitfalls and how to avoid them:
- Too crumbly: If your mixture is crumbling, it may be too dry. Add a bit more peanut butter or a splash of milk to help it stick together.
- Chocolate not melting: Ensure you’re using low heat and stirring often. If using a microwave, melt in short bursts (20-30 seconds) to prevent burning.
- Too sweet: If your cups are overly sweet, balance it out with a pinch of salt or add a bit of cocoa powder.
- Not setting: If they’re not firming up, they may need more time in the fridge—be patient!
Fun Variations to Try
Let’s get creative! Here are some delicious variations to spice up your peanut butter protein cups:
- Chocolate Peanut Butter Cups: Add a layer of melted chocolate on top for a rich, decadent treat.
- Nutty Delight: Mix in chopped nuts or seeds to the base for added crunch.
- Fruit Infusion: Incorporate dried fruits like cranberries or apricots for a sweet surprise.
- Flavor Boost: Add a teaspoon of cinnamon or a splash of coffee for a flavor kick!
Storage and Make-Ahead Instructions
These no-bake peanut butter protein cups are perfect for meal prep! Here’s how to store them:
- Refrigeration: Keep them in an airtight container in the fridge for up to two weeks.
- Freezing: Freeze them for up to three months. Just ensure to separate layers with parchment paper to prevent sticking.
- Thawing: When ready to enjoy, thaw them in the fridge overnight or at room temperature for about 30 minutes.
Frequently Asked Questions
Got questions? I’ve got answers! Here are some FAQs about making no-bake peanut butter protein cups:
- Can I use different nut butters? Absolutely! Almond butter, cashew butter, or sunflower seed butter can all be used.
- Is this recipe vegan? Yes, simply use maple syrup and a plant-based protein powder to keep it vegan-friendly.
- Can I omit the chocolate? Yes! The cups are delicious on their own without the chocolate topping.
- How do I make them lower in sugar? Use unsweetened cocoa powder and reduce the amount of honey or syrup.
- What if I don’t have protein powder? You can substitute with more oats, but the protein content will be lower.
- Are these gluten-free? If you use gluten-free oats, this recipe can be gluten-free!
- How can I make them more decadent? Try adding a layer of caramel or a drizzle of nut butter on top!
- What’s the best way to serve them? Enjoy them chilled as a quick snack or dessert!
Nutritional Tips and Dietary Adaptations
These cups are not only delicious but also packed with nutrients! Here are some tips for maximizing their health benefits:
- Protein Boost: Use a protein powder that suits your dietary needs, whether it’s whey, casein, or plant-based.
- Healthy Fats: The peanut butter and coconut oil provide healthy fats that are essential for energy and hormone production.
- Fiber Content: The oats and optional nuts/seeds boost the fiber content, aiding in digestion and keeping you fuller longer.
- Low Glycemic Index: Using natural sweeteners like honey or maple syrup can help maintain stable blood sugar levels.
Serving Suggestions
These no-bake peanut butter protein cups can be enjoyed in many ways. Here are some ideas:
- Post-Workout Snack: Perfect for refueling after a workout!
- Midday Energy Boost: Great for a quick pick-me-up during the day.
- Sweet Treat: Serve them as a dessert at your next gathering or dinner party.
- With Coffee or Tea: Pair them with your favorite beverage for a delightful treat!
Final Thoughts
And there you have it! Your ultimate guide to making no-bake peanut butter protein cups that are not only delicious but also nutritious. I hope you feel inspired to try this recipe and make it your own. Remember, cooking should be fun and creative, so don’t hesitate to experiment with flavors and ingredients. Enjoy your time in the kitchen, and happy snacking!
No-Bake Peanut Butter Protein Cups
Ingredients
dry mix
- 1.5 cups peanut butter (creamy)
- 1 cup protein powder
- 1 cup rolled oats
- 1/3 cup honey or maple syrup
- 2 tbsp coconut oil (melted)
- 2 tbsp cocoa powder (optional, for chocolate layer)
- 1/4 tsp salt
- 1 tsp vanilla extract
- 4 oz dark chocolate (for topping)
- as needed Chopped nuts or sea salt (garnish)
Instructions
- Mix dry ingredients: protein powder, oats, and salt.
- Combine wet ingredients: peanut butter, honey, coconut oil, and vanilla.
- Fold dry into wet until a firm dough forms.
- Press 2 tbsp of dough into muffin liners or molds.
- Melt chocolate with coconut oil, spoon over cups, then refrigerate 30-45 mins.
- Optional: garnish with nuts or sea salt before chocolate sets. Enjoy chilled.