Welcome to Your Homemade Bread Adventure!
Are you ready to embark on a delightful journey into the world of baking? If you’ve ever thought about making your own bread, you’re in for a treat! Baking homemade bread is not just a culinary task; it’s a heartwarming experience that fills your home with the aroma of baking and the promise of deliciousness. In this definitive guide, we’ll explore the ins and outs of creating the best homemade bread recipe that will impress your family and friends.
This guide is designed for everyone—whether you’re a seasoned baker or just starting out. You’ll find everything you need to know, from ingredients to troubleshooting tips. Let’s knead, rise, and enjoy this together!
Why You’ll Love This Recipe
- Simple Ingredients: You can create this bread using pantry staples like flour, water, yeast, salt, and a hint of honey or sugar for flavor.
- Minimal Effort: This recipe is a no-knead version, allowing for a long, slow rise that develops amazing flavor with little effort on your part.
- Flexibility: The dough is versatile—you can shape it into loaves, rolls, or even flatbreads!
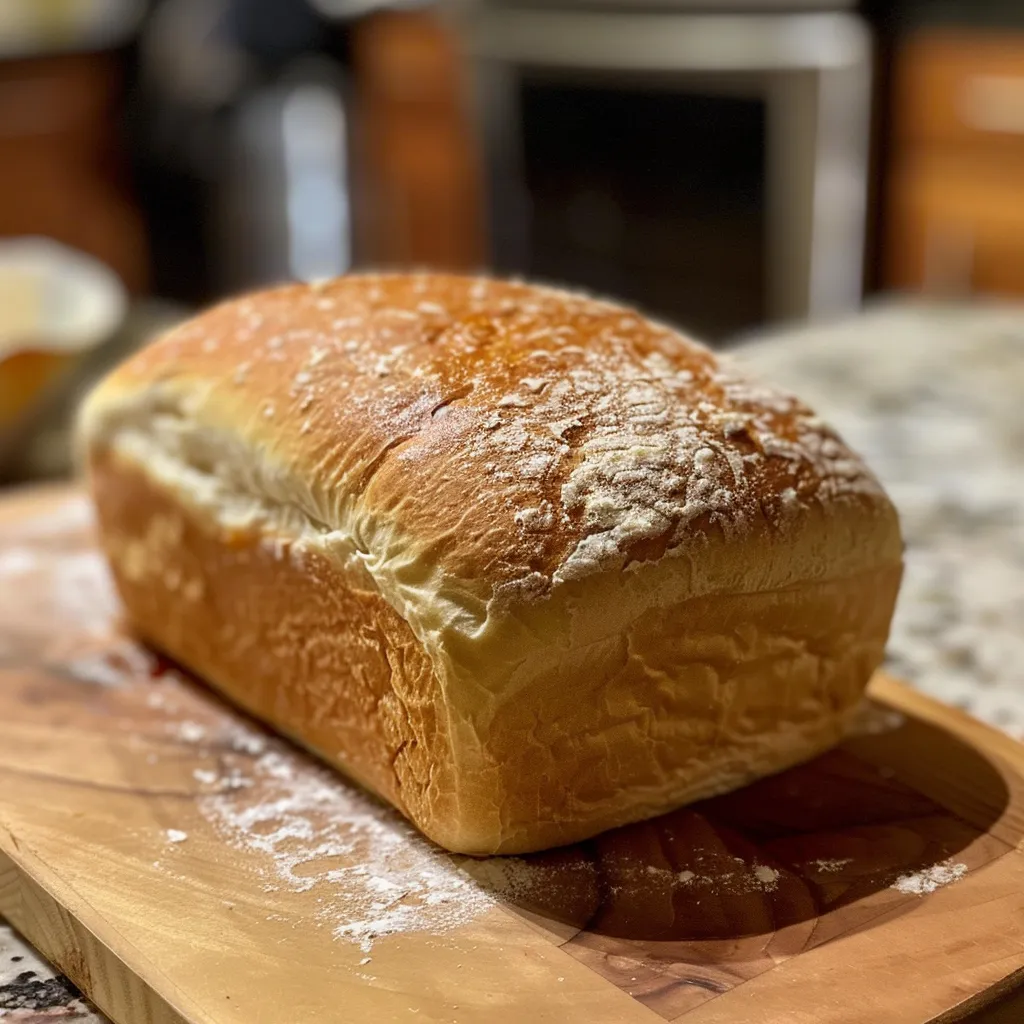
- Impressive Results: The crust is beautifully golden and crisp, while the inside is soft, airy, and perfect for sandwiches or toasting.
- Healthier Option: By making your own bread, you know exactly what goes in it, allowing for healthier choices and fewer preservatives.
Ingredients Breakdown
Here’s what you’ll need for this homemade bread recipe:
- 3 cups (384 grams) all-purpose flour: This forms the base of your dough. You can substitute with whole wheat flour for a healthier twist!
- 1 ½ cups (360 ml) lukewarm water: Ensure the temperature is between 105-115°F (40-46°C) for optimal yeast activation.
- 1 ½ teaspoons (5 grams) active dry yeast: This is your leavening agent. Instant yeast can also work, simplifying the process.
- 1 ½ teaspoons (8 grams) salt: Enhances flavor and controls yeast activity.
- 1 tablespoon (15 ml) honey or sugar: A touch of sweetness that feeds the yeast and enriches the flavor.
Step-by-Step Instructions
Now that you have your ingredients, let’s dive into making this delicious bread!
- In a large bowl, combine the lukewarm water and honey (or sugar). Sprinkle the active dry yeast over the water and let it sit for 5-10 minutes, or until foamy.
- Add the flour and salt to the bowl with the yeast mixture.
- Using a wooden spoon or your hands, mix the ingredients until just combined. The dough will be shaggy and sticky—don’t overmix!
- Cover the bowl with plastic wrap or a damp kitchen towel and let it rise in a warm place for 12-18 hours, or until doubled in size.
- Gently punch down the dough and turn it onto a lightly floured surface. Shape it into a round or oval loaf.
- Place the shaped dough in a well-floured proofing basket or on parchment paper. Cover with a clean kitchen towel and let it rise for another 30-60 minutes.
- Preheat your oven to 450°F (232°C) with a Dutch oven inside.
- Carefully remove the hot Dutch oven from the oven. Invert the dough into the hot Dutch oven and score the top with a sharp knife.
- Cover the Dutch oven with the lid and bake for 30 minutes.
- Remove the lid and bake for another 15-20 minutes, or until golden brown and the internal temperature reaches 200-210°F (93-99°C).
- Carefully remove the bread from the Dutch oven and let it cool completely on a wire rack before slicing and serving.
Pro Tips for Perfect Bread
- Temperature Matters: Always check your water temperature. Too hot can kill the yeast, while too cold will slow it down.
- Patience is Key: Allow the dough to rise fully—it’s worth the wait for that airy texture!
- Avoid Overmixing: Mix until just combined to keep the bread tender.
- Experiment with Flours: Try using whole wheat, rye, or a mix of flours for different flavors and textures.
- Use a Dutch Oven: This mimics a professional baking environment, trapping steam for a gorgeous crust.
- Check for Doneness: Use an instant-read thermometer for the best results—aiming for 200-210°F (93-99°C) ensures a perfect bake.
- Cool Completely: Let the bread cool fully before slicing to maintain its structure and avoid a gummy interior.
- Store Properly: To keep bread fresh, store it in a paper bag at room temperature for up to 3 days or freeze for longer storage.
Common Mistakes and Troubleshooting
Even the best bakers face challenges. Here are some common mistakes and how to fix them:
- Dough Won’t Rise: Make sure your yeast is fresh and that the water temperature is correct.
- Dense Bread: This often results from overmixing or not allowing enough rise time. Be gentle!
- Burnt Crust: If the crust is too dark, try lowering the oven temperature slightly or covering the bread with foil halfway through baking.
- Raw Center: If the crust browns before the inside is baked, lower the oven temperature and extend baking time.
Delicious Variations to Try
Feeling adventurous? Here are some fun variations to elevate your baking game:
- Herb-Infused Bread: Add chopped fresh herbs like rosemary or thyme to the dough for a fragrant twist.
- Cheese Bread: Mix in shredded cheese before the first rise for a cheesy delight.
- Seeded Crust: Top your loaf with sesame or poppy seeds before baking for added flavor and crunch.
- Swirl with Cinnamon: Add a cinnamon-sugar swirl for a sweet treat that’s perfect for breakfast.
Storage and Make-Ahead Instructions
Want to enjoy your bread later? Here’s how to store it:
- Room Temperature: Store in a paper bag for up to 3 days. Avoid plastic bags, as they can make the crust soggy.
- Freezing: Wrap tightly in plastic wrap and then in aluminum foil. It can last up to 3 months! To enjoy, thaw at room temperature or warm directly in the oven.
Frequently Asked Questions
- Can I use whole wheat flour? Yes! You can substitute up to half of the all-purpose flour with whole wheat flour for a heartier loaf.
- What if my dough is too sticky? If the dough sticks to your hands, sprinkle a little more flour on the surface while shaping.
- How do I know when the bread is done? The internal temperature should reach 200-210°F (93-99°C) for optimal doneness.
- Can I use instant yeast instead of active dry yeast? Absolutely! Use the same amount and mix it directly with the dry ingredients.
- How can I enhance the flavor? Adding herbs, spices, or even cheese can elevate the taste of your bread significantly.
- Can I make this bread without a Dutch oven? Yes! You can bake it on a baking sheet, but the crust may not be as crispy.
- Is it possible to double the recipe? Certainly! Just be sure to use a larger bowl for mixing and allow for more space to rise.
- How do I store leftover bread? Keep it in a paper bag at room temperature or freeze it for longer storage.
Nutritional Tips and Dietary Adaptations
Whether you’re looking for healthier options or dietary alternatives, here are some tips:
- Gluten-Free Option: Use a gluten-free all-purpose flour blend that includes xanthan gum for structure.
- Lower Sugar: You can reduce or omit the honey or sugar if you prefer less sweetness.
- Whole Grain Benefits: Using whole wheat flour increases fiber intake and nutrients in your bread.
Essential Equipment for Baking Bread
Having the right tools can make your baking experience smoother:
- Mixing Bowl: A large mixing bowl is essential for combining ingredients and allowing your dough to rise.
- Measuring Cups and Spoons: Accurate measurements are key in baking, so invest in a good set.
- Wooden Spoon: Perfect for mixing your dough by hand without overworking it.
- Dutch Oven: This is a must-have for achieving that perfect crust while baking.
- Kitchen Towel: Use a clean kitchen towel to cover the dough during rising to keep it warm.
Serving Suggestions
Your homemade bread is ready, and now it’s time to enjoy it! Here are some delightful serving suggestions:
- Toast: Slice it up and toast for a delicious breakfast treat with butter or jam.
- Sandwiches: Use it for your favorite sandwiches—think classic PB&J or a gourmet grilled cheese!
- With Soups: Serve warm, fresh bread alongside your favorite soups or stews for the perfect pairing.
- Bruschetta: Top slices with tomatoes, basil, and olive oil for a fresh appetizer.
Conclusion: Embrace Your Baking Journey!
Congratulations on taking the first step toward becoming a bread-baking pro! Remember, every loaf tells a story—your story. Enjoy the process, celebrate the little victories, and don’t be afraid to experiment. With this ultimate guide to homemade bread, you’ve got all the tools you need to create something truly special. Happy baking, and here’s to many more delicious loaves in your kitchen!

Best Homemade Bread Recipe
Ingredients
Dough
- 3 cups all-purpose flour (plus more for dusting)
- 1.5 cups lukewarm water (around 105-115°F or 40-46°C)
- 1.5 teaspoons active dry yeast
- 1.5 teaspoons salt
- 1 tablespoon honey or sugar
Instructions
- Mix warm water and honey, then add yeast and let sit until foamy.
- Add flour and salt, then mix until shaggy dough forms.
- Cover and let rise in a warm place for 12-18 hours.
- Punch down, shape into a loaf, and let rise for 30-60 minutes.
- Preheat oven to 450°F (232°C) with Dutch oven inside. Bake covered for 30 minutes, then uncovered for 15-20 minutes.
- Cool completely on wire rack before slicing.