
Welcome to Your Flavorful Journey with Homemade Garlic Breadsticks!
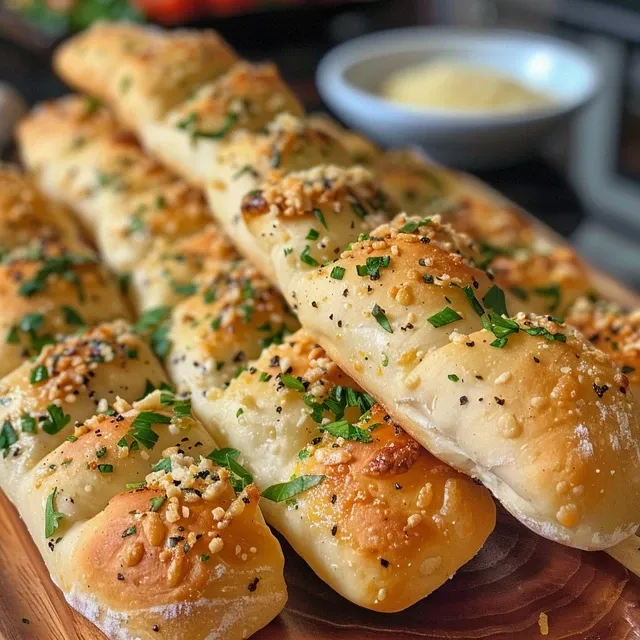
There’s something undeniably comforting about the scent of freshly baked garlic breadsticks wafting through the kitchen. These garlic breadsticks with a buttery glaze and a sprinkle of Italian herbs are not just delicious; they’re a warm hug in carbohydrate form! Whether you’re planning a cozy family dinner, a gathering with friends, or simply treating yourself, this recipe is designed to be approachable and rewarding. Let’s dive into the delicious world of homemade garlic breadsticks!
Why You’ll Love This Recipe
This garlic breadstick recipe is a winner for many reasons. Here are just a few:
- Quick and Easy: From start to finish, you can have these breadsticks ready in under an hour. Perfect for last-minute dinner plans!
- Irresistible Flavor: The combination of garlic, butter, and herbs creates a mouthwatering flavor that elevates any meal.
- Customizable: You can easily adjust the ingredients to suit your taste or dietary needs, making this recipe versatile.
- Perfect Texture: Each breadstick boasts a crisp exterior while remaining soft and chewy on the inside.
- Family-Friendly Fun: Involve your kids in the cooking process! They will love shaping and twisting the dough.
Let’s Gather Our Ingredients!
Before we start baking, let’s make sure we have everything we need. Here’s your ingredient list for these fantastic garlic breadsticks:
- 2 ½ cups all-purpose flour: The base for our dough. You can substitute with whole wheat flour for a healthier version.
- 1 packet (2 ¼ teaspoons) active dry yeast: This is what makes our breadsticks rise and become fluffy!
- 1 teaspoon granulated sugar: Helps activate the yeast for a better rise.
- 1 teaspoon salt: Enhances the flavor of the breadsticks.
- 1 cup warm water (about 110°F or 43°C): The perfect temperature to activate the yeast.
- 2 tablespoons olive oil: Adds moisture and richness to the dough.
- 4 tablespoons unsalted butter, melted: The star of our buttery glaze!
- 4 cloves garlic, minced: The key ingredient for that delicious garlic flavor.
- 1 teaspoon dried oregano: Adds an aromatic touch.
- 1 teaspoon dried basil: Complements the oregano beautifully.
- ½ teaspoon garlic powder: For an extra kick of garlic flavor.
- ½ teaspoon grated Parmesan cheese (optional): Gives a cheesy richness, but feel free to omit if dairy-free.
- Fresh parsley, chopped (for garnish): Adds a fresh touch and a pop of color!
Step-by-Step Instructions to Bake Your Garlic Breadsticks
Creating your homemade garlic breadsticks is straightforward if you follow these steps:
- Activate the Yeast: In a small bowl, combine warm water, sugar, and yeast. Let it sit for about 5-10 minutes until frothy.
- Mix Dry Ingredients: In a large mixing bowl, whisk together the flour and salt.
- Combine Ingredients: Once the yeast is activated, add it to the flour mixture along with olive oil. Stir until a dough forms.
- Knead the Dough: Transfer the dough to a floured surface and knead for about 5-7 minutes until smooth and elastic.
- First Rise: Place the dough in a lightly greased bowl, cover it with a kitchen towel, and let it rise in a warm place for 20-30 minutes or until doubled in size.
- Prepare the Baking Sheet: Preheat your oven to 375°F (190°C). Line a baking sheet with parchment paper.
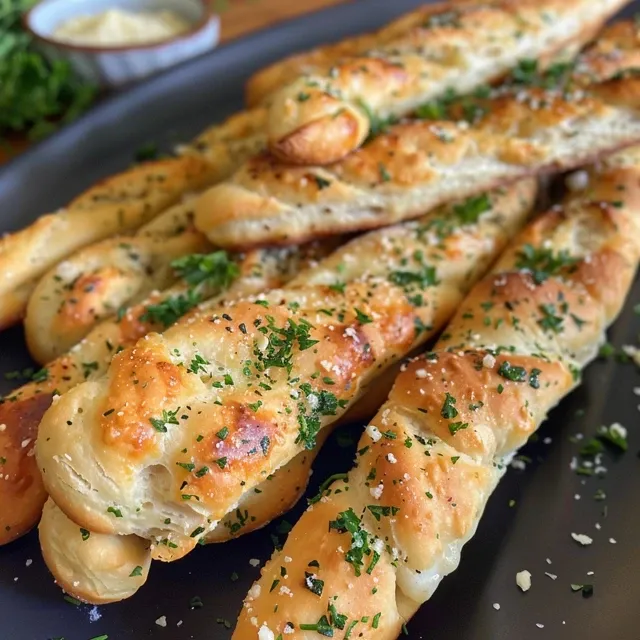
- Shape the Breadsticks: Once the dough has risen, punch it down and turn it out onto a floured surface. Roll it out into a rectangle about ½ inch thick. Cut into strips about 1 inch wide. Twist each strip gently and place them on the prepared baking sheet, leaving space between each stick.
- Second Rise: Cover the breadsticks with a towel and let them rise for an additional 10-15 minutes.
- Prepare the Buttery Glaze: In a small bowl, mix melted butter, minced garlic, oregano, basil, garlic powder, and Parmesan cheese (if using).
- Bake: Brush the glaze over the breadsticks generously. Bake in the preheated oven for 20-25 minutes or until golden brown.
- Garnish: Remove from the oven and brush with any remaining glaze. Sprinkle with fresh parsley for a pop of color.
- Serve Warm: Allow the breadsticks to cool for a few minutes before serving.
Pro Tips for Perfect Garlic Breadsticks
Want to achieve the best results? Check out these expert insights:
- Temperature Matters: Make sure your water is warm (not hot) to ensure the yeast activates properly.
- Kneading Technique: Knead until the dough is smooth and elastic; this helps develop gluten for a better texture.
- Don’t Rush the Rise: Allowing the dough to rise adequately is key to achieving fluffy breadsticks.
- Experiment with Flavors: Add chili flakes for a spicy twist or cheese for a gooey filling!
- Brush Generously: Don’t skimp on the garlic butter glaze; it’s what makes these breadsticks irresistible!
- Check for Doneness: The breadsticks should be golden brown. If they’re browning too quickly, cover them loosely with foil.
- Fresh Ingredients: Using fresh garlic and herbs will enhance the flavor significantly.
- Keep an Eye on Baking Time: Baking times may vary based on your oven. Start checking a few minutes early!
Common Mistakes and Troubleshooting
Even the best of us make mistakes in the kitchen! Here are some common pitfalls and how to avoid them:
- Yeast Not Activating: If your yeast doesn’t foam during activation, it may be expired. Always check the expiration date!
- Dough Too Sticky: If your dough is too sticky, add a little more flour, but be careful not to overdo it.
- Over-proofing: If your dough rises for too long, it can collapse. Keep an eye on it!
- Undercooked Breadsticks: If they look golden but are doughy inside, you may need to bake longer. Just be cautious not to burn them!
Delicious Variations to Try!
Once you’ve mastered the basic recipe, here are some fun variations to consider:
- Cheesy Garlic Breadsticks: Add shredded mozzarella or cheddar cheese on top before baking for a cheesy delight.
- Herb-Infused Breadsticks: Mix different herbs like thyme or rosemary into the dough for a unique flavor.
- Garlic Knots: Instead of straight strips, tie the dough into knots for a fun presentation!
- Sweet Garlic Breadsticks: Brush with melted butter and sprinkle cinnamon sugar for a dessert twist!
Storage and Make-Ahead Instructions
Want to prepare in advance? Here’s how you can store and freeze your garlic breadsticks:
- Make Ahead: You can prepare the dough a day in advance. Let it rise, then punch it down, cover, and refrigerate. Bring to room temperature before shaping and baking.
- Freezing: Bake the breadsticks, let them cool, then freeze in an airtight container for up to 3 months. Reheat at 350°F (175°C) until warmed through.
- Storage: Store leftover breadsticks in an airtight container at room temperature for up to 2 days.
Frequently Asked Questions
Got questions? Here are some common queries about garlic breadsticks:
- Can I use instant yeast instead of active dry yeast? Yes! You can use instant yeast without needing to activate it in warm water.
- Can I make these breadsticks gluten-free? Absolutely! Substitute the all-purpose flour with a gluten-free blend.
- What can I serve with garlic breadsticks? They pair wonderfully with pasta, soups, salads, or as a snack on their own!
- How long do these breadsticks keep? They are best enjoyed fresh but can be stored for up to 2 days in an airtight container.
- Can I add other flavors? Yes! Feel free to add spices or cheese to the dough for extra flavor.
- Can I make them smaller? Sure! Adjust the baking time accordingly if you make smaller breadsticks.
- What if my dough doesn’t rise? Ensure your yeast is fresh and your environment is warm enough for rising.
- Can I use different herbs? Yes! Feel free to experiment with your favorite herbs.
Nutrition Tips and Dietary Adaptations
Want to make your garlic breadsticks a bit healthier? Here are some tips:
- Whole Wheat Flour: Swap half of the all-purpose flour for whole wheat for added fiber.
- Less Butter: Reduce the amount of butter in the glaze or use a butter substitute for a lighter version.
- Herb and Garlic Boost: Increase the amount of fresh herbs and garlic for more flavor without additional calories.
- Vegan Option: Substitute butter with olive oil or a vegan butter alternative.
Essential Equipment You’ll Need
Make sure you have the following tools on hand for this recipe:
- Mixing Bowls: For combining ingredients.
- Whisk: For mixing dry ingredients.
- Measuring Cups and Spoons: For accuracy in measurements.
- Baking Sheet: To bake your delicious breadsticks.
- Parchment Paper: To prevent sticking and for easy cleanup.
- Kitchen Towel: For covering the dough during rising.
Serving Suggestions
These garlic breadsticks can elevate any meal. Here are some ideas:
- Pasta Dishes: Serve alongside your favorite spaghetti or lasagna for a classic pairing.
- Soups and Salads: Perfect for dipping into hearty soups or complementing fresh salads.
- Party Platter: Serve as an appetizer with marinara sauce or a garlic dipping sauce.
- Snack Time: Enjoy them warm with a spread of butter or homemade garlic butter.
Conclusion
And there you have it! A comprehensive guide to crafting your own homemade garlic breadsticks with a buttery glaze and Italian herbs. Remember, cooking should be a joyful experience filled with laughter and delicious aromas. Don’t be afraid to experiment and make this recipe your own! Happy baking, and here’s to many unforgettable meals ahead!
Homemade Garlic Breadsticks with Buttery Glaze and Italian Herbs: An Amazing Ultimate Recipe
Ingredients
Dough
- 2.5 cups all-purpose flour
- 1 packet active dry yeast (2 ¼ teaspoons)
- 1 teaspoon granulated sugar
- 1 teaspoon salt
- 1 cup warm water (about 110°F or 43°C)
- 2 tablespoons olive oil
Glaze
- 4 tablespoons unsalted butter, melted
- 4 cloves garlic, minced
- 1 teaspoon dried oregano
- 1 teaspoon dried basil
- ½ teaspoon garlic powder
- ½ teaspoon grated Parmesan cheese (optional)
Garnish
- to taste fresh parsley, chopped (for garnish)
Instructions
- Activate yeast: Mix warm water, sugar, and yeast; let sit until frothy (5-10 min).
- Mix dry ingredients: Whisk flour and salt. Combine with yeast mixture and olive oil to form dough.
- Knead and rise: Knead dough for 5-7 min, then let rise in a warm place for 20-30 min until doubled.
- Shape and second rise: Punch down dough, roll into a rectangle, cut into strips, twist, and let rise for 10-15 min.
- Prepare glaze: Mix melted butter, garlic, oregano, basil, garlic powder, and Parmesan. Brush over breadsticks and bake at 375°F (190°C) for 20-25 min until golden.
- Garnish and serve: Brush with remaining glaze, sprinkle with parsley, and serve warm.