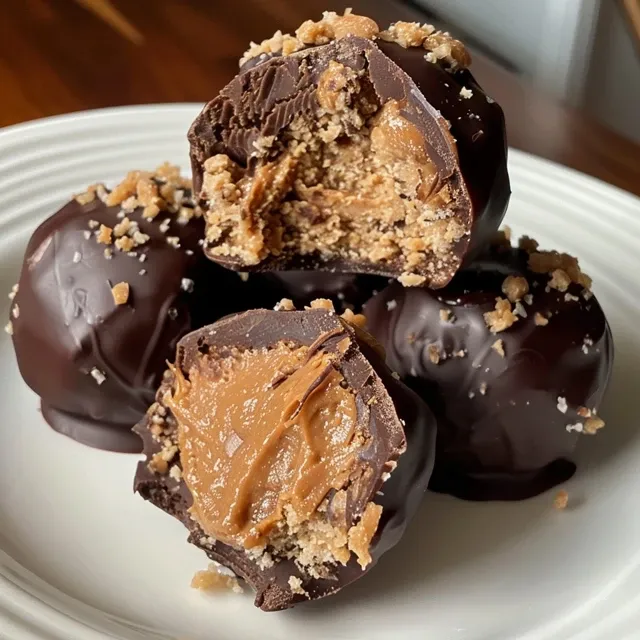
Why You’ll Love These Chocolate Dipped Peanut Butter Protein Balls
If you’re on the lookout for a delicious, energizing snack that’s both nutritious and easy to prepare, then these Chocolate Dipped Peanut Butter Protein Balls are just what you need! With a delightful combination of flavors and textures, these bites are perfect for an afternoon pick-me-up or post-workout fuel. Let’s dive into why they’re a must-try!
- Energy Boost: Packed with protein from peanut butter and protein powder, these energy balls provide a quick and satisfying boost to keep you going throughout the day.
- No-Bake Convenience: No oven required! These protein balls are simple to make and can be ready in under 30 minutes.
- Customizable Ingredients: You can easily swap out ingredients to suit your taste or dietary needs. Whether you prefer crunchy or creamy peanut butter, or want to add some chia seeds for extra nutrition, the choice is yours!
- Great for Meal Prep: Make a batch at the start of the week, and you’ll have a healthy snack on hand for those busy days.
- Kid-Friendly Fun: These bites are a hit with kids! Get them involved in the kitchen by letting them help mix and roll the balls.
Ingredients You’ll Need
Let’s gather our ingredients for these scrumptious chocolate-covered treats. Here’s what you’ll need to create the ultimate peanut butter protein balls:
- 1 cup crunchy peanut butter: I recommend Teddie’s Super Chunky for its rich flavor and texture.
- ¼ cup KOS vanilla protein powder: This adds a protein punch while enhancing the sweetness.
- 2 tablespoons pure maple syrup: For a touch of natural sweetness and moisture.
- 1 teaspoon vanilla extract: To elevate the flavor profile.
- Large pinch sea salt (optional): A little salt enhances the sweetness of the peanut butter.
- ¾ cup vegan chocolate chips: These are perfect for coating the protein balls.
- 1 tablespoon coconut oil: This helps the chocolate melt smoothly and adds a lovely sheen.
Step-by-Step Instructions
Ready to whip up these delicious treats? Follow these simple steps:
- Combine ingredients: In a medium bowl, mix together the peanut butter, protein powder, maple syrup, vanilla extract, and sea salt. Stir with a spatula until well combined; the texture should resemble cookie dough.
- Form into balls: Using a tablespoon or small cookie scoop, portion out the dough and roll it into balls with your hands. Place them on a prepared baking sheet lined with parchment paper.
- Freeze: Pop the baking sheet in the freezer for 10-13 minutes, or until the balls are firm.
- Melt chocolate: In a microwave-safe bowl, combine the chocolate chips and coconut oil. Microwave for 1 minute and 30 seconds, stirring every 30 seconds until smooth. Let it cool for a couple of minutes.
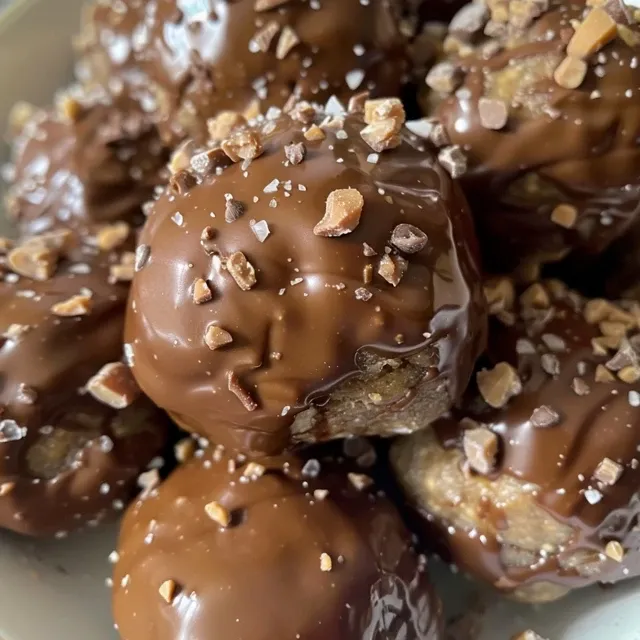
- Coat the balls: Remove the balls from the freezer and dip each one into the melted chocolate. Use a fork to roll them around, ensuring they’re fully coated. Tap off any excess chocolate and place them back on the parchment paper.
- Top with salt: For an extra flavor boost, sprinkle a pinch of sea salt on top of the chocolate-coated balls.
- Final freeze: Return the coated balls to the freezer for at least 15 minutes to set.
Pro Tips for Perfect Protein Balls
Here are some expert insights to help you create the best chocolate peanut butter protein balls:
- Use quality ingredients: Opt for natural peanut butter without added sugars or oils to keep your balls healthy and delicious.
- Adjust sweetness: Depending on your taste, feel free to add more or less maple syrup. Just remember that the chocolate coating will also add sweetness!
- Experiment with flavors: Swap out vanilla protein powder for chocolate or add some cocoa powder for an extra chocolatey kick.
- Check consistency: If the mixture is too dry, add a splash of milk or more maple syrup; if it’s too wet, add a bit more protein powder.
- Don’t skip the freeze: Freezing the balls before coating helps them hold their shape better when dipped in chocolate.
- Make it a family affair: Get kids involved by letting them roll the balls or decorate them with toppings like crushed nuts or sprinkles!
- Storage matters: Store them in an airtight container in the fridge for up to a week, or freeze for longer-lasting snacks.
- Mind the chocolate: If you prefer a less sweet chocolate coating, consider using dark chocolate.
Common Mistakes and Troubleshooting
Here are a few common pitfalls to avoid when making your protein balls:
- Too soft: If your protein balls are falling apart, they may need more protein powder or a longer freeze time.
- Chocolate too thick: If your chocolate coating is too thick, add a bit more coconut oil or milk to thin it out.
- Dry mixture: If the dough is too crumbly, add a little extra peanut butter or maple syrup to moisten it.
- Not chilling enough: Allow the balls to chill adequately to help them maintain their shape during coating.
Delicious Variations to Try
Here are some fun ideas to switch up your protein balls:
- Nutty Crunch: Add chopped nuts or seeds (like flaxseed or chia seeds) to the mixture for added texture and nutrition.
- Fruit Fusion: Mix in dried fruit like raisins, cranberries, or chopped dates for a sweet surprise.
- Spiced Delight: Incorporate a dash of cinnamon or nutmeg for a warm, spiced flavor.
- Chocolate Lovers: Use chocolate protein powder and sprinkle some mini chocolate chips inside for a double chocolate treat!
How to Store and Make Ahead
To keep your protein balls fresh and delicious:
- Refrigerate: Store in an airtight container in the fridge for up to a week.
- Freeze: For longer storage, freeze them in a single layer on a baking sheet, then transfer to a freezer-safe container. They can last for up to 3 months!
- Defrost: Let them thaw in the fridge overnight before enjoying.
Comprehensive FAQ
Got questions? We’ve got answers! Here are some common inquiries about these protein balls:
- Can I use almond butter instead of peanut butter? Yes! Almond butter works beautifully for a different twist.
- Are these protein balls gluten-free? Yes, as long as you use gluten-free oats and chocolate chips!
- How can I make them vegan? Use plant-based protein powder and ensure your chocolate chips are dairy-free.
- Can I add protein powder? Absolutely! It’s a great way to boost the protein content.
- How many protein balls can I eat in a day? It depends on your dietary needs, but 2-3 balls make a great snack!
- What’s the best way to coat them? Use a fork to dip them in melted chocolate, ensuring an even coat.
- Can I use honey instead of maple syrup? Yes! Honey is a perfect substitute for sweetness.
- What if I don’t have coconut oil? You can substitute with a neutral oil or omit it altogether, but it helps with the melting process.
Nutritional Tips and Dietary Adaptations
These protein balls can fit into various diet plans:
- High-Protein: Using protein powder boosts protein content, making them great for muscle recovery.
- Low Sugar: Adjust the maple syrup to keep sugar intake low without sacrificing flavor.
- Nut-Free: Substitute seed butter (like sunflower seed butter) for a nut-free option.
Essential Equipment Recommendations
Here’s what you’ll need to make these protein balls:
- Mixing bowl: A medium-sized bowl for combining ingredients.
- Spoon or spatula: For mixing and forming the balls.
- Baking sheet: Line it with parchment paper for easy cleanup.
- Microwave-safe bowl: For melting chocolate.
- Freezer: Essential for setting the protein balls!
Serving Suggestions
Enjoy these protein balls in various ways:
- Snack on the go: Perfect for a quick energy boost during busy days.
- Post-workout treat: Refuel after a workout with these delicious bites.
- Pair with fruit: Serve alongside fresh fruit for a balanced snack.
So there you have it! A comprehensive guide to making Chocolate Dipped Peanut Butter Protein Balls that are not only easy to whip up but also deliciously satisfying. Remember, cooking should be fun, and these little bites are all about bringing joy into your kitchen. Don’t forget to share your creations with friends and family, and enjoy the smiles they bring! Happy cooking!
Easy Chocolate Covered Peanut Butter Protein Balls
Ingredients
Dough mixture
- 0.25 cup crunchy peanut butter (Teddie's Super Chunky)
- 0.25 cup KOS vanilla protein powder
- 2 tablespoons pure maple syrup
- 1 teaspoon vanilla extract
- large pinch sea salt (optional)
- 0.75 cup vegan chocolate chips
- 1 tablespoon coconut oil
Instructions
- Mix peanut butter, protein powder, maple syrup, vanilla, and sea salt until combined.
- Form dough into small balls using a tablespoon or scoop, then place on a parchment-lined tray.
- Freeze for 10-13 minutes until set.
- Melt chocolate chips and coconut oil in microwave, stirring every 30 seconds until smooth. Cool slightly.
- Dip each frozen ball into the melted chocolate, then place back on parchment. Sprinkle with sea salt if desired.
- Freeze again for at least 15 minutes before enjoying.