
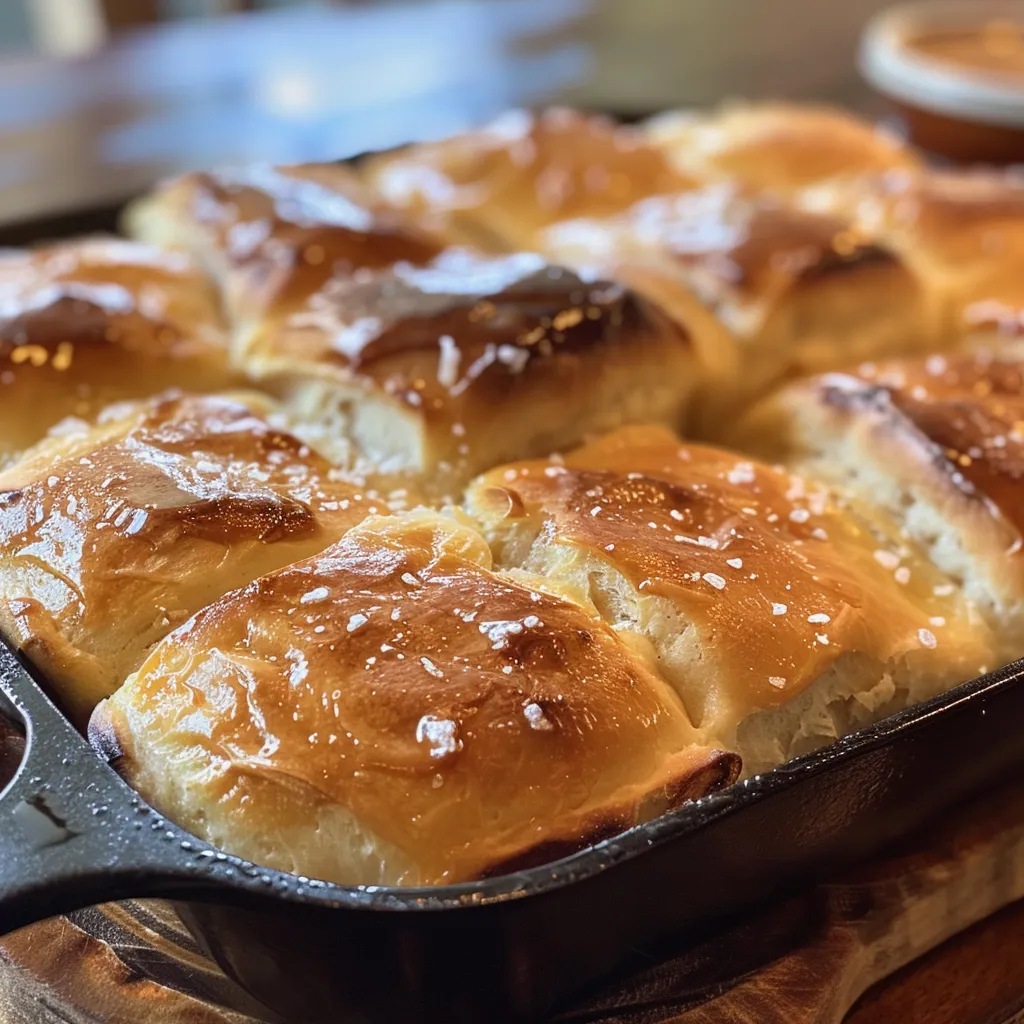
Unlock the Joy of Baking with Easy Skillet Rolls
Are you ready to elevate your baking game? These Easy Skillet Rolls are not just any rolls; they are fluffy, buttery, and perfect for any occasion! Whether you’re serving them alongside a big bowl of soup or bringing them to a family gathering, these rolls will have everyone coming back for seconds. Plus, they’re simple enough for even the newest of bakers to tackle with confidence. Let’s dive into everything you need to know to master this delightful recipe and make your kitchen time enjoyable!
Why You’ll Love This Recipe
These skillet rolls are not just delicious; they also come with a host of benefits that make them a must-try. Here’s why you’ll adore this recipe:
- Fluffy Texture: Achieve the perfect rise for rolls that are soft on the inside and slightly crisp on the outside.
- Quick to Prepare: With just a few simple steps, you can whip these rolls up in under two hours.
- Minimal Cleanup: Utilizing a single skillet means less mess and fewer dishes to wash afterward.
- Versatile Serving Options: These rolls are perfect for any meal, whether it’s a cozy dinner or a holiday feast.
- Great for Beginners: No fancy techniques or equipment needed; just mix, shape, and bake!
Ingredients Breakdown
Here’s what you’ll need to make these scrumptious rolls:
- ¼ cup warm water (105° to 110°): This temperature is crucial for activating the yeast.
- 1 teaspoon active dry yeast: The magic ingredient that makes these rolls rise beautifully.
- ¾ cup warm whole buttermilk (105° to 110°): Adds richness and moisture to the dough.
- 6 tablespoons unsalted butter, melted and divided: A must for that buttery flavor!
- ¼ cup sugar: Just the right amount of sweetness to balance the flavors.
- 4½ cups all-purpose flour, divided: Essential for structure; use more or less as needed.
- 2 large eggs: Helps bind the ingredients together.
- 1½ teaspoons kosher salt: Enhances the overall flavor.
- Garnish with flaked salt: Optional, but it adds a lovely finishing touch!
For substitutions:
- If you don’t have buttermilk, mix ¾ cup milk with 1 tablespoon of vinegar or lemon juice and let it sit for 5 minutes.
- Can’t find active dry yeast? You can use instant yeast instead; just mix it directly with the flour.
- Use any type of milk you have on hand if buttermilk isn’t available.
Step-by-Step Instructions
Ready to bake? Follow these simple steps for perfect skillet rolls every time:
- Activate the yeast: In a small bowl, stir together ¼ cup warm water and yeast. Let stand until foamy, about 5 minutes.
- Mix the wet ingredients: In another bowl, whisk together buttermilk, 4 tablespoons melted butter, and sugar.
- Combine the mixtures: In the bowl of a stand mixer fitted with the dough hook, beat the yeast mixture, buttermilk mixture, 2¼ cups flour, eggs, and salt at medium-low speed until combined, about 2 minutes.
- Add remaining flour: Reduce speed to low, adding the remaining 2¼ cups flour, ½ cup at a time, until a smooth ball forms, about 4 minutes.
- Knead the dough: Turn out the dough onto a floured surface and knead for 5 minutes until smooth.
- First rise: Place the dough in a greased bowl, turning to coat. Cover with plastic wrap and let it rise in a warm place until doubled in size, about 1½ hours.
- Shape the rolls: Punch down the dough, turn it out onto a floured surface, and divide it into 12 equal pieces, shaping each into a ball.
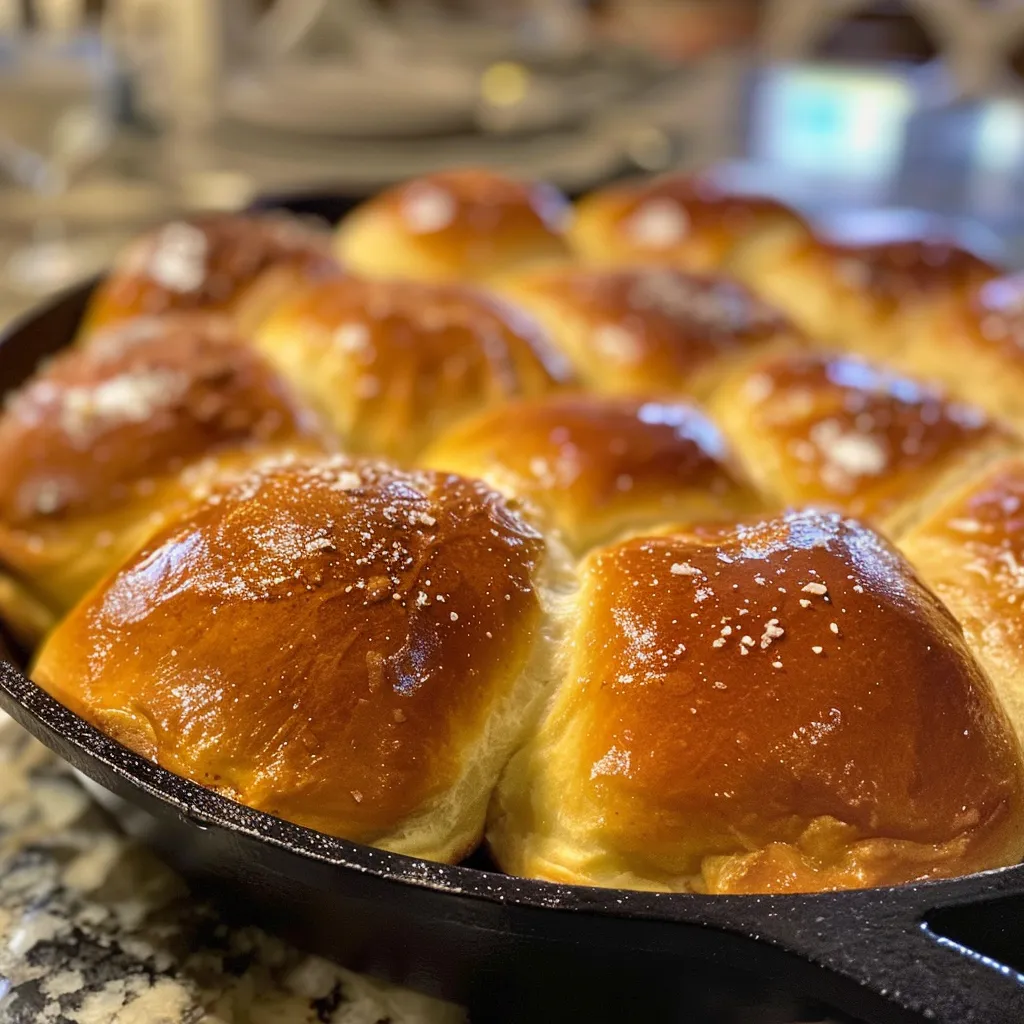
- Second rise: Place the balls in a greased 12-inch cast-iron skillet. Cover and let rise until doubled, about 1½ hours.
- Bake: Preheat oven to 350°F. Bake until golden brown, about 30 minutes, covering with foil if browning too quickly.
- Finish with butter: Let cool for 10 minutes before brushing with the remaining melted butter and sprinkling with flaked salt, if desired.
Pro Tips for Perfect Results
Here are some expert insights to ensure your rolls turn out beautifully every time:
- Check your yeast: Make sure your yeast is fresh by testing it with warm water before starting.
- Temperature matters: Keep your liquids warm, not hot; too much heat can kill the yeast.
- Don’t skimp on kneading: Proper kneading develops gluten, which gives the rolls structure.
- Use a warm environment: For rising, find a cozy spot free from drafts; a turned-off oven works well!
- Pay attention to texture: The dough should be soft and a little tacky; adjust flour as needed.
- Experiment with flavors: Add herbs or spices for an extra flavor boost—think garlic or rosemary!
- Cool before storing: Allow rolls to cool completely before storing them to avoid sogginess.
- Embrace imperfections: If your rolls are slightly misshapen, don’t worry! They’ll still taste fantastic.
Common Mistakes and Troubleshooting
Even seasoned bakers make mistakes! Here’s how to avoid common pitfalls:
- Over-proofing: If the rolls rise too long, they may collapse. Keep an eye on them!
- Too much flour: Adding too much flour can lead to dense rolls. Measure carefully!
- Not enough kneading: Insufficient kneading can result in tough rolls. Knead until smooth!
- Skipping the resting time: Allowing the dough to rest helps develop flavor and texture.
Variations to Try
Want to mix it up? Here are some fun variations to experiment with:
- Garlic Herb Rolls: Add minced garlic and chopped herbs into the dough for a savory twist.
- Cinnamon Rolls: Roll out the dough, sprinkle with cinnamon and sugar, roll it up, and slice into rounds before baking.
- Cheddar and Chive Rolls: Fold shredded cheddar and chopped chives into the dough for a cheesy delight.
- Sweet Rolls: Add dried fruits and nuts for a sweet version perfect for breakfast.
Storage and Make-Ahead Instructions
Want to enjoy these rolls later? Here’s how to store and prepare them:
- Storing: Keep baked rolls in an airtight container at room temperature for up to 3 days.
- Freezing: Freeze unbaked rolls by placing them on a baking sheet until firm, then transfer to a freezer bag for up to 3 months.
- Reheating: Warm rolls in the oven at 350°F for about 10 minutes to bring back their freshness.
Frequently Asked Questions
Here are some answers to common questions about this recipe:
- Can I use whole wheat flour?: Yes, but use half whole wheat and half all-purpose for the best texture.
- What if my rolls don’t rise?: Ensure your yeast is fresh and your liquids are at the right temperature.
- Can I make these rolls ahead of time?: Absolutely! Follow the make-ahead instructions above.
- What can I serve with these rolls?: They pair well with soups, stews, salads, or as a side to any meal.
- How do I know when the rolls are done?: They should be golden brown and sound hollow when tapped on the bottom.
- Can I add fillings to the rolls?: Yes! Cheese, herbs, or even sweet fillings can be added before shaping.
- What if I don’t have a cast-iron skillet?: You can use any oven-safe skillet or baking dish.
- Is this recipe adaptable for gluten-free diets?: Yes, use a gluten-free flour blend designed for baking.
Nutritional Tips and Dietary Adaptations
This recipe can easily adapt to different dietary needs while still being delicious:
- Low Sugar: Reduce the sugar to 2 tablespoons for a less sweet option.
- Dairy-Free: Substitute buttermilk with a non-dairy milk and vinegar mix.
- Whole Grain: Use whole wheat flour for a nuttier flavor and more fiber.
Essential Baking Equipment
Having the right tools can make all the difference. Here’s what you’ll need:
- 12-inch cast-iron skillet: Perfect for even baking and adds a lovely crust.
- Stand mixer: While optional, it makes mixing and kneading a breeze.
- Measuring cups and spoons: Accurate measurements are key to great baking.
- Plastic wrap: Essential for covering dough during rising.
Serving Suggestions
Pair your easy skillet rolls with these delightful options:
- Buttery Garlic Dip: Melted butter with minced garlic makes a perfect dipping sauce.
- Soup: Serve alongside a hearty vegetable or chicken soup for a comforting meal.
- Salads: Complement with a fresh garden salad for a light lunch.
Now that you have all the tools and tips for mastering easy skillet rolls, it’s time to roll up your sleeves and get baking! Remember, the kitchen is your playground, so have fun with it, experiment, and enjoy the process. Happy baking!
Easy Skillet Rolls
Ingredients
Dough
- 0.25 cup warm water (105 to 110°F)
- 1 teaspoon active dry yeast
- 0.75 cup warm buttermilk (105 to 110°F)
- 6 tablespoons unsalted butter, melted and divided
- 0.25 cup sugar
- 4.5 cups all-purpose flour (divided)
- 2 large eggs
- 1.5 teaspoons kosher salt
Garnish
- to taste flaked salt
Instructions
- Stir warm water and yeast; let foam for 5 minutes.
- Whisk buttermilk, 4 tbsp melted butter, and sugar.
- Mix yeast, buttermilk mixture, 2¼ cups flour, eggs, and salt until combined; knead for 5 minutes.
- Add remaining flour gradually, beating until a smooth dough forms; let rise until doubled (~1.5 hours).
- Divide dough into 12 balls, place in skillet, and let rise until doubled (~1.5 hours).
- Preheat oven to 350°F; bake rolls for 30 minutes, brush with remaining butter, and sprinkle with salt if desired.
![['Close-up of chocolate-covered cherry truffle balls on a white plate.', 'Side view of glossy chocolate cherry balls with a vibrant cherry in the center.', 'A tempting display of chocolate-coated cherry treats resting on a wooden surface.', 'Delicious chocolate cherry balls arranged artfully, showcasing their rich texture.']](https://snacknova.com/wp-content/uploads/2026/06/chocolate-cherry-balls_1_U1-1-150x150.webp)