
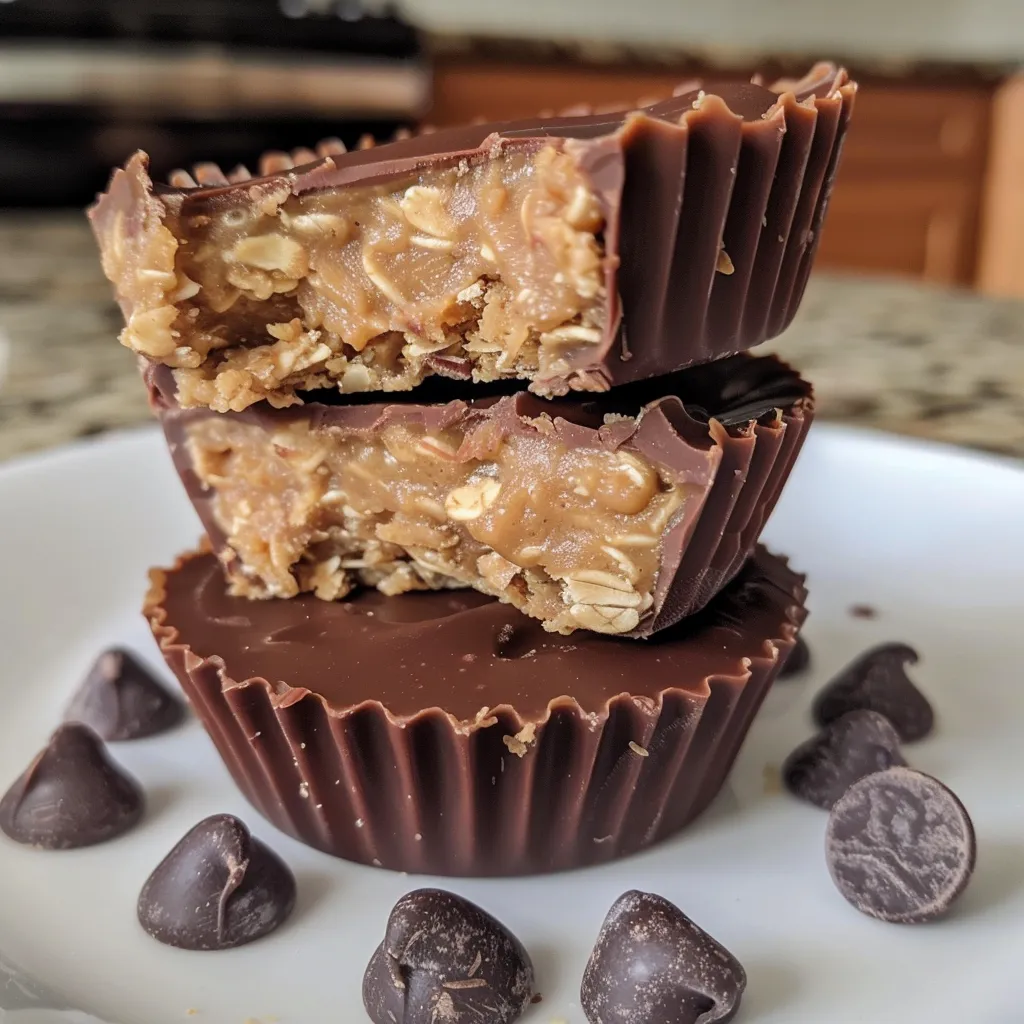
Discover the Joy of No-Bake Peanut Butter Oat Cups!
Welcome to Snack Nova, where we believe that cooking should be fun, flavorful, and incredibly simple! Today, we’re diving into the world of no-bake peanut butter oat cups—a treat that’s not only delicious but also quick to whip up. These delightful cups combine the creamy richness of peanut butter with the wholesome goodness of oats, all topped off with a luscious chocolate layer. Perfect for snacks or desserts, they’re a crowd-pleaser for both kids and adults alike. Let’s get started!
Why You’ll Love This Recipe
- Quick & Easy: With just a few simple ingredients and no oven required, you’ll have these yummy treats ready in no time!
- Healthy Ingredients: Packed with oats and natural peanut butter, these cups provide a nutritious boost to your day.
- Customizable: Feel free to add your favorite toppings or mix-ins to make these oat cups truly your own!
- Perfect for Meal Prep: Make a batch on the weekend and enjoy them throughout the week—great for busy days!
- No Baking Required: Enjoy a delicious dessert without heating up your kitchen—ideal for hot summer days!
Ingredients You’ll Need
To make these delectable peanut butter oat cups, gather the following ingredients:
- 1 1/2 cups rolled oats: The base of our cups, providing fiber and texture.
- 1/2 cup natural peanut butter: Adds creaminess and that irresistible nutty flavor.
- 1/4 cup honey or maple syrup: A natural sweetener to bind everything together.
- 1/4 teaspoon salt: Enhances the flavors and balances the sweetness.
- 1/2 teaspoon vanilla extract: For a lovely aromatic touch.
- 1/2 cup dark or semi-sweet chocolate chips: The rich topping that brings it all together.
- 1 tablespoon coconut oil: Helps melt the chocolate smoothly and adds a hint of tropical flavor.
How to Make No-Bake Peanut Butter Oat Cups with Chocolate Topping
Now that you have your ingredients ready, let’s dive into the steps for creating these scrumptious cups:
- Step 1: Line a 12-cup muffin tin with paper or silicone liners. This ensures easy removal and cleanup.
- Step 2: In a mixing bowl, combine the rolled oats, natural peanut butter, honey or maple syrup, salt, and vanilla extract. Stir until everything is well-coated and forms a cohesive mixture.
- Step 3: Scoop about 1 1/2 tablespoons of the oat mixture into each muffin cup. Use the back of a spoon to press down firmly, creating a solid base layer.
- Step 4: In a microwave-safe bowl, combine the chocolate chips and coconut oil. Microwave in 20-second intervals, stirring in between, until the mixture is smooth and fully melted.
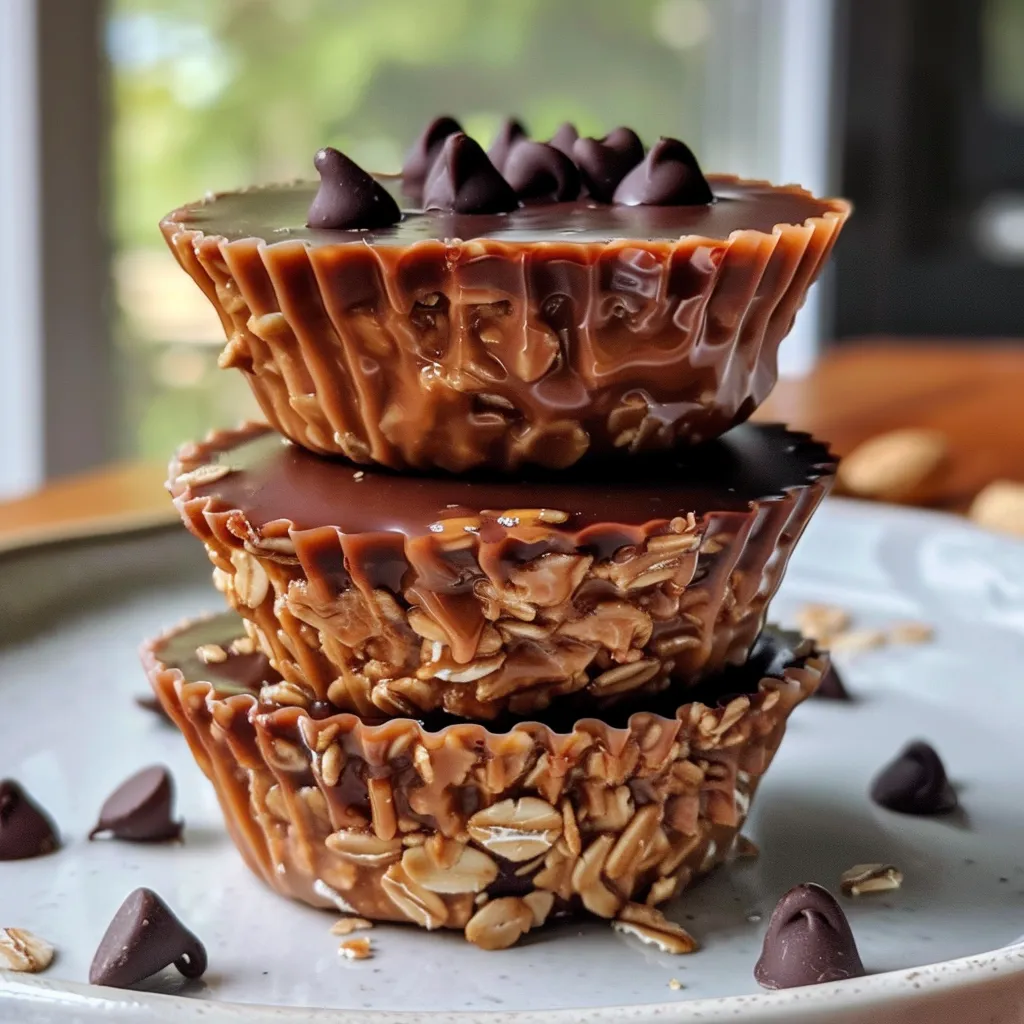
- Step 5: Spoon approximately 1 teaspoon of the melted chocolate over each oat base, spreading it evenly to cover the surface.
- Step 6: Place the muffin tin in the refrigerator for at least 30 minutes, or until the oat cups are firm and the chocolate has set completely.
Pro Tips for Perfect No-Bake Peanut Butter Oat Cups
- Use Natural Peanut Butter: Opt for a natural brand without added sugars or oils for the best flavor and health benefits.
- Chill Time: Ensure you allow enough chilling time for the chocolate to set properly—this makes them easier to handle!
- Customize Your Sweetness: Adjust the amount of honey or maple syrup based on your taste preference or dietary needs.
- Mix It Up: Feel free to add in ingredients like chia seeds, flaxseeds, or even protein powder for an added nutritional punch.
- Check Consistency: If your mixture is too dry, add a small amount of water or plant-based milk to help it hold together.
- Experiment with Flavors: Try adding a pinch of cinnamon or a splash of almond extract for an exciting twist!
- Storage Tips: Keep these oat cups in an airtight container in the fridge for up to a week—they also freeze well!
- Don’t Skip the Salt: A little salt helps enhance the flavors and balance the sweetness of the peanut butter and chocolate.
Common Mistakes and Troubleshooting
Even the best cooks can have mishaps! Here are some common mistakes to avoid:
- Too Crumbly: If your mixture is falling apart, it may need more binding agents like peanut butter or sweetener.
- Chocolate Not Melting Smoothly: Be cautious with microwave times. Heat in short bursts to prevent burning.
- Too Sweet or Not Sweet Enough: Always taste your mixture before chilling; you can adjust sweetness as needed.
- Weak Chocolate Layer: Ensure you’ve used enough chocolate for a good coverage; it should be a nice, thick layer!
Delicious Variations to Try
Feeling creative? Here are some fun variations to switch things up:
- Nutty Delight: Add chopped almonds or walnuts for an extra crunch!
- Fruit Fusion: Mix in dried cranberries, raisins, or chocolate-covered fruits for added flavor.
- Coconut Bliss: Stir in shredded coconut or top with coconut flakes for a tropical twist.
- Vegan Version: Use maple syrup instead of honey and ensure your chocolate is dairy-free.
Storage and Make-Ahead Instructions
These no-bake peanut butter oat cups are perfect for meal prep! Here’s how to store and make them ahead:
- Chill and Serve: After making, let them chill completely in the fridge. They’re ready to enjoy whenever you need a snack!
- Airtight Storage: Store in an airtight container in the refrigerator for up to a week. They can also be frozen for longer storage!
- Thawing Tips: If frozen, let them thaw in the fridge overnight for the best texture.
Nutritional Information
These oat cups are not just tasty—they’re nutritious too! Here are some health benefits:
- Rich in Fiber: The oats provide dietary fiber, which is great for digestion.
- Healthy Fats: Peanut butter is a good source of healthy fats, which can help keep you feeling full.
- Natural Sweetness: Using honey or maple syrup gives you a sweet treat without refined sugars.
- Protein Boost: These oat cups can be a good source of protein, especially when you add nuts or seeds.
FAQs About No-Bake Peanut Butter Oat Cups
Have questions? We’ve got answers! Here are some frequently asked questions:
- Can I use creamy peanut butter instead of crunchy? Absolutely! Both work well, though creamy will create a smoother texture.
- How long do these oat cups last? They can be stored in the fridge for up to a week or frozen for longer shelf life.
- Can I substitute agave for honey? Yes, agave syrup is a great alternative if you’re looking for a vegan option.
- What if I don’t have a muffin tin? You can shape the mixture into bars on a parchment-lined baking sheet!
- Are these gluten-free? If you use certified gluten-free oats, they will be gluten-free!
- Can I add protein powder to the mix? Yes, you can add protein powder for an extra boost—just adjust the liquid accordingly.
- What chocolate should I use? Dark or semi-sweet chocolate works best, but feel free to experiment with your favorites!
- Can I make these nut-free? Yes! Substitute peanut butter with sun butter or soy nut butter for a nut-free version.
Serving Suggestions
Here are some fun ways to serve and enjoy your oat cups:
- Top with Fresh Fruit: Add sliced bananas or strawberries for a fresh burst of flavor.
- Pair with Yogurt: Serve alongside Greek yogurt for a balanced snack.
- Drizzle with Honey: A drizzle of honey over the top can add an extra touch of sweetness.
- Share with Friends: These make great party treats—slice them into bite-sized pieces!
With these no-bake peanut butter oat cups, you’re all set for a delicious and easy snack! Remember, cooking should be enjoyable, and with this recipe, you’re sure to create something special. Happy cooking, friend!
No-Bake Peanut Butter Oat Cups with Chocolate Topping Recipe
Ingredients
Base
- 2 cups rolled oats
- 0.5 cup natural peanut butter
- 0.25 cup honey or maple syrup
- 0.25 teaspoon salt
- 0.5 teaspoon vanilla extract
Chocolate Topping
- 0.0625 cup dark or semi-sweet chocolate chips
- 1 tablespoon coconut oil
Instructions
- Line a 12-cup muffin tin with paper or silicone liners.
- Mix oats, peanut butter, honey, salt, and vanilla until well combined.
- Scoop 1.5 tablespoons of mixture into each cup and press firmly.
- Melt chocolate chips and coconut oil in 20-second intervals, stirring until smooth.
- Spread 1 teaspoon of melted chocolate over each oat base and chill for 30 minutes.
- Remove from tin and store in an airtight container in the fridge for up to 1 week.

![['Close-up view of golden-brown air fryer turkey bites garnished with herbs and lemon zest.', 'Juicy turkey bites cooked in an air fryer, showing a crispy exterior and fresh herbs.', 'Side view photo of flavorful turkey bites, highlighting their juicy texture and vibrant herbs.', 'Appetizing air fryer turkey bites displayed with a sprinkle of parsley and a lemon wedge.']](https://snacknova.com/wp-content/uploads/2026/06/air-fryer-turkey-bites_1_U1-150x150.webp)