
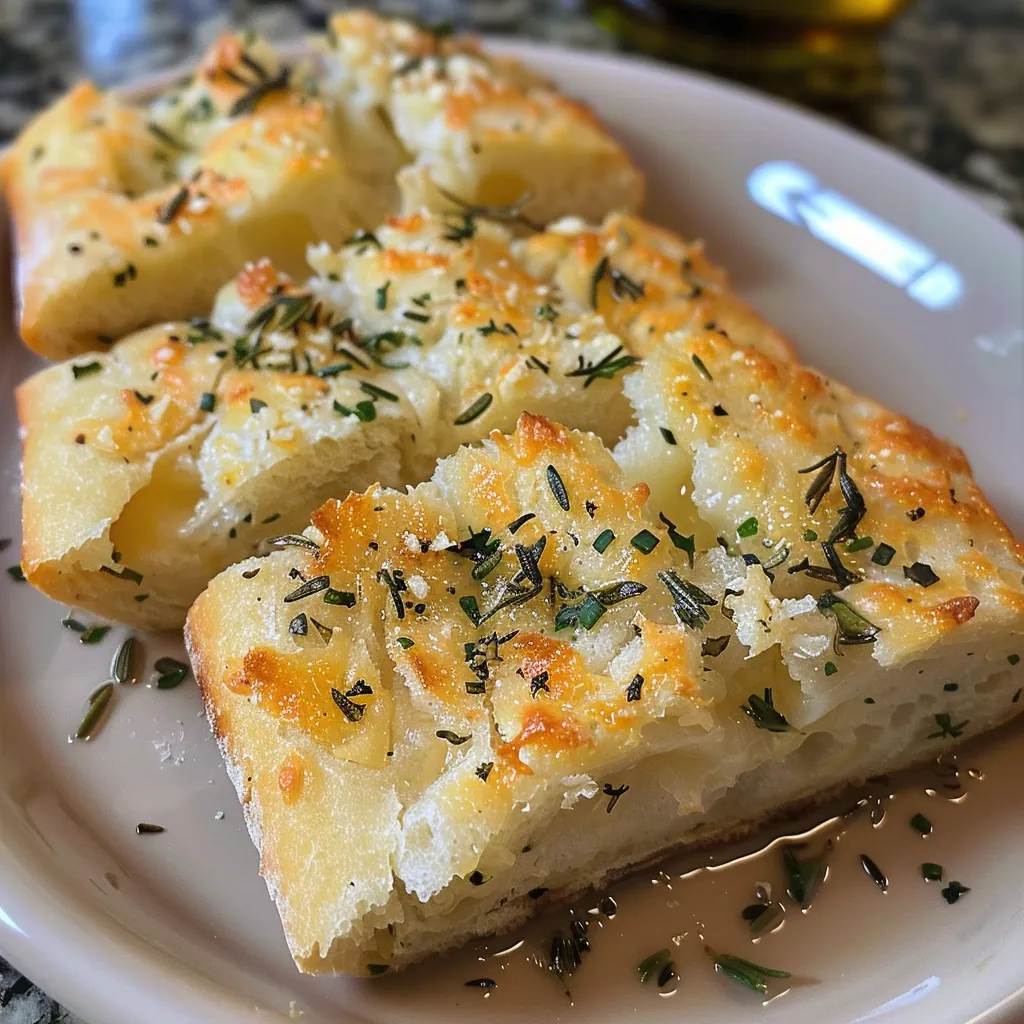
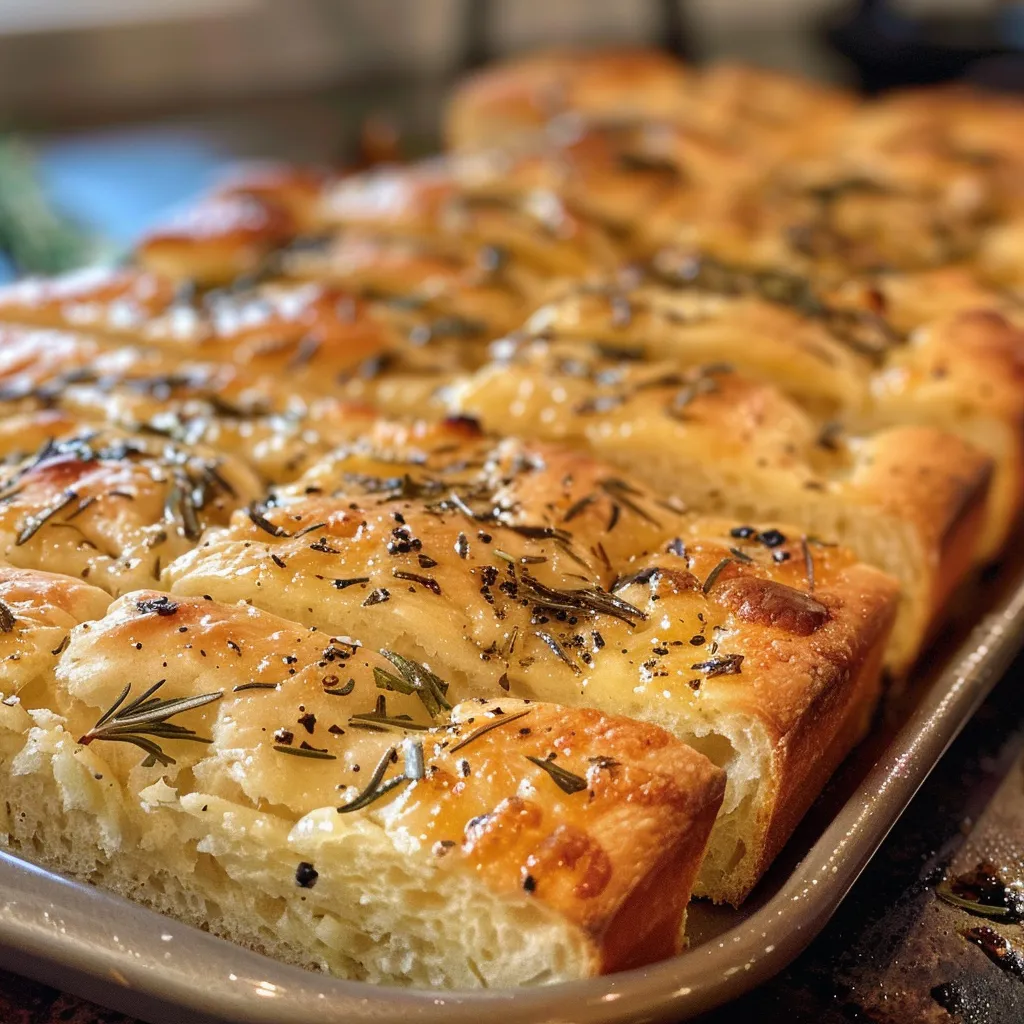
Unleash the Magic of Homemade Rosemary Garlic Bread!
Welcome to your new favorite baking adventure! If you’re ready to fill your home with the delightful aroma of fresh rosemary and garlic, you’ve come to the right place. This Rosemary Garlic Bread recipe is not just any bread; it’s a warm, inviting loaf that will turn any meal into a special occasion. With the right ingredients and a sprinkle of love, you’ll create a masterpiece that’s perfect for sharing (or indulging in all by yourself!). Let’s dive into the details!
Why You’ll Love This Recipe
Here are just a few reasons why this rosemary garlic bread will become a staple in your kitchen:
- Easy to make: No fancy equipment needed! Just mix, let it rise, and bake.
- Incredible flavor: Fresh garlic and rosemary make every bite aromatic and delicious.
- Perfect texture: Enjoy a crispy crust with a soft, fluffy interior.
- Versatile: Ideal for pairing with soups, salads, or as a standalone snack.
- Impressive presentation: Homemade bread looks and smells amazing, making it perfect for gatherings.
Ingredient Breakdown
Let’s go through what you’ll need to create this fabulous bread, along with some handy substitutions:
- 1 ¼ cups Warm Water: Activates the yeast; make sure it’s warm, not hot.
- 2 teaspoons Sugar: Feeds the yeast for better rising.
- 2 teaspoons Dry Active Yeast: The leavening agent for our bread.
- 2 tablespoons Extra Virgin Olive Oil: Adds richness and moisture.
- 3 cups + 1 tablespoon Bread Flour: Provides structure; you can use all-purpose flour if needed.
- 1 teaspoon Regular Salt: Enhances flavor; don’t skip it!
- ½ teaspoon Kosher Salt: For topping before baking.
- 1 teaspoon Vital Wheat Gluten: Optional, helps improve the bread’s texture.
- 1 teaspoon Dough Enhancer: Optional, but it improves rise and texture.
- 1 tablespoon Fresh or Dry Rosemary: The star flavor! Fresh is preferred.
- 4 cloves Garlic, Minced: Fresh garlic packs the best flavor punch.
- ½ tablespoon Vegetable Oil: For greasing the skillet.
- ½ tablespoon Extra Virgin Olive Oil: For brushing on the bread before baking.
- ¼ teaspoon Kosher Salt or Sea Salt: For sprinkling on top before baking.
- ½ tablespoon Fresh Rosemary: Optional, for topping.
Step-by-Step Instructions
Ready to get your hands a little floury? Follow these simple steps to create your rosemary garlic bread:
- Prepare the Garlic: Peel and mince 4 cloves of garlic. Set aside.
- Mix the Wet Ingredients: Pour 1 ¼ cups of warm water into your mixing bowl. Add 2 teaspoons of sugar, 2 teaspoons of dry active yeast, and 2 tablespoons of olive oil. Mix on the lowest setting and let it sit for 5 minutes.
- Combine the Dry Ingredients: In a separate bowl, mix 3 cups + 1 tablespoon of bread flour, 1 teaspoon of regular salt, ½ teaspoon of kosher salt, 1 teaspoon of vital wheat gluten, and 1 teaspoon of dough enhancer.
- Add Flavor: Into the flour mixture, mix in 1 tablespoon of rosemary and the minced garlic from step 1.
- Form the Dough: Slowly add the flour mixture to the yeast mixture until a dough forms. Increase the mixer speed to medium-high and mix for 5 minutes.
- Prep the Skillet: Grease a cast iron skillet with ½ tablespoon of vegetable oil.
- Let It Rise: Transfer the dough to the greased skillet, cover it with a wet cloth, and let it rise for 45 minutes to an hour at room temperature. Tip: Preheat your oven to 200°F, then turn it off and place the covered dough inside to speed up rising!
- Preheat the Oven: Preheat your oven to 450°F.
- Prepare for Baking: Once the dough has doubled in size, sprinkle ½ tablespoon of fresh rosemary and ¼ teaspoon of kosher salt on top. Lightly spray water on the dough 10 times with a spray bottle.
- Bake: Place the skillet in the oven and bake for 10 minutes. Remove from the oven and brush with ½ tablespoon of extra virgin olive oil. Lower the temperature to 400°F and continue baking for another 10-13 minutes until golden brown.
Expert Tips for Success
To ensure your bread turns out perfect every time, keep these expert tips in mind:
- Use Fresh Ingredients: Fresh garlic and rosemary give the best flavor. Avoid jarred garlic for this recipe.
- Check Yeast Freshness: Make sure your dry active yeast is not expired for optimal rising.
- Temperature Matters: Ensure your water is warm (about 110°F) but not hot to avoid killing the yeast.
- Don’t Rush the Rise: Allow the dough to rise properly; this is crucial for a fluffy texture.
- Experiment with Herbs: Feel free to add other herbs like thyme or oregano for a unique twist!
- Keep an Eye on Baking: Ovens can vary, so start checking for doneness a few minutes early.
- Brush with Butter: For an extra flavor boost, brush the bread with melted butter immediately after baking.
- Serve Warm: This bread is best enjoyed warm, right out of the oven!
Common Mistakes and Troubleshooting
Here are some potential pitfalls to watch for and how to avoid them:
- Dough Doesn’t Rise: Ensure the yeast is fresh and that your water is warm enough.
- Too Dense: Make sure you’re measuring flour correctly; too much flour can lead to dense bread.
- Hard Crust: If your crust is too hard, try adjusting your baking time and temperature.
- Flavor Lacking: Always use fresh garlic and herbs for the most flavor.
Delicious Variations
Feel like mixing it up? Here are some variations to try:
- Cheesy Garlic Bread: Add shredded mozzarella or parmesan cheese to the dough for a cheesy twist.
- Olive and Rosemary Bread: Fold in chopped olives for a Mediterranean flair.
- Sundried Tomato and Feta: Incorporate sundried tomatoes and feta cheese into the dough for added flavor.
- Herbed Loaf: Mix in a blend of your favorite herbs, like thyme or basil, along with rosemary for a herbaceous delight.
Storage and Make-Ahead Instructions
Want to prep ahead? Here’s how to best store your bread:
- Room Temperature: Store the bread wrapped in a clean kitchen towel or in a bread box for up to 3 days.
- Freezing: Wrap the bread tightly in plastic wrap and freeze for up to 3 months. Thaw at room temperature before serving.
- Make Ahead: You can prepare the dough and refrigerate it for up to 24 hours before baking. Just let it come to room temperature before proceeding with the recipe.
Frequently Asked Questions
Got questions? We’ve got answers!
- Can I use all-purpose flour instead of bread flour? Yes, but the texture may be slightly different.
- What if my dough is too sticky? Add a little more flour, one tablespoon at a time, until it’s manageable.
- Can I make this bread without a mixer? Absolutely! You can knead the dough by hand for about 10 minutes.
- How can I tell if my bread is done baking? It should be golden brown and sound hollow when tapped on the bottom.
- Can I add more garlic? Yes! Feel free to adjust the amount of garlic to your taste.
- What should I serve with rosemary garlic bread? It pairs beautifully with soups, stews, salads, or as an appetizer with olive oil and balsamic vinegar.
- Can I make this gluten-free? Yes, use a 1:1 gluten-free flour blend and skip the vital wheat gluten.
- How do I roast garlic for this recipe? Simply wrap whole garlic bulbs in foil and bake at 400°F for 30-35 minutes until soft and caramelized.
Nutritional Tips and Dietary Adaptations
This rosemary garlic bread can fit into various dietary needs:
- Vegan Option: Ensure the dough enhancer is vegan-friendly.
- Low-Sodium Version: Reduce or eliminate the added salt to cater to low-sodium diets.
- Gluten-Free: Use gluten-free flour and ensure all other ingredients are also gluten-free.
Essential Equipment Recommendations
Here’s what you’ll need to make your baking experience smooth and enjoyable:
- Mixing Bowl: A large bowl for combining ingredients.
- Stand Mixer: Optional, but makes kneading easier.
- Measuring Cups and Spoons: Accurate measurements are key to great bread!
- Cast Iron Skillet: Perfect for baking bread with a nice crust.
- Kitchen Towel: For covering the dough while it rises.
- Spray Bottle: For adding moisture in the oven—prevents a hard crust.
Serving Suggestions
Once your bread is baked to perfection, here are a few delicious ways to enjoy it:
- With Olive Oil: Serve warm with a side of olive oil and balsamic vinegar for dipping.
- As a Sandwich Base: Use slices to make delicious sandwiches with your favorite fillings.
- Accompanied by Soup: Pair with a hearty soup or stew for a comforting meal.
- Toast with Toppings: Top slices with butter, garlic spread, or cheese for a tasty snack.
Now, you’re all set to create your very own rosemary garlic bread from scratch! Remember, the joy of baking comes not just from the end product, but from the love and care you put into every step. Whether you’re serving it at a dinner party or enjoying a quiet evening with a slice of warm bread, this recipe is bound to bring smiles to your table. Happy baking, my friends!
Rosemary Garlic Bread
Ingredients
Dough
- 1 1/4 cup Warm Water
- 2 teaspoons Sugar
- 2 teaspoons Dry active yeast
- 2 tablespoons Extra virgin olive oil
- 3 cup Bread flour
- 1 teaspoon Regular salt
- 1/2 teaspoon Kosher salt
- 1 teaspoon Vital wheat gluten
- 1 teaspoon Dough enhancer
- 1 tablespoon Rosemary (Fresh or dry)
- 4 cloves Garlic (Minced)
- 1/2 tablespoon Vegetable oil (For grease the skillet)
- 1/2 tablespoon Extra virgin olive oil (For brushing the bread)
- 1/4 teaspoon Kosher salt or sea salt
- 1/2 tablespoon Rosemary (Fresh)
Instructions
- Peel and mince 4 garlic cloves.
- Mix warm water, sugar, yeast, and olive oil in a mixer; let sit for 5 minutes.
- Combine flour, salts, gluten, and dough enhancer; add rosemary and garlic. Slowly mix into yeast mixture until dough forms. Knead for 5 minutes.
- Grease a skillet with vegetable oil, place dough inside, cover, and let rise for 45 minutes to 1 hour. Preheat oven to 450°F.
- Sprinkle rosemary and salt on dough, spray with water, bake at 450°F for 10 minutes, brush with olive oil, then reduce oven to 400°F and bake for another 10-13 minutes until golden brown.

![['Close-up of fluffy cottage cheese pancakes stacked on a plate.', 'Side view of golden brown cottage cheese pancakes with syrup drizzling.', 'Delicious cottage cheese pancakes served with fresh fruit on the side.', 'Juicy cottage cheese pancakes topped with a pat of butter and maple syrup.']](https://snacknova.com/wp-content/uploads/2026/06/cottage-cheese-pancakes_1_U1-150x150.webp)