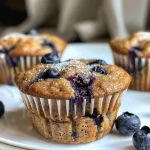
Deliciously Cheesy Garlic Rolls: A Comforting Delight!
Welcome to the world of homemade cheesy garlic rolls, where the aroma of freshly baked bread meets the irresistible allure of melted cheese and fragrant garlic butter! This recipe is not just about food; it’s about creating moments of joy at your dinner table. Imagine pulling a batch of these golden, fluffy rolls from the oven, their cheesy centers bubbling and that garlic-infused butter glistening on top. Trust me, these rolls will become the star of any meal, and you’ll find yourself making them time and again!
In this comprehensive guide, we’ll explore every aspect of making these heavenly cheesy garlic rolls, from the ingredients you’ll need to expert tips ensuring perfect results every time. So grab your apron, and let’s dive into this delicious adventure together!
Why You’ll Love This Recipe
Here are just a few reasons why this cheesy garlic rolls recipe will win your heart:
- Irresistible Flavor: The combination of gooey cheese and aromatic garlic creates a flavor explosion in every bite.
- Perfect for Any Meal: Whether it’s a family dinner, holiday gathering, or a casual get-together with friends, these rolls fit perfectly into any meal.
- Easy to Make: With simple ingredients and step-by-step instructions, even novice bakers can whip these up with confidence.
- Customizable: Feel free to add your favorite herbs, spices, or types of cheese to make these rolls uniquely yours!
- Great for Leftovers: These rolls taste just as good the next day, making them perfect for meal prep or parties.
Ingredients You’ll Need
Let’s break down the ingredients for these delicious cheesy garlic rolls and explore potential substitutions:
- 1 cup (240ml) warm milk (105-115°F / 40-46°C): Essential for activating the yeast. Substitution: Almond milk or oat milk works well for a dairy-free version.
- 2 ¼ teaspoons active dry yeast: This is what makes the dough rise and become fluffy.
- 2 tablespoons granulated sugar: This helps to activate the yeast and adds a hint of sweetness.
- 1 large egg (room temperature): Provides structure and richness to the rolls.
- ¼ cup (56g) unsalted butter, melted, slightly cooled: Adds flavor and moisture to the dough.
- 3 ½ cups (420g) all-purpose flour: The base of our dough. Substitution: Bread flour can be used for a chewier texture.
- 1 teaspoon salt: Enhances flavor and strengthens the dough.
- ½ cup (113g) unsalted butter, melted (for garlic butter): The secret to the irresistible garlic flavor.
- 4-6 cloves garlic, minced finely: Fresh garlic is a must for that aromatic taste.
- 2 tablespoons fresh parsley, finely chopped: Adds a fresh, vibrant flavor.
- ½ teaspoon salt (for garlic butter) and ¼ teaspoon black pepper (for garlic butter): Seasoning for the garlic butter.
- 1 ½ cups shredded mozzarella cheese: The gooey cheese filling.
- ½ cup shredded sharp cheddar cheese: Adds a nice flavor contrast.
- ¼ cup grated Parmesan cheese (optional): For an extra cheesy topping.
- 1 large egg (for egg wash) and 1 tablespoon water or milk (for egg wash): Gives the rolls a beautiful golden color.
Pro Tips for Perfect Cheesy Garlic Rolls
To ensure your cheesy garlic rolls turn out perfectly every time, consider these expert tips:
- Warm Milk: Always check the milk temperature with a thermometer; it should be warm but not hot, to avoid killing the yeast.
- Proof Your Yeast: Let the yeast mixture sit until frothy to ensure it’s active before adding to the dough.
- Don’t Rush the Dough: Allow the dough to rise in a warm, draft-free environment for the best results.
- Flour Gradually: When kneading, add flour gradually if the dough is too sticky to achieve the right consistency.
- Cheese Variations: Experiment with different cheeses like gouda or pepper jack for a unique twist.
- Garlic Butter Ratio: Don’t be shy with the garlic butter; it’s what makes these rolls stand out!
- Resting Time: Let the rolls rest after baking for a few minutes to develop their full flavor.
- Storage Tips: Store leftovers in an airtight container to keep them fresh for up to two days.
Common Mistakes and Troubleshooting
Even the best of us can make mistakes in the kitchen! Here are some common pitfalls and how to avoid them:
- Flat Rolls: If your rolls don’t rise, your yeast may have been dead. Always check the expiration date and proof it in warm liquid.
- Too Dense: Incorporating too much flour can result in dense rolls. Measure carefully and add flour only as needed.
- Overbaking: Keep an eye on the rolls towards the end of the baking time to prevent them from becoming dry.
- Underseasoned: Make sure to season both the dough and the garlic butter adequately to enhance the flavor of your rolls.
Variations to Try
Feeling adventurous? Here are some fun variations to customize your cheesy garlic rolls:
- Herbed Rolls: Add dried herbs like oregano or basil into the dough for an aromatic twist.
- Spicy Garlic Rolls: Incorporate red pepper flakes into the garlic butter for a spicy kick.
- Stuffed Rolls: Add cooked spinach and feta cheese to the cheese filling for a Mediterranean flair.
- Sweet Garlic Rolls: Incorporate cinnamon and sugar into the dough and top with a sweet glaze for a dessert version.
Storage and Make-Ahead Instructions
Want to prepare these rolls in advance? Here’s how to store or make them ahead of time:
- Make-Ahead Rolls: Prepare the rolls up to the second rise, then cover and refrigerate overnight. Allow them to come to room temperature before baking.
- Storing Leftovers: Keep any leftover rolls in an airtight container at room temperature for up to two days. For longer storage, refrigerate for up to four days.
- Reheating: To restore their fresh-baked texture, reheat in a warm oven for a few minutes or microwave for 10-15 seconds.
Comprehensive FAQ
Let’s tackle some questions you might have while making these delicious cheesy garlic rolls:
- Can I use instant yeast instead of active dry yeast? Yes, you can use instant yeast without proofing; just mix it directly with the dry ingredients.
- What if my dough is too sticky? Gradually add flour, one tablespoon at a time, while kneading until it reaches the right consistency.
- How do I know when the rolls are done baking? They should be golden brown and sound hollow when tapped on the bottom. An internal temperature of 200°F (93°C) is ideal.
- Can I freeze these rolls? Yes! Freeze the unbaked rolls after shaping them. Let them thaw and rise before baking.
- What type of cheese should I use? A combination of mozzarella and cheddar works best, but feel free to experiment with your favorites!
- How can I enhance the garlic flavor? Use roasted garlic instead of fresh for a sweeter and richer flavor.
- Are these rolls suitable for a vegan diet? You can substitute the butter, milk, and egg with vegan alternatives for a plant-based version.
- What can I serve with these rolls? They pair wonderfully with soups, salads, or as a side for pasta dishes.
Nutritional Tips and Dietary Adaptations
For those watching their diet, here are some tips to adapt this recipe:
- Low-Carb Option: Substitute traditional flour with almond flour or coconut flour for a low-carb version.
- Dairy-Free: Use plant-based butter and cheese alternatives to make these rolls dairy-free.
- Gluten-Free: A gluten-free flour blend can be used, but ensure to adjust the liquid accordingly.
- Reduced Fat: Use less butter in the garlic topping and opt for low-fat cheese to reduce calories.
Equipment Recommendations
Having the right tools can make all the difference in your baking experience. Here’s what I recommend for making these cheesy garlic rolls:
- Stand Mixer: A stand mixer with a dough hook can make kneading much easier and more efficient.
- Measuring Cups and Spoons: Accurate measurements are crucial for baking success.
- Kitchen Thermometer: To ensure your milk is at the perfect temperature for yeast activation.
- Rolling Pin: Useful for flattening the dough into circles for filling.
- Baking Dish: A 9×13-inch baking dish works perfectly for arranging the rolls.
Serving Suggestions
These cheesy garlic rolls shine on their own, but here are some creative serving suggestions:
- As a Side Dish: Serve alongside hearty soups or stews for a complete meal.
- With Dips: Pair with marinara sauce or garlic aioli for an extra layer of flavor.
- As a Snack: Enjoy them fresh out of the oven or reheat for a tasty snack any time of day.
- For Breakfast: Slather with butter or jam for a delightful breakfast treat.
Conclusion: Bake Your Way to Happiness!
Now that you have all the knowledge and tips to create the most delicious cheesy garlic rolls, it’s time to get baking! Remember, the joy of cooking lies in the experience and the love you put into your food. So, whether you’re sharing these rolls with loved ones or enjoying them solo, take a moment to savor each bite and celebrate your success in the kitchen. Happy baking, friends!
Irresistible Cheesy Garlic Dinner Rolls
Ingredients
Dough
- 1 cup warm milk (105-115°F / 40-46°C)
- 2 ¼ teaspoons active dry yeast
- 2 tablespoons granulated sugar
- 1 large egg (room temperature)
- ¼ cup unsalted butter, melted (slightly cooled)
- 3 ½ cups all-purpose flour
- 1 teaspoon salt
Garlic Butter
- ½ cup unsalted butter, melted
- 4-6 cloves garlic, minced
- 2 tablespoons fresh parsley, chopped
- ½ teaspoon salt
- ¼ teaspoon black pepper
Cheese Filling
- 1 ½ cups shredded mozzarella cheese
- ½ cup shredded sharp cheddar cheese
Topping
- ¼ cup grated Parmesan cheese (optional)
- 1 large egg (for egg wash)
- 1 tablespoon water or milk (for egg wash)
Instructions
- Activate yeast by combining warm milk and sugar, then sprinkling yeast and letting sit until frothy.
- Add egg and melted butter to yeast mixture, whisk to combine.
- Mix in flour and salt, knead until smooth, adding remaining flour if sticky.
- Let dough rise in a greased bowl, covered, for 1-1.5 hours until doubled.
- Prepare garlic butter by melting butter and mixing with garlic, parsley, salt, and pepper.
- Shape dough into rolls with cheese filling, arrange in dish, proof for 30-45 minutes, then brush with egg wash and bake at 375°F (190°C) for 20-25 minutes.