
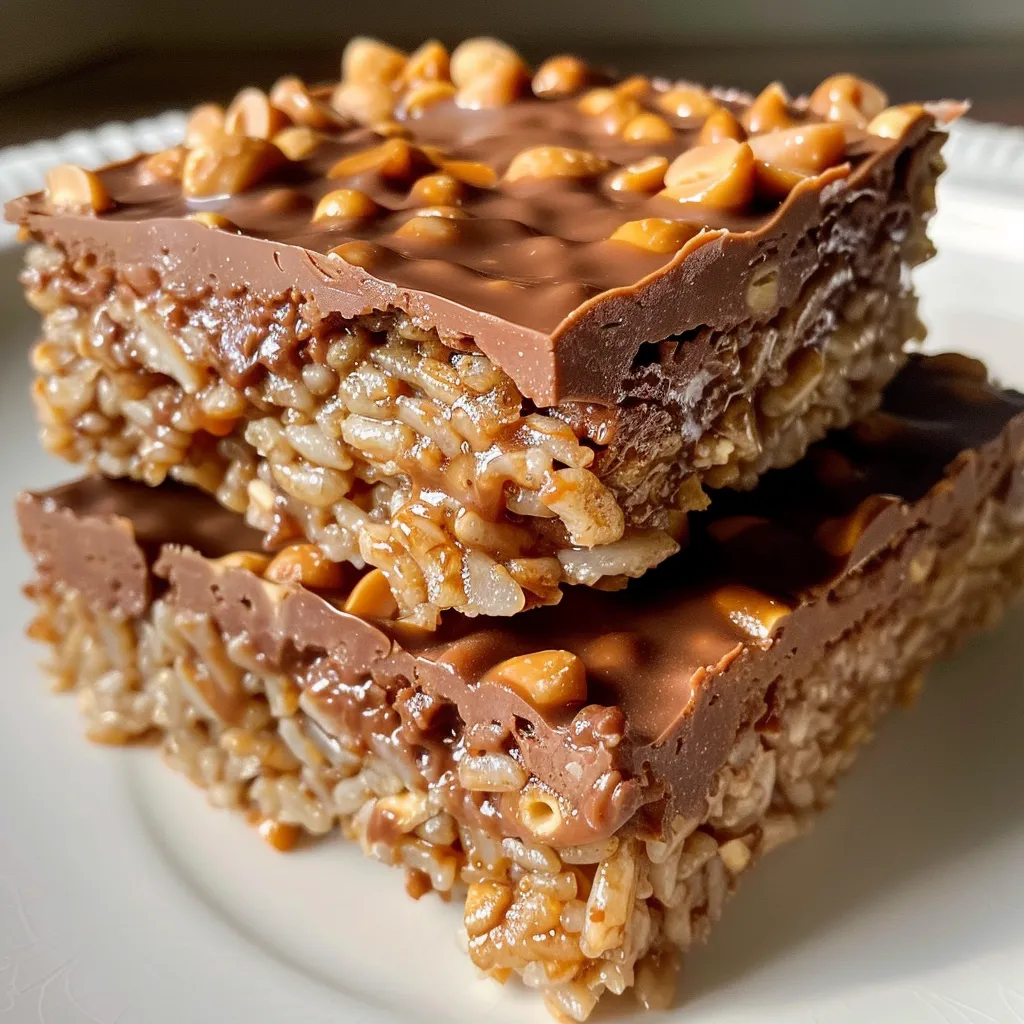
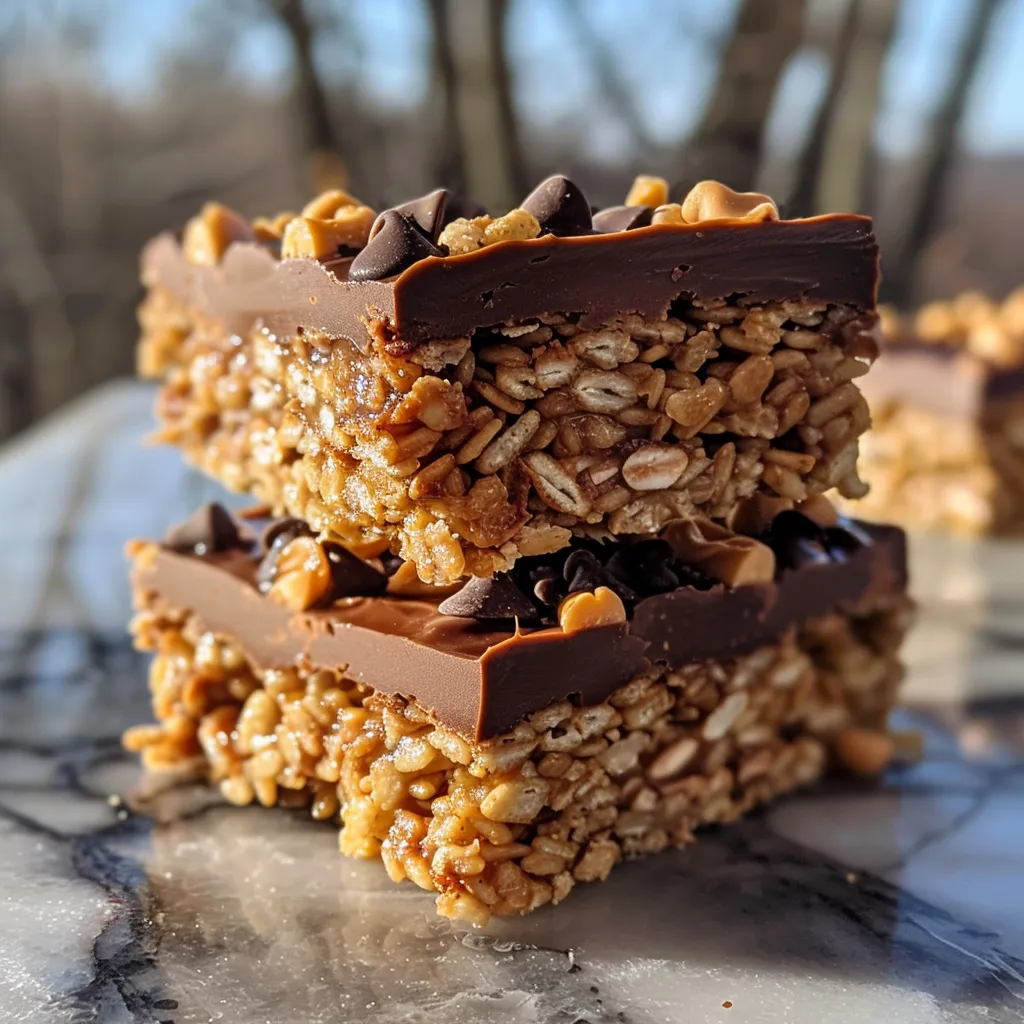
Indulge in the Ultimate Chocolate Peanut Butter Crunch Bars
If you’re looking for a simple, no-bake treat that combines the rich flavors of chocolate and peanut butter, you’ve found it! These Chocolate Peanut Butter Crunch Bars are not just easy to make but also a delightful addition to any occasion. Trust me, once you try them, you’ll be making these bars again and again! Let’s embark on this delicious journey together!
Why You’ll Love This Recipe
Here are just a few reasons why this recipe will become a household favorite:
- Quick and Easy: With just a few simple ingredients and no baking required, you’ll have these bars ready in no time!
- Decadent Flavor: The combination of creamy peanut butter and rich chocolate creates a flavor explosion that’s hard to resist.
- Perfect Texture: The crunch from the rice cereal perfectly complements the smoothness of the peanut butter and chocolate layers.
- Customizable: This recipe allows for various toppings and mix-ins, so you can make it uniquely yours!
- Great for Sharing: These bars are perfect for parties, picnics, or just a sweet treat to enjoy at home.
Ingredients You’ll Need
Gather these ingredients to whip up your Chocolate Peanut Butter Crunch Bars:
- 3 cups rice crisp cereal: This gives our bars that delightful crunch.
- 1/2 cup brown rice syrup: A sticky sweetener that binds everything together.
- 1/4 cup light brown sugar: Adds a bit of sweetness and depth.
- 3/4 cup creamy peanut butter: Choose low sodium if preferred for a healthier option.
- 1/4 cup cocoa powder: For that rich chocolate flavor.
- 2 teaspoons pure vanilla extract: It enhances the overall flavor profile.
- 3/4 cup mini chocolate chips: More for optional topping, of course!
- 1/2 cup creamy peanut butter: Added on top for an extra layer of deliciousness.
- Chopped peanuts: Optional, for added crunch and flavor.
How to Make Chocolate Peanut Butter Crunch Bars
Now, let’s dive into the steps for creating these mouth-watering bars!
- Line an 8 x 8-inch baking dish with parchment paper and set it aside.
- Pour the rice cereal into a large bowl and set aside.
- In a saucepan over medium heat, combine the brown rice syrup and brown sugar. Stir well until it becomes bubbly, about 2-3 minutes. Remove from heat.
- Add 3/4 cup peanut butter, cocoa powder, and vanilla extract to the syrup mixture. Stir until well combined.
- Pour the mixture over the rice cereal and fold together gently with a spatula until well-coated.
- Transfer the mixture to the prepared pan. Press it down firmly into an even layer.
- In a microwave-safe bowl, add the chocolate chips and 1/2 cup of peanut butter. Microwave on 50% power in 30-second increments, stirring each time until melted and smooth.
- Pour the melted mixture over the cereal layer, spreading it evenly. Tap the pan a few times to settle it.
- Sprinkle chopped peanuts and extra chocolate chips on top if desired.
- Chill in the refrigerator for 30-60 minutes until the chocolate is set.
- To cut, lift the bars out using the parchment paper and place on a cutting board. Cut into squares.
Pro Tips for Perfect Chocolate Peanut Butter Crunch Bars
Here are some expert insights to ensure your bars turn out perfectly:
- Use Fresh Ingredients: Ensure your peanut butter and chocolate are fresh for the best flavor.
- Don’t Rush the Cooling: Allowing the bars to chill completely is crucial for easy cutting.
- Experiment with Sweeteners: Try using maple syrup or agave nectar instead of brown rice syrup for a different taste.
- Customize Your Toppings: Feel free to add nuts, seeds, or even dried fruits for added texture.
- Make It Gluten-Free: Ensure that your rice cereal is labeled gluten-free if that’s a concern.
- Microwave Carefully: When melting chocolate, be cautious not to overheat, as it can seize.
- Sharp Knife for Cutting: Use a warm sharp knife for clean cuts through the chilled bars.
- Store Properly: Keep bars in an airtight container to maintain freshness.
Common Mistakes and Troubleshooting
If you run into any issues, here are some common mistakes to avoid:
- Too Sticky: If the mixture is too sticky, it may need more cereal. Just fold in a bit more!
- Not Setting Properly: Ensure the bars are chilled long enough in the refrigerator to set properly.
- Crumbly Texture: If the bars are too crumbly, it might be due to too much cereal. Aim for a good balance between the wet and dry ingredients.
Variations to Try
Want to mix things up? Here are some fun variations:
- Nut Butter Swap: Use almond or cashew butter for a different flavor profile.
- Chocolate Variations: Experiment with dark chocolate chips or white chocolate for a twist.
- Fruit Add-ins: Toss in dried cranberries or raisins for a fruity touch.
- Spicy Crunch: Add a pinch of cayenne pepper or chili powder for a surprising kick!
Storage and Make-Ahead Instructions
These bars are perfect for prepping ahead of time!
- Room Temperature: Store in an airtight container at room temperature for 5-7 days.
- Freezing: You can freeze these bars for 2-3 months. Just wrap individual squares tightly before placing them in a freezer-safe bag.
- Thawing: To enjoy frozen bars, simply let them thaw at room temperature for a bit or in the fridge overnight.
Frequently Asked Questions
Here are some questions people often ask about these delicious bars:
- Can I use crunchy peanut butter? Absolutely! Crunchy peanut butter adds extra texture.
- Is there a vegan option? Yes, use vegan chocolate and ensure your cereal is vegan-friendly.
- What can I substitute for brown rice syrup? Maple syrup or agave nectar can work as alternatives.
- How can I make these bars healthier? Use low-sugar chocolate chips and opt for natural peanut butter.
- Can I add protein powder? Yes, just replace some of the cereal with your favorite protein powder.
- How do I know when they are set? They should feel firm to the touch and not stick to your fingers.
- Are these bars gluten-free? If you use gluten-free rice cereal, then yes!
- Can I double the recipe? Definitely! Just use a larger pan for thicker bars.
Nutrition Tips and Dietary Adaptations
For those watching their dietary intake:
- Lower Sugar: Use less sugar or sugar substitutes to reduce overall sweetness.
- Protein Boost: Add nuts or seeds to increase protein content.
- Allergy-Friendly: Make these bars nut-free by using sunflower seed butter.
Equipment Recommendations
Here’s what you’ll need to make these bars:
- 8 x 8-inch baking dish: Perfect for setting the bars.
- Parchment paper: Helps with easy removal and cleanup.
- Microwave-safe bowl: For melting chocolate and peanut butter.
- Spatula: Great for mixing and spreading the mixture evenly.
Serving Suggestions
Enjoy your Chocolate Peanut Butter Crunch Bars as a snack or dessert! Here are some fun ways to serve them:
- With a Glass of Milk: Perfect for dunking!
- As a Party Treat: Cut into bite-sized squares for sharing.
- Drizzled with Caramel: Add a drizzle of caramel sauce for an indulgent twist.
And there you have it! Your ultimate guide to creating deliciously crunchy Chocolate Peanut Butter Bars. So, what are you waiting for? Gather your ingredients, and let’s get cooking! Don’t forget to share your creations with friends and family—you’ll be the star of the kitchen!
Chocolate Peanut Butter Crunch Bars
Ingredients
Main
- 3 cups rice crisp cereal
- 0.5 cup brown rice syrup
- 0.25 cup light brown sugar
- 0.75 cup creamy peanut butter low sodium if preferred
- 0.25 cup cocoa powder
- 2 teaspoons pure vanilla extract
- 0.75 cup mini chocolate chips more for optional topping
- 0.5 cup creamy peanut butter low sodium if preferred
Optional Toppings
- to taste Chopped Peanuts (optional)
Instructions
- Line an 8x8-inch baking dish with parchment paper and set aside.
- Combine brown rice syrup and brown sugar in a saucepan over medium heat until bubbly, then remove from heat. Stir in peanut butter, cocoa powder, and vanilla until smooth.
- Pour the mixture over rice cereal and fold until well-coated. Transfer to the prepared pan and press firmly into an even layer.
- Microwave chocolate chips and peanut butter until melted, then pour over the cereal layer and spread evenly. Add optional toppings if desired.
- Refrigerate for 30-60 minutes until set. Cut into squares and store in an airtight container at room temperature for 5-7 days or freeze for 2-3 months.

![['Close-up of freshly baked Strawberry Banana Oat Bars with a golden crust.', 'Side view of Strawberry Banana Oat Bars, featuring layers of strawberries and bananas.', 'Juicy Strawberry Banana Oat Bars, showcasing a mix of oats and fruit.', 'Delicious Strawberry Banana Oat Bars displayed on a rustic wooden table.']](https://snacknova.com/wp-content/uploads/2026/06/strawberry-banana-oat-bars_1_U1-150x150.webp)