
Unleashing the Joy of Baking with Garlic Herb Bread
Welcome to a delightful culinary adventure! If you’re looking to elevate your baking game and fill your home with the irresistible aroma of freshly baked bread, you’ve landed in the right place. This Garlic Herb Bread recipe is easy to follow and will make you feel like a kitchen superstar. You’ll love the way the warm, fluffy bread pairs perfectly with any meal, from casual family dinners to festive gatherings. Let’s dive into the magic of making your own homemade garlic bread!
Why You’ll Love This Recipe
Here are some reasons that make this Garlic Herb Bread a must-try:
- Fluffy Texture: The dough is soft and airy, giving you that perfect bite that melts in your mouth.
- Bold Flavor: With the combination of garlic and fresh herbs, every slice is packed with flavor that will elevate your meals.
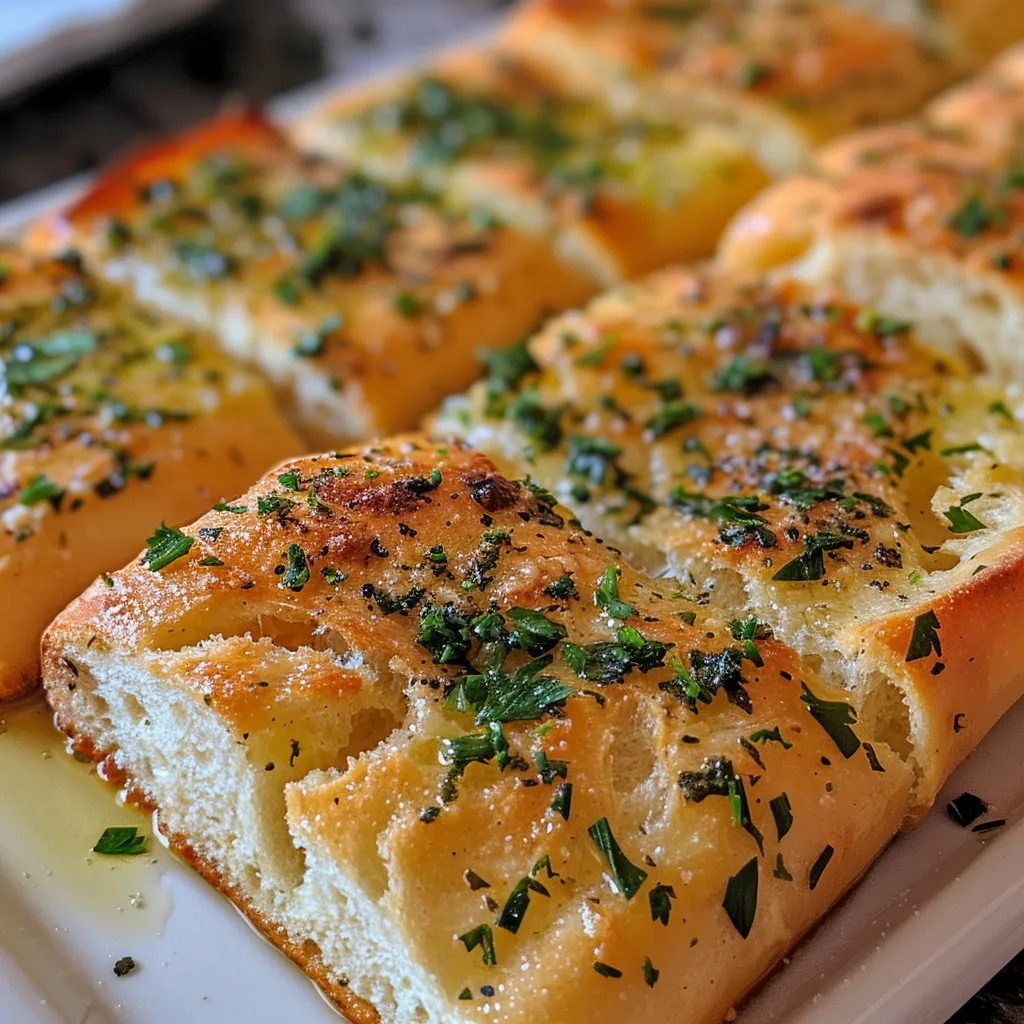
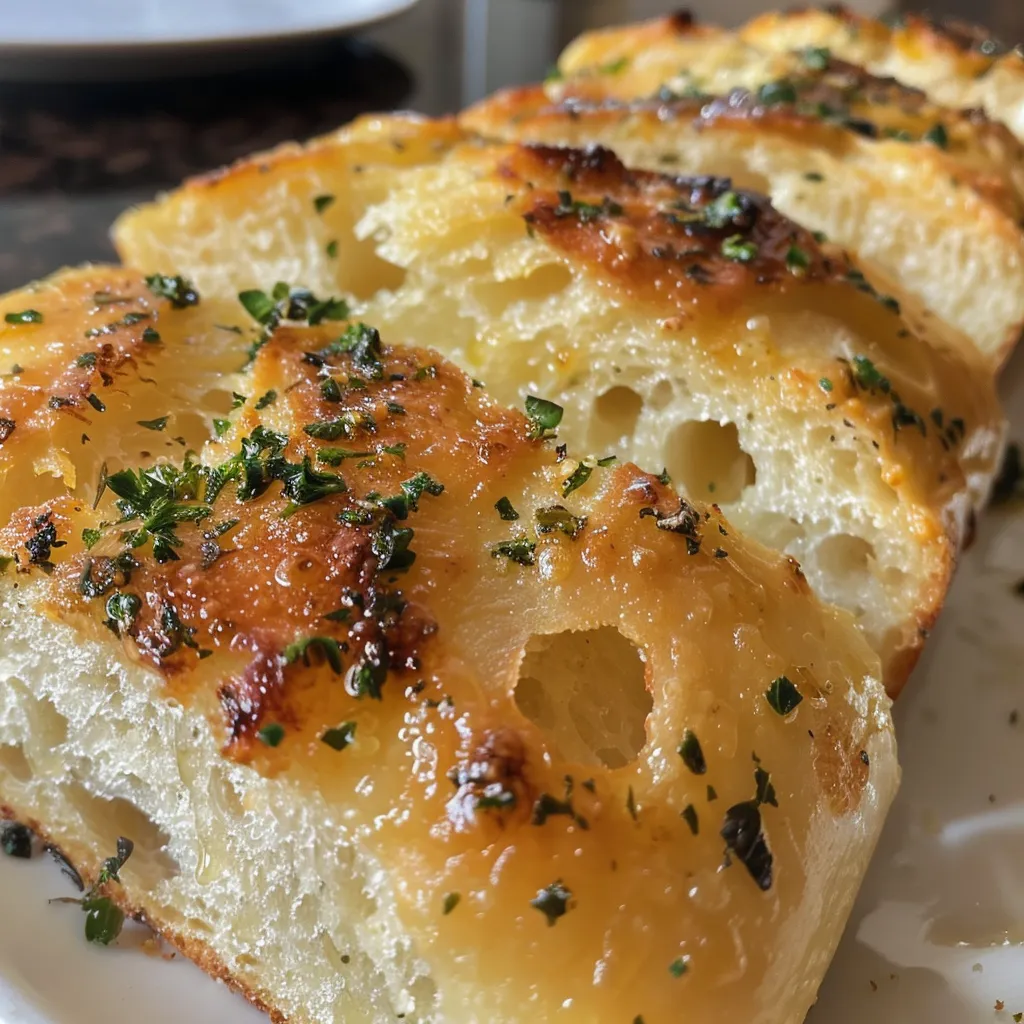
- Visual Appeal: The beautiful swirl of garlic and herbs makes this bread a stunning centerpiece on your table.
- Versatile: This bread pairs beautifully with soups, salads, or can be enjoyed on its own with a drizzle of olive oil.
- Easy to Make: Whether you’re a novice or an experienced baker, this simple recipe will guide you every step of the way.
Ingredients for Garlic Herb Bread
Let’s gather our ingredients! Here’s what you’ll need to whip up this delicious bread:
- 3.5 cups all-purpose flour
- 2.25 tsp active dry yeast
- 0.5 cup butter (softened)
- 1 cup warm water (110-115°F)
- 2 tsp sugar (to feed the yeast)
- 1.5 tsp salt (for flavor)
- 3 cloves garlic (minced)
- 1/4 cup fresh herbs (like parsley and thyme, chopped)
- Extra olive oil (for brushing)
If you’re looking for substitutions, consider using whole wheat flour for a nuttier flavor or vegan butter for a dairy-free version!
Step-by-Step Baking Guide
Ready to get your hands doughy? Let’s follow these simple steps to create your Garlic Herb Bread:
1. Prepare the Dough
In a large bowl, combine the warm water, sugar, and yeast. Let it sit for about 5-10 minutes until bubbly. Add the softened butter, salt, and flour, mixing until a dough begins to form.
2. Knead the Dough
Transfer the dough to a floured surface and knead for about 8-10 minutes until smooth and elastic. This step is crucial for developing the gluten, which gives your bread that lovely texture!
3. Let the Dough Rise
Place the dough in a greased bowl, cover with a damp cloth, and let it rise in a warm place for about 1 hour, or until it doubles in size.
4. Prepare the Garlic Herb Filling
While the dough is rising, mix the minced garlic and fresh herbs with a bit of olive oil in a small bowl. This will create a flavorful paste to spread on your dough.
5. Shape the Bread
Once the dough has risen, punch it down and roll it out into a rectangle (about 12×18 inches). Spread the garlic herb filling evenly over the surface, then roll the dough tightly starting from one long edge.
6. Twist and Bake
Twist the rolled dough into a spiral shape and place it in a greased loaf pan. Let it rise again for about 30 minutes. Preheat your oven to 375°F (190°C) and bake for 25-30 minutes until golden brown.
7. Cool Before Slicing
Once baked, remove the bread from the oven and let it cool in the pan for 10 minutes before transferring it to a wire rack. This helps maintain its fluffy texture.
Pro Tips for Perfect Garlic Herb Bread
Here are some expert insights to ensure your baking experience is a success:
- Temperature Matters: Always use warm water (not hot) to activate the yeast. Aim for 110-115°F to ensure the yeast thrives.
- Don’t Rush the Rising: Allowing the dough to rise fully is key for achieving that light and fluffy texture.
- Experiment with Herbs: You can customize the flavor by using different herbs like rosemary or basil.
- Brush with Garlic Butter: For an extra burst of flavor, brush the warm bread with melted garlic butter right after it comes out of the oven.
- Use Quality Ingredients: Fresh herbs and high-quality butter make a noticeable difference in taste!
- Check for Doneness: Tap the bottom of the loaf; it should sound hollow when fully baked.
- Cool Properly: Letting the bread cool completely helps it slice better without falling apart.
- Make Ahead: You can prepare the dough in advance and refrigerate it overnight for a quicker bake day.
Common Mistakes and Troubleshooting
If you run into issues, don’t worry! Here are some common pitfalls and how to avoid them:
- Dough Doesn’t Rise: This could mean your yeast was inactive. Always check the expiration date and proof it properly.
- Dense Bread: Ensure you knead the dough enough to develop gluten. A well-kneaded dough will rise beautifully.
- Overbaking: Keep an eye on your bread towards the end of the baking time; it can go from perfect to overdone quickly!
- Too Garlic-y: If you find the garlic flavor too strong, reduce the amount in the filling or roast it before adding for a milder taste.
Variations to Try
Add a twist to your Garlic Herb Bread with these fun variations:
- Cheesy Garlic Bread: Add shredded mozzarella or parmesan to the garlic herb filling for a cheesy surprise.
- Spicy Herb Bread: Incorporate red pepper flakes to the garlic mixture for a spicy kick.
- Sun-Dried Tomato and Basil: Mix chopped sun-dried tomatoes and fresh basil into the filling for a Mediterranean flair.
- Pesto Infusion: Spread a layer of pesto instead of the garlic filling for a unique flavor profile.
Storage and Make-Ahead Instructions
Want to keep your Garlic Herb Bread fresh? Here’s how:
- Room Temperature: Store wrapped in plastic wrap or in an airtight container for up to 3 days.
- Freezing: Slice and freeze individual pieces in a zip-lock bag for up to 3 months. Thaw at room temperature and reheat in the oven.
- Make-Ahead: Prepare the dough and refrigerate overnight for an easy bake in the morning.
Frequently Asked Questions
Got questions? We’ve got answers!
- Can I use whole wheat flour? Yes! Just note that the texture will be denser.
- What if my dough is too sticky? Add a little more flour, one tablespoon at a time, until it reaches the right consistency.
- Can I use dried herbs instead of fresh? Absolutely! Use about 1/3 of the amount since dried herbs are more potent.
- How do I know when the bread is done? Look for a golden-brown crust and a hollow sound when tapped on the bottom.
- Can I make this bread gluten-free? Yes! Use a gluten-free flour blend that is suitable for bread baking.
- What’s the best way to reheat the bread? Wrap it in foil and warm in the oven at 350°F until heated through.
- Can I add other ingredients to the filling? Definitely! Feel free to experiment with nuts or different cheeses.
- How can I adjust the garlic flavor? Roast the garlic first for a milder taste or use less in the filling for a subtler flavor.
Nutrition Tips and Dietary Adaptations
If you’re watching your diet, here are some helpful tips:
- Low-Calorie Option: Substitute half the butter with applesauce for a lighter version that still retains moisture.
- Whole Grain Version: Use whole wheat flour to increase fiber content.
- Vegan Friendly: Replace butter with a plant-based alternative and use a flaxseed mixture as an egg substitute if needed.
Recommended Equipment
To make your baking experience smooth and enjoyable, consider these essentials:
- Mixing Bowls: A set of various sizes for mixing and rising.
- Measuring Cups and Spoons: Accurate measurements are key to success!
- Baking Sheet: A good quality sheet for even baking.
- Loaf Pan: Essential for shaping your Garlic Herb Bread.
- Wire Rack: Perfect for cooling your bread after baking.
Serving Suggestions
Now that you’ve baked your delicious Garlic Herb Bread, here are some serving ideas:
- As a Side: Serve alongside soups, salads, or pasta dishes for a hearty meal.
- For Dipping: Pair with olive oil and balsamic vinegar for a tasty appetizer.
- Toast it Up: Slice and toast the bread for breakfast, topped with butter or jam.
- Make Sandwiches: Use it as the base for delicious sandwiches or sliders.
Conclusion
And there you have it! Your very own Garlic Herb Bread, bursting with flavor and perfect for any occasion. Baking doesn’t have to be intimidating—embrace the process, have fun, and enjoy the delicious results. Remember, every loaf you make is a step closer to mastering the art of baking. So gather your ingredients, roll up your sleeves, and let’s make some bread magic together!
Swirled Garlic Herb Bread
Ingredients
Dough
- 3.5 cups all-purpose flour
- 2.25 tsp active dry yeast
- 0.5 cup butter (softened)
Instructions
- Prepare dough and let it rise.
- Spread garlic herb filling and roll the dough.
- Twist the rolled dough and bake.
- Cool before slicing and serving.

