Welcome to the Joy of Homemade Bread Baking!
There’s something magical about the smell of fresh bread wafting through your home. Baking your own homemade bread is not just a culinary task; it’s an experience filled with warmth and satisfaction. In this comprehensive guide, you’ll learn how to create your very own fluffy, delicious loaves that will not only fill your kitchen with delightful aromas but also your heart with joy. Whether you are a beginner or a seasoned baker, this guide will equip you with all the tips, tricks, and variations you need to succeed.
Why You’ll Love This Recipe
This homemade bread recipe is truly special, and here are some reasons why you’ll adore it:
- Simple Ingredients: You only need a handful of pantry staples to create this bread. No fancy items, just everyday ingredients!
- Easy to Follow: The step-by-step instructions are designed for all skill levels, making it perfect for newbies and experienced bakers alike.
- Versatile: You can customize this bread with herbs, spices, or even add-ins like cheese or nuts to suit your taste preferences.
- Healthier Option: When you make bread at home, you control what goes in it, ensuring there are no preservatives or artificial ingredients.
- Family Bonding: Baking bread can be a fun activity to share with family or friends, creating memories that will last a lifetime.
Essential Ingredients and Substitutions
Let’s gather our ingredients for this delightful homemade bread recipe. Each component plays a vital role in creating the perfect loaf.
- 1 cup warm water (110-120°F): Essential for activating the yeast. Make sure it’s warm but not too hot, or it will kill the yeast!
- 1/3 cup granulated sugar: This adds a touch of sweetness and feeds the yeast, helping it to ferment.
- 1 packet (2 1/4 teaspoons) instant yeast: The magic ingredient that makes your dough rise beautifully.
- 3 cups all-purpose flour: Provides the structure for the bread. You can substitute with whole wheat flour for a denser, healthier loaf.
- 3/4 teaspoons salt: Enhances the flavor of the bread.
- 2 tablespoons vegetable or canola oil: Keeps the bread moist and adds richness.
- 2 tablespoons unsalted butter, melted: Adds flavor and a nice crust to the loaf.
Step-by-Step Instructions
Grab your apron, and let’s get started on this delightful bread-making journey!
- In a small bowl, stir together the warm water, sugar, and yeast. Let sit for about 10 minutes until it becomes bubbly and frothy.
- In the bowl of a stand mixer fitted with the dough hook attachment, combine the flour, salt, and vegetable oil. Pour in the yeast mixture and turn the mixer to medium. Knead until the dough pulls away from the sides of the bowl, about 8-10 minutes. The dough should feel soft and elastic.
- Roll the dough into a tight ball and transfer it to a greased bowl. Cover it loosely with plastic wrap and let it rise in a dark, warm, draft-free place for 60-90 minutes, or until it has doubled in size.
- Once risen, gently deflate the dough and shape it into a log that fits a 9×5 loaf pan. Cover loosely again with plastic wrap and let rise for another 50-60 minutes, until doubled.
- About 20 minutes before the second rise is complete, preheat your oven to 350°F.
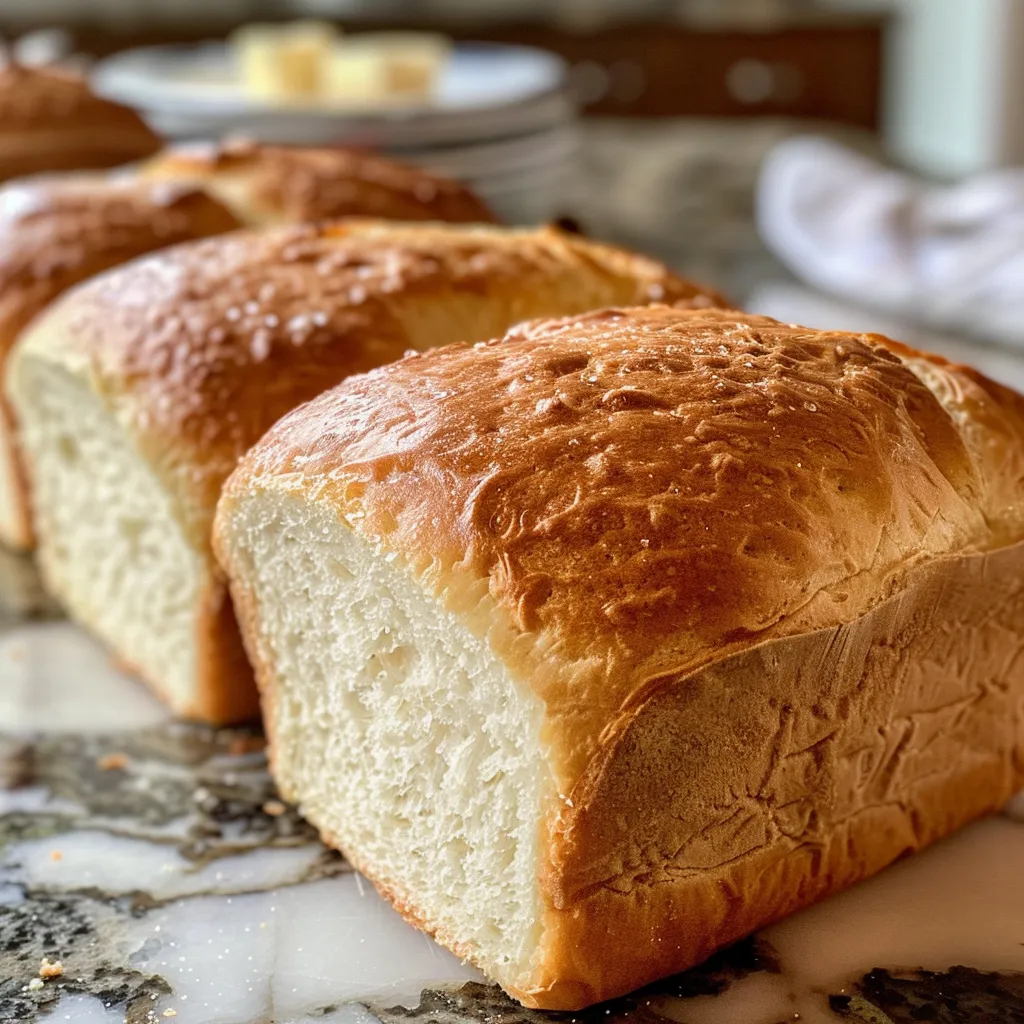
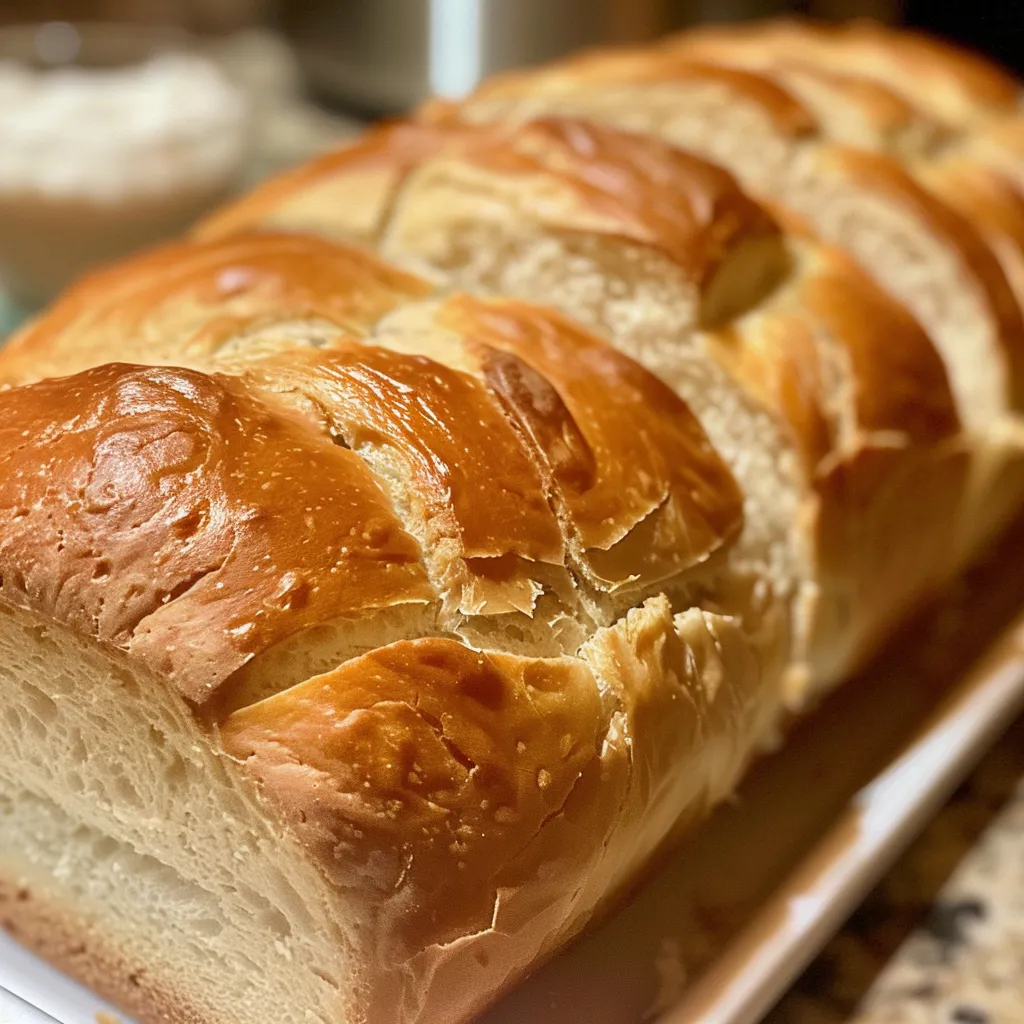
- Bake for 25-30 minutes, until the top is golden brown and sounds hollow when tapped.
- Brush the crust with melted butter. Let the bread cool for 10 minutes in the pan before removing it and transferring it to a cooling rack to cool completely.
Pro Tips for Perfect Homemade Bread
Here are some expert tips to ensure your homemade bread turns out perfectly every time:
- Use fresh yeast: Old or expired yeast will not activate properly, leading to dense bread.
- Check your water temperature: Too hot water can kill the yeast, while too cold won’t activate it.
- Knead thoroughly: Proper kneading develops gluten, which gives the bread its structure and chewiness.
- Don’t rush the rising: Allow the dough to rise until it has doubled in size for the best texture.
- Keep the dough covered: Prevent a crust from forming on the dough during rising.
- Experiment with flavors: Add herbs, cheese, or spices for a unique twist on your loaf.
- Use a thermometer: For the best results, the internal temperature of baked bread should be around 190°F.
- Cool completely: Allow the bread to cool completely before slicing to prevent it from becoming gummy.
Common Mistakes and Troubleshooting
Even seasoned bakers make mistakes! Here’s how to troubleshoot common issues:
- Dough not rising: This could be due to inactive yeast. Always check the expiration date and proof it before use.
- Dense bread: Be sure to knead the dough adequately and allow enough time for rising.
- Too crusty: If your bread is too crusty, try baking it covered with foil for the first half of the baking time.
- Uneven texture: Make sure to knead the dough evenly and shape it uniformly before the second rise.
Delicious Variations to Try
Don’t be afraid to get creative! Here are some fun variations to switch up your homemade bread:
- Herb Bread: Add 2 tablespoons of your favorite fresh herbs (like rosemary or thyme) to the dough for an aromatic twist.
- Garlic Bread: Mix in minced garlic or garlic powder for a savory flavor boost.
- Cheese Bread: Fold in shredded cheese (like cheddar or mozzarella) into the dough before the first rise.
- Sweet Bread: Add a cinnamon-sugar mixture to the dough for a delightful sweet treat.
Storage and Make-Ahead Instructions
Here’s how to store your homemade bread and even make it ahead of time:
- Room Temperature: Store your bread in a breadbox or wrapped in a towel at room temperature for up to 3 days.
- Refrigerator: You can refrigerate your bread for up to a week, but it may dry out faster.
- Freezer: Slice your bread and store in an airtight container or freezer bag for up to 3 months. Thaw at room temperature or toast slices directly from the freezer.
- Make-Ahead: You can prepare the dough in advance and keep it in the fridge for up to 24 hours before baking.
Frequently Asked Questions
Here are some common questions about homemade bread that might help you along the way:
- Can I use whole wheat flour? Yes! You can replace up to half of the all-purpose flour with whole wheat flour for a healthier loaf.
- What if my dough is too sticky? If your dough is sticking to your hands, add a little flour at a time until it reaches a workable consistency.
- How long does it take to rise? The first rise usually takes 60-90 minutes, while the second rise takes about 50-60 minutes.
- Can I add seeds or nuts? Absolutely! Fold in seeds or nuts into the dough before the first rise for added texture and flavor.
- Why is my bread too dense? This can happen if you didn’t knead enough or if you used old yeast.
- Can I make this bread without a stand mixer? Yes! You can knead by hand for about 10-15 minutes until the dough is elastic.
- What’s the best way to slice the bread? Use a serrated knife and let the bread cool completely before slicing for the cleanest cuts.
- Can I double the recipe? Yes! You can easily double the ingredients to make two loaves, just ensure your mixing bowl is large enough.
Nutritional Tips and Dietary Adaptations
If you’re looking for healthier alternatives, consider these tips:
- Whole Grains: Substitute all-purpose flour with whole wheat flour or a mix of whole grains for added fiber.
- Reduce Sugar: You can cut down the sugar to 1/4 cup without compromising the recipe too much.
- Gluten-Free Option: Use a gluten-free all-purpose flour blend for a gluten-free version of the bread.
- Low-Fat Version: Replace vegetable oil with unsweetened applesauce for a lower-fat bread.
Essential Equipment Recommendations
To make your bread-making experience smoother, here’s a list of handy tools:
- Stand Mixer: A stand mixer with a dough hook saves time and effort while kneading.
- Loaf Pan: A standard 9×5 loaf pan is essential for shaping your bread.
- Instant Read Thermometer: This tool helps you check the internal temperature of your bread for perfect results.
- Measuring Cups and Spoons: Accurate measurements are crucial for successful baking.
- Cooling Rack: This helps your bread cool evenly and prevents sogginess.
Serving Suggestions
Your homemade bread is versatile and can be served in numerous delightful ways:
- With Butter: Spread some butter on warm slices for a classic treat.
- Sandwiches: Use your bread for hearty sandwiches packed with your favorite fillings.
- Toast: Toast slices for breakfast topped with avocado or jam.
- With Soups: Serve alongside a warm bowl of soup for a comforting meal.
Conclusion: Your Homemade Bread Journey Awaits
Baking homemade bread is an incredibly rewarding experience that fills your kitchen with love and warmth. With this comprehensive guide, you’re now equipped with the knowledge and confidence to embark on your bread-making adventure. Remember, practice makes perfect, and every loaf is a step towards mastering the art of bread. So roll up your sleeves, have fun, and don’t forget to share your successes (and even your kitchen mishaps) with friends and family. Happy baking!
Homemade Bread
Ingredients
Dough
- 1 cup warm water (110-120°F)
- 1/3 cup granulated sugar
- 2 1/4 teaspoons instant yeast (1 packet)
- 3 cups all-purpose flour
- 3/4 teaspoon salt
- 2 tablespoons vegetable or canola oil
- 2 tablespoons unsalted butter, melted
Instructions
- Mix warm water, sugar, and yeast; let sit 10 min until bubbly.
- Combine flour, salt, and oil; add yeast mixture and knead until soft and elastic.
- Shape dough into a ball, let rise 60-90 min until doubled.
- Shape into a log, let rise 50-60 min until doubled.
- Preheat oven to 350°F; bake 25-30 min until golden and hollow-sounding.
- Brush with melted butter, cool 10 min before slicing.