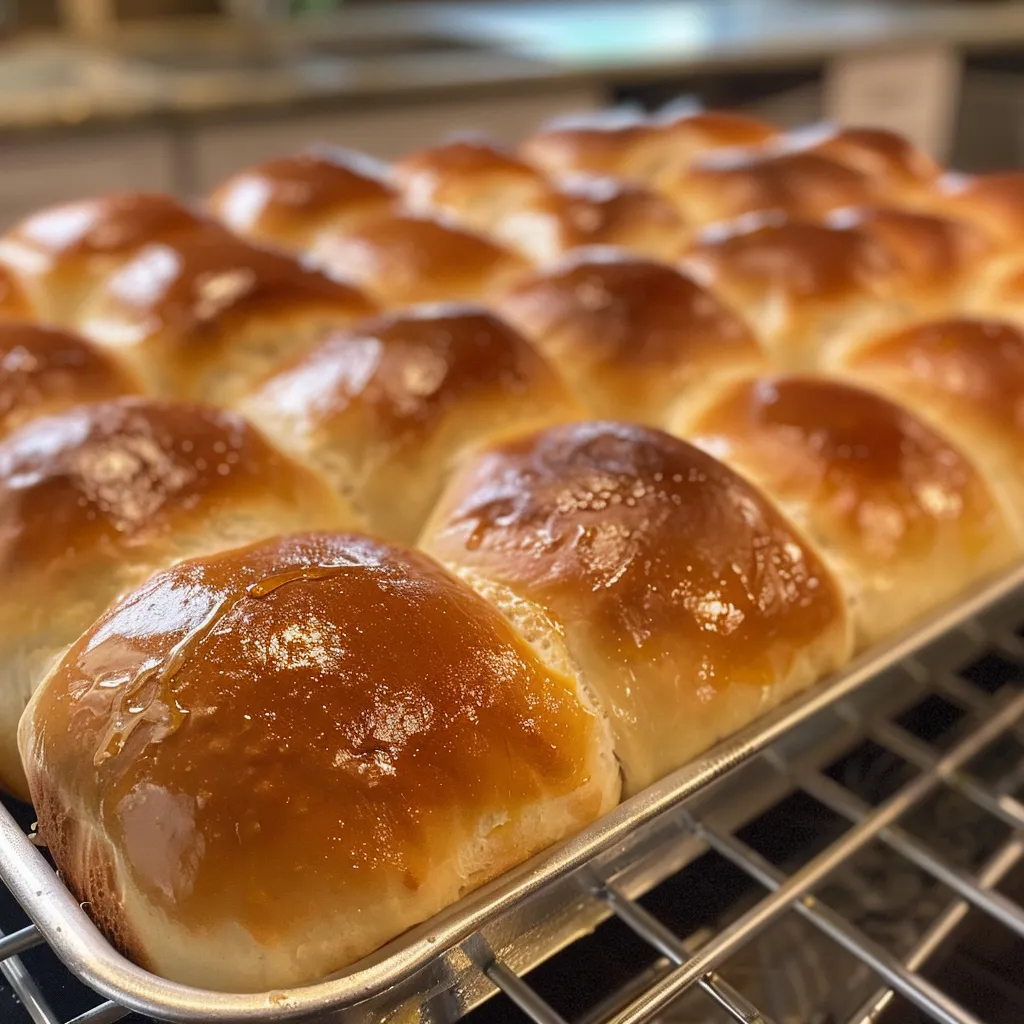
Welcome to the wonderful world of homemade dinner rolls! If you’ve ever wanted to fill your kitchen with the warm aroma of freshly baked bread, you’ve landed in the right place. This recipe will guide you to create soft, fluffy dinner rolls that are not only delicious but will also make your heart sing with joy. Let’s roll up our sleeves and embark on this delightful baking adventure together!
Why You’ll Love This Recipe
Making homemade dinner rolls is a rewarding experience. Here are just a few reasons why you’re going to love this recipe:
- Simple Ingredients: You only need a handful of everyday ingredients, making it easy to whip up a batch any day of the week.
- Two-Part Rising: The two rises create a light, airy texture that’s simply irresistible.
- Customizable: Add herbs, cheese, or even sweet toppings to personalize these rolls to your taste.
- Perfect for Any Occasion: Whether it’s a cozy family dinner or a festive holiday gathering, these rolls will impress your guests.
- Fun for Everyone: Baking can be a joyful activity to share with family and friends, creating lasting memories in the kitchen.
Ingredients You’ll Need
Gathering the right ingredients is the first step to success! Here’s what you’ll need for these delightful dinner rolls:
- 1 cup (240ml) whole milk, warmed to about 110°F (43°C)
- 1 (0.25 oz) package (7g or 2 1/4 teaspoons) Platinum Yeast
- 2 tablespoons (24.75g) granulated sugar, divided
- 1 large egg
- 1 large egg yolk
- 1/4 cup (4 tablespoons, 56g) unsalted butter, melted and slightly cooled
- 1 teaspoon table salt
- 3 1/2 cups (455g) bread flour
- 1/4 cup (4 tablespoons, 56g) unsalted butter, very soft
- 2 tablespoons (42g) honey
If you’re missing any of these ingredients, don’t worry! Here are some substitutions:
- Milk: You can use almond milk or oat milk for a dairy-free option.
- Butter: Coconut oil works well for a dairy-free alternative.
- Bread Flour: All-purpose flour can be used, but the rolls may not be as fluffy.
How to Make Homemade Dinner Rolls
Ready to dive into the baking process? Let’s break it down step-by-step!
Step 1: Prepare the Dough
In the bowl of your stand mixer, whisk together the warm milk, yeast, and 1 tablespoon of sugar. Cover and let it sit for 5 minutes until it becomes frothy. If you don’t have a stand mixer, no worries! You can also mix this by hand in a large mixing bowl.
Step 2: Combine Ingredients
Add the remaining sugar, egg, melted butter, salt, and 1 cup of flour to the yeast mixture. Mix on low speed for about 30 seconds. Scrape down the sides of the bowl and then continue adding flour until the dough starts pulling away from the sides, about 2 minutes.
Step 3: Knead the Dough
Keep the dough in the mixer and knead for an additional 2 minutes on medium speed, or knead by hand on a lightly floured surface. Your dough should be soft and slightly sticky but manageable.
Step 4: The First Rise
Lightly grease a large bowl and place the dough inside, turning it to coat all sides with oil. Cover with aluminum foil or a clean kitchen towel and let it rise in a warm area for 1-2 hours, or until it doubles in size.
Step 5: Shape the Rolls
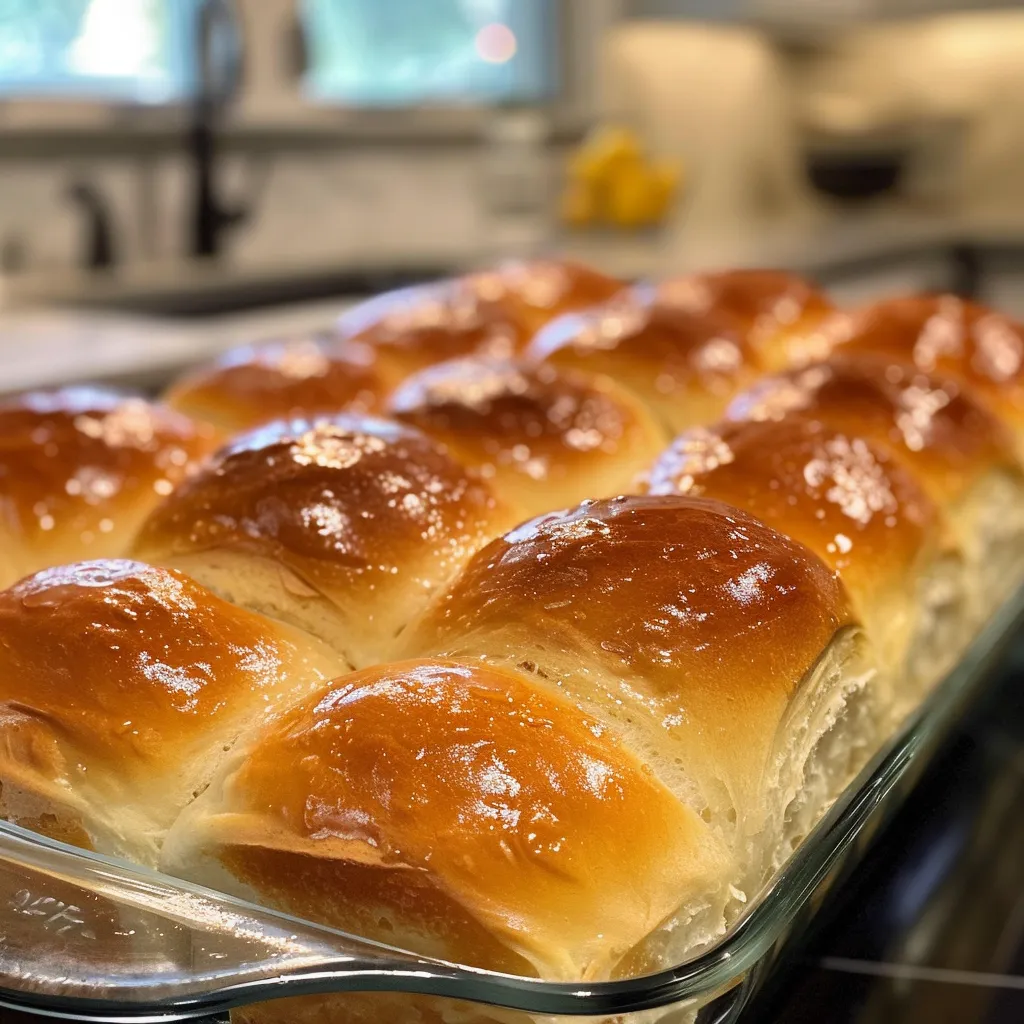
Once the dough has risen, punch it down to release the air. Divide it into 14-16 equal pieces and shape each piece into a smooth ball. Arrange the balls in a greased 9×13 inch baking pan.
Step 6: The Second Rise
Cover the shaped rolls with foil or a towel and let them rise again until puffy, about 1 hour.
Step 7: Bake the Rolls
Preheat your oven to 350°F (177°C). Bake the rolls for 20-25 minutes or until golden brown on top. If they brown too quickly, tent the pan with foil. Remove from the oven and brush with honey butter if desired.
Pro Tips for Perfect Dinner Rolls
Here are some expert insights to help you achieve roll perfection:
- Temperature Matters: Ensure your milk is warm but not too hot (about 110°F) to activate the yeast without killing it.
- Don’t Rush the Rise: Patience is key! Allow the dough to rise fully for the best texture.
- Keep It Floured: Use a lightly floured surface when shaping the rolls to prevent sticking.
- Butter It Up: Brushing the rolls with butter right after baking adds a delicious flavor and keeps them soft.
- Experiment with Flavors: Feel free to add garlic powder, herbs, or cheese to the dough for a twist!
- Check for Doneness: The rolls should sound hollow when tapped on the bottom.
- Use a Thermometer: For perfect yeast activation, a thermometer can ensure your liquids are at the right temperature.
Common Mistakes and Troubleshooting
Even the best bakers make mistakes! Here are some common pitfalls and how to avoid them:
- Flat Rolls: If your rolls don’t rise, check your yeast’s expiration date. Fresh yeast is crucial for proper rising.
- Dry Dough: If the dough is too dry, add a tablespoon of milk at a time until it reaches the right consistency.
- Overbaking: Keep an eye on the rolls towards the end of baking to prevent them from becoming too hard.
- Sticky Dough: Don’t be tempted to add too much flour during kneading; a slightly sticky dough is perfect for soft rolls.
Delicious Variations
Feel like switching things up? Try these fun variations:
- Herbed Rolls: Add dried herbs like rosemary or thyme to the dough for a savory twist.
- Cheesy Rolls: Incorporate shredded cheese into the dough for a cheesy delight.
- Sweet Rolls: Mix in cinnamon and sugar for a sweet breakfast option.
- Garlic Butter Rolls: Brush melted garlic butter over the rolls before baking for extra flavor.
Storage and Make-Ahead Instructions
Want to prepare these rolls in advance? Here’s how:
- Make-Ahead: You can prepare the dough and let it rise, then shape and freeze the rolls before the second rise. When ready to bake, let them thaw and rise before baking.
- Storage: Store leftover rolls in an airtight container at room temperature for 2-3 days or in the refrigerator for up to a week. Reheat in the oven for a few minutes to refresh.
Frequently Asked Questions
Here are some common questions you might have:
- Can I use active dry yeast instead of Platinum yeast? Yes! Just activate it in warm milk with sugar before adding it to the recipe.
- What if my dough isn’t rising? Ensure your yeast is fresh and that you’re in a warm environment.
- How do I know when the rolls are done? They should be golden brown and sound hollow when tapped.
- Can I make these rolls gluten-free? Yes! Use a gluten-free flour blend suitable for baking.
- Can I make these rolls without dairy? Absolutely! Substitute with plant-based milk and butter alternatives.
- How can I add flavor to the rolls? You can mix in herbs, spices, or even cheese into the dough!
- Can I use this recipe for slider buns? Yes! Just shape the rolls smaller for perfect sliders.
- What’s the best way to serve these rolls? Warm from the oven, brushed with melted butter or honey!
Nutritional Tips and Dietary Adaptations
For those keeping an eye on nutrition, here are some tips:
- Whole Wheat Flour: Substitute half of the bread flour with whole wheat flour for added fiber.
- Reduce Sugar: Cut down on sugar for a less sweet roll.
- Healthy Fats: Use olive oil instead of butter for a heart-healthy option.
- Monitor Portions: Enjoy these rolls as a treat, keeping portion sizes in mind.
Equipment Recommendations
Here’s what you’ll need to make these rolls:
- Stand Mixer: Makes mixing and kneading a breeze.
- Mixing Bowls: For preparing and rising the dough.
- Baking Pan: A 9×13 inch pan works perfectly.
- Kitchen Thermometer: To ensure your liquids are at the right temperature for yeast activation.
Serving Suggestions
These rolls are so versatile! Here are some delicious ways to enjoy them:
- With Dinner: Pair them with soups, stews, or salads for a comforting meal.
- As a Snack: Enjoy them warm with butter or jam for a delightful snack.
- For Breakfast: Use them to make breakfast sandwiches or serve with eggs.
- For Special Occasions: They’re perfect for holiday dinners, brunches, or family gatherings.
So there you have it! Your ultimate guide to making perfect homemade dinner rolls. I hope you’re as excited as I am to try this recipe. Remember, the kitchen is a place for creativity, laughter, and tasty adventures. Happy baking!
Homemade Dinner Rolls
Ingredients
Dough
- 1 cup whole milk (warmed to about 110°F (43°C))
- 1 package Platinum Yeast (7g or 2 1/4 teaspoons)
- 2 tablespoons granulated sugar (divided)
- 1 large egg
- 1 large egg yolk
- 4 tablespoons unsalted butter (melted and slightly cooled)
- 1 teaspoon table salt
- 3.5 cups bread flour
- 4 tablespoons unsalted butter (very soft)
- 2 tablespoons honey
Instructions
- Whisk warm milk, yeast, and 1 tablespoon sugar; let sit 5 minutes.
- Add remaining sugar, egg, butter, salt, and 1 cup flour; mix on low 30 seconds, then add remaining flour and beat until dough pulls away from sides, about 2 minutes.
- Knead dough by hand or mixer for 2 minutes until soft and slightly sticky.
- Let dough rise in greased bowl, covered, for 1-2 hours until doubled.
- Punch down dough, divide into 14-16 pieces, shape into balls, and place in greased pan. Let rise covered for 1 hour until puffy.
- Preheat oven to 350°F (177°C). Bake rolls 20-25 minutes until golden. Brush with honey butter if desired, then cool slightly before serving.