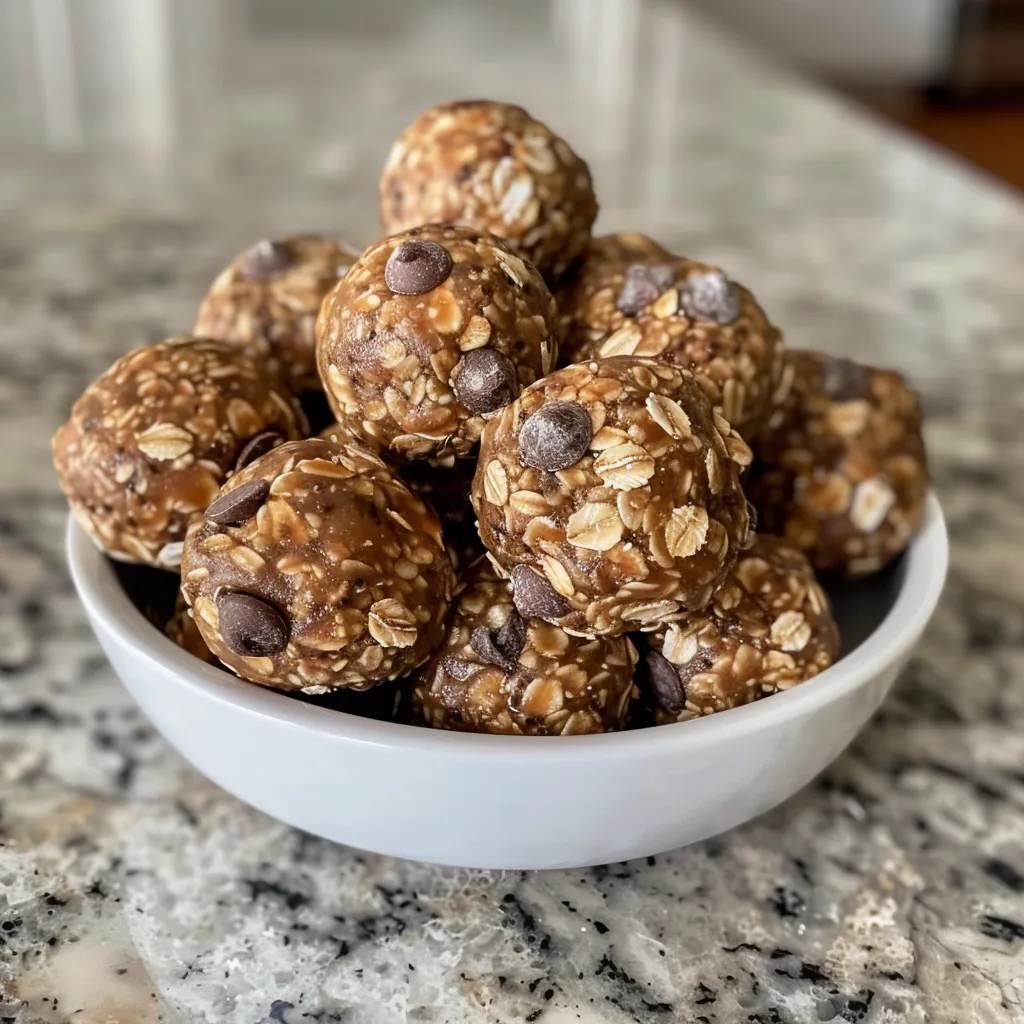
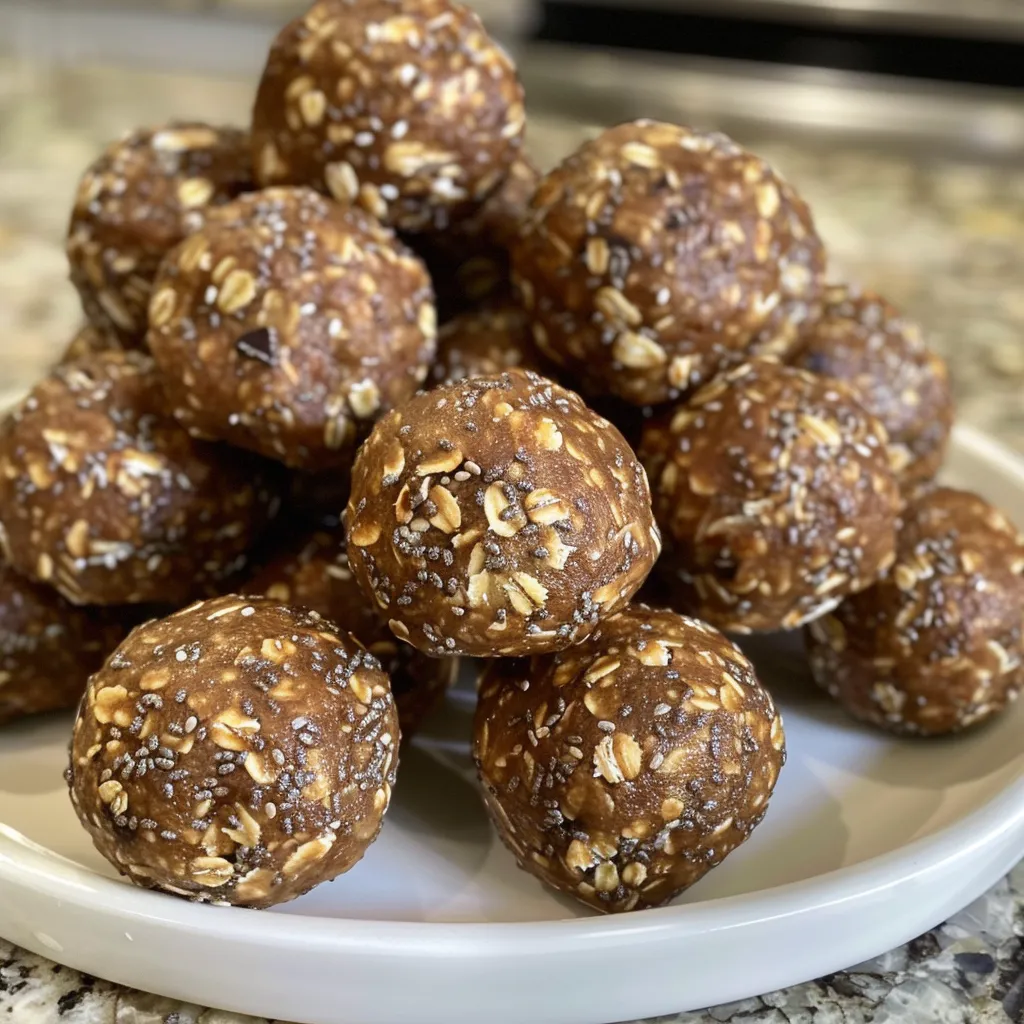
If you’re looking for a quick and delicious way to boost your energy, you’ve landed in the right spot! These No Bake Protein Balls are not only easy to make but they’re also packed with flavor and nutrition. With simple ingredients like creamy peanut butter, honey, and chocolate chips, you can whip up a batch in no time. Perfect for any time of day, these tasty bites make an excellent snack or a pre/post workout boost. Let’s dive into this wonderful recipe that turns everyday ingredients into a delightful treat!
Why You’ll Love This Recipe
- Quick to Make: With a prep time of just 10 minutes, you can have these energy bites ready in a flash!
- Healthy Ingredients: Made with wholesome oats and protein powder, these protein balls are a guilt-free snack option.
- Customizable: Feel free to mix in your favorite nuts, seeds, or dried fruits to make these bites your own!
- No Baking Required: Enjoy a delicious treat without turning on the oven—perfect for warm days!
- Great for Meal Prep: Make a batch ahead of time and store them for an easy grab-and-go snack throughout the week.
Ingredient Breakdown
Let’s take a closer look at the ingredients that make these protein balls so special. Each one plays a vital role in flavor and texture!
- 1 1/2 cups no stir creamy peanut butter: Rich in healthy fats and protein, this is the star ingredient that binds everything together.
- 1/2 cup honey: Adds natural sweetness and helps hold the protein balls together. You can substitute with maple syrup for a vegan option.
- 1 1/3 cups old fashioned oats (rolled oats): Provides a chewy texture and is a great source of fiber. Ensure they are certified gluten-free if needed.
- 1/2 cup vanilla protein powder: Boosts the protein content, making these bites ideal for a post-workout snack.
- 1/8 teaspoon salt: Balances the sweetness and enhances overall flavor.
- 1/2 cup mini chocolate chips: Because who doesn’t love a little chocolate? Feel free to use dark chocolate chips for a healthier twist.
How to Make No Bake Protein Balls
Ready to create these delicious bites? Follow these simple steps:
- Mix Ingredients: In a mixing bowl, combine peanut butter, honey, rolled oats, protein powder, salt, and mini chocolate chips using a rubber spatula until fully mixed.
- Portion Out Energy Balls: Use a mini cookie scoop or spoon to drop one-inch-sized balls onto a wax paper-covered cookie sheet.
- Shape the Balls: Roll each ball with your hands to smooth it out and make it more uniform.
- Chill: Place the balls in the fridge for about one hour until firm.
- Store Properly: Store in an airtight container in the fridge for up to one week or freeze for 2-3 months.
Pro Tips for Perfect Protein Balls
Want to elevate your protein ball-making game? Here are some expert tips:
- Use Fresh Ingredients: Ensure all your ingredients are fresh for the best taste and texture.
- Experiment with Flavors: Try adding spices like cinnamon or nutmeg for an extra flavor kick.
- Make Them Vegan: Substitute honey with maple syrup and use vegan protein powder.
- Keep Them Sweet: If your mixture is too dry, add a splash of almond milk to achieve the desired consistency.
- Roll Them Tight: Squeeze tightly when rolling to prevent them from falling apart.
- Chill Longer if Needed: If the balls aren’t firm enough after one hour, let them chill longer.
- Flavor Combinations: Consider adding dried fruits like cranberries or apricots for added sweetness and texture.
- Store Smart: Use a vacuum-sealed bag for freezing to maintain freshness.
Common Mistakes and Troubleshooting
Even the best cooks can run into issues. Here are some common mistakes and how to fix them:
- Too Crumbly: If your mixture is too dry, add a little more peanut butter or honey to hold it together.
- Too Sticky: If the mixture is too sticky to handle, chill it in the fridge for a while before shaping.
- Too Sweet: To balance out sweetness, add a pinch of salt or a squeeze of lemon juice.
- Not Enough Flavor: Enhance flavor by adding a splash of vanilla extract or almond extract.
Variations to Try
Want to mix things up? Here are some tasty variations to consider:
- Chocolate Fudge Protein Balls: Add cocoa powder to the mixture for a rich chocolate flavor.
- Lemon Poppy Seed Energy Bites: Stir in lemon zest and poppy seeds for a refreshing twist.
- Almond Joy Protein Balls: Incorporate shredded coconut and almond extract for a tropical feel.
- Trail Mix Protein Balls: Mix in your favorite nuts and dried fruits for a crunchy texture.
Storage and Make-Ahead Instructions
These protein balls are perfect for meal prep! Here’s how to store them:
- Refrigerate: Keep in an airtight container in the fridge for up to one week.
- Freeze: Store in a freezer-safe bag or container for up to three months. Just thaw before enjoying!
- Label Your Containers: Date your containers so you know when to enjoy them by!
Frequently Asked Questions
Got questions about these protein balls? Let’s answer some common ones:
- Can I use a different nut butter? Absolutely! Almond butter or cashew butter work great as substitutes.
- Are these protein balls gluten-free? Yes, if you use certified gluten-free oats. Always check your labels!
- Can I add protein powder? Yes! Just make sure to adjust the other ingredients to maintain the right consistency.
- How do I make them vegan? Use maple syrup instead of honey and ensure your protein powder is plant-based.
- What can I substitute for honey? Maple syrup or agave nectar can be used as a sweetener alternative.
- Can I add other mix-ins? Definitely! Feel free to add seeds, nuts, or dried fruits for variety.
- How long do they last? They last up to a week in the fridge or 2-3 months in the freezer.
- What’s the best way to serve them? Enjoy them chilled as a quick snack or after a workout for an energy boost!
Nutrition Tips and Dietary Adaptations
These protein balls pack a nutritious punch! Here’s how you can adapt the recipe for various dietary needs:
- Low Carb: Substitute honey with a low-carb sweetener and use a low-carb protein powder.
- Nut-Free: Use sunbutter or a seed butter instead of peanut butter.
- Increased Fiber: Add chia seeds or ground flaxseeds to boost fiber content.
- Higher Protein: Increase the amount of protein powder or add hemp seeds for extra protein.
Essential Equipment
Before you get started, make sure you have these essentials:
- Mixing Bowl: A large bowl to combine all your ingredients.
- Rubber Spatula: For mixing and scraping down the sides of the bowl.
- Cookie Scoop: A mini cookie scoop makes portioning the balls super easy.
- Wax Paper: Perfect for lining your cookie sheet and preventing sticking.
Serving Suggestions
These protein balls can be enjoyed in so many ways! Here are a few suggestions:
- Snack On the Go: Perfect for a quick, nutritious snack during busy days.
- Post-Workout Fuel: Great to replenish energy after exercise.
- Lunchbox Treat: Toss a couple into your kids’ lunchboxes for a healthy treat.
- Party Platter: Serve them at gatherings as a healthy alternative to sweets.
Now that you have the complete guide to making these delightful No Bake Protein Balls, it’s time to roll up your sleeves and get started! Enjoy the process, embrace the flavors, and remember that cooking is all about having fun. Happy snacking!
No Bake Protein Balls
Ingredients
Dried ingredients
- 1 1/2 cups no stir creamy peanut butter
- 1/2 cup honey
- 1 1/3 cups old fashioned oats (rolled oats)
- 1/2 cup vanilla protein powder
- 1/8 teaspoon salt
- 1/2 cup mini chocolate chips
Instructions
- Mix peanut butter, honey, oats, protein powder, salt, and chocolate chips until fully combined.
- Use a scoop to form one-inch balls and place on wax paper-lined tray.
- Roll each ball to smooth it out.
- Chill in the fridge for about one hour until firm.
- Store in an airtight container in the fridge for up to one week or freeze for 2-3 months.