Indulge in Guilt-Free Bliss with Keto No-Bake Protein Cheesecake Cups!
If you’re on the lookout for a delightful dessert that satisfies your sweet tooth while keeping your health goals in check, then you’ve landed in the right place! These Keto No-Bake Protein Cheesecake Cups are not only incredibly easy to make but are also a treat you can enjoy without any guilt. Packed with protein, low in carbs, and bursting with flavor, this recipe is perfect for anyone wanting a tasty yet nutritious dessert. Let’s dive into the joy of whipping up these creamy delights!
Why You’ll Love This Recipe
- Quick and Easy: With minimal prep time, you can have these cheesecake cups ready in under 30 minutes!
- Health-Conscious: Low in carbs and high in protein, they fit perfectly into a keto lifestyle.
- Customizable: Add your favorite toppings or mix-ins to personalize each cup to your taste.
- No Baking Required: Save time and avoid the oven—just mix, layer, and chill!
- Perfect Portions: Individual servings help manage portion control, making it easier to enjoy without overindulging.
Ingredient Breakdown
Before we get cooking, let’s take a closer look at the key ingredients that make these cheesecake cups so irresistible:
- Almond Flour: This gluten-free alternative provides a nutty flavor and serves as the base for our crust.
- Allulose or Preferred Sweetener: A low-carb sweetener that doesn’t spike blood sugar, making it ideal for keto.
- Butter: Adds richness and binds the crust ingredients together.
- Cinnamon: A dash of cinnamon enhances the flavor profile of the crust.
- Cottage Cheese: Creamy and protein-packed, it forms the base of our cheesecake filling.
- Cream Cheese: Provides that classic cheesecake texture and rich taste.
- Low-Carb Vanilla Protein Powder: Boosts the protein content while adding a delicious vanilla flavor.
- Keto-Friendly Maple Syrup: A low-carb syrup that gives sweetness and a hint of maple flavor.
Step-by-Step Instructions
Ready to whip up these delightful cheesecake cups? Follow these simple steps:
- Gather and prep all of your ingredients.
- Add all ingredients for the crust into a bowl and mix well.
- Press the crumble mixture into the bottom of the jars or containers you’ll be using.
- Prepare the cheesecake filling by adding all filling ingredients to a food processor.
- Blend until completely smooth. Alternatively, use an immersion blender for convenience.
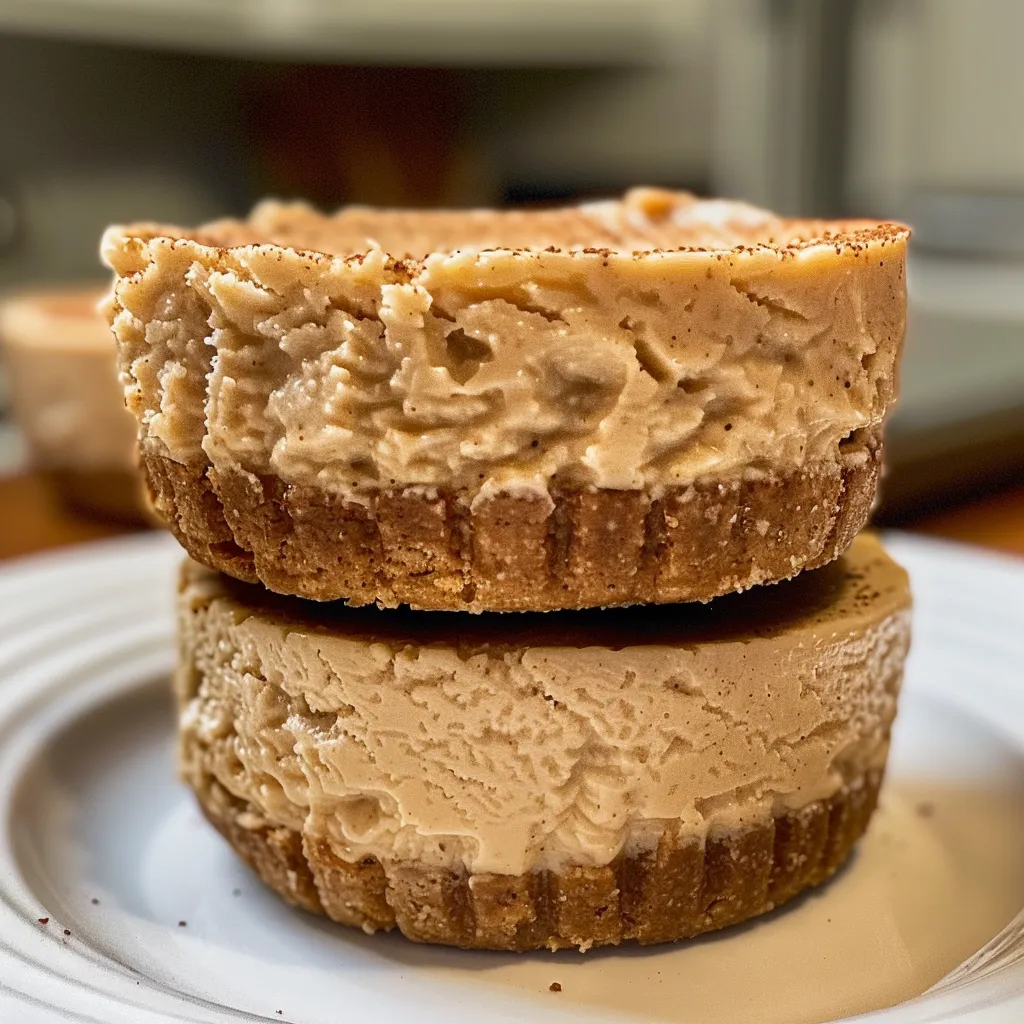
- Pour the mixture over the crust, then refrigerate until set.
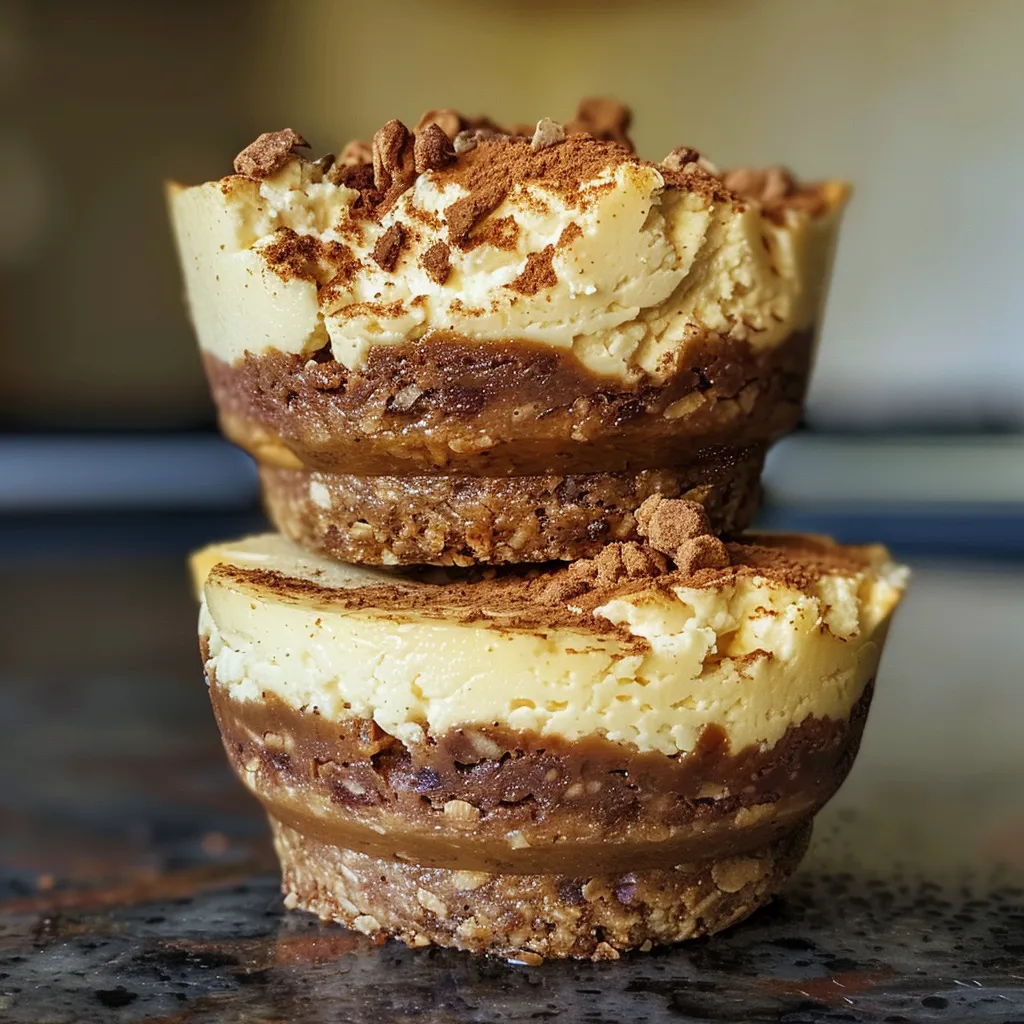
- For a pop of flavor, top with fresh berries before serving. Enjoy your delicious treat!
Pro Tips for Perfect Cheesecake Cups
- Chill Time: Allow at least 2 hours in the fridge for the cheesecake to set properly.
- Texture Check: Ensure the cream cheese and cottage cheese are at room temperature for a smoother blend.
- Flavor Boost: Experiment with different flavored protein powder for a unique taste experience.
- Sweetness Level: Adjust the sweetener according to your preference; taste as you go!
- Serving Size: Use small jars or glasses for a beautiful presentation.
- Mix and Match: Swap almond flour for coconut flour if you prefer a different flavor.
- Keep it Simple: For a quicker version, layer the crust and filling in a single bowl rather than jars.
- Garnish Wisely: Fresh mint or a sprinkle of cocoa powder can elevate your presentation.
Common Mistakes and Troubleshooting
Even the best of us can make mistakes in the kitchen! Here are some common pitfalls and how to avoid them:
- Overmixing: Blend just until smooth; overmixing can lead to a watery texture.
- Undersweetened: If you find your cheesecake too bland, adjust the sweetness as needed.
- Crust Issues: If the crust crumbles, ensure you have enough melted butter to bind it together.
- Setting Time: If your cheesecake isn’t setting, it may need more time in the refrigerator.
Delicious Variations
Feel free to mix it up! Here are some fun variations to try:
- Chocolate Lovers: Add cocoa powder to the filling for a chocolate cheesecake version.
- Berry Bliss: Fold in crushed berries into the cheesecake filling for a fruity twist.
- Nutty Delight: Top with chopped nuts for added crunch and flavor.
- Caramel Drizzle: A drizzle of sugar-free caramel sauce can add an extra layer of decadence.
Storage and Make-Ahead Instructions
These cheesecake cups can be made ahead of time and stored for up to a week in the refrigerator. Just be sure to cover them tightly to maintain freshness. For longer storage, you can freeze them for up to a month. Thaw in the fridge overnight before enjoying!
Frequently Asked Questions
- Can I use regular sugar instead of allulose? Yes, but it will increase the carb count, making it less keto-friendly.
- What if I can’t find almond flour? You can substitute it with coconut flour, but use less, as it absorbs more moisture.
- Can I make these vegan? Swap dairy-based ingredients with plant-based alternatives like vegan cream cheese.
- How do I know when they are set? The filling should be firm to the touch and not jiggle when shaken.
- Can I add gelatin for a firmer texture? Yes, adding gelatin can help set the cheesecake even more.
- What toppings work best? Fresh berries, nuts, or a drizzle of sugar-free chocolate sauce are all excellent choices!
- Is this recipe suitable for kids? Absolutely! It’s a healthy dessert that kids will love too.
- How can I make this a chocolate version? Simply add unsweetened cocoa powder to the filling!
Nutrition Tips and Dietary Adaptations
These cheesecake cups are not only keto-friendly but can also be adapted for various dietary needs. If you’re looking to boost the nutritional value further, consider adding:
- Seeds: Chia seeds or flaxseeds can be mixed into the filling for added fiber.
- Protein Boost: Increase the protein content by adding an extra scoop of protein powder.
- Healthy Fats: Incorporate nut butters for added creaminess and healthy fats.
Equipment Recommendations
To make your cheesecake cups, you’ll need:
- Food Processor: For blending the filling smoothly.
- Mixing Bowls: To prepare your crust and filling.
- Measuring Cups and Spoons: Precision is key for the best results.
- Containers or Jars: Individual serving sizes make for a lovely presentation.
Serving Suggestions
Serve these cheesecake cups chilled straight from the fridge. For a more festive touch, consider garnishing with:
- Fresh Berries: Blueberries, strawberries, or raspberries add a splash of color.
- Mint Leaves: A sprig of mint on top gives a fresh finish.
- Chocolate Shavings: For the chocolate version, a sprinkle of shavings can make it look even more indulgent.
Your Culinary Adventure Awaits!
With these Keto No-Bake Protein Cheesecake Cups, you’ll find that enjoying dessert doesn’t have to mean sacrificing your health goals. Each bite is a testament to how delicious healthy eating can be! So, gather your ingredients, invite a friend, and enjoy this fun cooking adventure together. Happy baking!
Keto No-Bake Protein Cheesecake Cups
Ingredients
Crust
- 0.5 cup almond flour
- 2 tablespoon allulose (or preferred sweetener)
- 1 tablespoon butter (melted)
- 0.25 teaspoon cinnamon
- pinch salt
Filling
- 1.25 cup cottage cheese
- 8 ounce cream cheese
- 0.5 cup low-carb vanilla protein powder
- 0.25 cup keto-friendly maple syrup
Instructions
- Mix crust ingredients until well combined, then press into jars.
- Blend filling ingredients until smooth.
- Pour filling over crust and refrigerate until set.
- Optional: top with berries before serving.