
Discover the Joy of Guilt-Free Baking!
Welcome, fellow food enthusiasts! Today, we’re diving into a delightful treat that’s not just indulgent but also guilt-free! Imagine enjoying chocolate brownies that are packed with protein and flavor. These Guilt-Free Chocolate Protein Brownies are perfect for satisfying your sweet tooth without compromising your health goals. Whether you’re looking for a post-workout snack or a sweet treat for a cozy movie night, these brownies will surely become a staple in your kitchen.
Let’s explore why this recipe is a must-try, how to make it step by step, and some tips to ensure your brownies are the best they can be!
Why You’ll Love This Recipe
Here are five reasons why you’ll adore these guilt-free chocolate protein brownies:
- High in Protein: Each brownie is made with protein powder, making it a perfect snack for muscle recovery after workouts.
- Low in Sugar: Sweetened naturally with maple syrup, these brownies are a healthy alternative to traditional desserts.
- Easy to Make: With just a few ingredients and simple steps, you can whip up a batch in no time!
- Customizable: Adjust the ingredients to fit your dietary needs, whether you’re vegan, gluten-free, or looking for low-carb options.
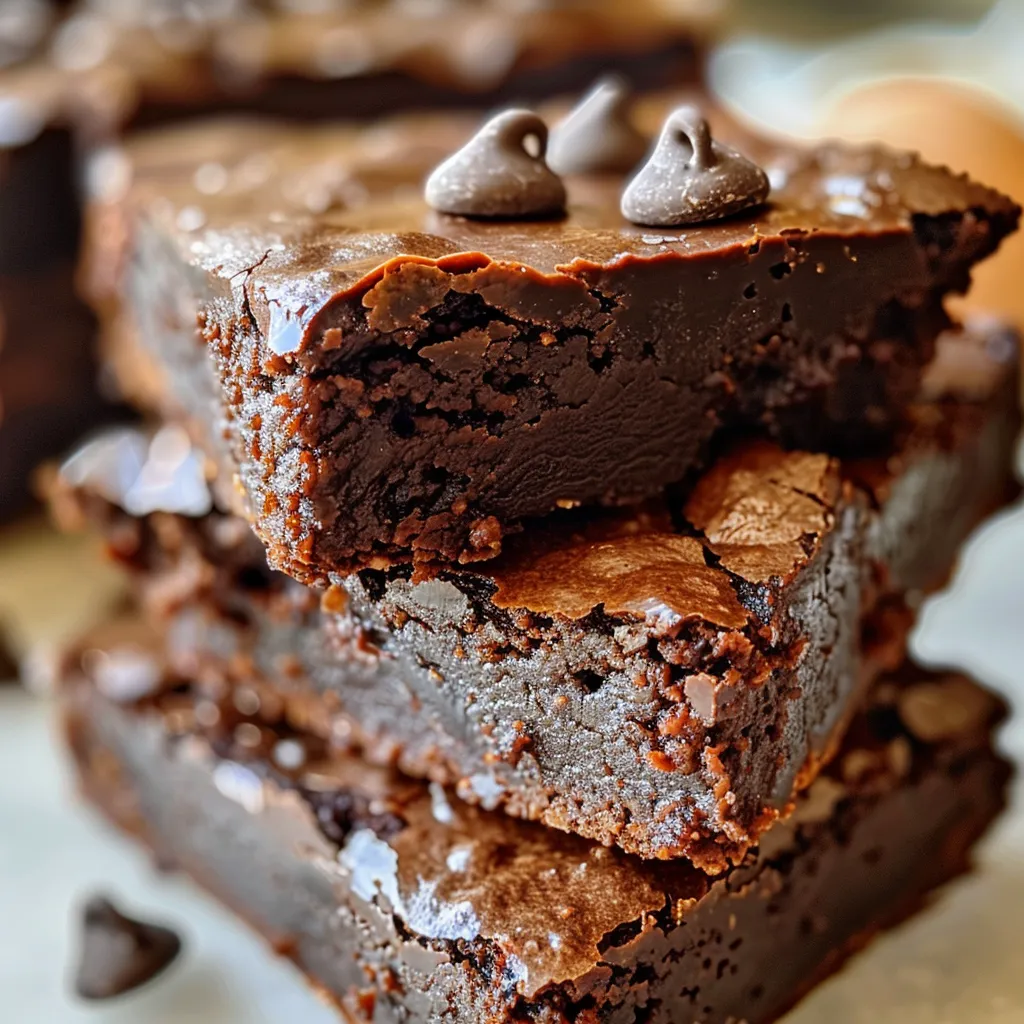
- Deliciously Chocolatey: Rich cocoa and chocolate chips ensure that every bite is both decadent and satisfying!
Ingredients You’ll Need
Gather these ingredients to make the best guilt-free chocolate protein brownies:
- 1/4 cup chocolate protein powder (whey or plant-based)
- 1/4 cup unsweetened cocoa powder
- 1/4 cup almond flour (or oat flour)
- 2 tablespoons Greek yogurt (plain, non-fat)
- 1 tablespoon maple syrup (or honey)
- 2 tablespoons almond milk
- 1 egg
- 1/2 teaspoon baking powder
- Pinch of salt
- 1 tablespoon mini chocolate chips (optional)
Step-by-Step Instructions for Making Brownies

Follow these easy steps to create your brownies:
- Preheat your oven to 350°F (175°C) and grease or line a mini muffin tin.
- In a mixing bowl, whisk together the egg, Greek yogurt, almond milk, and maple syrup until smooth.
- Gradually stir in the protein powder, cocoa powder, almond flour, baking powder, and salt until a thick batter forms.
- If you’re using chocolate chips, gently fold them into the batter.
- Divide the batter evenly into the muffin cups, which should yield 8–10 brownies.
- Bake for 10–12 minutes. A toothpick inserted should come out mostly clean.
- Let cool in the pan for 5 minutes, then transfer to a wire rack. Enjoy warm or store for later!
Pro Tips for Perfect Brownies
Here are some expert insights to ensure your brownies turn out amazing:
- Don’t Overmix: Stir just until combined to keep the brownies tender.
- Watch Your Baking Time: Slightly underbaking will give you that fudgy texture—perfect for brownies!
- Experiment with Flavors: Add a teaspoon of vanilla extract or a pinch of espresso powder to enhance the chocolate flavor.
- Keep It Moist: If using almond flour, ensure it’s finely ground for best texture.
- Storage Tip: Store brownies in an airtight container to keep them fresh and moist.
- Portion Control: Use a mini muffin tin for perfectly portioned brownies.
- Let Them Cool: Allow brownies to cool completely before cutting for cleaner edges.
- Try Different Mix-Ins: Nuts, dried fruit, or even a swirl of peanut butter can elevate these brownies!
Common Mistakes to Avoid
Here are a few common pitfalls to watch out for:
- Overbaking: Keep a close eye on the brownies as they bake; they should be soft in the center!
- Ignoring Substitutions: If you’re using different flour or sweeteners, be aware that this may change the texture.
- Not Cooling Properly: Cutting brownies while they’re still warm can lead to crumbly pieces.
Delicious Variations to Try
Get creative with these fun variations:
- Vegan Brownies: Substitute the egg with a flax egg (1 tablespoon ground flaxseed + 2.5 tablespoons water) and use a plant-based yogurt.
- Nutty Brownies: Fold in chopped walnuts or pecans for extra crunch and flavor.
- Mint Chocolate: Add a few drops of peppermint extract for a refreshing twist!
- Chocolate Chip Cookies: Make a cookie dough version by adding more flour and using cookie-sized scoops.
Storage and Make-Ahead Instructions
These brownies can be made ahead of time and stored for later enjoyment:
- Refrigeration: Store brownies in the fridge for up to a week.
- Freezing: Freeze brownies in an airtight container for up to 3 months; thaw before serving.
- Meal Prep: Bake a batch on the weekend for easy snacks throughout the week!
Frequently Asked Questions
Here are some answers to common questions about this recipe:
- Can I use a different type of protein powder? Absolutely! Just ensure it’s a compatible flavor that you enjoy.
- How do I know when my brownies are done? They should look set around the edges with a slight jiggle in the center when done.
- Can I make this recipe gluten-free? Yes, use almond flour or a gluten-free flour blend.
- What’s the best way to store leftovers? Keep them in an airtight container at room temperature or in the fridge.
- Are these brownies suitable for kids? Yes! They’re a healthier alternative to regular brownies.
- Can I add protein bars to the recipe? You can, but it may change the texture. Start with smaller amounts.
- What’s the nutritional information for these brownies? Each brownie has approximately 100 calories, 6g protein, and 5g sugar.
- Can I add fruits to the batter? Yes! Mashed bananas or applesauce can add moisture and natural sweetness.
Nutrition Tips and Dietary Adaptations
Make these brownies fit your dietary needs:
- Low-Carb Options: Use coconut flour instead of almond flour, and omit the maple syrup.
- Higher Fiber: Add ground chia seeds or flaxseeds for extra fiber and omega-3s.
- Less Sugar: Reduce the amount of maple syrup or use a sugar substitute.
Recommended Equipment
For this recipe, you’ll need:
- Mixing Bowl: A medium-sized bowl for mixing the batter.
- Whisk: Essential for combining wet ingredients smoothly.
- Mini Muffin Tin: Perfect for portion control and baking evenly.
- Silicone Spatula: Great for scraping down the sides of the bowl and transferring batter.
Serving Suggestions
Pair these brownies with:
- Fresh Berries: Strawberries or raspberries on the side add a touch of freshness.
- Greek Yogurt: A dollop of yogurt on top creates a creamy contrast.
- Coconut Whipped Cream: A light and fluffy topping that complements the chocolate.
Conclusion
And there you have it—your new favorite guilt-free treat! These Guilt-Free Chocolate Protein Brownies are not only simple to make but also bursting with flavor and nutrition. So grab your ingredients, gather your friends or family, and enjoy a baking session filled with laughter, creativity, and delicious results. Remember, cooking is all about having fun, so don’t sweat the small stuff—just enjoy the process and the delightful brownies that come out of it!
Guilt-Free Chocolate Protein Brownies That Taste Like Dessert
Ingredients
Dry ingredients
- 1/4 cup chocolate protein powder (whey or plant-based)
- 1/4 cup unsweetened cocoa powder
- 1/4 cup almond flour (or oat flour)
- 1 tablespoon mini chocolate chips (optional)
Wet ingredients
- 2 tablespoons Greek yogurt (plain, non-fat)
- 1 tablespoon maple syrup (or honey)
- 2 tablespoons almond milk
- 1 egg egg
- 1/2 teaspoon baking powder
- Pinch salt
Instructions
- Preheat oven to 350°F (175°C) and prepare muffin tin.
- Mix egg, Greek yogurt, almond milk, and maple syrup until smooth.
- Stir in protein powder, cocoa, almond flour, baking powder, and salt to form batter.
- Fold in mini chocolate chips if using.
- Divide batter into muffin cups and bake for 10-12 minutes.
- Cool briefly, then enjoy or store for later.

