
Welcome to your new favorite baking adventure! If you’re looking for a way to elevate your meals without spending hours in the kitchen, you’re in the right place. These One Hour Dinner Rolls are fluffy, buttery, and ready to impress in just 60 minutes. Perfect for family dinners, holiday gatherings, or just a cozy night in, these rolls will become a staple in your baking repertoire. Let’s dive in and make some culinary magic happen!
Why You’ll Love This Recipe
Here are just a few reasons why this recipe will win a spot in your heart (and on your table):
- Quick and Easy: These rolls come together in just one hour, making them an ideal choice for any meal, even on busy weeknights.
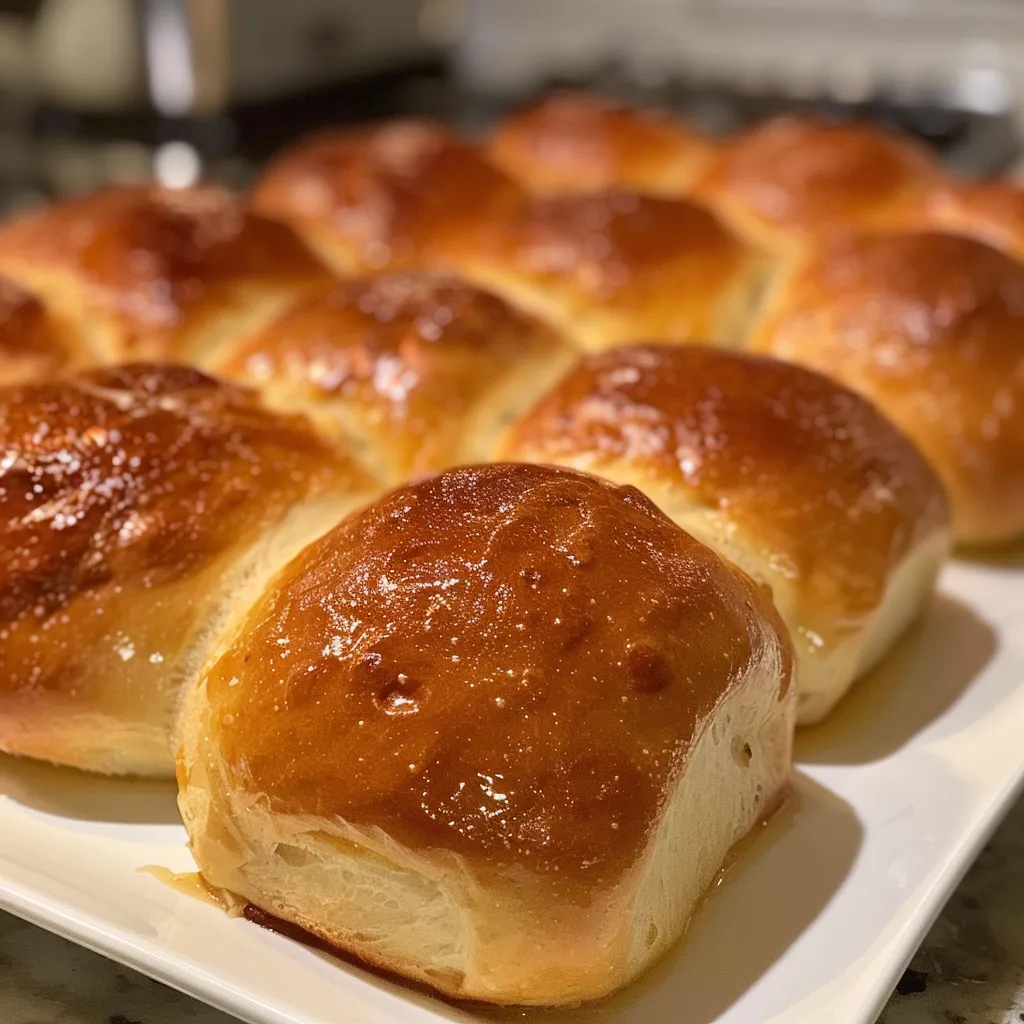
- Fluffy and Buttery: Enjoy the perfect texture that’s soft on the inside with a golden, buttery crust that you can’t resist.
- Beginner-Friendly: No professional baking skills required! Just mix, knead, and bake, with simple instructions to guide you.
- Customizable: Feel free to add herbs, cheese, or garlic to the dough for added flavor and variety.
- Great for Sharing: These rolls are perfect for serving at gatherings, making them a delightful addition to any dinner table.
Ingredients Breakdown
Let’s take a closer look at what you’ll need to whip up these delicious rolls, along with some handy substitutions!
- 4 cups all-purpose flour: The foundation of your rolls. You can substitute with whole wheat flour for a healthier option, but be aware it may alter the texture slightly.
- 2 tablespoons granulated sugar: This not only sweetens the dough but also helps activate the yeast. Honey or maple syrup can be used as alternatives.
- 1 tablespoon instant yeast: Ensures your rolls rise quickly. If you only have active dry yeast, just proof it in warm water first.
- 1 teaspoon salt: Enhances flavor. Sea salt or kosher salt works well too.
- 1 cup warm milk (about 110°F / 43°C): This moisture is essential for the dough. Non-dairy milk can also be used for a lactose-free version.
- 1/4 cup unsalted butter (melted): Adds richness. You can use olive oil for a dairy-free option.
- 1 large egg: Helps bind everything together and adds a lovely golden color. For a vegan substitute, use a flax egg or applesauce.
How to Make One Hour Dinner Rolls
Ready to get your hands doughy? Follow these steps for perfect rolls every time!
- In a large mixing bowl, combine 2 cups of the all-purpose flour, sugar, instant yeast, and salt. Mix well to combine.
- In a separate bowl, whisk together the warm milk, melted butter, and egg until fully combined.
- Pour the milk mixture into the dry ingredients and stir until a soft dough forms.
- Gradually add the remaining flour, 1/2 cup at a time, until the dough is no longer sticky and easy to handle.
- Knead the dough on a lightly floured surface for about 5 minutes until smooth and elastic. If the dough is too sticky, sprinkle a little more flour while kneading.
- Place the dough in a lightly greased bowl, cover it with a clean kitchen towel, and let it rest for 10 minutes in a warm area.
- After resting, punch down the dough and divide it into 12 equal pieces. Shape each piece into a ball.
- Place the dough balls on a baking sheet lined with parchment paper or greased, spacing them about 1 inch apart.
- Cover the rolls with the kitchen towel again and let them rise for another 15 minutes in a warm place.
- Preheat the oven to 375°F (190°C).
- Bake the rolls for 15-20 minutes, or until they are golden brown on top. Remove from the oven and, if desired, brush with additional melted butter for added flavor.
Pro Tips for Perfect Rolls
Here are some expert insights to ensure your rolls come out perfectly every time:
- Use warm (not hot) milk: If it’s too hot, it can kill the yeast. Aim for around 110°F (43°C).
- Knead well: Proper kneading develops gluten, ensuring your rolls are fluffy and chewy.
- Let them rise: A warm environment is key for the dough to rise effectively. Consider using the oven (turned off) with a bowl of hot water beside it.
- Don’t rush the second rise: Allowing the rolls to rise properly ensures they puff up beautifully in the oven.
- Brush with butter: For extra flavor, brush the rolls with melted butter right after baking.
- Experiment with flavors: Add garlic powder, herbs, or cheese to the dough for a unique twist!
- Check doneness: The rolls should sound hollow when tapped on the bottom when they are fully baked.
- Store properly: Keep leftover rolls in an airtight container to maintain freshness.
Common Mistakes and Troubleshooting
Even the best of us can run into little hiccups while baking. Here’s how to avoid common pitfalls:
- Dense rolls: This could be due to not enough kneading or not allowing the dough to rise properly. Make sure to knead until elastic and give the dough adequate time to rise.
- Too much flour: Adding too much flour during kneading can lead to dry rolls. Add flour gradually until the dough is smooth.
- Burnt tops: If your rolls are browning too quickly, cover them loosely with aluminum foil during baking.
- Yeast issues: If your rolls don’t rise, your yeast might be expired or your liquid too hot. Always check the expiration date and temperature!
Variations to Try
Feel free to get creative with these fun variations!
- Garlic Butter Rolls: Add minced garlic to the melted butter and brush on top before baking for a flavorful twist.
- Herb-Infused Rolls: Mix in dried herbs like rosemary or thyme into the dough for an aromatic flavor.
- Cheesy Rolls: Fold in shredded cheese (like cheddar or mozzarella) for a cheesy delight.
- Cinnamon Sugar Rolls: Before shaping, sprinkle the dough with cinnamon sugar and roll it up for a sweet treat!
Storage and Make-Ahead Instructions
Want to prepare these rolls in advance? Here’s how!
- Make Ahead: You can prepare the dough and let it rise, then shape it, cover, and refrigerate overnight. Allow to rise for 30-60 minutes before baking.
- Storing Leftovers: Keep any leftover rolls in an airtight container at room temperature for up to 3 days, or freeze for up to a month.
- Reheating: Warm rolls in a preheated oven at 350°F (175°C) for about 10-15 minutes to regain their fluffy texture.
Frequently Asked Questions
Let’s tackle some of the most common questions about these dinner rolls:
- Can I use bread flour instead of all-purpose flour? Yes, bread flour can work, but it may yield a chewier texture.
- What if I don’t have instant yeast? You can use active dry yeast; just dissolve it in the warm milk before combining.
- Can these rolls be frozen? Absolutely! Freeze either the dough or the baked rolls for later enjoyment.
- How can I make these rolls dairy-free? Substitute the milk with a non-dairy option and use plant-based butter or oil.
- What’s the best way to serve these rolls? They’re delicious on their own or served with butter, honey, or alongside your favorite soups and stews.
- How do I know when the rolls are done? They should be golden brown and sound hollow when tapped on the bottom.
- Is it possible to double the recipe? Yes! Just ensure you have enough space for the rolls to rise.
- What if my dough is too sticky? Add a little more flour gradually until it reaches the right consistency.
Nutritional Tips and Dietary Adaptations
If you’re keeping an eye on health, here are some tips:
- Whole Wheat Option: Substitute half or all of the all-purpose flour with whole wheat flour for added fiber.
- Reduce Sugar: You can cut the sugar by half if you prefer less sweetness.
- Low-Fat Variations: Use reduced-fat milk and leave out the butter for a lighter version.
Equipment Recommendations
To ensure a smooth baking process, here are some handy tools:
- Mixing Bowls: A set of various sizes will help in combining ingredients seamlessly.
- Kitchen Scale: For precise measurements, especially helpful if you’re using different types of flour.
- Baking Sheet: A sturdy, non-stick baking sheet is ideal for even cooking.
- Silicone Baking Mat: Prevents sticking and makes for easy clean-up.
- Whisk and Wooden Spoon: Essential tools for mixing your ingredients effectively.
Serving Suggestions
These rolls are incredibly versatile! Here are a few ideas to serve them:
- With Butter: Classic and simple, a pat of butter makes these rolls even more irresistible.
- Alongside Soups: Perfect for dipping into hearty soups or stews.
- As Sliders: Use them as mini burger buns for a fun dinner twist.
- With Dipping Sauces: Try serving with olive oil and balsamic vinegar for a tasty appetizer.
Cooking should always feel like a joy, and I hope these One Hour Dinner Rolls bring a little more happiness to your kitchen. With each fluffy bite, you’ll be reminded that good food creates connections and warm memories. So don’t hesitate to experiment, make mistakes, and enjoy the process. Happy baking, friends!

One Hour Dinner Rolls
Ingredients
Dry ingredients
- 2 cups all-purpose flour
- 2 tablespoons granulated sugar
- 1 tablespoon instant yeast
- 1 teaspoon salt
Wet ingredients
- 1 cup warm milk (About 110 F / 43 C)
- 0.25 cup unsalted butter (Melted)
- 1 large egg
Instructions
- Mix 2 cups of flour, sugar, yeast, and salt in a bowl.
- Whisk warm milk, melted butter, and egg; combine with dry ingredients to form a dough.
- Gradually add remaining flour until dough is no longer sticky; knead for 5 minutes.
- Let dough rest covered for 10 minutes, then punch down and divide into 12 balls.
- Place rolls on a lined baking sheet, cover, and let rise for 15 minutes.
- Preheat oven to 375 F (190 C) and bake rolls for 15-20 minutes until golden brown.

