Welcome to Your New Favorite No-Bake Treat!
If you’re searching for a quick, delicious, and satisfying snack, you’ve landed in the right place! Today, we’re diving into the world of No-Bake Chocolate Peanut Butter Crunch Bars. With just five simple ingredients, this treat is perfect for any occasion, whether you’re hosting a gathering, treating yourself, or need a quick energy boost. Let’s get crunchy and chocolaty together!
Why You’ll Love This Recipe
Before we roll up our sleeves, let’s talk about why these no-bake bars are a must-try:
- Quick & Easy: Ready in just 15 minutes (plus chill time), these bars are perfect for last-minute cravings.
- Minimal Ingredients: Only five ingredients mean you can whip these up without a trip to the grocery store.
- No Oven Required: Keep your kitchen cool while enjoying a delicious treat, ideal for hot days.
- Perfectly Balanced Flavors: The combination of creamy peanut butter and rich chocolate creates a delightful sweet and salty experience.
- Family-Friendly Fun: This recipe is great for kids to help with, making it a fun family activity that results in a tasty reward!
Ingredients You’ll Need for Chocolate Peanut Butter Crunch Bars
Let’s gather our ingredients! Here’s what you’ll need:
- 1 ½ cups (375 ml) chocolate chips: Choose semisweet or dark chocolate for a richer flavor.
- 1 cup (250 ml) peanut butter: Creamy or chunky will work—pick your favorite!
- 3 cups (750 ml) crispy rice cereal: This gives the bars their satisfying crunch.
- ½ cup (125 ml) maple syrup: A natural sweetener that adds a lovely flavor.
- ¼ cup (60 ml) coconut oil: Helps to bind everything together and adds richness.
Making No-Bake Chocolate Peanut Butter Crunch Bars Easily
Ready to create your delicious bars? Follow these simple steps:
Step 1: Prep the Pan
Start by lining an 8 x 8-inch baking dish with parchment paper. This will ensure easy removal of the bars once they’re set.
Step 2: Ready the Crunch Base
In a large mixing bowl, empty the crispy rice cereal, prepping it for its chocolatey coating.
Step 3: Craft the Dreamy Chocolate Mixture
In a microwave-safe bowl, combine the chocolate chips, peanut butter, maple syrup, and coconut oil. Microwave in 30-second intervals, stirring in between, until fully melted and smooth.
Step 4: Mix Everything Together
Once melted, whisk the mixture until it’s silky and uniform, ensuring no visible separation.
Step 5: Create Chocolatey Cereal Blend
Gently pour the melted chocolate-peanut butter blend over the crispy rice cereal. Stir carefully to coat each piece evenly.
Step 6: Shape the Bars
Transfer the mixture to your prepared baking dish. Use a spatula to spread and level it out evenly across the surface.
Step 7: Chill and Set
Place the dish in the refrigerator, allowing the bars to solidify for about 60-90 minutes. They should become firm enough to slice.
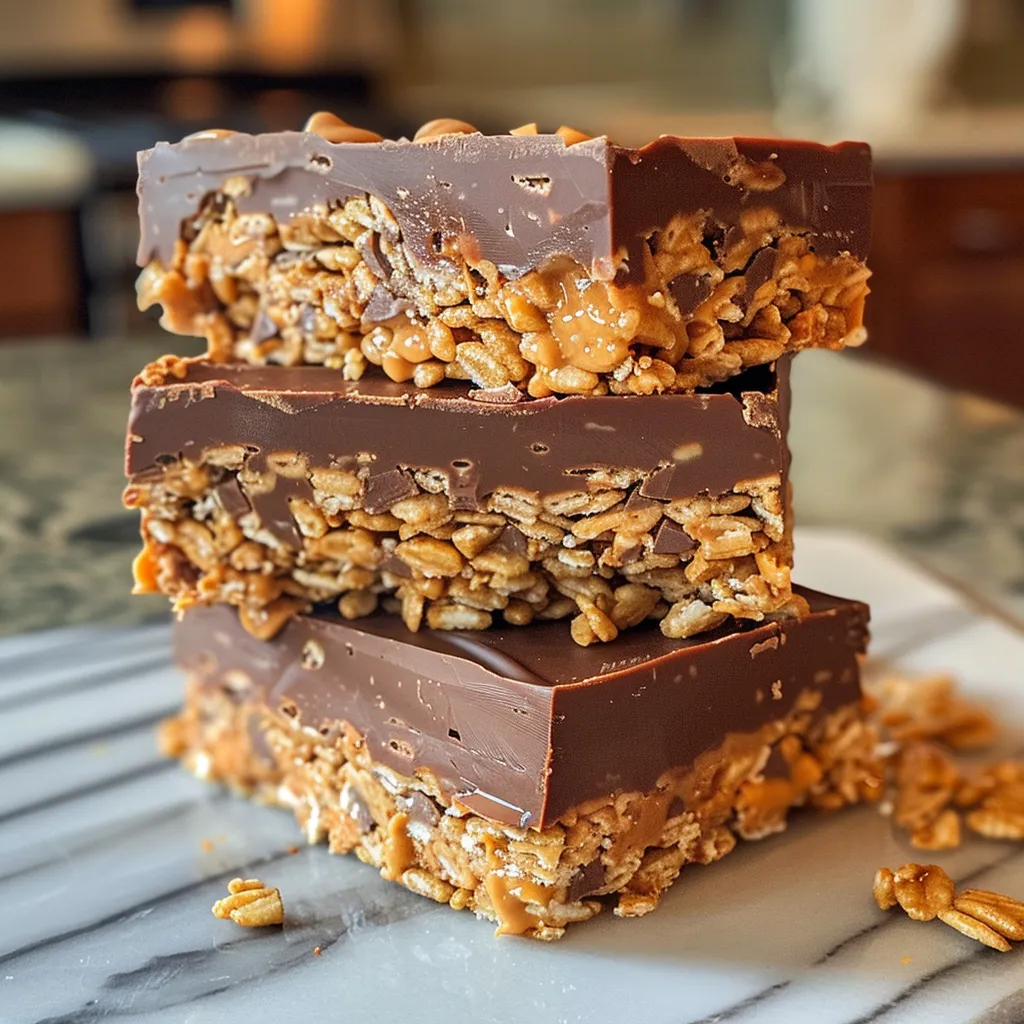
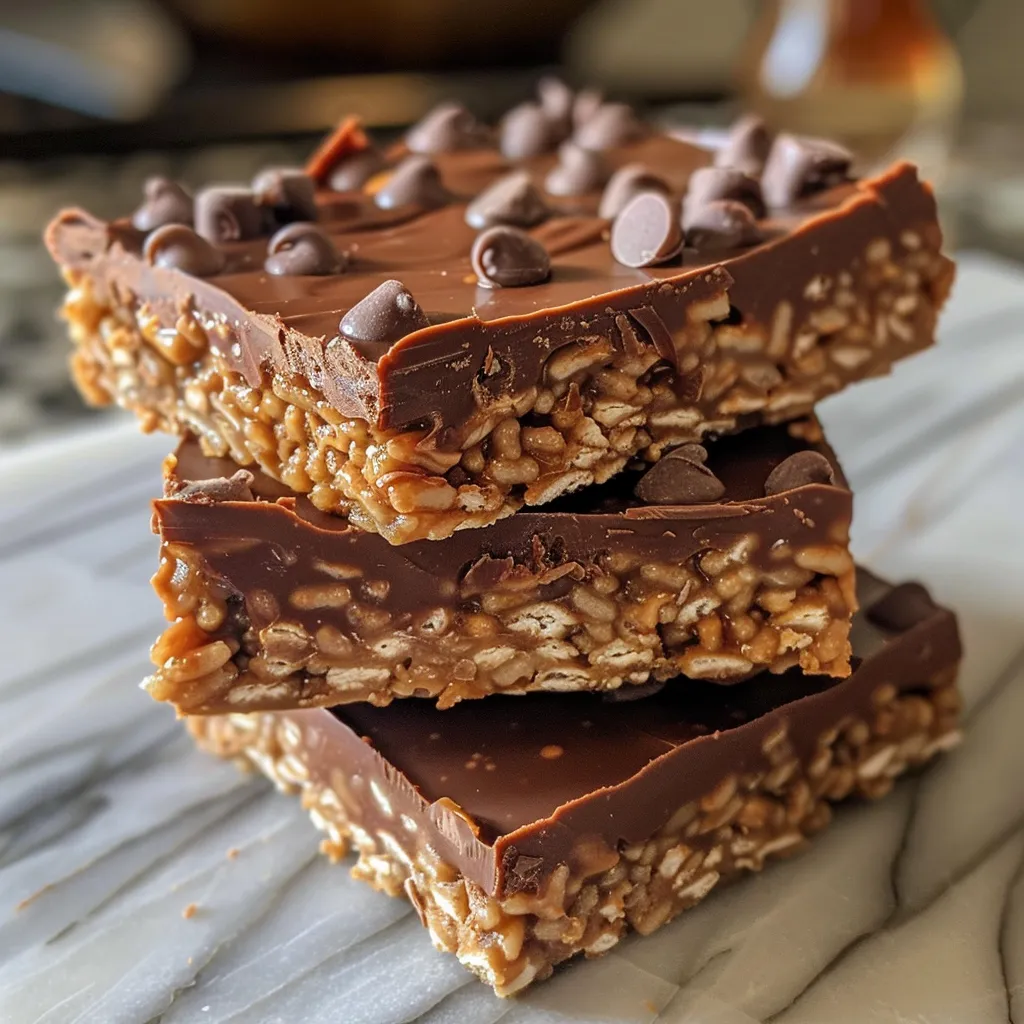
Step 8: Slice and Enjoy
Once set, carefully lift the bars out of the dish using the parchment paper. Slice into neat rectangular portions, and get ready to indulge!
Tips to Get That Perfect No-Bake Crunch Bar Texture
Want to ensure your bars turn out perfectly? Here are some pro tips:
- Don’t Overheat: Be cautious when melting the chocolate mixture; overheating can cause it to seize.
- Mix Thoroughly: Ensure every piece of cereal is coated for optimal flavor and texture.
- Use a Firm Press: When spreading the mixture in the pan, press down firmly to eliminate air pockets.
- Cool Completely: Ensure the bars are chilled long enough to set firmly before slicing.
- Experiment with Flavors: Feel free to mix in nuts, dried fruits, or a sprinkle of sea salt on top for added texture and flavor.
Common Mistakes & Troubleshooting
If you encounter issues, don’t worry! Here are some common pitfalls and how to avoid them:
- Bars are too crumbly: This could happen if there’s not enough binding mixture. Add a touch more peanut butter or maple syrup next time.
- Bars are too sweet: If you find them overpoweringly sweet, consider reducing the amount of maple syrup.
- Bars are difficult to cut: Make sure they’re fully chilled and set. Warming the knife slightly can help ease cutting.
Variations to Try
Feeling adventurous? Here are some fun variations to switch things up:
- Nutty Delight: Add ½ cup of chopped nuts (like almonds or walnuts) for extra crunch.
- Fruity Twist: Mix in ½ cup of dried fruits like cranberries or raisins for a chewy texture.
- Chocolate Drizzle: Melt extra chocolate and drizzle over the top before chilling for an added touch of elegance.
- Flavored Peanut Butter: Use flavored peanut butter (like chocolate or honey) to introduce a new flavor dimension.
Storing Chocolate Peanut Butter Crunch Bars Like a Pro
To keep your bars fresh, follow these storage tips:
- Refrigeration: Store in an airtight container in the refrigerator for up to 2 weeks.
- Freezing: For longer storage, freeze the bars in an airtight container for up to 3 months. Just thaw before enjoying!
Frequently Asked Questions
Got questions? Here are some FAQs to help you out:
- Can I use other cereals? Absolutely! Try using cornflakes or granola for a different crunch.
- Is there a vegan option? Yes! Use dairy-free chocolate chips and maple syrup for a vegan-friendly treat.
- Can I make these bars gluten-free? Ensure your crispy rice cereal is labeled gluten-free to make them suitable for a gluten-free diet.
- How do I know when they’re set? The bars should feel firm to the touch and hold their shape when lifted out of the pan.
- What if I don’t have coconut oil? You can substitute with butter or another neutral oil, but coconut oil adds a unique flavor.
- Can I add protein powder? Yes! Stir in a scoop of your favorite protein powder to boost the nutritional value.
- Can I double the recipe? Definitely! Just use a larger pan and adjust the chilling time accordingly.
- What’s the best way to slice them? Use a sharp knife and warm it slightly under hot water for clean cuts.
Nutritional Tips and Dietary Adaptations
These bars can be tailored to fit various dietary needs:
- For a lower-sugar option: Use unsweetened chocolate and reduce the maple syrup.
- For added protein: Include protein powder or additional nuts to enhance the nutritional profile.
- For a nut-free version: Substitute peanut butter with sunflower seed butter.
Equipment Recommendations
Here’s what you’ll need to make this recipe:
- 8×8-inch baking dish: A standard size for perfect portioning.
- Parchment paper: To line the dish for easy removal.
- Microwave-safe bowl: For melting your chocolate and peanut butter mixture.
- Mixing bowl: A large bowl for combining all your ingredients.
- Spatula: For spreading and leveling the mixture in the pan.
Serving Suggestions
These bars are delicious on their own, but here are some fun serving ideas:
- Pair with fresh fruit: Serve alongside sliced bananas or strawberries for a complete snack.
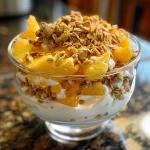
- Top with yogurt: Crumble over yogurt for a crunchy breakfast or dessert.
- Serve with tea or coffee: These bars make a delightful accompaniment to your favorite hot beverage.
Conclusion
There you have it! With just a few ingredients and simple steps, you can whip up these delectable No-Bake Chocolate Peanut Butter Crunch Bars. They’re not only quick and easy but also customizable to suit your taste! So gather your ingredients, invite a friend, and enjoy the joyful experience of creating something delicious in the kitchen. Happy snacking!
No-Bake Chocolate Peanut Butter Crunch Bars Recipe
Ingredients
Base
- 1.5 cups chocolate chips
- 1 cup peanut butter
- 3 cups crispy rice cereal
- 0.5 cup maple syrup
- 0.25 cup coconut oil
Instructions
- Line an 8x8-inch dish with parchment paper.
- Mix cereal in a bowl; melt chocolate, peanut butter, maple syrup, and coconut oil until smooth.
- Pour melted mixture over cereal, stirring to coat evenly.
- Transfer mixture to prepared dish and press down evenly.
- Refrigerate for 60-90 minutes until set, then cut into bars.