
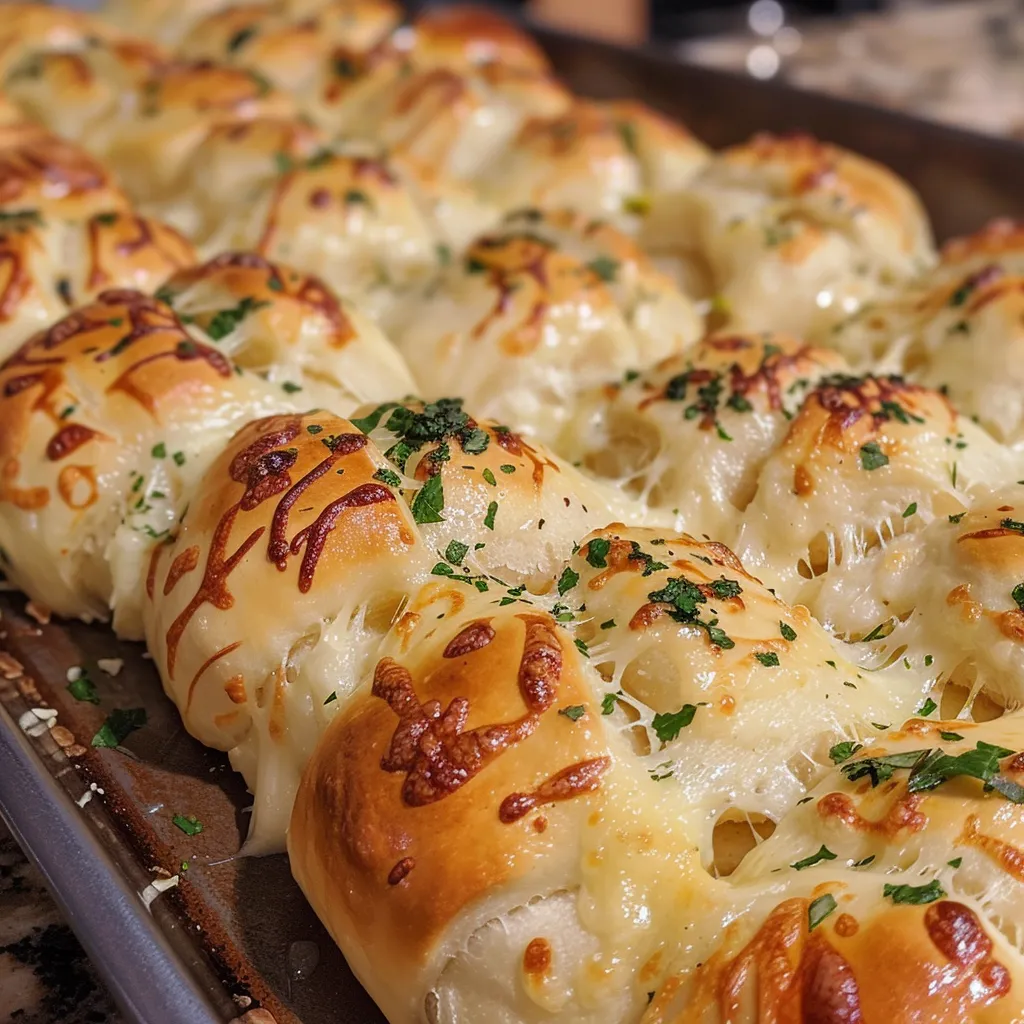
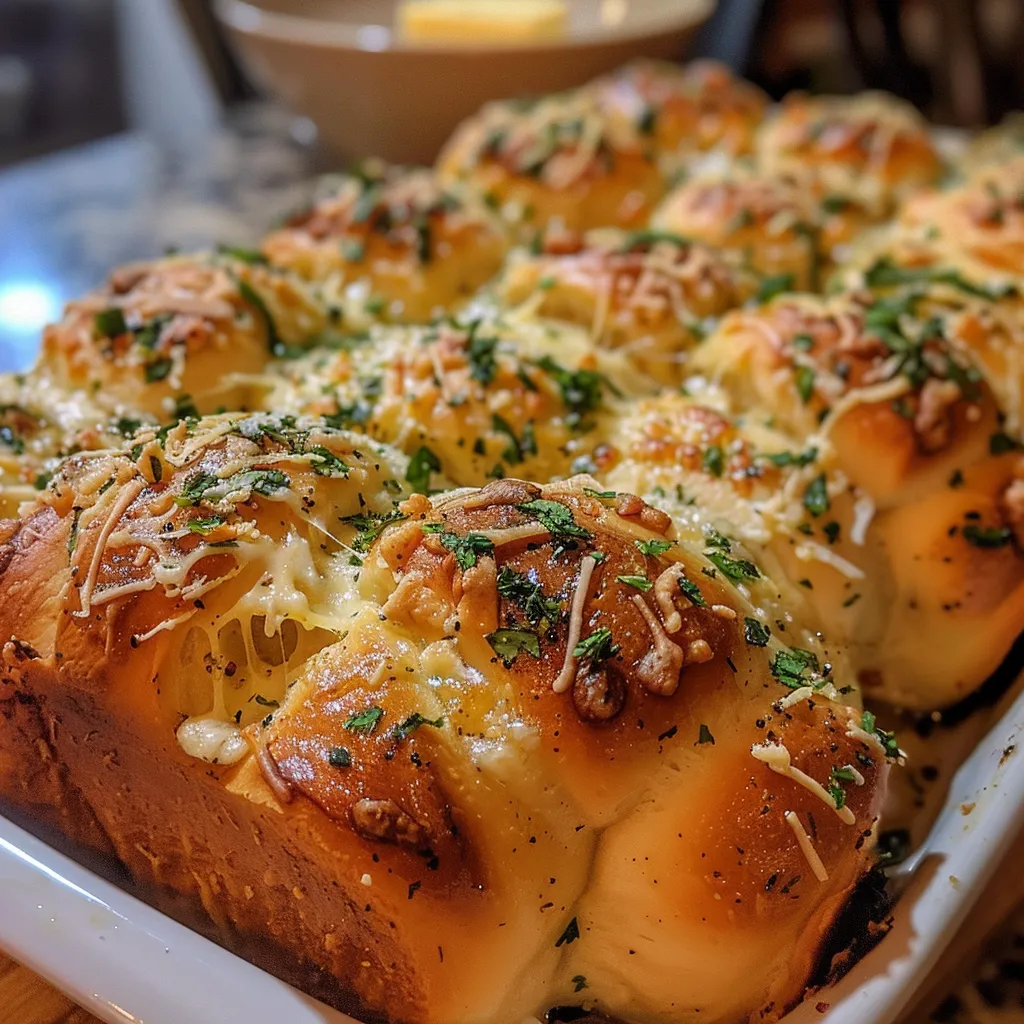
Welcome to the delicious world of cheesy garlic pull-apart rolls! If you’re looking for a recipe that’s not only scrumptious but also fun to make, you’ve come to the right place. These rolls are soft, buttery, and bursting with flavor, making them perfect for any occasion—from family dinner to game day snacks. Plus, the process of pulling them apart is just as satisfying as enjoying each cheesy bite!
In this guide, we’ll dive deep into how to make these delightful rolls, explore tips and tricks for success, and share some fun variations that you can try. Let’s get ready to bake together and make every bite a celebration!
Why You’ll Love This Recipe
- Easy to Follow: With straightforward steps, even novice bakers can master these rolls effortlessly!
- Irresistible Flavor: The combination of garlic butter and melted cheese creates a mouthwatering flavor explosion in every bite.
- Versatile Serving Options: These rolls can be served as an appetizer, side dish, or even for breakfast—perfect for any meal!
- Fun to Make: There’s a joy in shaping the rolls and watching them rise—bring the kids along for the fun!
- Perfect for Sharing: Pull-apart rolls are a hit at gatherings, making them a great choice for parties and potlucks.
Ingredients Breakdown
Let’s take a look at what you’ll need to create these cheesy garlic pull-apart rolls:
- 2 cups all-purpose flour: This is the foundation of your rolls. You can substitute with whole wheat flour for a healthier twist!
- 1 tablespoon granulated sugar: A little sweetness helps activate the yeast and adds flavor.
- 1 teaspoon salt: Essential for flavor balance—don’t skip it!
- 1 teaspoon instant dry yeast: This is what makes your dough rise and become fluffy.
- ¾ cup warm milk (about 110°F): Warm milk helps activate the yeast effectively. You can use almond or oat milk for a dairy-free version.
- 2 tablespoons unsalted butter, melted: Adds richness to the dough and enhances flavor.
- 1 cup mozzarella cheese, shredded: This is the gooey goodness inside your rolls; feel free to mix in some cheddar for extra flavor!
- 4 tablespoons unsalted butter (for garlic butter): This will be drizzled over the rolls before baking, creating a delicious golden crust.
- 4 cloves garlic, minced: Fresh garlic is key for that delicious garlic flavor.
- 2 tablespoons fresh parsley, finely chopped: Adds color and freshness to the garlic butter.
Step-by-Step: How to Make Cheesy Garlic Pull-Apart Rolls
Step 1: Prepare the Dough
In a large mixing bowl, combine the flour, sugar, salt, and yeast. Gradually mix in the warm milk and melted butter until a sticky dough forms. Knead the dough on a lightly floured surface for about 5-7 minutes until it becomes smooth and elastic.
Step 2: Let the Dough Rise
Place the kneaded dough in a greased bowl, cover it with a clean kitchen towel, and let it rise in a warm place for about 1 hour or until it doubles in size.
Step 3: Shape the Rolls
Once the dough has risen, punch it down and divide it into 12 equal pieces. Flatten each piece, add a generous amount of mozzarella cheese in the center, pinch it closed, and roll it into a ball.
Step 4: Arrange and Let Rise Again
Place the rolls seam-side down in a greased baking dish. In a small bowl, mix the melted butter with minced garlic and chopped parsley, then drizzle it over the rolls. Cover and let them rise for another 30 minutes.
Step 5: Bake to Golden Perfection
Preheat your oven to 350°F (175°C). Bake the rolls for 20-25 minutes or until they are golden brown and the cheese is bubbling. Enjoy the heavenly aroma that fills your kitchen!
Pro Tips for Success
- Use Fresh Ingredients: Always opt for fresh yeast and quality cheese for the best flavor.
- Milk Temperature Matters: Ensure your warm milk is not too hot, as it can kill the yeast. Aim for around 110°F.
- Kneading Technique: Don’t be afraid to knead the dough well—it develops gluten for that perfect texture!
- Flour as Needed: If the dough is too sticky, sprinkle a little more flour while kneading until it’s manageable.
- Monitor the Oven: Ovens can vary in temperature; keep an eye on the rolls as they bake to avoid over-browning.
- Experiment with Cheese: Feel free to mix different types of cheese for a unique flavor profile.
- Herb Additions: Try adding herbs like rosemary or thyme for an extra flavor boost in the garlic butter.
- Check for Doneness: The rolls should be golden brown and sound hollow when tapped on the bottom.
Common Mistakes and Troubleshooting
Even seasoned bakers can run into issues. Here are some common pitfalls and how to avoid them:
- Dough Not Rising: This can happen if your yeast is old or the liquid was too hot. Always check the expiration date on your yeast!
- Rolls Too Dense: This usually indicates under-kneading or not enough rising time. Make sure to knead thoroughly and allow sufficient time for rising.
- Burnt Tops: If the tops of your rolls are browning too quickly, cover them loosely with foil during baking.
- Cheese Leakage: If cheese spills out while baking, it’s likely because the rolls were overstuffed. Be generous but not excessive with the filling!
Variations to Try
Once you’ve mastered the classic version, why not mix things up? Here are some fun variations to consider:
- Herbed Cheese Rolls: Incorporate finely chopped fresh herbs like basil or oregano into the cheese filling for an aromatic twist.
- Spicy Jalapeño Rolls: Add diced jalapeños into the cheese filling for a spicy kick that pairs perfectly with the garlic.
- Sweet Cinnamon Rolls: Swap out the garlic for cinnamon and sugar, and drizzle with a cream cheese frosting for a sweet treat!
- Stuffed Rolls: Try adding cooked bacon or diced ham along with the cheese for a meaty delight!
Storage and Make-Ahead Instructions
These tasty rolls are best enjoyed fresh, but you can store leftovers for later:
- Storing Leftovers: Keep any uneaten rolls in an airtight container at room temperature for up to 2 days.
- Freezing Rolls: Freeze unbaked rolls after shaping them. Just pop them into a greased container, and when you’re ready to bake, let them thaw and rise before baking.
- Reheating: Warm leftover rolls in the oven at 350°F for about 10 minutes to refresh them.
Frequently Asked Questions
Here are some common questions about making cheesy garlic pull-apart rolls:
- Can I use whole wheat flour? Absolutely! Whole wheat flour will work, but you may need to adjust the liquid slightly.
- What can I substitute for garlic? If you prefer not to use garlic, try using garlic powder or even a different seasoning blend.
- Can I make these rolls without dairy? Yes! Substitute with plant-based milk and vegan butter for a dairy-free version.
- What can I do with leftover rolls? Leftover rolls can be made into croutons or used for sandwiches.
- Is it necessary to use instant yeast? No, you can use active dry yeast, but it requires proofing before mixing.
- How do I know when my rolls are done? They should be golden brown and sound hollow when tapped.
- Can I add other fillings? Yes! Feel free to get creative with your fillings like spinach, artichokes, or different cheeses.
- Can I make the dough ahead of time? Yes! You can prepare the dough and refrigerate it overnight before shaping and baking.
Nutritional Tips and Dietary Adaptations
These cheesy garlic pull-apart rolls can be made to fit various dietary needs:
- Gluten-Free: Use a gluten-free all-purpose flour blend for a gluten-free adaptation.
- Low-Carb: Consider using almond flour and reducing the sugar for a low-carb option.
- Vegan: Replace dairy with plant-based alternatives and use flax eggs if needed.
Equipment Recommendations
Here are some tools that can make your roll-making experience easier:
- Mixing Bowls: A set of mixing bowls will help you combine ingredients easily.
- Baking Dish: A 9×13-inch baking dish is perfect for these rolls.
- Stand Mixer: If you have one, it makes kneading the dough a breeze!
- Measuring Cups and Spoons: Accurate measurements are key to baking success!
Now that you’re equipped with all the knowledge and tips you need, it’s time to roll up your sleeves and get baking. These cheesy garlic pull-apart rolls are sure to become a family favorite, and I can’t wait to hear about your baking adventures! Remember, cooking is all about having fun, so don’t stress and enjoy every moment in the kitchen. Happy baking!
Cheesy Garlic Pull-Apart Rolls
Ingredients
Dough
- 2 cups all-purpose flour
- 1 tablespoon granulated sugar
- 1 teaspoon salt
- 1 teaspoon instant dry yeast
- 0.75 cup warm milk about 110 F
- 2 tablespoons unsalted butter, melted
Cheese Filling
- 1 cup mozzarella cheese, shredded
- 4 tablespoons unsalted butter for garlic butter
- 4 cloves garlic, minced
- 2 tablespoons fresh parsley, finely chopped
Instructions
- Mix flour, sugar, salt, and yeast. Add warm milk and melted butter; knead into a smooth dough. Let rise for 1 hour.
- Punch down dough, divide into 12 pieces, flatten, add cheese, pinch closed, and shape into balls. Arrange in a greased dish.
- Mix melted butter with garlic and parsley, then drizzle over the rolls. Cover and let rise for 30 minutes.
- Bake at 350°F (175°C) for 20-25 minutes until golden brown.
![['Side view of delicious low carb mixed berry muffins, showcasing their golden-brown tops and colorful berry fillings.', 'Close-up of moist low carb muffins with fresh blueberries and raspberries, highlighting their texture and vibrant colors.', 'Juicy mixed berry muffins with a golden crust and visible chunks of berries on the side.', 'Scrumptious low carb muffins featuring a mix of blueberries and raspberries, captured from a side angle.']](https://snacknova.com/wp-content/uploads/2026/06/low-carb-mixed-berry-muffins_1_U1-1-150x150.webp)