Discover the Joy of Baking Homemade Bread
Baking homemade bread is not just about fulfilling a culinary task; it’s about creating something wonderful with your own hands and sharing that joy with others. This easy homemade bread recipe will become your go-to, transforming simple ingredients into a fluffy, golden loaf that fills your kitchen with warmth and delicious aromas. Whether you’re a complete novice or a seasoned pro, you’ll find that baking bread is easier than you think—and just as rewarding!
Why You’ll Love This Recipe
- Beginner-Friendly: This recipe is designed for everyone, even if you’ve never baked bread before. With straightforward steps, you’ll feel confident and empowered to create your own loaf.
- Minimal Ingredients: With just six simple ingredients, you’re likely to have everything you need in your pantry, making this recipe hassle-free.
- Quick and Easy: You can whip up this bread in under two hours, making it a fantastic choice for weeknight meals or unexpected guests!
- Customizable: Once you master this basic recipe, you can easily experiment with flavors and add-ins like herbs, cheese, or nuts to make it your own.
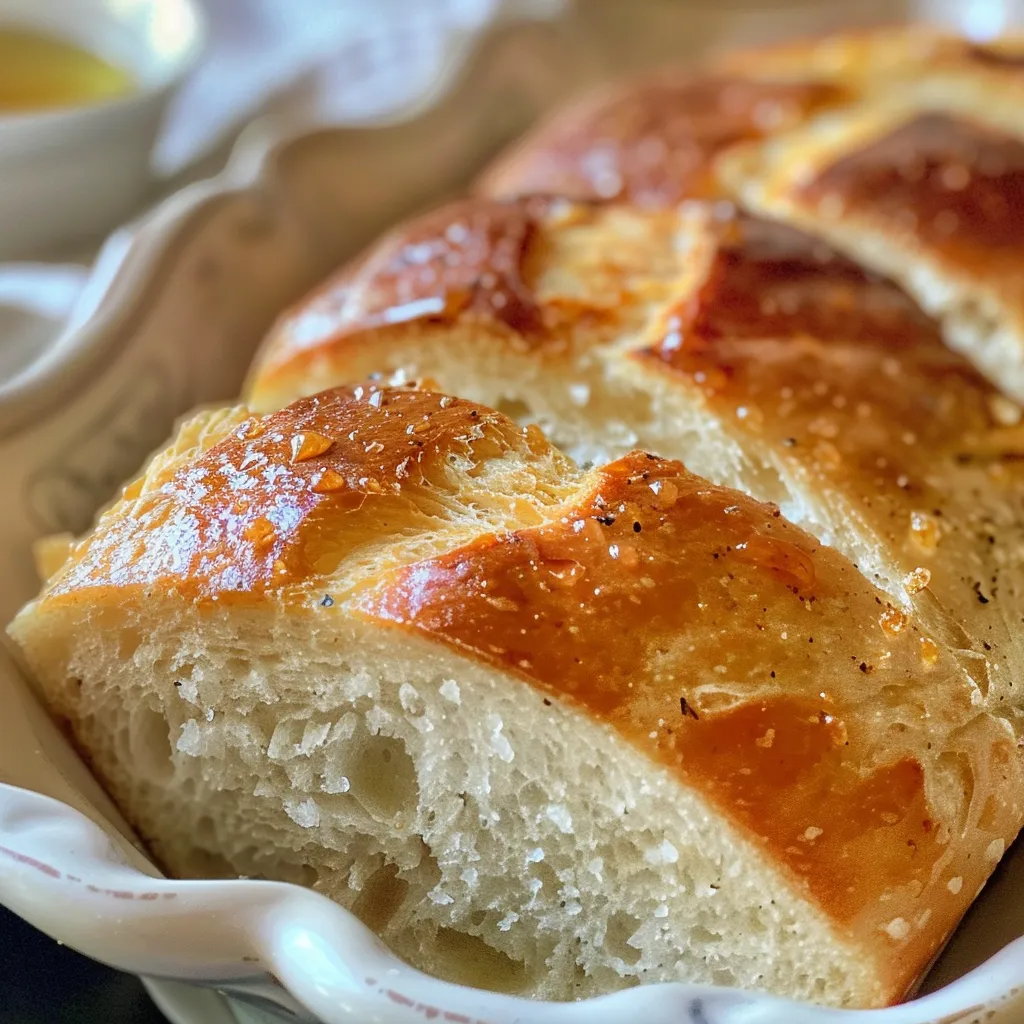
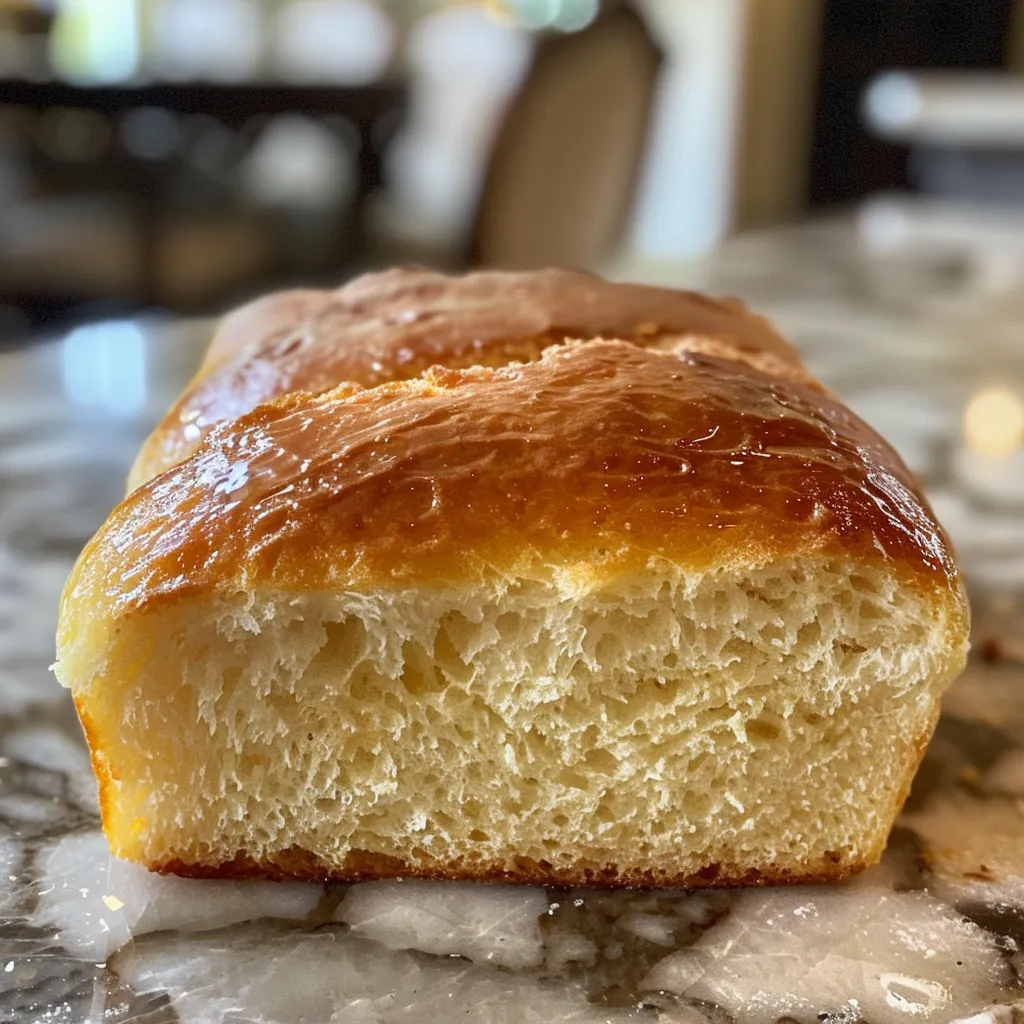
- Deliciously Satisfying: The final product is a beautifully baked loaf with a crunchy crust and a soft, airy interior that’s perfect for sandwiches or simply slathered with butter.
Essential Ingredients for Your Bread
Before you begin, let’s take a closer look at the ingredients you’ll need. Understanding each component can help you troubleshoot any issues and allow for easy substitutions when necessary.
- Active Dry Yeast: 2 ¼ teaspoons (one standard packet) – This is what makes your bread rise. If you have instant yeast on hand, feel free to use it in the same amount!
- Warm Water: 1 ½ cups (105°F to 115°F / 40°C to 46°C) – Think of bathwater temperature! Too hot or too cold can affect how well your yeast activates.
- Granulated Sugar: 1 teaspoon (or honey) – This tiny amount helps to feed the yeast, aiding in the fermentation process and enhancing flavor.
- All-Purpose Flour: 3 ½ to 4 cups – Flour provides the structure. You can also use bread flour for a chewier texture.
- Fine Sea Salt: 2 teaspoons – Salt enhances flavor and controls yeast activity, so don’t skip this step!
- Unsalted Butter: 2 tablespoons, melted and cooled – Adds richness and flavor to the bread.
Step-by-Step Guide to Making Your Bread
Now that you have your ingredients, let’s get into the fun part—baking! Follow these steps closely for a successful loaf.
- Activate the Yeast: In a large bowl, combine warm water and sugar. Sprinkle the yeast over the water and let it sit for 5-10 minutes until it becomes foamy. This step ensures your yeast is alive and ready to work.
- Mix the Dough: Stir in the melted butter. In a separate bowl, whisk together 3.5-4 cups of flour and salt. Gradually add the dry ingredients to the wet mixture, mixing until a shaggy, slightly tacky dough forms.
- Knead the Dough: Turn the dough onto a lightly floured surface. Knead for 8-10 minutes or 6-8 minutes with a stand mixer and dough hook, until the dough is smooth and elastic. It should pass the windowpane test—when stretched, it should form a thin membrane without tearing.
- First Rise: Lightly grease a large bowl, place the dough inside, and turn it to coat. Cover the bowl with a damp cloth and let it rise in a warm, draft-free spot for 1-1.5 hours, or until doubled in size.
- Shape Your Loaf: Gently punch down the dough to release air. On a lightly floured surface, flatten the dough, fold the edges inward, and roll tightly into a 9-inch log. Place seam-side down in a greased 9×5-inch loaf pan.
- Second Rise: Cover the pan and let it rise in a warm spot for 30-45 minutes, until the dough rises about 1 inch above the rim. Preheat your oven to 375°F (190°C) during the last 15-20 minutes of this rise.
- Bake to Perfection: (Optional) Brush the top with milk or an egg wash for a golden crust. Bake for 30-35 minutes until golden brown and the internal temperature reaches 200-210°F. You can tap the bottom of the loaf; it should sound hollow.
- Cool Completely: Transfer the bread to a wire rack and let it cool for 1-2 hours before slicing. This helps set the crust and ensures the best texture.
Pro Tips for Perfect Bread
As you embark on your bread-baking journey, keep these expert tips in mind to enhance your results:
- Temperature Matters: Ensure your water is at the right temperature. If it’s too hot, it can kill the yeast; too cool, and the yeast won’t activate.
- Flour Variations: Experiment with different types of flour, like whole wheat or rye, to create unique flavors and textures.
- Use a Kitchen Scale: For the most accurate measurements, consider weighing your ingredients. A cup of flour can vary in weight based on how it’s packed.
- Humidity Check: Adjust the flour quantity based on your kitchen’s humidity level. You may need more or less flour for the perfect dough consistency.
- Resting Time: Allowing the dough to rest between kneading and shaping can enhance gluten development, leading to a better rise.
- Don’t Rush the Rise: Patience is key! If you let the dough rise until it’s doubled, you’ll have a lighter loaf.
- Experiment with Add-ins: Try adding herbs, seeds, or cheese to the dough for added flavor. Just remember to adjust the flour slightly for moisture content.
- Cooling Is Crucial: Letting your bread cool completely before slicing helps maintain its structure and moisture.
Common Mistakes and Troubleshooting
Even the best bakers make mistakes! Here are some common pitfalls and how to avoid them:
- Dense Bread: This can happen if the dough didn’t rise enough. Ensure your yeast is fresh and give the dough ample time to rise.
- Dry Bread: If your bread turns out dry, you may have added too much flour. Make sure to measure accurately and adjust based on humidity.
- Overbaking: Keep an eye on your bread as it bakes. If it browns too quickly, you can tent it with aluminum foil.
- Yeast Not Rising: If your yeast mixture doesn’t foam, it may be dead. Always check the expiration date and ensure your water temperature is correct.
- Sticky Dough: If the dough is too sticky, gradually add more flour until it reaches the right consistency. But be careful not to add too much!
Delicious Variations to Try
Once you’ve mastered the basic recipe, don’t hesitate to get creative! Here are some tasty variations to inspire your next loaf:
- Herb and Cheese Bread: Add 1 cup of shredded cheese (like cheddar) and 2 tablespoons of your favorite herbs (like rosemary or thyme) to the dough for a savory twist.
- Whole Wheat Variation: Substitute half of the all-purpose flour with whole wheat flour for a nuttier flavor and added nutrition.
- Sweet Cinnamon Raisin Bread: Mix in 1 cup of raisins and 2 teaspoons of cinnamon for a delightful breakfast treat.
- Garlic Bread Loaf: Incorporate roasted garlic into the dough and brush the top with garlic butter before baking for a flavorful side dish.
Storage and Make-Ahead Instructions
Wondering how to store your freshly baked bread? Here’s how to keep it fresh:
- Room Temperature: Store your bread in a bread box or a paper bag to maintain freshness for up to 3 days.
- Freezing: If you want to keep it longer, slice the bread and wrap it tightly in plastic wrap and aluminum foil. It can last up to 3 months in the freezer. To enjoy, let it thaw at room temperature or toast slices directly from the freezer!
- Make-Ahead: You can prepare the dough ahead of time and let it rise in the refrigerator overnight. Just remember to bring it back to room temperature before baking.
Frequently Asked Questions
Here are some common questions about homemade bread:
- Can I use gluten-free flour? Yes! You can use a 1:1 gluten-free flour blend, but the texture may differ slightly.
- What if my bread is too salty? If you accidentally add too much salt, you can try to balance it by adding a bit more flour and water.
- Can I use milk instead of water? Absolutely! Using milk will create a richer flavor and softer crumb.
- Why is my bread falling after baking? This can happen due to under-baking or rapid cooling; make sure it’s fully baked and cool it gradually.
- Is it okay to leave out the sugar? Sugar helps with yeast activation and flavor, but you can reduce it or use alternatives if needed.
- Can I bake this bread in a different pan? Yes, you can use a round or other shaped pans, but baking times may vary.
- What’s the best way to slice bread? Use a serrated knife for clean slices and to prevent squishing the bread.
- How can I tell when my bread is done? The bread should be golden brown and have an internal temperature of 200-210°F (93-99°C).
Nutritional Tips and Dietary Adaptations
If you’re looking to make this recipe more nutritious, consider these tips:
- Whole Grains: Using whole wheat flour can boost fiber content and provide additional nutrients.
- Reduce Sugar: You can cut back on the sugar if you prefer a less sweet bread.
- Add Seeds: Incorporating seeds like flaxseed or chia seeds can increase omega-3 fatty acids and fiber.
- Low-Fat Options: Substitute melted butter with unsweetened applesauce for a lower-fat version.
Equipment Recommendations
Here’s what you’ll need to make your bread-making experience smooth and enjoyable:
- Mixing Bowls: A large mixing bowl for combining ingredients and a smaller one for dry ingredients.
- Measuring Cups and Spoons: Accurate measurements are key to successful baking!
- Wooden Spoon or Dough Scraper: For mixing and kneading the dough.
- Loaf Pan: A standard 9×5 inch loaf pan works great for this recipe.
- Wire Rack: Essential for cooling your bread evenly after baking.
- Kitchen Thermometer: Useful for checking the internal temperature of your bread.
Serving Suggestions
Your freshly baked bread is perfect on its own, but here are some delightful serving ideas:
- Classic Butter: Spread with a generous pat of butter for a simple and satisfying treat.
- Sandwiches: Use your bread for delicious sandwiches filled with your favorite ingredients.
- Bruschetta: Top slices with fresh tomatoes, basil, and mozzarella for a delightful appetizer.
- French Toast: Turn leftover bread into a scrumptious breakfast by making French toast.
Conclusion: Celebrate Your Baking Success!
Baking homemade bread is a joyful experience that brings the comforting aroma of freshly baked goods into your home. With this easy recipe, you’ve not only created a delicious loaf but also gained the confidence to experiment and make it your own. So gather your ingredients, roll up your sleeves, and let’s make some memories in the kitchen. Celebrate every little win and enjoy the satisfaction that comes with baking your very own bread!
Easy Homemade Bread
Ingredients
Yeast
- 2 ¼ teaspoons active dry yeast (one standard packet)
- 1 ½ cups warm water (105°F to 115°F / 40°C to 46°C)
- 1 teaspoon granulated sugar (or honey)
- 3 ½ to 4 cups all-purpose flour
- 2 teaspoons fine sea salt
- 2 tablespoons unsalted butter, melted and cooled
Instructions
- Combine warm water and sugar; sprinkle yeast. Let stand 5-10 min until foamy.
- Stir in melted butter. Mix in flour and salt until a shaggy dough forms.
- Knead for 8-10 min until smooth. Let rise in a warm spot for 1-1.5 hours.
- Shape into a log, place in a greased loaf pan. Let rise 30-45 min.
- Preheat oven to 375°F (190°C). Bake for 30-35 min until golden.
- Cool on a wire rack for 1-2 hours before slicing. Enjoy!