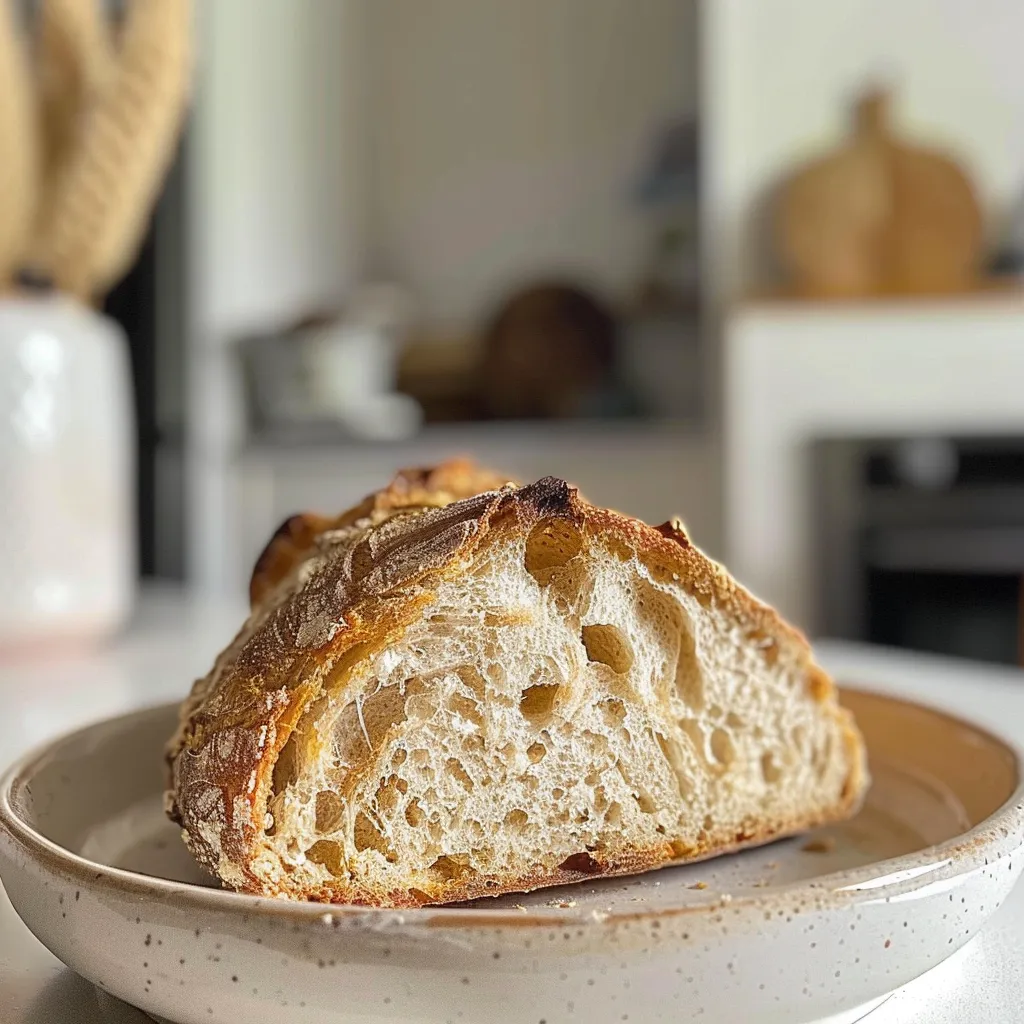
Wake Up to the Warmth of Homemade Sourdough Bread
Imagine waking up to the tantalizing aroma of freshly baked sourdough bread wafting through your home. This effortless overnight sourdough bread recipe not only fills your kitchen with warmth and comfort but also delivers a loaf that’s bursting with flavor. Whether you’re a seasoned baker or just starting your culinary journey, this guide will take you through every step to achieve that perfect crust and soft, airy crumb. Let’s dive into the world of sourdough!
Why You’ll Love This Recipe
- Minimal Effort Required: This recipe allows you to prep everything the night before and wake up to a beautifully risen dough, ready to bake.
- Perfect for Beginners: Even if you’ve never made bread before, this straightforward method ensures your first attempt will be a success.
- Delicious Flavor: The long fermentation process develops a rich, tangy flavor that you simply can’t achieve with quick bread recipes.
- Versatile Base: Once you master this recipe, you can easily customize it with herbs, spices, or other add-ins to suit your taste.
- Health Benefits: Sourdough bread is easier to digest and may have a lower glycemic index than commercial bread, making it a healthier option!
Essential Ingredients and Substitutions
The key to a great sourdough loaf lies in the ingredients. Here’s what you’ll need:
- Levain: 50 g active sourdough starter (100 percent hydration) (If your starter is not active, feed it 4-6 hours before starting this recipe.)
- Whole Wheat or Bread Flour: 25 g (you can substitute with all-purpose flour if necessary)
- Tepid Water: 25 g (filtered water is best to ensure optimal yeast activity)
- Dough: All the levain from above, plus:
- Whole Wheat Flour: 50 g (or substitute with all-purpose flour)
- Strong Bread Flour: 450 g (essential for structure and texture)
- Slightly Warm Water: 375 g
- Fine Sea Salt: 10 g (always use fine salt to ensure it dissolves well)
Step-by-Step Instructions for Overnight Sourdough Bread

1. Prepare the Levain
In a small jar, mix together the active sourdough starter, whole wheat flour, and tepid water until a paste forms. Cover it and let it ripen at room temperature for 6-8 hours. Ideally, you should do this in the evening so that you can bake the next morning. Your levain will be bubbly and doubled in size.
2. Mix the Dough
In a large mixing bowl, combine the levain, warm water, and flours until a shaggy dough forms. Use your hands to knead and pinch the dough until all the flour is incorporated. Cover and let it sit for 1 hour. This important step, known as autolyse, allows the flour to fully hydrate.
3. Incorporate the Salt
After the autolyse, sprinkle the salt over the dough and use wet hands to gently knead it in. Cover the dough and let it rest for 45 minutes.
4. Lamination (Optional)
This step strengthens the dough and is the perfect opportunity to add mix-ins! Lightly spray your counter with water and stretch the dough into a large thin sheet. Add any desired ingredients (like herbs or cheese), fold the dough, and place it in a lightly greased container.
5. Folding the Dough
Instead of kneading, fold the dough. Grab one side, lift it, and fold it over itself. Rotate the bowl and repeat this process four times. Let it rest for 30 minutes, and repeat this folding process a total of 3 times, every 45 minutes.
6. Bulk Fermentation
Once you’ve completed the folds, cover the dough and let it rise undisturbed in a warm spot for about 2 hours. Look for the dough to be puffy with visible bubbles.
7. Prepare the Proofing Basket
Line a bread proofing basket or bowl with clean kitchen towels and dust them heavily with flour. A generous amount of flour will prevent sticking.
8. Shape the Dough
Dust your work surface with flour and gently turn the dough out. Stretch it into a small rectangle, fold it into a log, and transfer it to your prepared basket, seam side up. Cover it with plastic wrap and place it in the fridge to proof overnight.
9. Preheat the Oven
The next day, preheat your oven to 475°F (245°C) with a Dutch oven inside for about 40 minutes.
10. Bake the Bread
Remove the dough from the fridge and carefully lower it onto a piece of parchment paper. Score the top if desired, then use the parchment to transfer it into the preheated Dutch oven. Cover and bake for 25 minutes, then uncover, reduce the temperature to 450°F (232°C), and bake for an additional 20 minutes until golden brown. Allow the loaf to cool for at least 2 hours before slicing.
Pro Tips for Perfect Sourdough Bread
- Perfect Starter: Ensure your starter is active and bubbly. If it hasn’t doubled in size after feeding, it might be too weak to leaven your bread.
- Hydration Matters: Adjust water content if your dough feels too dry or too wet; every environment can affect how flour absorbs water.
- Temperature Control: If your kitchen is cool, the dough may take longer to rise. Consider a warm spot or using an oven with the light on.
- Don’t Rush the Rise: Allow the dough to fully rise; under-proofing can lead to dense bread.
- Scoring Technique: Use a sharp blade to score; this allows steam to escape and creates a rustic appearance.
- Cooling Time: Patience pays off! Letting the bread cool completely before slicing helps the crumb set.
- Experiment! Don’t be afraid to try different flours, seeds, or herbs in your dough for unique flavor profiles.
- Batch Baking: Consider making multiple loaves at once; they freeze well and are perfect for gifts!
Common Mistakes and Troubleshooting
1. My bread didn’t rise!
Check if your starter was active enough. It should be bubbly and doubled in size before mixing.
2. The crust is too hard!
This can happen if the bread is baked too long. Keep an eye on it during the final minutes of baking.
3. My dough is too sticky!
Add a little more flour during kneading, but be careful not to overdo it as it can affect the texture.
4. The inside is gummy!
This indicates under-baking or under-proofing. Ensure the bread is fully baked and cooled before slicing.
Variations to Try
- Herb Infused: Add fresh herbs like rosemary or thyme to the dough for a fragrant twist.
- Cheese Lover’s Delight: Mix in shredded cheese for a savory flavor boost.
- Nutty and Seeded: Add a mix of nuts and seeds to the dough for texture and flavor.
- Sweet Sourdough: Incorporate dried fruit like cranberries or apricots for a delightful sweetness.
Storage and Make-Ahead Instructions
This sourdough bread can be wrapped tightly in plastic wrap and stored at room temperature for up to 3 days. For longer storage, slice the bread and freeze it for up to a month. Simply toast the slices directly from the freezer for a quick snack or breakfast.
FAQs About Overnight Sourdough Bread
1. Can I use all-purpose flour instead of bread flour?
Yes, but bread flour gives a better structure due to its higher protein content.
2. How do I know if my sourdough starter is ready?
If it doubles in size within a few hours after feeding and passes the float test, it’s ready to use!
3. What if my dough is too wet?
Add a small amount of flour gradually until you achieve a workable consistency.
4. How can I make my sourdough bread more sour?
Allow the dough to ferment longer or use a starter that hasn’t been fed for a while.
5. Can I bake this bread in a regular loaf pan?
Yes, but the shape and crust may differ. Baking in a Dutch oven creates a steam environment for a crusty loaf.
6. Is sourdough bread gluten-free?
No, traditional sourdough is made from wheat flour, which contains gluten.
7. What is the best way to slice sourdough bread?
Use a serrated knife and slice the loaf while it’s completely cooled for the best results.
8. Can I add spices to my sourdough?
Absolutely! Adding spices like cinnamon or nutmeg can give your bread a unique flavor.
Nutrition Tips and Dietary Adaptations
Sourdough bread is generally easier to digest due to the fermentation process, which breaks down gluten and phytic acid. For a healthier version, consider using whole grain flours or adding seeds for extra nutrients. If you’re looking for gluten-free options, explore gluten-free sourdough starters and flours.
Equipment Recommendations
To make this recipe, you’ll need:
- Mixing Bowls: A large bowl for mixing the dough and a smaller one for the levain.
- Dutch Oven: Essential for creating a perfect crust.
- Sourdough Starter Jar: A clear jar helps monitor your starter’s growth.
- Bench Scraper: Useful for shaping the dough and transferring it without deflating.
- Kitchen Scale: For precise measurements of ingredients.
Serving Suggestions
This sourdough bread is perfect for:
- Toast: Enjoy it with butter, jam, or avocado for a delightful breakfast.
- Sandwiches: Use it as the base for delicious sandwiches or paninis.
- Soup Pairing: Serve warm slices alongside your favorite soups and stews.
- Cheese Board: Pair with a selection of cheeses for a lovely appetizer.
Now that you’re equipped with all the knowledge you need, it’s time to embark on your sourdough journey! Remember, every loaf is a learning experience, and with each attempt, you’ll grow more confident in your baking skills. Happy baking!
easy overnight sourdough bread
Ingredients
Levain
- 50 g active sourdough starter (100 percent hydration)
- 25 g whole wheat or bread flour
- 25 g tepid water
Dough
- all the levain from above all the levain from above
- 50 g whole wheat flour
- 450 g strong bread flour
- 375 g slightly warm water
- 10 g fine sea salt
Instructions
- Mix starter, flour, and water; let ripen 6-8 hours until bubbly and doubled.
- Combine levain, water, and flours; knead until shaggy, then autolyse for 1 hour.
- Add salt, knead gently, then perform folds every 45 minutes for 3 rounds over 2 hours.
- Shape dough into a log, place seam side up in a floured basket, and refrigerate overnight.
- Preheat oven with Dutch oven to 475°F. Transfer dough onto parchment, score, and bake covered 25 min, then uncovered 20 min at 450°F.