
Unlock the Secrets to Fluffy Sandwich Bread: Your Ultimate Guide
Welcome to your new favorite baking adventure! If you’ve ever dreamed of creating your own soft and fluffy sandwich bread that rivals even the best bakery options, you’re in the right place. This recipe is designed to boost your kitchen confidence while delivering a delicious loaf that’s perfect for sandwiches or simply enjoying with a pat of butter. In this guide, we’ll take you step-by-step through the process of making homemade fluffy sandwich bread, complete with tips, variations, and answers to your most pressing questions. Let’s get started!
Why You’ll Love This Recipe
- Beginner-friendly: This recipe breaks down the process into simple, easy-to-follow steps, making it perfect for novice bakers.
- Unmatched freshness: Say goodbye to store-bought bread! Enjoy the delightful aroma and taste of freshly baked bread right from your kitchen.
- Customizable: You can easily adapt this recipe to fit your dietary needs or personal preferences.
- Perfect for meal prep: This bread stays soft and delicious for days, making it great for prepping lunches or snacks ahead of time.
- Creative possibilities: Use it for various dishes—from classic sandwiches to French toast or bread pudding!
Ingredients You’ll Need
Before you dive into baking, let’s gather our ingredients. Here’s what you’ll need:
- 2 1/4 teaspoons active dry yeast: This will help your bread rise beautifully.
- 2 tablespoons honey: Adds a touch of sweetness and helps activate the yeast.
- 1/4 cup warm water: Make sure it’s about 105-115°F (40-46°C) for optimal yeast activation.
- 1 1/2 teaspoons salt: Enhances flavor and strengthens the dough.
- 5 tablespoons unsalted butter, softened: For that rich, creamy texture.
- 1 large egg, at room temperature: Adds richness and helps bind the ingredients.
- 6 cups all-purpose flour, plus more for dusting: The base of your fluffy bread.
- 2 cups whole milk, warmed: This keeps the bread soft and adds moisture.
Step-by-Step Instructions
Now that we have everything ready, let’s get baking! Follow these detailed steps for the perfect fluffy sandwich bread.
- Activate the yeast: In a large bowl, combine warm water and honey. Sprinkle the yeast over the top and let it sit for 5-10 minutes until it becomes foamy.
- Add the remaining ingredients: To the foamy yeast mixture, add salt and softened butter. Gradually mix in warmed milk, incorporating flour one cup at a time. Add the egg when about half the flour is mixed in. Continue adding flour until a shaggy dough forms.
- Knead the dough: Knead by hand for 8-10 minutes or in a stand mixer for 6-8 minutes until the dough is smooth, elastic, and no longer sticky. Perform the windowpane test to ensure it’s ready.
- First rise: Lightly grease a bowl, place the dough inside, and turn to coat. Cover and let it rise in a warm, draft-free spot for 1-1.5 hours, or until it doubles in size. Punch down the dough.
- Shape and second rise: Shape the dough into an oblong rectangle, tightly roll it up like a jelly roll, pinch the seam, and tuck the ends. Place seam-side down in a greased 9×5 inch loaf pan. Cover and let rise for 45 minutes to 1 hour, until it rises about 1 inch above the pan rim.
- Bake the bread: Preheat your oven to 375°F (190°C). Bake the loaf for 30-35 minutes, or until it’s a deep golden brown and the internal temperature reaches 190-200°F (88-93°C). Tap the bottom for a hollow sound.
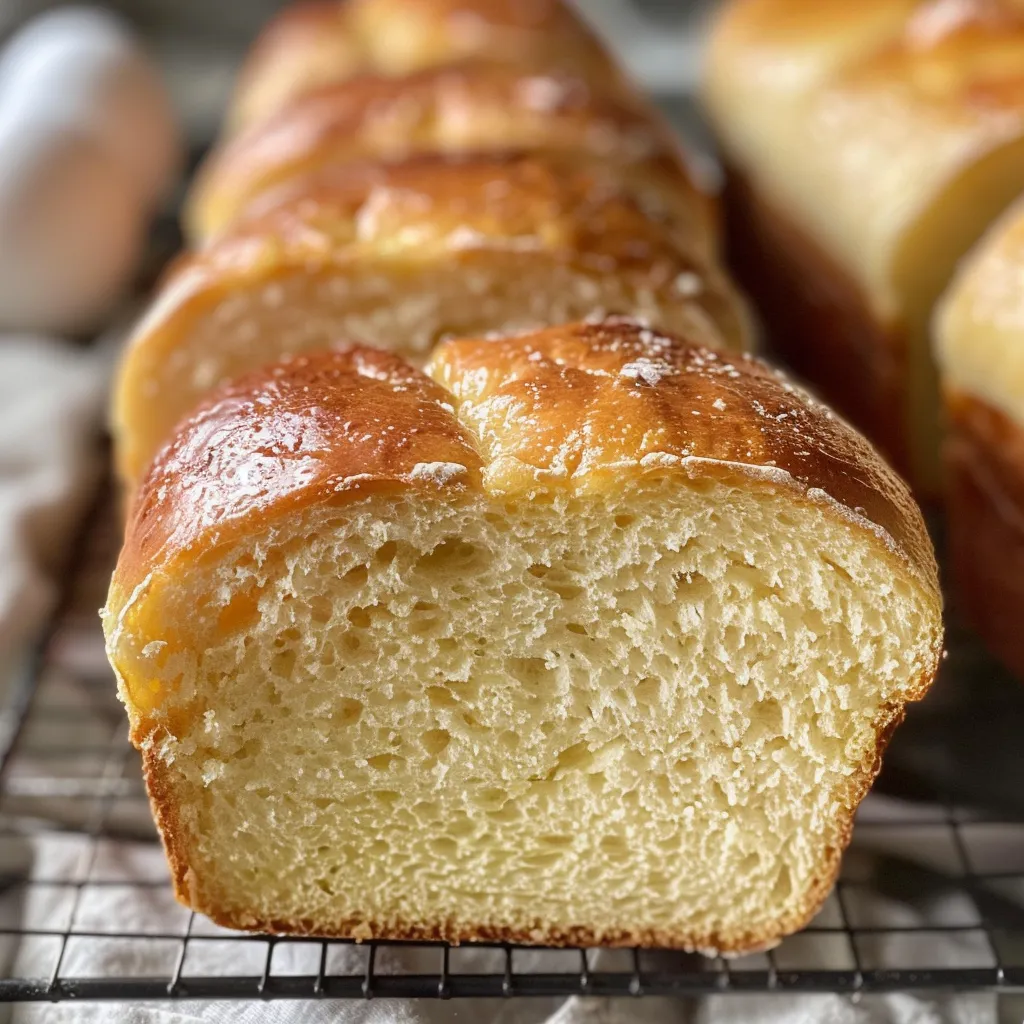
- Cool the bread: Carefully remove the bread from the pan and cool completely on a wire rack for at least 1-2 hours before slicing to avoid a gummy texture.
Pro Tips for Perfect Bread
To ensure your bread turns out perfectly every time, consider these expert tips:
- Use fresh yeast: Check your yeast’s expiration date for optimal rising.
- Room temperature ingredients: Ensure your egg and milk are at room temperature for better integration.
- Measure flour correctly: Spoon flour into your measuring cup and level off for accuracy—too much flour can make your bread dense.
- Don’t rush the rises: Allow adequate time for both rises; this is crucial for achieving that fluffy texture.
- Test the dough: The windowpane test (stretching a piece of dough until it’s thin and translucent) ensures gluten development.
- Use a thermometer: Checking the internal temperature of your bread guarantees it’s fully baked.
- Store properly: To maintain freshness, store your bread in an airtight container at room temperature or freeze it for longer storage.
- Experiment with flavors: Feel free to add herbs, cheese, or spices to customize your loaf!
Avoiding Common Mistakes
Baking bread can be tricky, but knowing what pitfalls to avoid will set you up for success:
- Skipping the yeast activation: Always activate your yeast to ensure it’s alive and ready to work its magic!
- Not kneading enough: Insufficient kneading can lead to dense bread. Make sure the dough is elastic.
- Overproofing: If the dough rises too long, it can collapse. Keep an eye on it!
- Incorrect oven temperature: Always preheat your oven to ensure even baking.
- Cutting too soon: Resist the urge to slice into your bread before it has cooled completely.
Delicious Variations
Feeling adventurous? Here are some fun variations to try:
- Whole Wheat Sandwich Bread: Substitute half the all-purpose flour with whole wheat flour for a nuttier flavor.
- Herbed Bread: Add dried herbs like rosemary or thyme into the dough for a fragrant twist.
- Sweet Cinnamon Bread: Mix in cinnamon and sugar for a delightful breakfast treat.
- Cheese Bread: Incorporate shredded cheese into the dough for a cheesy, savory loaf.
Storage and Make-Ahead Instructions
Want to enjoy this delicious bread throughout the week? Here are some storage tips:
- Room temperature: Store in an airtight container or zip-top bag for up to 4-5 days.
- Freezing: Wrap the loaf tightly in plastic wrap and foil, then freeze for up to 3 months. Thaw at room temperature before slicing.
- Make-ahead: You can prepare the dough up to the first rise, then refrigerate it overnight. Allow it to come to room temperature before shaping.
Frequently Asked Questions
Got questions? We’ve got answers! Here are some common queries about making fluffy sandwich bread:
- Can I use active dry yeast instead of instant yeast? Yes! Just activate it in warm water first.
- What if my bread doesn’t rise? Ensure your yeast is fresh and the environment is warm enough for rising.
- Can I make this bread without a stand mixer? Absolutely! You can knead by hand—just be prepared for a workout!
- How do I know when my bread is done baking? The internal temperature should be between 190-200°F (88-93°C).
- Can I add ingredients like nuts or seeds? Yes! Just fold them into the dough at the end of the kneading process.
- How should I slice the bread? Use a serrated knife for clean, even slices.
- What can I make with leftovers? Try French toast, bread pudding, or simply toast for breakfast!
- Is this recipe suitable for vegan adaptations? Yes! Substitute the egg with flaxseed meal and use plant-based milk and butter.
Nutritional Tips and Dietary Adaptations
This fluffy sandwich bread can fit into a variety of dietary needs:
- Whole grain option: Use whole wheat flour for added fiber and nutrients.
- Dairy-free version: Substitute whole milk with almond or oat milk and use vegan butter.
- Low-carb alternative: Consider using almond flour or a low-carb bread mix for keto-friendly options.
Essential Equipment for Success
Having the right tools can make a big difference in your baking experience:
- Mixing bowls: A large mixing bowl for combining ingredients is essential.
- Measuring cups and spoons: Accurate measurements are key to successful baking.
- Stand mixer: While optional, it can make kneading easier and faster.
- Loaf pan: A 9×5 inch loaf pan is perfect for shaping your bread.
- Wire rack: Helps cool the bread evenly after baking.
Serving Suggestions
Once your bread is baked and cooled, it’s time to enjoy! Here are some delicious serving ideas:
- Classic sandwiches: Fill with your favorite meats, cheeses, and veggies for a satisfying lunch.
- French toast: Dip slices in an egg mixture and cook on a skillet for a decadent breakfast.
- Garlic bread: Spread with butter and garlic, then toast briefly for a tasty side dish.
- Toast with toppings: Enjoy with avocado, jam, or peanut butter for a quick snack.
Conclusion
Congratulations! You’ve just mastered the art of making fluffy sandwich bread from scratch. With this recipe in your toolkit, you can impress your family and friends with your baking skills while enjoying the deliciousness of homemade bread. Remember, every loaf you bake is a chance to experiment, learn, and have fun in the kitchen. So go ahead, roll up your sleeves, and let the baking begin!

Fluffy Sandwich Bread - Easy Homemade Soft Recipe
Ingredients
Yeast
- 2 1/4 teaspoons active dry yeast
- 2 tablespoons honey
- 1/4 cup warm water
Salt
- 1 1/2 teaspoons salt
Butter
- 5 tablespoons unsalted butter, softened
Egg
- 1 large egg, at room temperature
Flour
- 6 cups all-purpose flour, plus more for dusting
Milk
- 2 cups whole milk, warmed
Instructions
- Activate yeast: Mix warm water and honey, add yeast, and let sit until foamy.
- Add ingredients: Mix salt, butter, milk, flour, and egg into the yeast mixture to form a shaggy dough.
- Knead the dough until smooth and elastic, then let rise until doubled in size.
- Shape the dough, place in a greased loaf pan, and let rise until about 1 inch above the pan rim.
- Bake at 375°F (190°C) for 30-35 minutes until golden brown and hollow sounding when tapped.
- Cool completely on a wire rack before slicing.

