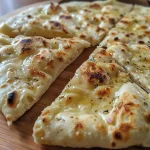
Why You’ll Love Making Garlic Breadsticks
If you’ve ever craved warm, buttery garlic breadsticks that melt in your mouth, you’re in for a treat! This recipe takes you through the delightful journey of crafting homemade garlic breadsticks that are not only easy to make but also incredibly satisfying. Picture this: soft, pillowy breadsticks brushed with garlic butter, the aroma filling your kitchen, and the anticipation of that first bite. Let’s dive into why this recipe will become a staple in your kitchen!
- Quick and Easy: This recipe is designed for busy home cooks. From start to finish, you can have these garlic breadsticks ready in under an hour!
- Perfect Texture: The breadsticks are fluffy on the inside with a lightly crisp exterior, making them ideal for dipping or enjoying on their own.
- Common Pantry Ingredients: You probably have most of these ingredients at home, so there’s no need for a last-minute grocery run!
- Versatile Pairing: These garlic breadsticks complement a variety of dishes, from pasta to soups, and even salads, elevating your meal effortlessly.
- Impressive Presentation: Serve these breadsticks at your next gathering, and watch your friends and family rave over them – they’ll think you’re a kitchen superstar!
Ingredients for Irresistible Garlic Breadsticks
Here’s what you’ll need to make these delicious garlic breadsticks:
- 2 1/4 teaspoons active dry yeast: The key to fluffy breadsticks that rise perfectly.
- 1 cup warm water (about 43°C / 110°F): Essential for activating the yeast. Make sure it’s not too hot or cold!
- 1 tablespoon granulated sugar: This helps activate the yeast and adds a hint of sweetness.
- 2 tablespoons olive oil: Adds richness and moisture to the dough.
- 2 1/2 cups all-purpose flour: Provides structure to the breadsticks.
- 1 teaspoon fine salt: Enhances the overall flavor.
- 3 tablespoons unsalted butter, melted: For brushing on top before and after baking.
- 3 cloves garlic, minced: The star ingredient for that irresistible garlic flavor.
- 2 tablespoons fresh parsley, finely chopped: Adds freshness and color.
- 1/2 teaspoon dried oregano: For an Italian touch.
- 1/2 teaspoon dried basil: Another herb that enhances flavor.
- 1/2 teaspoon garlic powder: Extra garlic flavor without the chopping!
- 1/2 teaspoon fine salt: For the garlic butter mixture.
- 2 tablespoons grated Parmesan cheese: For that cheesy finish on top!
Step-by-Step Method to Make Garlic Breadsticks
Follow these simple steps to whip up your garlic breadsticks:
- In a large mixing bowl, combine warm water, sugar, and yeast. Whisk briefly and let sit for 5–10 minutes until foamy.
- Stir in olive oil, salt, and 2 cups of the flour, mixing with a wooden spoon until a shaggy dough forms.
- Add the remaining 1/2 cup flour a little at a time and knead in the bowl or on a lightly floured surface for 5–7 minutes until smooth and elastic.
- Shape the dough into a ball, place it back in a lightly oiled bowl, cover with a kitchen towel or plastic wrap, and let rise in a warm place for about 1 hour or until doubled in size.
- Line a baking sheet with parchment paper and lightly dust your work surface with flour.
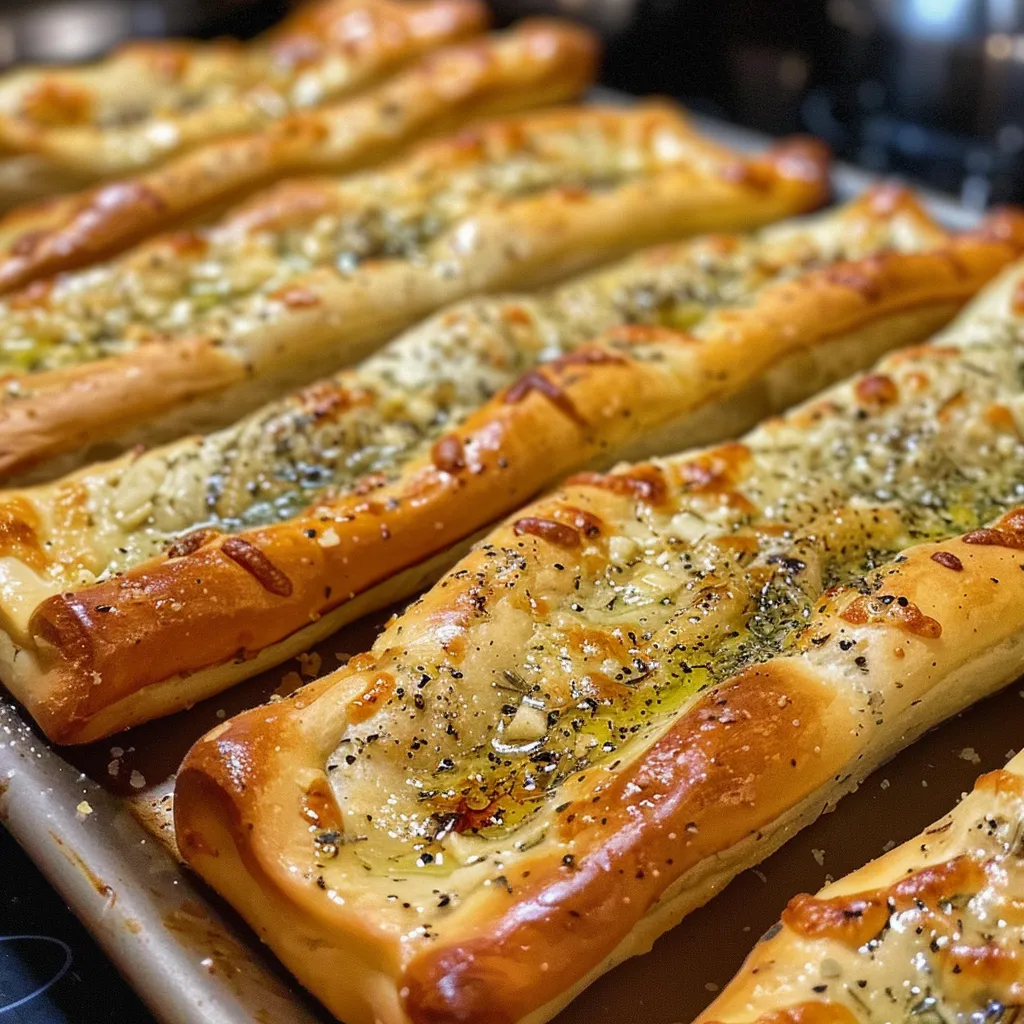
- Punch down the risen dough, turn it out onto the floured surface, and roll it into a rectangle about 1 cm (3/8 inch) thick.
- Use a sharp knife or pizza cutter to slice the dough into 12 equal strips.
- Transfer the strips to the prepared baking sheet, spacing them slightly apart.
- Cover the shaped breadsticks lightly with a kitchen towel and let rest for 10–15 minutes while you preheat the oven to 200°C (400°F).
- In a small mixing bowl, combine melted butter, minced garlic, parsley, oregano, basil, garlic powder, and salt, stirring well.
- Brush half of the garlic butter mixture over the tops of the breadsticks.
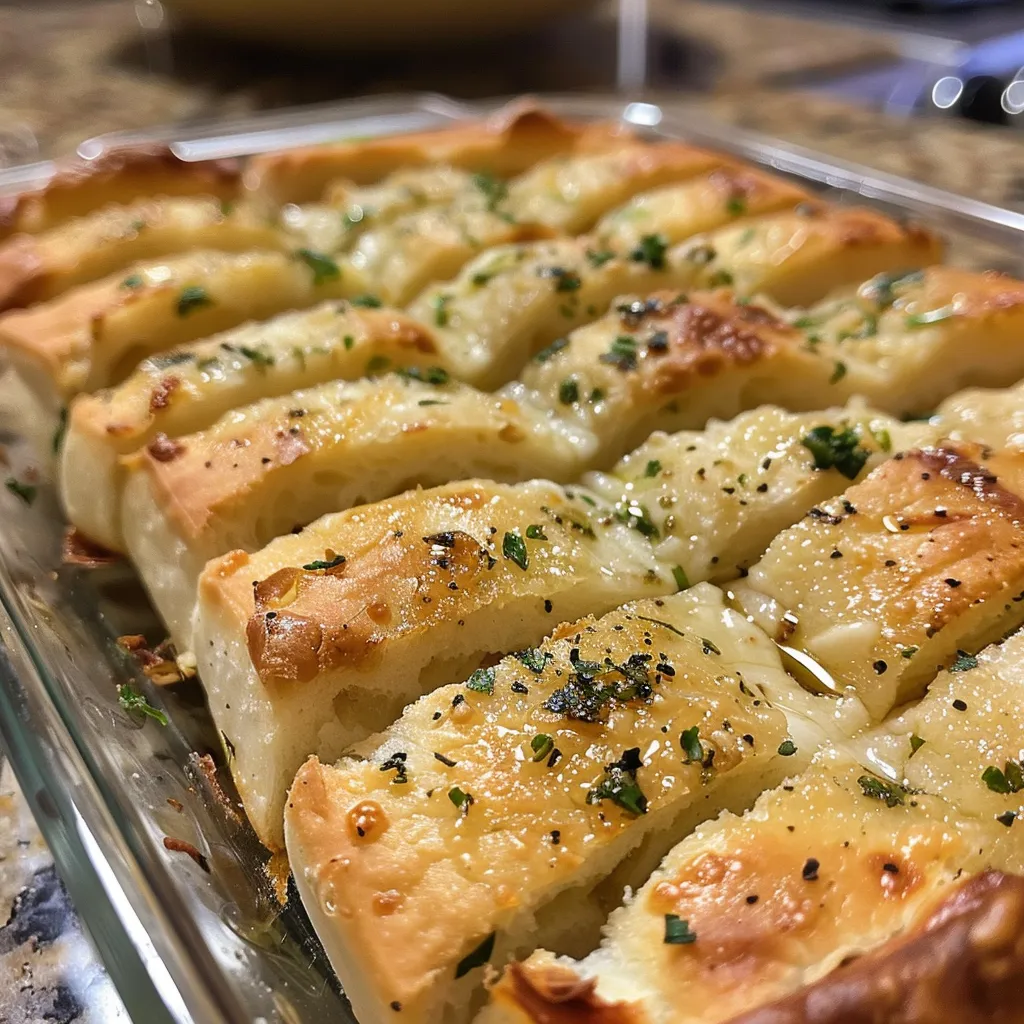
- Bake the breadsticks for 12–15 minutes or until puffed and lightly golden brown.
- Remove from the oven and immediately brush with the remaining garlic butter.
- Sprinkle the hot breadsticks with grated Parmesan cheese and let cool for 5 minutes before serving.
Pro Tips for Perfect Garlic Breadsticks
To ensure your garlic breadsticks come out perfectly every time, check out these expert insights:
- Use Fresh Ingredients: Fresh yeast and garlic will make a noticeable difference in flavor.
- Monitor the Temperature: Ensure your water is warm but not scalding to keep the yeast active.
- Knead Properly: Kneading the dough helps develop gluten, giving your breadsticks the right texture.
- Resting Time is Key: Don’t rush the rising process – it’s crucial for airy breadsticks.
- Brush Generously: Be sure to brush the garlic butter on both before and after baking for maximum flavor.
- Experiment with Flavors: Don’t hesitate to add other herbs or spices to customize your breadsticks.
- Keep an Eye on Baking Time: Ovens can vary, so check for a golden brown color to know they’re done.
- Serve Warm: For the best experience, serve these breadsticks warm out of the oven!
Common Mistakes and Troubleshooting
Even the most seasoned bakers face hiccups now and then! Here’s how to overcome common issues:
- Dough Not Rising: Make sure your yeast is active; it should be foamy within 5-10 minutes of mixing.
- Hard Breadsticks: Overbaking can lead to tough breadsticks; keep an eye on them in the oven.
- Too Salty: Double-check your measurements; a little salt goes a long way in bread!
- Flavors Not Strong Enough: Feel free to increase the garlic or herbs to suit your taste.
Delicious Variations to Try
Get creative with your garlic breadsticks by trying these fun variations:
- Cheesy Garlic Breadsticks: Add mozzarella or cheddar cheese on top before baking for a cheesy twist.
- Herb-Infused Breadsticks: Mix in different herbs like thyme, rosemary, or even chili flakes for a kick.
- Stuffed Garlic Breadsticks: Roll the dough around cheese sticks or pepperoni for a fun surprise!
- Gluten-Free Version: Substitute all-purpose flour with a gluten-free blend for a celiac-friendly option.
Storage and Make-Ahead Instructions
Want to prepare ahead of time? Here’s how to store and reheat:
- Make Ahead: You can prepare the dough a day in advance. Just let it rise, then refrigerate overnight. Allow it to come to room temperature before shaping.
- Storage: Keep leftover breadsticks in an airtight container at room temperature for up to 2 days.
- Freezing: Freeze unbaked breadsticks, then bake directly from the freezer, adding a couple of extra minutes to the baking time.
- Reheating: Warm leftover breadsticks in the oven at 180°C (350°F) for about 5-7 minutes for the best texture.
FAQ: Your Garlic Breadsticks Questions Answered
Here are some frequently asked questions to help guide you:
- Can I use instant yeast instead of active dry yeast? Yes, you can! Just mix it directly with the flour.
- What can I serve with garlic breadsticks? They pair wonderfully with pasta, soups, salads, or can be enjoyed as a snack!
- How do I know when the breadsticks are done? Look for a golden brown color on top and a soft puffiness.
- Can I make these vegan? Absolutely! Substitute the butter with vegan butter and omit the cheese.
- What if my dough is too sticky? Add a little more flour, a tablespoon at a time, until you achieve the right consistency.
- Can I add cheese to the dough? Yes! Mixing in some grated cheese into the dough can add a lovely flavor.
- Is this recipe suitable for a bread machine? Yes! You can use the dough cycle for convenience.
- Can I use dried garlic instead of fresh? Yes, but use a smaller amount as dried garlic is more concentrated.
Nutritional Tips and Dietary Adaptations
Want to make this dish fit your dietary needs? Here are some tips:
- Low-Carb Option: Use almond flour or coconut flour to create a low-carb version.
- Dairy-Free: Use olive oil instead of butter and omit cheese for a dairy-free recipe.
- Whole Wheat Variation: Substitute half of the all-purpose flour with whole wheat flour for added fiber.
- Healthier Fats: Opt for avocado oil instead of olive oil for a different flavor and nutrient profile.
Equipment Recommendations
To make the process seamless, here’s what you’ll need:
- Mixing Bowls: A large bowl for mixing and a small one for the garlic butter.
- Wooden Spoon: For mixing the dough – a trusty kitchen tool!
- Kitchen Towel: Keeps the dough warm while it rises.
- Baking Sheet: A large, flat sheet for baking the breadsticks.
- Parchment Paper: For easy cleanup and to prevent sticking.
Serving Suggestions
These garlic breadsticks can be enjoyed in various ways:
- Dipping Sauces: Serve with marinara, alfredo, or a garlic herb olive oil for dipping.
- As a Side: Pair with your favorite pasta dish or a hearty soup.
- Appetizers: Cut them into smaller pieces for a delightful appetizer at gatherings.
- Snack Time: Enjoy them on their own with a sprinkle of extra cheese or herbs!
Final Thoughts
Making your own garlic breadsticks is not just an enjoyable experience; it’s a sure way to impress your family and friends while filling your kitchen with delightful aromas. With this comprehensive guide, you’re now equipped to whip up these irresistible breadsticks that will complement any meal beautifully. So roll up your sleeves, gather your ingredients, and let’s create some garlic breadstick magic together!
Garlic Bread Sticks
Ingredients
Yeast
- 2 1/4 teaspoon active dry yeast
- 1 cup warm water (about 43°C / 110°F)
- 1 tablespoon granulated sugar
- 2 tablespoon olive oil
- 2 1/2 cup all-purpose flour
- 1 teaspoon fine salt
- 3 tablespoon unsalted butter melted
- 3 clove garlic minced
- 2 tablespoon fresh parsley finely chopped
- 1/2 teaspoon dried oregano
- 1/2 teaspoon dried basil
- 1/2 teaspoon garlic powder
- 2 tablespoon grated Parmesan cheese
Instructions
- Combine warm water, sugar, and yeast; let sit until foamy (~5-10 min).
- Mix in olive oil, salt, and 2 cups flour; form shaggy dough.
- Add remaining flour gradually; knead until smooth (~5-7 min).
- Let dough rise in oiled bowl for 1 hour or until doubled.
- Shape dough into rectangle, cut into 12 strips, and let rest 10-15 min.
- Preheat oven to 200°C (400°F). Brush with garlic butter, bake 12-15 min, then brush remaining butter and sprinkle Parmesan.