
Get Ready for a Deliciously Fun Snack Adventure!
Welcome to Snack Nova, where cooking is all about joy and creativity! Today, we’re diving into a delightful recipe for granola cups that are not just tasty but also super versatile. These cups are filled with creamy yogurt and are perfect for breakfast, snacks, or even dessert! Whether you’re a kitchen novice or a seasoned pro, this recipe will have you whipping up deliciousness in no time. Let’s get started!
Why You’ll Love This Recipe
This recipe isn’t just about creating tasty snacks; it’s about making cooking enjoyable and stress-free. Here are some specific reasons to fall in love with these granola cups:
- Quick and Easy: With minimal prep time and simple ingredients, you can whip these up in under 30 minutes!
- Customizable: Feel free to play around with ingredients! Add your favorite fruits, nuts, or seeds to make them your own.
- Healthy and Nutritious: Packed with oats and fruit, these cups are a wholesome snack option that keeps you feeling full.
- Perfect for Meal Prep: Make a batch at the beginning of the week for quick grab-and-go breakfasts or snacks.
- Fun to Make: Involve the kids! They’ll love helping to mix and fill the cups, making it a fun family activity.
Ingredients Breakdown
Here’s what you’ll need to make these scrumptious granola cups. Don’t worry if you’re missing something; substitutions are included!
- 1/4 cup butter or coconut oil: Softened for easy mixing. If you want a dairy-free option, coconut oil is perfect!
- 1/4 cup honey: Adds natural sweetness. For a vegan alternative, maple syrup works wonderfully.
- 1 tsp vanilla extract: Enhances flavor; feel free to experiment with almond extract for a different twist.
- 1 banana: Mashed (about 1/2 cup). This adds moisture and natural sweetness. If you’re out of bananas, unsweetened applesauce is a great substitute!
- 1 cup oat flour: A gluten-free option that makes these cups deliciously soft. You can easily make your own by blending oats in a food processor.
- 1 cup oats: Use quick, minute, or rolled oats for a hearty texture.
- 1 tsp cinnamon: For warmth and flavor. Feel free to add a pinch of nutmeg for extra spice!
- 1/4 tsp salt: Enhances flavor and balances sweetness.
- 2 tbsp milk (if needed): This helps bind the mixture if it’s too crumbly.
Step-by-Step Instructions for Making Granola Cups
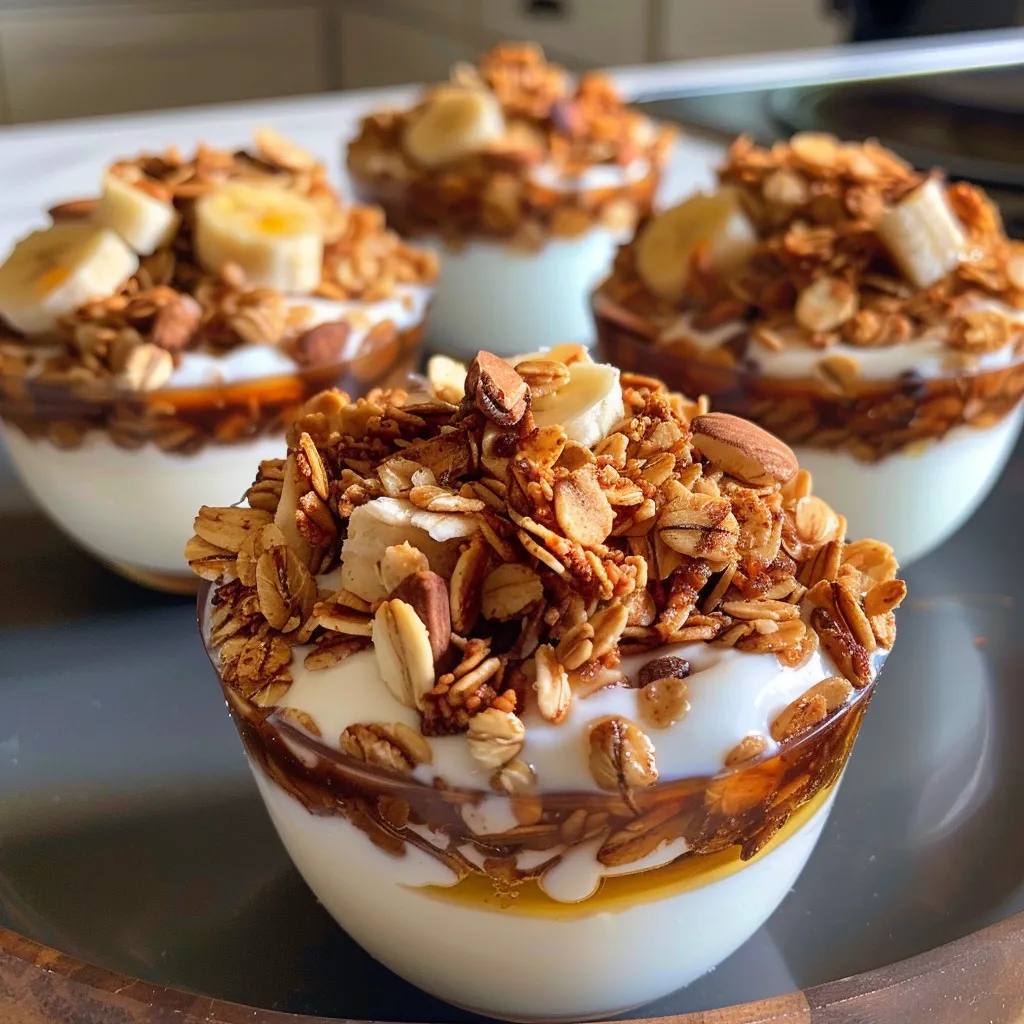
Let’s get cooking! Follow these easy steps to create your granola cups:
- Preheat the oven: Set it to 350°F (175°C) to prepare for baking.
- Prep your muffin tin: Grab a silicone muffin tin or spray a regular muffin tin with non-stick spray.
- Mix the wet ingredients: In a large mixing bowl, combine the softened butter, honey, vanilla, and mashed banana until smooth.
- Add the dry ingredients: Stir in the oats, oat flour, cinnamon, and salt until well combined. If the mixture is too crumbly, add the milk a little at a time until it holds together.
- Fill the muffin cavities: Divide the mixture evenly among 8-10 muffin cavities (about 2 heaping tablespoons per cavity). Press down firmly to form an even layer and gently press the mixture up the sides of the cups.
- Bake: Place in the oven and bake for 12-15 minutes, or until the edges are golden brown.
- Cool and serve: Allow the granola cups to cool in the pan before loosening them with a butter knife and removing. Serve them warm or cold topped with your favorite yogurt, ice cream, or fruit!
Pro Tips for Perfect Granola Cups
Here are some expert insights to ensure your granola cups turn out perfectly every time:
- Don’t Overmix: Mix just until combined to keep the texture light and airy.
- Use Ripe Bananas: The riper the banana, the sweeter and more flavorful your cups will be.
- Adjust Sweetness: Taste the mixture before baking and adjust the sweetness to your liking.
- Experiment with Flavors: Add a teaspoon of cocoa powder for a chocolate twist or mix in some peanut butter for added richness.
- Check for Doneness: Ovens vary; keep an eye on your cups to avoid overbaking.
- Cooling is Key: Letting them cool fully allows them to firm up for easier removal and better texture.
- Store Properly: If you have leftovers, store them in an airtight container to maintain freshness.
- Make Ahead: These cups can be made a few days in advance, making them a perfect meal prep option!
Common Mistakes and Troubleshooting
Here are some common pitfalls and how to avoid them:
- Too Crumbly: If your mixture is too dry, add more milk gradually until it holds together.
- Too Wet: If the mixture is too wet and won’t hold shape, add a little more oat flour.
- Burnt Edges: Keep an eye on the cups as they bake; if they start to brown too quickly, cover them loosely with foil.
- Sticking to the Pan: Ensure your muffin tin is well-greased or use silicone molds for easy removal.
Variations to Try
Get creative with these fun variations of your granola cups:
- Chocolate Chip Granola Cups: Stir in a handful of chocolate chips before baking for a sweet surprise.
- Nutty Granola Cups: Add chopped nuts like almonds or walnuts for added crunch and healthy fats.
- Berry Bliss Granola Cups: Top with fresh or frozen berries before adding yogurt for a fruity twist.
- Spiced Pumpkin Granola Cups: Substitute half of the banana with pumpkin puree and add pumpkin spice for a fall favorite.
Storage and Make-Ahead Instructions
These granola cups are perfect for meal prep! Here’s how to store them:
- Room Temperature: Store in an airtight container for up to 3 days.
- Refrigerator: For longer freshness, keep them in the fridge for up to a week.
- Freezing: Freeze unfilled cups in a single layer, then transfer to a freezer bag for up to 3 months. Thaw before adding yogurt and toppings.
Frequently Asked Questions
Here are some common questions about making granola cups:
- Can I use other types of flour? Yes! Whole wheat flour or almond flour can be used, but adjust the liquid accordingly.
- What if I don’t have a muffin tin? You can use silicone molds, mini loaf pans, or even a baking dish to create bar-like granola squares.
- Are these granola cups gluten-free? Yes, if you use certified gluten-free oats and oat flour.
- Can I make these vegan? Absolutely! Substitute honey with maple syrup and butter with coconut oil.
- What’s the best way to serve them? Top with yogurt, fresh fruit, or a drizzle of nut butter for a delicious treat!
- How can I add protein? Mix in protein powder or top with Greek yogurt for a protein boost.
- Can I double the recipe? Yes! Just make sure to use a larger baking dish or more muffin tins.
- How do I know when they’re done? The edges should be golden brown, and they should feel firm to the touch.
Nutritional Tips and Dietary Adaptations
These granola cups are not only delicious but can also be tailored to fit various dietary needs:
- Low Sugar: Reduce or omit honey and use unsweetened yogurt or fruit to add natural sweetness.
- High Protein: Add protein powder to the mixture or serve with Greek yogurt.
- Dairy-Free: Use coconut yogurt or almond milk instead of dairy products.
- Nut-Free: If allergies are a concern, avoid nuts and opt for seeds like pumpkin or sunflower.
Equipment Recommendations
To make your cooking experience smooth, here’s some equipment you might need:
- Silicone Muffin Tin: Easiest for removing the cups without sticking.
- Mixing Bowls: A set of different sizes will help you prep efficiently.
- Measuring Cups and Spoons: Accurate measurements lead to consistent results.
- Spatula: For mixing and scraping down the sides of your bowl.
Serving Suggestions
These granola cups are fantastic on their own, but here are some serving ideas to elevate your snack:
- With Yogurt: Top with your favorite yogurt and fresh fruit for a satisfying breakfast.
- With Ice Cream: Transform them into a dessert by topping with a scoop of ice cream.
- With Nut Butter: Drizzle almond or peanut butter for extra creaminess and flavor.
- On a Platter: Arrange on a serving platter as a fun and healthy treat for parties or gatherings.
Now that you have all the knowledge and tools at your fingertips, it’s time to get cooking! Remember, the kitchen is your playground, so don’t be afraid to experiment and have fun with these granola cups. Happy cooking, and I can’t wait to hear about your delicious creations!

Granola Cups with Yogurt
Ingredients
Wet ingredients
- 0.25 cup butter or coconut oil (softened)
- 0.25 cup honey
- 1 tsp vanilla
- 0.5 cup mashed banana (about 1/2 cup)
Dry ingredients
- 1 cup oat flour
- 1 cup oats (quick, minute, or rolled)
- 1 tsp cinnamon
- 0.25 tsp salt
- 2 tbsp milk (if needed)
Instructions
- Preheat oven to 350°F (175°C). Prepare muffin tin with non-stick spray or silicone liners.
- Mix butter, honey, vanilla, and mashed banana until smooth.
- Add oats, oat flour, cinnamon, and salt; mix well. If too crumbly, add 2 tbsp milk.
- Divide mixture evenly into muffin cavities, pressing down to form a base and sides.
- Bake for 12-15 minutes until edges are golden. Cool, then remove from pan.


![['Juicy beef burritos filled with colorful ingredients presented on a plate.', 'Close-up view of beef burritos with melted cheese and garnishes.', 'A side view of a beef burrito showcasing its filling and tortilla.', 'Deliciously prepared beef burritos drizzled with sauce and garnished with cilantro.']](https://snacknova.com/wp-content/uploads/2026/06/beef-burritos_1_U1-1-150x150.webp)