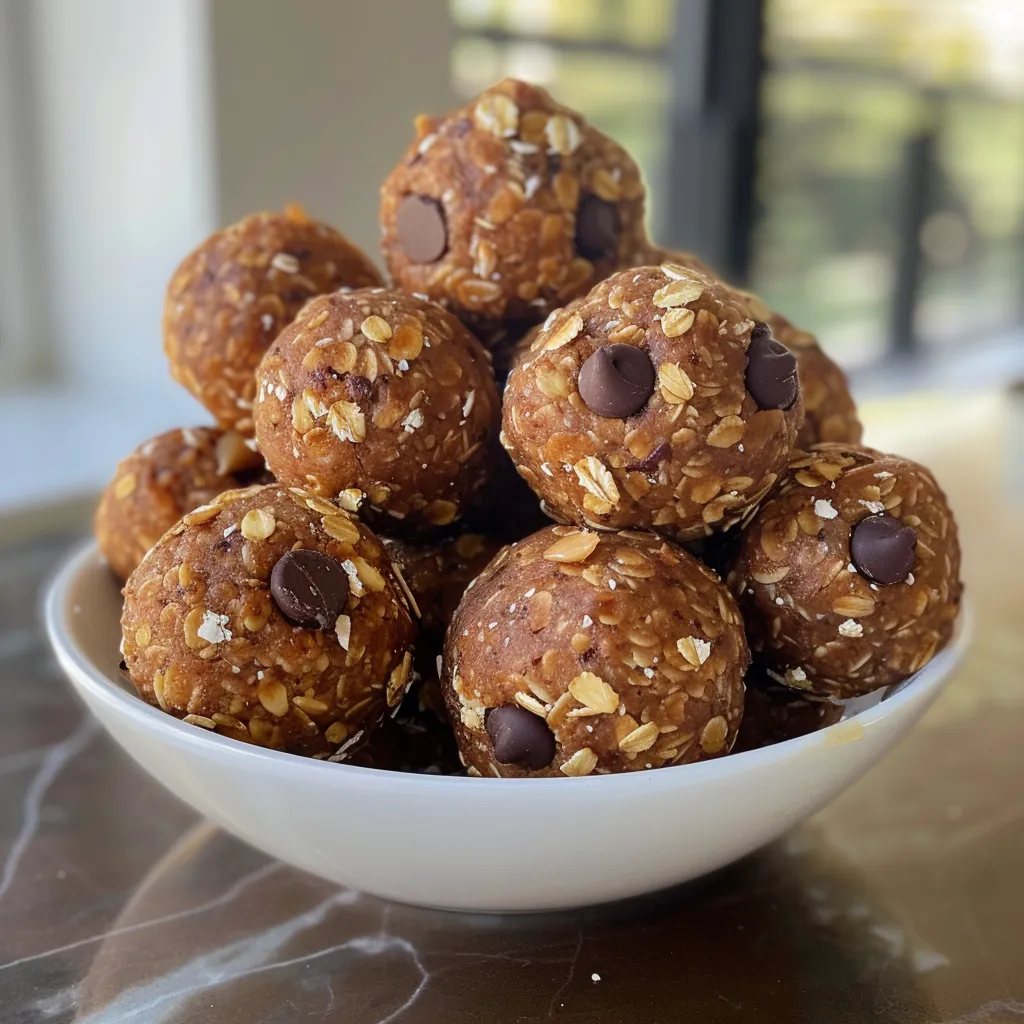
Welcome to the World of Peanut Butter Bliss Balls!
Are you looking for a deliciously simple snack or dessert that will keep you energized throughout the day? Look no further! Peanut Butter Bliss Balls are a delightful treat that are not only easy to make but also packed with nutritional goodness. In this comprehensive guide, we’ll explore everything you need to know about making these scrumptious bites—from the ingredients to expert tips and creative variations. So grab your apron, and let’s dive into the wonderful world of Peanut Butter Bliss Balls!
Why You’ll Love This Recipe
- Quick and Easy: With just a handful of ingredients, you can whip up a batch in under 30 minutes!
- No Baking Required: These bliss balls are a no-bake treat, making them perfect for hot days or when you’re short on time.
- Customizable: Personalize your bliss balls with various mix-ins and flavors to suit your taste.
- Nutritious Snack: Packed with healthy fats, fiber, and protein, these bliss balls are a guilt-free indulgence.
- Make-Ahead Friendly: Prepare a batch in advance for quick, on-the-go snacking throughout the week!
Ingredients Breakdown
Let’s take a closer look at the ingredients that make these Peanut Butter Bliss Balls so delicious and nutritious:
- 1 cup creamy peanut butter: The star ingredient! Choose a natural version with no added sugar for maximum health benefits.
- 1/2 cup honey or maple syrup: Both sweeteners work wonderfully, but maple syrup is a great vegan option.
- 2 cups rolled oats: Provides a wholesome base and adds fiber to your bliss balls.
- 1/2 cup chocolate chips: For a touch of indulgence! Use dark chocolate or dairy-free chips for health-conscious choices.
- 1/4 cup ground flaxseed (optional): A great source of omega-3 fatty acids and fiber. Optional but highly recommended!
- 1 tsp vanilla extract: Adds a lovely depth of flavor.
- A pinch of salt: Balances the sweetness and enhances the flavors.
How to Make Peanut Butter Bliss Balls
Ready to roll up your sleeves? Here’s a step-by-step guide to making the perfect Peanut Butter Bliss Balls:
- Step 1: In a large mixing bowl, combine the creamy peanut butter and honey (or maple syrup). Stir until smooth.
- Step 2: Add the vanilla extract and a pinch of salt to the mixture, and stir to combine.
- Step 3: Gradually mix in the rolled oats, ground flaxseed (if using), and chocolate chips.
- Step 4: Use a spatula or your hands to ensure all ingredients are evenly incorporated.
- Step 5: Form small balls, about 1 inch in diameter, and place them on a parchment-lined baking sheet.
- Step 6: Refrigerate the balls for at least 30 minutes to firm up.
- Step 7: Enjoy your Peanut Butter Bliss Balls as a nutritious snack or dessert!
- Step 8: Store any leftovers in an airtight container in the refrigerator.
Pro Tips for Perfect Bliss Balls
- Mix Well: Ensure all ingredients are thoroughly mixed to avoid dry pockets in your bliss balls.
- Chill Time: Don’t skip the chilling step! It helps the bliss balls firm up and hold their shape.
- Adjust Sweetness: Taste the mixture before rolling; if you prefer sweeter bliss balls, add more honey or maple syrup.
- Texture Matters: For a creamier texture, use natural peanut butter that’s well-stirred.
- Hands On: Get your hands involved when rolling; it’s more effective and adds a personal touch!
- Keep It Clean: Wet your hands slightly to prevent the mixture from sticking while rolling.
- Experiment: Don’t be afraid to try different nut butters or add-ins like dried fruit or seeds!
- Stay Organized: Set up your ingredients and tools before you start to make the process smoother.
Common Mistakes and Troubleshooting
Even the best of us make mistakes in the kitchen! Here are some common pitfalls and how to avoid them:
- Too Sticky: If your mixture is too sticky, add a bit more oats or flaxseed to help absorb moisture.
- Balls Falling Apart: If they’re not holding together, try adding a bit more peanut butter or chilling them longer.
- Overmixing: Be careful not to overmix; it can make the bliss balls tough instead of tender.
- Flavorless Balls: If your bliss balls taste bland, try adding a pinch of cinnamon or a splash of almond extract for extra flavor.
Creative Variations of Peanut Butter Bliss Balls
Looking to switch things up? Here are some delicious variations to consider:
- Coconut Bliss Balls: Add shredded coconut to the mixture for a tropical twist.
- Nutty Variants: Substitute peanut butter with almond butter, cashew butter, or sunflower seed butter for different flavors.
- Protein-Packed: Add protein powder to the recipe for a post-workout snack!
- Fruitful Bliss: Incorporate dried fruits like raisins, cranberries, or apricots for a chewy texture and added sweetness.
Storage and Make-Ahead Instructions
One of the best features of these bliss balls is that they store incredibly well!
- Refrigeration: Store your bliss balls in an airtight container in the refrigerator for up to one week.
- Freezing: For longer storage, place them in a freezer-safe container for up to three months. Just thaw them in the fridge before enjoying!
- Make Ahead: Prepare a large batch on the weekend, and you’ll have nutritious snacks ready for the week ahead.
Frequently Asked Questions (FAQs)
- Can I use crunchy peanut butter? Absolutely! Crunchy peanut butter adds delightful texture.
- Are these bliss balls gluten-free? Yes, as long as you use certified gluten-free oats!
- Can I substitute honey with agave syrup? Yes, agave syrup works well as a sweetener in this recipe.
- Are these suitable for kids? Definitely! They make a great energy snack for kids after school.
- How do I make these vegan? Simply use maple syrup instead of honey and ensure your chocolate chips are dairy-free.
- Can I use old-fashioned oats instead of rolled oats? Yes, but the texture may be slightly chewier.
- What can I add for extra flavor? Try adding spices like cinnamon or nutmeg for a warm flavor profile.
- How can I make these protein balls? Add a scoop of your favorite protein powder to the mixture!
Nutritional Tips and Dietary Adaptations
These Peanut Butter Bliss Balls can be tailored to fit various dietary needs:
- Vegan: Use maple syrup and dairy-free chocolate chips.
- Gluten-Free: Ensure to use gluten-free oats.
- Nut-Free: Substitute peanut butter with sunflower seed butter for a nut-free option.
- Lower Sugar: Reduce the amount of honey or maple syrup used for a lower sugar content.
Essential Equipment
Here’s what you’ll need to make these bliss balls:
- Mixing Bowl: A large bowl for combining all the ingredients.
- Spatula or Wooden Spoon: For mixing the ingredients together.
- Parchment Paper: To line your baking sheet and prevent sticking.
- Measuring Cups and Spoons: Accurate measurements make a difference in baking and cooking.
- Refrigerator: To chill the bliss balls to firm them up.
Serving Suggestions
Enjoy these bliss balls as a snack, dessert, or even a breakfast option! Here are some ideas:
- On-the-Go Snack: Perfect for a quick energy boost before or after a workout.
- Lunchbox Treat: Add them to your child’s lunchbox for a nutritious surprise.
- Gourmet Dessert: Serve them with a drizzle of melted dark chocolate for an indulgent dessert.
- Party Platter: Arrange them on a plate for a visually appealing treat at gatherings.
In Conclusion
Peanut Butter Bliss Balls are not just a treat; they are a celebration of flavor, nutrition, and convenience. With their endless possibilities for customization, these no-bake bites are a must-have in your kitchen repertoire. So whether you’re fueling up for a busy day or satisfying a sweet craving, these bliss balls have got you covered. Happy cooking, and may your kitchen adventures be filled with joy and deliciousness!
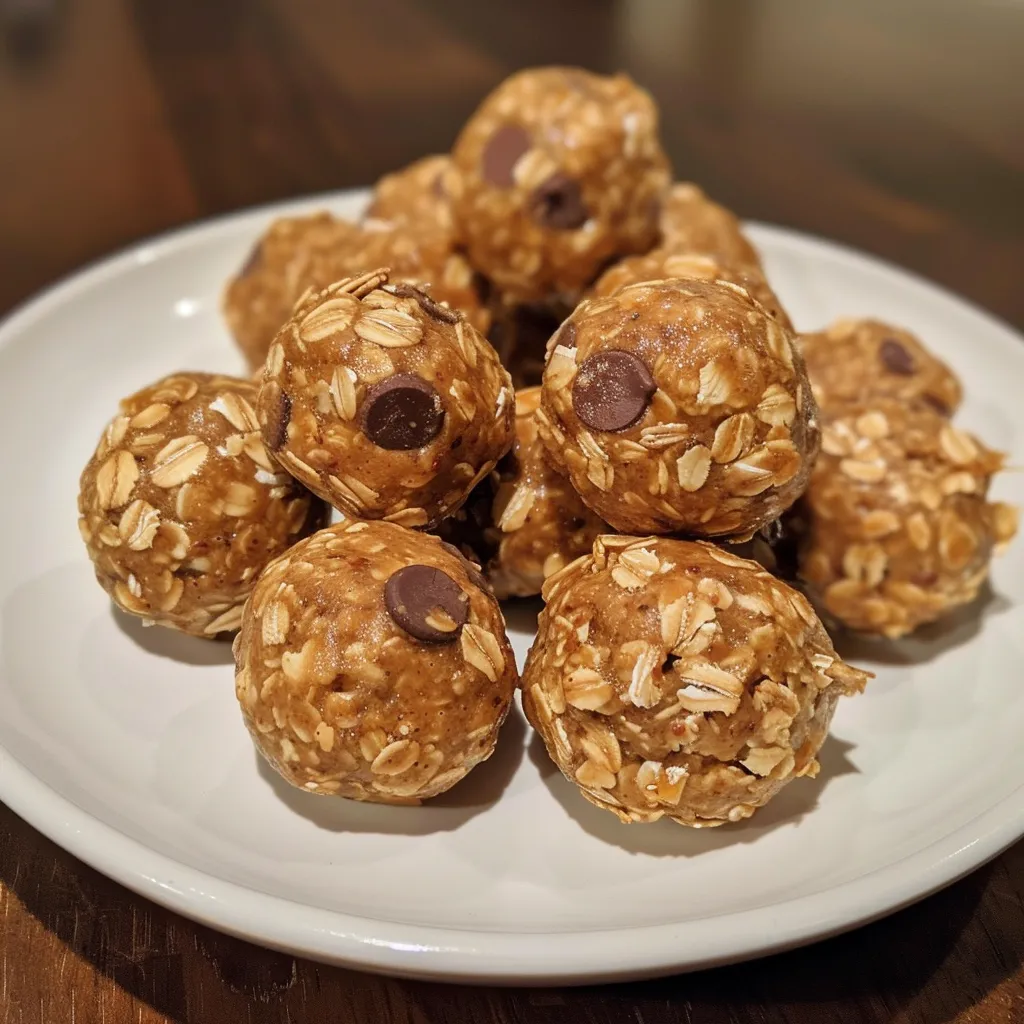
Peanut Butter Bliss Balls
Ingredients
Base
- 1 cup creamy peanut butter
- 1/2 cup honey or maple syrup
- 2 cups rolled oats
- 1/2 cup chocolate chips
- 1/4 cup ground flaxseed (optional)
- 1 tsp vanilla extract
- a pinch salt
Instructions
- Mix peanut butter and honey until smooth.
- Add vanilla and salt, stir well.
- Mix in oats, flaxseed (if using), and chocolate chips.
- Form into 1-inch balls and place on parchment.
- Refrigerate for 30 minutes to set.
- Enjoy as a quick snack or dessert!