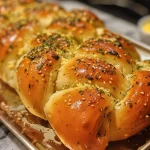
Indulge in a Sweet Treat: No-Bake Peanut Butter Chocolate Oat Cups
Welcome, fellow food lovers! Today, we’re diving into the delicious world of No-Bake Peanut Butter Chocolate Oat Cups. If you’re looking for a quick and easy snack that’s both healthy and indulgent, you’ve landed in the right place! These delightful cups are not only simple to whip up, but they also satisfy that sweet tooth without the guilt. Let’s roll up our sleeves and get cooking!
Why You’ll Love This Recipe
Let’s chat about why these No-Bake Peanut Butter Chocolate Oat Cups are going to become your new favorite snack:
- Quick and Easy: With just a handful of ingredients and minimal prep time, you can whip these up in no time!
- Healthy Ingredients: Packed with oats and peanut butter, these cups offer a nutritious treat filled with fiber and protein.
- Customizable: Feel free to switch up the ingredients to suit your taste—add nuts, seeds, or even dried fruits!
- Kid-Friendly: These are perfect for kids! They can help make them and enjoy a tasty yet healthy snack afterward.
- Make-Ahead Friendly: Prepare them in advance and store them in the fridge for a quick grab-and-go option!
Ingredients Breakdown
Ready to start? Here’s everything you’ll need to make these delightful Peanut Butter Chocolate Oat Cups:
- 70g rolled oats: You can use gluten-free oats if you prefer!
- 2 tbsp smooth peanut butter: If you’re allergic to peanuts, feel free to substitute with almond butter or sunflower seed butter.
- 2 tbsp maple syrup: This natural sweetener adds just the right amount of sweetness!
- Pinch of salt: A little salt enhances the flavors beautifully.
- 100g smooth peanut butter: For the luscious middle layer—oh-so-creamy!
- 1 tbsp maple syrup: To sweeten the peanut butter layer further.
- 70g dark chocolate: Melted, for that irresistible topping.
- Optional drizzle of melted Biscoff spread: For an extra special touch, this adds a wonderful caramel flavor!
Step-by-Step Instructions
Time to get cooking! Follow these easy steps to create your No-Bake Peanut Butter Chocolate Oat Cups:
- Mix the base: In a bowl, combine the rolled oats, 2 tbsp peanut butter, 2 tbsp maple syrup, and a pinch of salt. Stir until well mixed.
- Press into molds: Firmly pack the mixture into a 6-cup silicone muffin tray. This helps them hold their shape!
- Freeze for 15 minutes: Pop the tray in the freezer to allow the oat base to firm up.
- Create the peanut butter layer: In a small bowl, mix 100g peanut butter with 1 tbsp maple syrup until smooth. Spread this on top of the oat bases.
- Add the chocolate topping: Melt the dark chocolate and pour it over the peanut butter layer. You can also drizzle some melted Biscoff spread on top for added flavor!
- Chill: Return to the fridge and let them chill until firm, about 30 minutes.
- Enjoy: Once set, pop them out of the molds and enjoy your delicious creations!
Pro Tips for Perfect Peanut Butter Cups
Want to elevate your No-Bake Peanut Butter Chocolate Oat Cups? Here are some pro tips:
- Texture matters: Ensure your oats are finely ground if you prefer a smoother texture.
- Use quality chocolate: Opt for high-quality dark chocolate for a richer flavor.
- Experiment with flavors: Add a splash of vanilla extract for extra depth.
- Don’t rush the chilling: Allow ample time for the cups to set for the best texture.
- Mix-ins galore: Consider adding chopped nuts or seeds for added crunch!
- Storage tips: Keep your cups in an airtight container in the fridge for up to a week.
- Make them bite-sized: Use mini muffin trays for smaller, snack-sized portions!
- Check the sweetness: Adjust the maple syrup to your taste preference.
Common Mistakes to Avoid
Even the best cooks make mistakes! Here are a few common pitfalls to watch out for:
- **Too much liquid:** If your mixture is too wet, your cups won’t hold their shape. Start with less syrup and adjust as needed.
- **Not pressing firmly:** Be sure to pack the oat mixture tightly into the muffin tray to avoid crumbling.
- **Skipping the chill:** Don’t skip the chilling step—this is essential for the cups to set properly!
- **Using instant oats:** Stick to rolled oats for the best texture and flavor.
Delicious Variations
Feeling adventurous? Here are some fun variations to try:
- Nutty Delight: Add chopped walnuts or almonds for a crunchy twist.
- Fruit Fusion: Mix in dried cranberries or raisins for a fruity kick.
- Chocolate Lovers: Use milk chocolate instead of dark for a sweeter treat.
- Caramel Surprise: Add a layer of caramel sauce between the oat base and peanut butter layer.
Storage and Make-Ahead Instructions
These cups are great for meal prepping! Here’s how to store them:
- Keep them in an airtight container in the fridge for up to one week.
- You can also freeze them for longer storage—just make sure to separate layers with parchment paper to prevent sticking.
- To enjoy, simply thaw in the fridge overnight or at room temperature for a few minutes before eating.
Frequently Asked Questions
Got questions? I’ve got answers! Here are some FAQs about our No-Bake Peanut Butter Chocolate Oat Cups:
- Can I use crunchy peanut butter? Absolutely! Crunchy peanut butter adds a delightful texture.
- What can I substitute for maple syrup? Honey or agave nectar works great as a substitute.
- Is it possible to make these vegan? Yes! Use maple syrup and a nut butter that doesn’t contain any animal products.
- Can I use quick oats instead of rolled oats? It’s best to stick with rolled oats for the best texture.
- How do I know when they’re ready to eat? They should be firm to the touch and hold their shape when removed from the mold.
- What if I don’t have a silicone muffin tray? You can use regular muffin tins lined with paper liners.
- Can I double the recipe? Yes! Just adjust your mixing bowl size accordingly.
- What’s the best way to serve them? Enjoy them chilled for the best flavor and texture!
Nutritional Tips and Dietary Adaptations
Here are some additional tips to keep in mind while enjoying your No-Bake Peanut Butter Chocolate Oat Cups:
- Low Sugar Option: Reduce the amount of maple syrup to lower the sugar content.
- Protein Boost: Add protein powder to the oat mixture for an extra protein kick!
- Healthy Fats: Choose natural nut butters with no added sugars or oils for a healthier treat.
- Gluten-Free: Ensure your oats are certified gluten-free if you have a gluten intolerance.
- High Fiber: These cups are already rich in fiber, but consider adding chia seeds for even more fiber!
Equipment Recommendations
Before you start, make sure you have these handy kitchen tools:
- Silicone muffin tray: This makes it easy to pop out your cups once they’re set.
- Mixing bowls: Use at least two bowls for mixing different layers.
- Measuring cups and spoons: Accurate measurements ensure the best results.
- Spatula: Perfect for spreading the peanut butter layer evenly!
Serving Suggestions
Ready to dig in? Here are some fun serving suggestions:
- Garnish: Drizzle with extra melted chocolate or Biscoff spread for a decadent touch.
- Pair with fruit: Serve alongside fresh fruit for a balanced snack.
- On-the-go option: Pack them as a quick snack for work or school!
And there you have it! A comprehensive guide to making your very own No-Bake Peanut Butter Chocolate Oat Cups. I hope you’re as excited to try this recipe as I am to share it with you! Remember, cooking should be fun and filled with love, so don’t hesitate to add your own creative twist. Enjoy every bite, and happy cooking!
Peanut Butter Chocolate Oat Cups
Ingredients
Base
- 70 g rolled oats (gluten-free if necessary)
- 2 tbsp smooth peanut butter or nut butter of choice
- 2 tbsp maple syrup
- Pinch salt
- 100 g smooth peanut butter
- 1 tbsp maple syrup
- 70 g dark chocolate melted
Optional Drizzle
- Melted Biscoff spread drizzle of Biscoff spread (optional)
Instructions
- Mix base ingredients, press into a silicone muffin tray, and freeze for 15 minutes.
- Combine peanut butter and maple syrup for the middle layer, spread over the frozen base, then top with melted chocolate.
- Refrigerate until the chocolate is hardened. Enjoy!