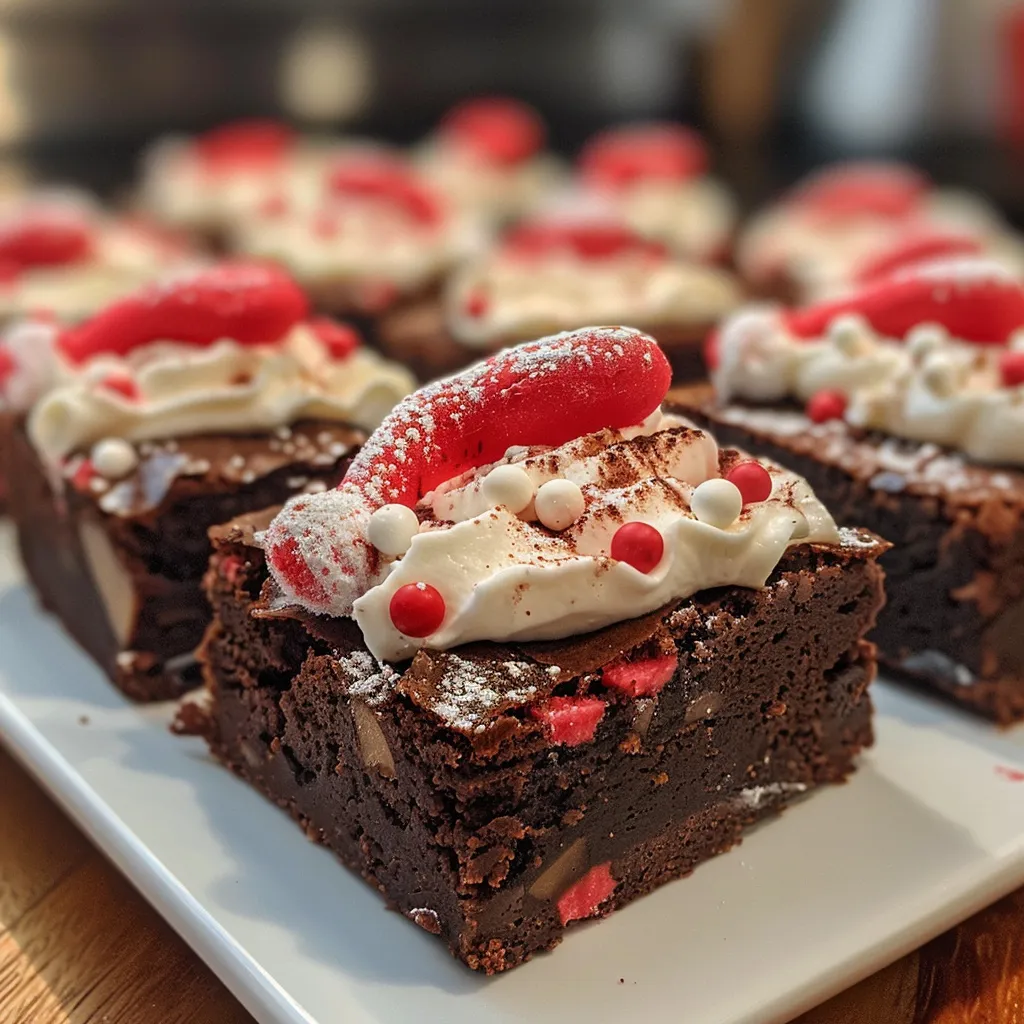
Welcome, fellow food lovers! As December rolls in, it’s time to embrace the festive spirit with a delightful treat that’s sure to bring joy to your holiday gatherings: Santa Hat Brownies! These adorable, decadent brownies topped with fluffy frosting and fresh strawberries are not just a feast for the eyes but also a burst of flavors that will make your taste buds dance. Whether you’re hosting a holiday party or looking for a fun baking project with the kids, these brownies are the perfect way to spread cheer one delicious bite at a time!
In this guide, we’ll take you through everything you need to know to create your very own Santa Hat Brownies. From detailed ingredient breakdowns to expert tips and tricks, we’ve got you covered. So, roll up your sleeves and let’s get baking!
Why You’ll Love This Recipe
- Festive Appeal: These Santa Hat Brownies are not just a treat; they are a show-stopping centerpiece that adds a festive touch to any dessert table.
- Easy to Make: With simple ingredients and straightforward steps, this recipe is perfect for bakers of all skill levels.
- Kid-Friendly Fun: Involve the little ones in the decorating process! They’ll love helping to assemble these delightful treats.
- Decadent Flavor: The combination of fudgy brownies, creamy frosting, and fresh strawberries creates a flavor explosion that is simply irresistible.
- Versatile Treat: Perfect for Christmas parties, potlucks, or as a sweet surprise for family and friends. You can even customize them for other holidays!
Ingredients You’ll Need
To bring these Santa Hat Brownies to life, gather the following ingredients:
- Brownies: Use your favorite brownie mix or homemade recipe for the base.
- Frosting: A fluffy buttercream or whipped cream frosting works best.
- Strawberries: Fresh, firm strawberries are essential for creating the Santa hats!
- Optional Garnishes: Mini chocolate chips or holiday sprinkles can add a festive touch.
Ingredient Substitutions
- Brownie Mix: For a gluten-free option, use a gluten-free brownie mix.
- Frosting: Vegan butter can be used to make a dairy-free frosting.
- Strawberries: If strawberries aren’t available, consider using raspberries or cherries.
How to Make Santa Hat Brownies
Now that you have your ingredients ready, let’s dive into the step-by-step process of creating these festive treats!
Step 1: Bake the Brownies
Prepare your brownie mix according to the package instructions or your favorite homemade recipe. Pour the batter into a greased baking pan and bake until a toothpick inserted in the center comes out clean. Let them cool completely before decorating.
Step 2: Prepare the Frosting
While the brownies are cooling, whip up your frosting. In a mixing bowl, beat together softened butter, powdered sugar, vanilla extract, and a splash of milk until fluffy. Adjust the consistency with more milk or sugar as needed.
Step 3: Assemble the Santa Hats
Once the brownies have cooled, cut them into squares. Take each square and pipe a generous amount of frosting on top. This will be the base of your Santa hat.
Step 4: Add Strawberries and Frosting Dot
Place a strawberry, stem-side down, on top of the frosting. Add a small dollop of frosting at the tip of the strawberry to complete the look of Santa’s hat.
Step 5: Chill and Serve
For the best results, chill the assembled brownies in the refrigerator for about 30 minutes before serving. This helps the frosting set and makes them even more delightful to eat!
Pro Tips for Making Santa Hat Brownies
- Use Ripe Strawberries: Choose fresh, firm strawberries that are ripe but not overripe to ensure they hold their shape on top of the brownies.
- Let Brownies Cool Completely: Allowing the brownies to cool fully before cutting keeps the edges clean and prevents the frosting from melting.
- Experiment with Flavors: Feel free to mix in peppermint extract or a splash of orange zest to your frosting for a unique twist!
- Keep it Simple: If you’re short on time, store-bought brownies and frosting work just as well as homemade.
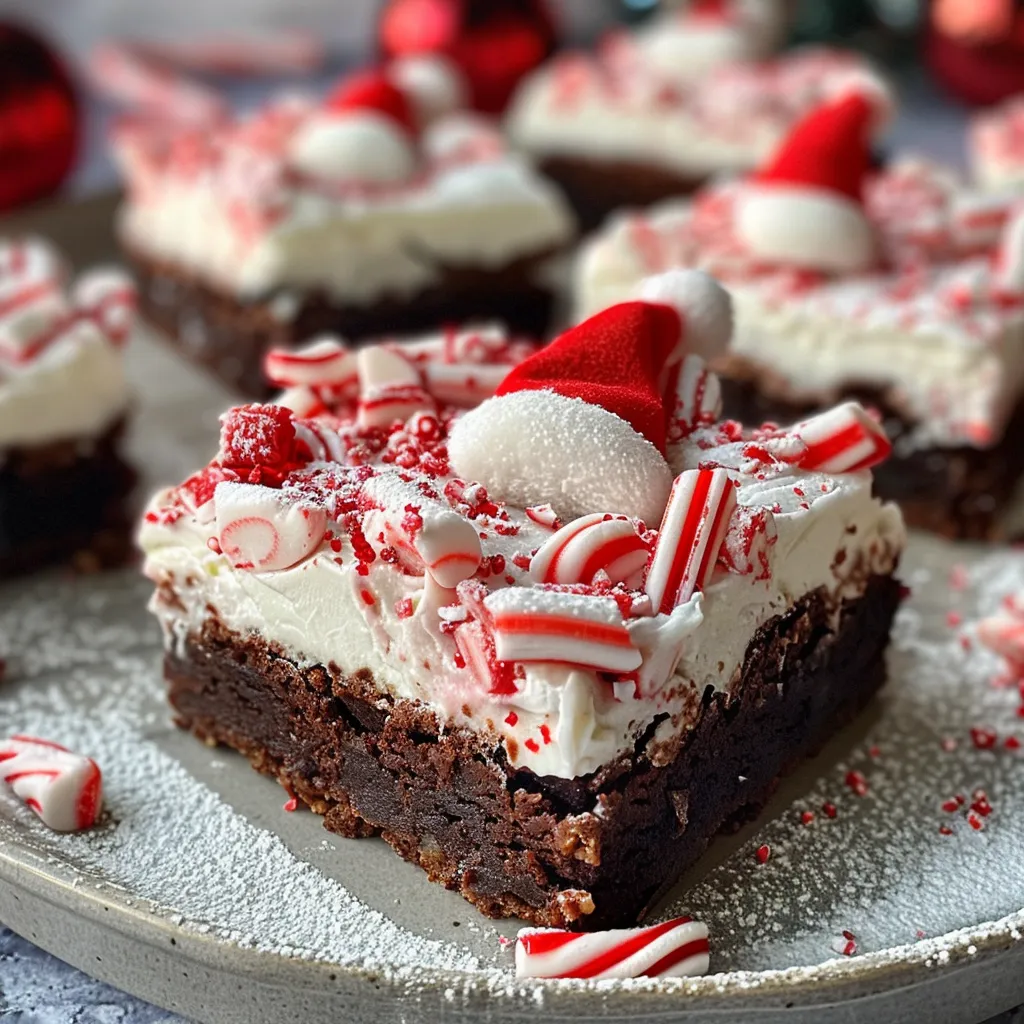
- Dress Them Up: Get creative with toppings! Drizzle melted chocolate or sprinkle crushed candy canes for added flair.
- Plan Ahead: These brownies can be made a day in advance and stored in the fridge until you’re ready to serve.
Common Mistakes and Troubleshooting
Even the best bakers can have mishaps, so here are some common issues and how to avoid them:
- Overbaking: Keep an eye on your brownies; they can go from delicious to dry in a matter of minutes!
- Too Soft Frosting: If your frosting is too runny, add more powdered sugar until you reach the desired consistency.
- Strawberries Sliding Off: If your strawberries aren’t staying put, try adding a little extra frosting to secure them.
Variations to Try
Want to mix things up? Here are a few fun variations on the classic Santa Hat Brownies:
- Chocolate Mint Santa Hats: Add peppermint extract to the frosting and use crushed candy canes as a topping.
- Red Velvet Santa Hats: Swap out the brownie base for red velvet brownies to add a festive color twist!
- Gluten-Free Version: Use a gluten-free brownie mix and ensure your frosting ingredients are also gluten-free.
- Mini Hat Brownies: Bake in a mini muffin tin for bite-sized Santa hat treats, perfect for parties!
Storage and Make-Ahead Instructions
These Santa Hat Brownies can be made ahead of time and stored in the refrigerator for up to 3 days. For longer storage, freeze the brownies without the frosting for up to a month. When ready to serve, simply thaw and decorate with frosting and strawberries!
Frequently Asked Questions
- Can I make Santa Hat Brownies ahead of time for a party? Yes! Assemble them the day before and refrigerate until serving.
- What’s the best way to cut clean squares for Santa Hat Brownies? Use a sharp knife and wipe it with a damp cloth between cuts for neat edges.
- Can I use a different fruit instead of strawberries? Absolutely! Raspberries or cherries also make great alternatives.
- How do I store leftover brownies? Keep them in an airtight container in the fridge for up to 3 days.
- Can I freeze these brownies? Yes! Freeze un-frosted brownies for up to a month, then frost when ready to serve.
- What if my frosting is too soft? Simply add more powdered sugar to thicken it up!
- Can I use a different type of frosting? Of course! Cream cheese frosting or whipped cream can be delicious alternatives.
- How can I make these brownies more festive? Use holiday-themed sprinkles or edible glitter for an extra festive touch!
Nutritional Tips and Dietary Adaptations
If you’re mindful of dietary restrictions, here are some tips:
- Lower Sugar Option: You can reduce the sugar in the brownie mix and frosting recipe if desired.
- Vegan Adaptation: Use vegan butter and a plant-based brownie mix for a completely vegan treat.
- Healthier Frosting: Consider using Greek yogurt mixed with a touch of honey for a lighter frosting option.
Equipment Recommendations
To make the baking process smoother, here are some essential tools:
- Mixing Bowls: A set of different-sized mixing bowls for prepping ingredients.
- Baking Pan: A square 9×9 inch baking pan works perfectly for brownies.
- Piping Bag: Use a piping bag (or a zip-top bag with the corner snipped) for easy frosting application.
- Offset Spatula: Great for spreading frosting evenly on your brownies.
Serving Suggestions
When it comes time to serve your Santa Hat Brownies, consider these fun ideas:
- Accompany with Hot Chocolate: Serve alongside a warm cup of hot cocoa for a cozy treat.
- Garnish with Mint Leaves: Fresh mint leaves can add a pop of color and a refreshing taste.
- Plate with Holiday Decor: Present on a festive platter or cake stand for a beautiful display.
In conclusion, Santa Hat Brownies are a delectable way to celebrate the holiday season. With their festive appearance and rich flavors, they’re sure to be a hit at any gathering. So, gather your ingredients and start creating these delightful treats. Remember, cooking is all about having fun, experimenting, and enjoying the process! Happy baking!
Santa Hat Brownies Because even December deserves a little decadence
Ingredients
Brownie Base
- 1 box brownie mix (preferably fudgy)
- 2 eggs eggs
- 1/2 cup vegetable oil
Frosting & Decorations
- 1 cup whipped cream (for the hat's pom-pom)
- 1 cup strawberry jam (for the hat's base)
- 10 strawberries strawberries (for the hat's pom-pom)
- 50 grams white chocolate (for the hat's trim)
Instructions
- Prepare the brownie batter according to package instructions and bake in a preheated oven at 350°F (175°C) for 25 minutes. Let cool completely.
- Cut the cooled brownies into triangular shapes to resemble Santa hats.
- Spread a layer of strawberry jam on the wide end of each brownie triangle to form the hat's base.
- Pipe whipped cream onto the pointed end of each triangle to create the pom-pom, and add a strawberry on top for decoration.
- Melt white chocolate and drizzle along the edge of the base for a trim effect.