Author

Ava

Browsing

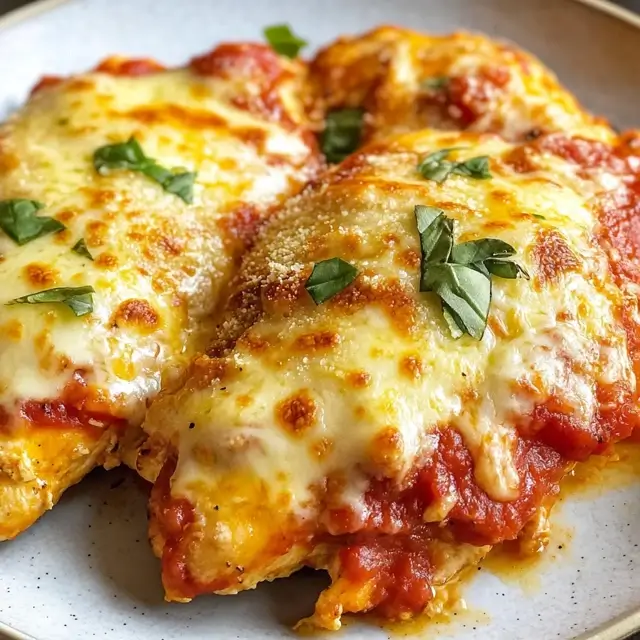
At the end of a hectic day, we all crave comfort food that doesn’t keep us stuck in the kitchen. That’s exactly why I love this Extra Crispy Keto Chicken Parmesan Recipe. It delivers the golden, crunchy crust and melty cheese of classic chicken parm, but without the carbs (almond and coconut flours to the rescue!). Best of all, it’s quick enough for a busy schedule yet feels like a special treat. (My family even jokes this is our new favorite “date night” dinner!)

Why You’ll Love This Extra Crispy Keto Chicken Parmesan Recipe

  • Crunchy Parmesan-almond crust: By ditching breadcrumbs and using almond flour + Parmesan, you get a golden, extra-crunchy coatingfitmamarealfood.com. It’s completely gluten-free yet still “crispy and delicious”fitmamarealfood.com.
  • Keto- and gluten-free: Made with almond and coconut flours (no grains), this recipe fits right into low-carb and keto meal plans without skimping on flavor. You’ll hardly miss the traditional breading!
  • Family favorite: Even picky eaters can’t resist this cheesy, savory chicken. It’s comfort food that feels indulgent but is actually better-for-you — win-win for busy parents.
  • Quick and hands-off: Simply bread and bake the chicken. With the oven doing most of the work, you can multitask (prep a salad, help with homework, etc.) while it cooks.
  • Feel-good flexibility: No time to simmer sauce from scratch? No problem – use your favorite jarred marinara (look for no added sugar for keto). We often double the sauce and use the extra on my Low-Carb Zucchini Pizza Boats or grilled veggies for a bonus side.

Ingredients

  • 1 tbsp olive oil
  • 1½ lbs boneless skinless chicken breasts (about 3 large breasts), each cut in half lengthwise (to make 6 fillets)
  • 2 large eggs
  • 1 cup almond flour
  • ½ cup coconut flour
  • 1½ tsp sea salt (½ tsp mixed into eggs, 1 tsp mixed into flours)
  • ¼ cup yellow onion, chopped
  • 2 cloves garlic, minced
  • 15 oz tomato puree (small can)
  • 2 tsp Italian seasoning (or 2 tsp fresh oregano)
  • 1½ cups shredded mozzarella cheese
  • 1 cup freshly grated Parmesan cheese
  • 1 tbsp fresh basil, chopped (for garnish)

Instructions

  1. Preheat and prep: Preheat your oven to 400°F (200°C). Line a large baking sheet with foil or parchment and spray or brush it with some of the olive oil. A very hot oven helps the breading become golden and crisp.
  2. Prepare the chicken: Pat the chicken fillets dry with paper towels. Slice each breast in half horizontally if needed so you have 6 even pieces (about ½ inch thick each). Season the chicken lightly with a pinch of salt and pepper.
  3. Bread the chicken: In a medium bowl, beat the 2 eggs with ½ teaspoon salt. In another bowl, stir together the almond flour, coconut flour, and the remaining 1 teaspoon salt. One at a time, dip each chicken fillet into the beaten egg, letting excess drip off, then press it firmly into the flour mixture to coat on both sides. Shake off any extra and place the breaded chicken pieces on the prepared baking sheet in a single layer. Spray the tops lightly with more oil for extra crunch.
  4. Bake first side & make sauce: Bake the chicken in the hot oven for 8 minutes. Meanwhile, heat 1 tablespoon olive oil in a medium saucepan over medium heat. Sauté the chopped onion until translucent, about 2–3 minutes, then add the garlic and cook another 30 seconds until fragrant. Pour in the tomato puree, stir in the Italian seasoning and a pinch of salt, then cover and let simmer 5 minutes. (Pro tip: If the sauce seems too thick, add a splash of water and cook a bit longer for deeper flavor.)
  5. Top and finish baking: Remove the chicken from the oven and carefully flip each piece. Spoon an even layer of the tomato sauce over the top of each fillet, then sprinkle with the shredded mozzarella and grated Parmesan. Return to the oven and bake 8 more minutes, or until the cheese is melted and bubbly and the chicken is cooked through (165°F internal temperature).
  6. Serve: Let the chicken rest for a minute or two out of the oven, then sprinkle with fresh basil. Serve hot, and enjoy the crunch!

Cooking Tips

  • Prep tip: Pat chicken dry before breading. Removing extra moisture helps the coating stick and get super crispy.
  • Hot oven: Always preheat your oven to 400°F. A blazing-hot oven makes the crust turn beautifully golden brown and crunchy.
  • Sauce shortcut: In a real rush? A jar of no-sugar-added marinara works just fine. Heat it up in a pan with a little extra seasoning if needed. (I also sometimes double the sauce; it’s amazing on leftover meatballs or spread on veggie pizzas like our Low-Carb Zucchini Pizza Boats!)
  • More Parmesan goodness: Love these garlic-and-Parmesan flavors? Try our Garlic-Parmesan Chicken Skewers (Keto) for another fun chicken dinner. Or if you prefer set-it-and-forget-it cooking, our Slow-Cooker Garlic-Parmesan Chicken (Keto) delivers the same flavors with zero babysitting.
  • Bonus sauce hack: If your homemade sauce is a bit thin, just simmer it a few extra minutes uncovered to thicken. Add some water and longer cooking time for a richer, deeper flavor.
  • Leftovers: Store any extra chicken in an airtight container in the fridge. To reheat, pop it briefly in the oven or an air fryer to revive the crunch. (Full disclosure: this is best right out of the oven, but it still tastes great as leftovers.)

Frequently Asked Questions

  • Can I use store-bought marinara? Absolutely! A jar of low-sugar or no-sugar-added marinara is a great shortcut. Warm it on the stove and spoon it over the chicken just the same—no one will notice the difference.
  • Do I have to use almond flour? Almond flour really is the secret to that crispy, golden crust. You could try substituting coconut flour or regular breadcrumbs, but coconut flour alone won’t crisp up as well, and breadcrumbs add carbs (and gluten). For a true keto version, almond (or almond-and-Parmesan) is preferred.
  • Is this recipe really keto/low-carb? Yes! Each serving is high in protein and low in carbohydrates (roughly 11g net carbs after fiber), fitting nicely into keto or low-carb diets. It’s also gluten-free thanks to the nut flours. You get all the satisfaction of chicken parm with none of the guilt.
  • How should I store leftovers? Any leftovers keep in the fridge for a few days. We recommend reheating in the oven or air fryer to restore some crispiness. It’s still delicious, but of course that coating is crispiest right out of the oven. (You can even freeze cooked pieces wrapped well, then reheat from frozen later.)

This crispy keto chicken parm will certainly earn a spot in your dinner rotation. For more tasty chicken dinners, head over to our Chicken Recipes section. You might also explore all of our Keto Recipes and Low-Carb Recipes for a full range of healthy, flavor-packed meals. And if you’re still craving a big, cheesy chicken parm feast, our Slow-Cooker Chicken Parmesan is the ultimate set-it-and-forget-it comfort food. Enjoy, and happy cooking!

Extra Crispy Keto Chicken Parmesan

Prep Time 15 minutes
Cook Time 20 minutes
Total Time 35 minutes
Servings 6 servings
Calories 430
This Extra Crispy Keto Chicken Parmesan delivers the golden, cheesy crunch you crave — without the carbs. Almond and coconut flours create the perfect gluten-free coating for juicy baked chicken topped with melty mozzarella and fresh basil.

Ingredients

Main Ingredients

  • 1 tbsp olive oil (plus extra for spraying or brushing)
  • 1.5 lb boneless skinless chicken breasts (about 3 large breasts, halved horizontally to make 6 fillets)
  • 2 large eggs (beaten with ½ tsp salt)
  • 1 cup almond flour (for crispy texture)
  • 1/2 cup coconut flour (adds structure to the breading)
  • 1.5 tsp sea salt (divided (½ tsp in eggs, 1 tsp in flour mix))
  • 1/4 cup yellow onion (chopped)
  • 2 cloves garlic (minced)
  • 15 oz tomato puree (small can)
  • 2 tsp Italian seasoning (or fresh oregano)
  • 1.5 cups shredded mozzarella cheese
  • 1 cup freshly grated Parmesan cheese
  • 1 tbsp fresh basil (chopped, for garnish)

Instructions 

  • Preheat the oven to 400°F (200°C) and line a baking sheet with foil or parchment. Brush lightly with olive oil.
  • Pat chicken dry. If needed, slice each breast in half horizontally to create 6 even fillets. Season with a pinch of salt and pepper.
  • In one bowl, beat eggs with ½ tsp salt. In another bowl, combine almond flour, coconut flour, and remaining salt.
  • Dip each chicken fillet into the eggs, let excess drip off, then coat in the flour mixture. Place on the prepared sheet. Spray or drizzle with olive oil.
  • Bake for 8 minutes. Meanwhile, sauté onion in 1 tbsp olive oil for 2–3 minutes, then add garlic. Stir in tomato puree, Italian seasoning, and a pinch of salt. Simmer 5 minutes.
  • Flip chicken. Spoon sauce evenly over each piece, top with mozzarella and Parmesan, then bake another 8–10 minutes until cheese is melted and chicken is 165°F inside.
  • Let rest 2 minutes. Garnish with chopped basil and serve hot.

Notes

For maximum crispiness, preheat your baking sheet in the oven before placing the chicken on it. Reheat leftovers in an air fryer or oven for best texture.
Calories: 430kcal
Cost: $12–15
Course: Dinner, Main Course
Cuisine: Italian-American
Keyword: gluten free, keto chicken parmesan, Low Carb

You know those days when life happens and the last thing you want is a complicated dinner? Keto garlic Parmesan chicken is my go‑to lifesaver. With just a handful of everyday ingredients and a prep time that hardly dents your schedule, this dish brings restaurant‑quality flavor to your table—without wrecking your low‑carb goals. As a mom juggling work and family, I totally get the appeal of meals that are both delicious and doable. Let me show you how this cheesy, garlicky wonder can fit right into your busy week.

Why You’ll Love This Keto Garlic Parmesan Chicken

Keto cooking doesn’t have to be bland or intimidating. Here’s why this dish is a keeper:

  • Low‑carb comfort food – The combination of buttery chicken and Parmesan satisfies cravings while keeping carbs in check. Ketogenic diets prioritize fat (about 70–80 percent), moderate protein and very low carbohydrates, so this recipe fits right in.
  • Easy, no‑fuss prep – You only need 10 minutes to pat the chicken dry and mix your spices. Then the oven does the work.
  • Family‑friendly flavor – Italian seasoning blends herbs like basil, oregano, thyme, rosemary and marjoram, creating a savory aroma that even picky eaters appreciate.
  • Healthy ingredients – Garlic brings antimicrobial and immune‑boosting properties while Parmesan adds calcium and protein. Together, they make a nutritious topping that happens to taste heavenly.

If you’re curious about other ways to enjoy this flavor combo, check out our for a fun, party‑ready variation.

Ingredients

To whip up Keto Garlic Parmesan Chicken, you’ll need:

  • 4 boneless, skinless chicken breasts
  • 1 teaspoon garlic powder
  • 1 teaspoon onion powder
  • 1 teaspoon Italian seasoning
  • ½ teaspoon salt
  • ½ teaspoon black pepper
  • ¼ cup grated Parmesan cheese
  • ¼ cup unsalted butter, melted
  • 2 tablespoons fresh parsley, chopped (for garnish)

A quick note on butter

Why unsalted butter? Salted butter varies widely in sodium—one stick can range from 600 mg to more than 900 mg. Using unsalted butter gives you control over the salt level and consistency of your dish. If you’re watching sodium, unsalted is the way to go. Salted butter also has a longer shelf life because the salt acts as a preservative, so if that’s all you have, just reduce the added salt in the seasoning mix.

Step‑by‑Step Instructions

Making this dish is a breeze—perfect for busy nights when you need dinner on the table fast.

  1. Preheat your oven to 375 °F (190 °C). This ensures the chicken cooks evenly and safely. According to the U.S. government’s food safety guidelines, chicken should reach an internal temperature of 165 °F (74 °C).
  2. Pat the chicken dry with paper towels. Removing surface moisture helps the spices stick and encourages browning.
  3. Mix your spices – combine garlic powder, onion powder, Italian seasoning, salt and pepper in a small bowl. Italian seasoning typically includes basil, oregano, rosemary, thyme and marjoram, so this blend adds a balanced flavor without extra effort.
  4. Season the chicken by rubbing the spice mix evenly over each breast.
  5. Prepare your baking dish by pouring melted unsalted butter across the bottom. The butter creates a flavorful base and prevents sticking.
  6. Arrange the chicken in the dish, placing each breast on top of the buttery goodness.
  7. Add Parmesan – generously sprinkle the grated cheese over the chicken. Parmesan is rich in calcium and protein, making it a nutritious, savory crust.
  8. Bake for 20–25 minutes or until the internal temperature hits 165 °F (check with a meat thermometer). The chicken will be juicy and the Parmesan topping golden brown.
  9. Garnish with freshly chopped parsley. The bright green adds color and a subtle fresh note.
  10. Serve immediately. Pair with a side salad or our for a satisfying keto‑friendly meal.

Handy Tips & Tricks

  • Don’t skimp on drying the chicken – moisture on the surface can prevent the seasoning from adhering and delay browning. Patting dry makes a big difference.
  • Experiment with cheese – Parmesan lends nutty depth, but you can blend it with mozzarella for a gooier topping. Keep in mind that mozzarella has a higher moisture content, so you might need to extend baking time by a few minutes.
  • Choose fresh garlic whenever possible – raw garlic contains allicin, a compound with antimicrobial and antioxidant properties. For maximum benefits, let chopped garlic rest for 10 minutes before cooking—though for this recipe, powdered garlic keeps things quick and fuss‑free.
  • Mind the salt – if you only have salted butter, reduce the added salt in the seasoning mix. Brands vary in sodium content, so adjust to taste.

Looking for a set‑and‑forget version? Our keto slow‑cooker garlic Parmesan chicken transforms this recipe into a cozy crock‑pot meal—perfect for days when the oven is busy or you’re out running errands.

Ava’s Kitchen Story

This recipe holds a special place in my heart because it was one of the first keto dishes I made that got rave reviews from my kids. We had just started exploring a low‑carb lifestyle, and I needed something comforting that didn’t feel like “diet food.” The aroma of butter, herbs and Parmesan wafting through the kitchen turned a hectic Wednesday into a mini celebration. Since then, Keto Garlic Parmesan Chicken has been my secret weapon for everything from weeknight dinners to casual gatherings—because who doesn’t love a meal that feels indulgent but still aligns with your goals?

FAQs

Can I use chicken thighs instead of breasts?
Absolutely. Thighs are naturally juicier and can handle a few extra minutes in the oven. Just watch the internal temperature and cook until 165 °F.

What’s the best way to store leftovers?
Store cooked chicken in an airtight container in the fridge for up to three days. To reheat, gently warm it in the oven at 325 °F to keep the crust crisp. If you prefer freezer meals, wrap each portion tightly in foil, then freeze for up to three months.

Can I use fresh garlic instead of powder?
Yes! Substitute one minced clove for every ½ teaspoon of garlic powder. For health benefits like improved immunity and reduced inflammation, let the minced garlic sit for a few minutes before cooking. Powdered garlic offers convenience, but fresh adds extra flavor and nutrition.

Is this dish suitable for strict keto?
Keto diets limit carbs to around 5–10 percent of daily calories. This recipe is extremely low in carbs, so it fits perfectly into a ketogenic meal plan. Need more variety? Browse our keto recipes for more ideas.

Can I make this in a slow cooker?
For a hands‑off approach, try our slow‑cooker chicken Parmesan or the dedicated keto slow‑cooker garlic Parmesan chicken. Slow cooking results in tender meat and a deeply infused sauce—ideal for busy days.

Keep the Flavor Going

Now that you’ve discovered how simple and satisfying Keto Garlic Parmesan Chicken can be, why stop here? Explore more chicken recipes and low‑carb dishes on Snack Nova. Whether you’re in the mood for slow‑cooker chicken Parmesan or creative keto dinners, there’s a recipe waiting to make your weeknight meals shine.

Keto garlic Parmesan chicken is more than just a recipe—it’s a reminder that nourishing your family doesn’t have to be stressful. With simple steps and big flavor, this dish will quickly become a reliable favorite in your kitchen.

Keto Garlic Parmesan Chicken

Prep Time 10 minutes
Cook Time 25 minutes
Total Time 35 minutes
Servings 4 people
Calories 380
This easy Keto Garlic Parmesan Chicken is buttery, cheesy, and full of flavor—perfect for busy weeknights when you want something comforting yet low in carbs.

Ingredients

Main Ingredients

  • 4 boneless, skinless chicken breasts
  • 1 tsp garlic powder
  • 1 tsp onion powder
  • 1 tsp Italian seasoning
  • 1/2 tsp salt (reduce if using salted butter)
  • 1/2 tsp black pepper
  • 1/4 cup grated Parmesan cheese
  • 1/4 cup unsalted butter, melted (for baking dish)
  • 2 tbsp fresh parsley, chopped (for garnish)

Instructions 

  • Preheat the oven to 375°F (190°C).
  • Pat chicken dry with paper towels to help seasonings stick and encourage browning.
  • In a small bowl, mix garlic powder, onion powder, Italian seasoning, salt, and pepper.
  • Rub the spice mix evenly over each chicken breast.
  • Pour melted butter into a baking dish, then place the seasoned chicken on top.
  • Sprinkle grated Parmesan evenly over the chicken.
  • Bake 20–25 minutes, until internal temperature reaches 165°F (74°C) and the cheese topping turns golden.
  • Garnish with chopped parsley and serve warm.

Notes

Use unsalted butter for better control of saltiness. For a creamier texture, mix Parmesan with mozzarella and bake an extra 3–5 minutes.
Calories: 380kcal
Cost: $10–12
Course: Dinner, Main Course
Cuisine: American, Italian-Inspired
Keyword: garlic parmesan, keto chicken, low carb dinner

Welcome to a stress-free dinner idea! This Keto Chicken Parmesan is a deliciously cheesy, low-carb twist on a classic. It’s just what busy weeknights ordered: juicy chicken breasts coated in garlic and Parmesan, baked with marinara and melted mozzarella. I promise, even picky kids and carb-craving adults will ask for seconds. It’s one of those recipes that feels fancy (yum!) yet only takes a few minutes of prep. You’ll have this on the table fast, and your kitchen will smell like an Italian trattoria – total comfort food without the carb overload. Let’s dive in and make cooking fun again!

Why You’ll Love This Keto Chicken Parmesan

  • Quick & Easy: Just a few simple steps and about 30 minutes in the oven, and dinner is done. No complicated prep here – mostly mixing and dipping. Perfect for busy evenings when time is tight!
  • Low-Carb & Gluten-Free: We skip the breadcrumbs and instead use Parmesan cheese for the crust, so it’s completely gluten-free and keto-friendly. At only about 6.5g carbs per serving, it easily fits a keto or Trim Healthy Mama S meal plan. (For context, keto diets typically limit carbs to under ~50g/day, so this is well within safe limits.)
  • Flavor-Packed: Garlic, herbs, and Parmesan pack tons of flavor into every bite. The chicken stays juicy under that crunchy cheese coating, and the melted mozzarella gives it a gooey, classic Parmesan feel. It truly tastes indulgent (hello, pizza-vibes!), but without the guilt.
  • Family-Friendly: My own family loves this one. Even my kids fight over who gets the extra cheese on their plate! The gentle garlic and cheesy flavor make it a hit with all ages. Leftovers reheat great for lunches or another easy dinner.
  • Versatile: Feel free to customize – you can thread low-carb veggies (zucchini, tomatoes, peppers) on skewers with the chicken before baking. For a fun pizza-inspired side, try our Low-Carb Zucchini Pizza Boats – they satisfy those pizza cravings without the carbs!

Ingredients

  • 2.5–3 lb chicken breast (about 6 large breasts)
  • 1 egg, beaten
  • 1 cup grated Parmesan cheese
  • ½ tbsp dried minced garlic
  • ½ tbsp dried minced onion
  • ½ tbsp dried oregano
  • ½ tbsp dried basil
  • ½ tbsp dried parsley
  • ¼ tsp freshly ground black pepper
  • Pinch of salt
  • 1 cup marinara sauce (sugar-free or low-sugar for keto)
  • 6 oz shredded mozzarella cheese

Full printable ingredient list is available in the recipe card below.

Instructions

  1. Preheat & Prep: Preheat your oven to 400°F (200°C). Line a large baking sheet with foil or parchment, and spray it lightly with cooking spray (this makes cleanup a breeze).
  2. Set Up Coating Station: In a shallow bowl, beat the egg well. In a second bowl, combine the Parmesan cheese with garlic, onion, oregano, basil, parsley, pepper, and a pinch of salt. Mix until evenly blended.
  3. Coat the Chicken: Dip each chicken breast (or portion) first into the beaten egg, turning to coat both sides. Then press it into the Parmesan–herb mix, ensuring both sides are well covered in the cheesy coating. Place each coated chicken piece on the prepared baking sheet.
  4. Bake First: Bake the chicken in the preheated oven for about 20–30 minutes. You want the internal temperature to reach roughly 145–150°F (it will look almost done but still a touch pink). This partial bake gets the chicken mostly cooked before adding sauce.
  5. Add Sauce & Cheese: Remove the chicken from the oven. Spoon about 2–3 tablespoons of marinara sauce on top of each piece, spreading to cover. Sprinkle shredded mozzarella evenly over the sauce. Return the chicken to the oven and bake an additional 5–10 minutes, or until the cheese is melted, bubbly, and the chicken’s internal temp reaches at least 160°F. (It will rise a few degrees more as it rests.) If you like a golden brown top, hit it with the broiler for 1–2 minutes at the end – but watch it closely!
  6. Rest & Serve: Once fully cooked, let the chicken rest 3–5 minutes before serving. This lets the juices redistribute (making it extra moist) and brings the temp safely to the USDA-recommended 165°F. In fact, food-safety charts note that poultry is instantly safe at 158°F, so pulling it at ~160°F (with resting) is perfectly fine.

Enjoy your warm, saucy Keto Chicken Parmesan! A squeeze of lemon or a sprinkle of fresh basil can brighten it up if you like. 🍋✨

Cooking Tips & Tricks

  • Prep Ahead: You can prepare the egg wash and Parmesan coating in advance and even set out all the bowls. If short on time, mix everything and then dip just before baking.
  • Ingredient Swaps: No parmesan? You could try almond flour + grated hard cheese as an alternative coating (extra-low-carb) – but fresh Parmesan gives the best crusty texture. No egg? Unlikely to stick without it, so try to have the egg for binding.
  • Veggie Skewers: To sneak in extra veggies, thread sliced zucchini, cherry tomatoes, or bell peppers between the chicken on skewers before baking. They’ll roast nicely alongside the chicken.
  • Sauce Smoothness: If your marinara is very thick or chunky, warm it a bit before topping. It’ll spread more easily and meld with the cheese.
  • Rest for Juiciness: As mentioned, let the chicken rest a few minutes out of the oven. This not only finishes the cooking but keeps the meat tender. Nobody likes dry chicken!
  • Slow-Cooker Hack: No oven? No problem. For a hands-off method, try our Slow-Cooker Chicken Parmesan recipe. You’ll toss the chicken, sauce, and cheeses into the crock-pot and come back hours later to fork-tender chicken in a cheesy tomato sauce.
  • Reheat Safely: Leftovers store well in the fridge (3–4 days). To reheat, warm in a 350°F oven or air fryer for a few minutes – this brings back the crunch a bit. (Microwaving works but may soften the crust.)
  • Make It Spicy: If you like heat, sprinkle red pepper flakes into the Parmesan mix or over the sauce before the final bake. It adds a fun kick, which picky eaters often ignore anyway! 😉

FAQs

Can I use chicken thighs instead of breasts? Yes! Chicken thighs work fine here. Thighs are fattier, so they’ll actually stay very moist. You may need to adjust baking time (thighs can be smaller or larger than breasts), so just check the temperature. A meat thermometer is your friend – cook until the thickest part hits 160°F before resting. (Bone-in pieces will take longer; boneless about the same or a bit less time than breasts.)

How do I know when the chicken is fully cooked and safe? The gold standard is temperature. USDA recommends 165°F for poultry, but as mentioned above, you can pull the chicken at around 160°F and let it rest. The carryover heat will bring it up to 165°F. According to official guidelines, reaching 158°F kills harmful bacteria instantly. So rest assured – if you bake as directed, your chicken will be both juicy and safe.

How should I store leftovers? Let the chicken cool briefly, then refrigerate in an airtight container. It will stay good for 3–4 days. To reheat, you can microwave it covered for a quick meal, but to revive the crispy coating, pop the chicken back in a 350°F oven or air fryer for 5–10 minutes. It’ll taste almost as good as fresh!

Thanks for cooking along with me! This Keto Chicken Parmesan is one of my favorite quick & easy meals, and I hope it becomes one of yours. It’s perfect for busy moms, professionals, or anyone craving a cheesy, comforting dinner without the carb crash. Give it a try tonight – I bet it’ll become a new go-to recipe for your family. And while you’re here, don’t forget to explore more delicious ideas on Snack Nova: check out our Chicken Recipes for other poultry meals, browse the Keto Recipes section for more low-carb dishes, and see our Low-Carb Recipes page for even more creative meals.

Keto Chicken Parmesan – Easy, Cheesy, and Low-Carb

Prep Time 10 minutes
Cook Time 30 minutes
Total Time 40 minutes
Servings 6 servings
Calories 420
This Keto Chicken Parmesan is a low-carb twist on the Italian classic – juicy chicken breasts coated in garlic and Parmesan, baked with marinara and melted mozzarella. It’s comfort food made easy and keto-friendly, perfect for busy weeknights or family dinners.

Ingredients

Main Ingredients

  • 2.5–3 lb chicken breasts (about 6 large breasts, boneless and skinless)
  • 1 egg (beaten)
  • 1 cup grated Parmesan cheese
  • 0.5 tbsp dried minced garlic
  • 0.5 tbsp dried minced onion
  • 0.5 tbsp dried oregano
  • 0.5 tbsp dried basil
  • 0.5 tbsp dried parsley
  • 0.25 tsp freshly ground black pepper
  • 1 pinch salt (to taste)
  • 1 cup marinara sauce (sugar-free or low-sugar for keto)
  • 6 oz shredded mozzarella cheese

Instructions 

  • Preheat the oven to 400°F (200°C). Line a large baking sheet with foil or parchment and lightly spray with cooking spray.
  • In a shallow bowl, beat the egg. In a second bowl, combine Parmesan, garlic, onion, oregano, basil, parsley, pepper, and salt. Mix well.
  • Dip each chicken breast into the egg, then coat in the Parmesan mixture. Place coated chicken on the prepared baking sheet.
  • Bake for 20–30 minutes, until the internal temperature reaches about 145–150°F.
  • Remove from oven. Spoon marinara sauce over each piece, top with mozzarella, and bake for another 5–10 minutes until bubbly and golden. For extra crispiness, broil for 1–2 minutes.
  • Let rest 3–5 minutes before serving to keep the chicken juicy. Serve warm with fresh basil or a squeeze of lemon if desired.

Notes

For best results, use freshly grated Parmesan and let the chicken rest before serving. Leftovers reheat well in an oven or air fryer for a crispy texture. Great for meal prep or next-day lunches!
Calories: 420kcal
Cost: $15–$18
Course: Dinner, Main Course
Cuisine: Italian, keto
Keyword: chicken parmesan, keto dinner, Low Carb

Feeling overwhelmed by dinnertime on a busy weeknight? You’re not alone. These Keto Diet Chicken Skewers with Garlic and Parmesan are here to save the day – and they’re so easy and flavorful, your family will think you spent hours cooking. I know I love quick, hands-off meals that still taste gourmet, and these skewers fit the bill perfectly. They’re marinated in olive oil and herbs, coated with cheese, and grilled (or baked) to juicy perfection. As Ava from Snack Nova likes to say, she “whips up bold, flavor-packed recipes that make cooking fun, easy, and anything but boring”snacknova.com – and this dish is no exception. It’s perfect if you want a garlic-Parmesan flavor bomb on a keto-friendly plate with minimal fuss. Plus, the aroma of garlic grilling? Absolute kitchen magic on a hectic daysnacknova.com.

Why You’ll Love These Keto Diet Chicken Skewers with Garlic and Parmesan

  • Super Quick & Easy: Prep takes just minutes, and most of that is letting the chicken marinate. You can even coat and marinate these ahead of time. They’re perfect for busy moms and professionals who need a fast, satisfying dinner.
  • Low-Carb & Keto-Friendly: Loaded with healthy fats (olive oil and Parmesan) and protein, these skewers keep the carbs low so your body stays in fat-burning ketosis. After all, a keto diet is all about high fat and low carbohydrate to “induce a metabolic state called ketosis” – meaning your body burns fat for fuel. This meal fits right in!
  • Flavor-Packed: Garlic and Parmesan are a match made in heaven. The savory, cheesy coating crisps up and locks in juicy chicken. It tastes decadent (think creamy garlic pasta vibes!) yet it’s totally guilt-free. Even picky eaters will love it – the whole family will ask for seconds. (One night I tried these with my kids, and they practically fought over who got the extra Parmesan on their plate!)
  • Versatile & Customizable: Thread on some low-carb veggies (zucchini, cherry tomatoes, bell peppers, or mushrooms) for color and texture. Roll them in the Parmesan mix for extra crunch. Feel free to spice it up with chili flakes or cayenne, or sneak in different herbs – these skewers take well to tweaks. For another veggie-packed side, our [Low Carb Zucchini Pizza Boats]snacknova.com are quick to make and satisfy pizza cravings without the carbs.

Ingredients

To make these flavorful chicken skewers, gather the following simple ingredients:

  • 2 lbs boneless, skinless chicken breasts or thighs (cut into bite-sized cubes)
  • 3 tbsp extra-virgin olive oil
  • 4 cloves garlic, minced (fresh garlic adds tons of flavor!)
  • 1 tsp dried oregano (or Italian seasoning)
  • 1 tsp smoked paprika
  • ½ tsp chili flakes (optional, for a little kick)
  • Salt and freshly ground black pepper to taste
  • 1 cup grated Parmesan cheese (freshly grated works best)
  • 1 tsp garlic powder
  • ½ tsp onion powder
  • Optional for skewers: Zucchini slices, cherry tomatoes, bell peppers, mushrooms (use your favorite low-carb veggies!)
  • Wooden or metal skewers (if using wooden, soak in water for at least 20 minutes)
  • Fresh parsley, chopped (for garnish)
  • Lemon wedges (for serving)

How to Make the Recipe

  1. Prep the Skewers (if using wood): Fill a shallow pan with warm water and soak wooden skewers for 20–30 minutes. This helps prevent them from burning on the grill. (If you forgot, metal skewers are a great no-fuss alternative.)
  2. Marinate the Chicken: In a large bowl, whisk together olive oil, minced garlic, oregano, smoked paprika, chili flakes, salt, and pepper. Add the chicken cubes and toss to coat thoroughly. Let it marinate for at least 30 minutes in the fridge. This infuses the meat with flavor – or you can do this step in the morning or evening for easy meal prep.
  3. Prepare the Parmesan Coating: In another bowl, mix the grated Parmesan with garlic powder and onion powder. This cheesy blend will form a crispy crust on the chicken.
  4. Thread the Skewers: Drain the chicken from the marinade, then thread the pieces onto the skewers. If you’re adding veggies, alternate chicken with slices of zucchini, cherry tomatoes, or peppers. The veggies will cook quickly and add color (they’re optional but fun for a complete meal).
  5. Coat with Cheese: Roll each assembled skewer in the Parmesan mixture, pressing gently so the cheese clings to the chicken. Don’t worry if a little falls off – those bits just crisp up in cooking for extra flavor.
  6. Cook – Grill or Oven:
    • Grill: Heat your grill to medium-high (about 375°F). Place the skewers on the grates and cook for 10–12 minutes, turning occasionally. You want the chicken to reach 165°F internally for safety. (FoodSafety.gov confirms all poultry should hit 165°F to be safe.) The skewers should be golden and the cheese lightly charred in spots.
    • Oven: Preheat the oven to 425°F. Lay the skewers on a foil-lined baking sheet. Bake for 20–25 minutes, flipping once halfway, until the chicken is cooked through. For extra crispiness, switch the oven to broil and broil 2–3 more minutes – keep an eye on them so the cheese just gets golden.
  7. Garnish and Serve: Carefully remove the skewers. Sprinkle with chopped parsley and serve with lemon wedges for squeezing over the top. The lemon adds a fresh zing that brightens the garlic-Parmesan flavors.

You now have a plate of juicy, garlic-Parmesan chicken skewers ready to enjoy! They pair wonderfully with a simple salad or low-carb side. (For instance, our [Healthy Sesame Chicken]snacknova.com makes a great companion dish – it’s also a quick, family-friendly meal that packs big flavor.)

Cook’s Tips & Tricks

  • Don’t skip soaking: As noted in The Spruce Eats, soaked bamboo skewers have “a lower chance of catching fire” on the grill. At least 20 minutes in water is recommendedto keep things from turning into charcoal.
  • Room-temperature chicken cooks best: Let the marinated chicken sit out for 10 minutes before threading. It will cook more evenly.
  • Space on the skewer: Don’t overcrowd the chicken pieces. Leave a bit of space between cubes so heat can circulate and everything cooks through.
  • Veggie ideas: Low-carb veggies like zucchini, bell peppers, or mushrooms are perfect. Their juices add moisture and flavor. (And if you like pizza, try stuffing zucchini with marinara and cheese like we do in our [Zucchini Pizza Boats]snacknova.com!)
  • Storage: Leftovers reheat well. Simply pop skewers (or meat off the skewers) in the oven at 350°F or in an air fryer for a few minutes. They’ll be nearly as crisp as fresh.

FAQs

Can I use chicken thighs instead of breasts? Yes! Thighs work great here, and their extra fat means more juicy flavor (and even more keto-friendly fat). Just cut them into similar bite-sized pieces.

What if I don’t have a grill? No problem. You can bake them entirely in the oven at 425°F as directed above. You can also cook skewered chicken in an air fryer: try 400°F for ~10 minutes, flipping once. It will get nicely crispy!

How do I store leftovers? Cool the chicken, then refrigerate in an airtight container for 3–4 days. Reheat in the oven (350°F for 5–10 min) or air fryer until warm. They stay flavorful – even my picky kids still love them as leftovers!

Can I add other spices or toppings? Absolutely. For extra heat, sprinkle cayenne or more chili flakes on the chicken before cooking. You could also switch up the cheese – Parmesan and mozzarella together make a great combo. The sky’s the limit!

These Keto Diet Chicken Skewers with Garlic and Parmesan are guaranteed to become a new favorite. They’re quick enough for a weeknight but tasty enough to serve to guests. Who said keto meals had to be boring? Give these skewers a try and enjoy a hearty, low-carb dinner that really impresses. Your kitchen (and your taste buds) will thank you!

Keto Slow Cooker Garlic Parmesan Chicken

Prep Time 10 minutes
Cook Time 4 hours
Total Time 4 hours 10 minutes
Servings 4 servings
Calories 520
This Keto Slow Cooker Garlic Parmesan Chicken is the ultimate easy comfort food—rich, creamy, and packed with flavor. Just toss everything in the slow cooker and let it work its magic while you relax or tackle your busy day.

Ingredients

Main Ingredients

  • 4 boneless, skinless chicken breasts or thighs (about 1.5–2 lbs)
  • 1/2 cup unsalted butter (melted)
  • 1 cup grated Parmesan cheese
  • 1/2 cup heavy cream
  • 1 tbsp garlic powder
  • 1 tbsp Italian seasoning
  • 1 tsp onion powder
  • 1/2 tsp salt (or to taste)
  • 1/2 tsp black pepper (or to taste)
  • 1/2 tsp crushed red pepper flakes (optional, for heat)
  • 2–3 cloves garlic (minced)
  • fresh parsley (chopped, for garnish)

Instructions 

  • Place chicken breasts or thighs at the bottom of the slow cooker. (Optional: Sear first for extra flavor.)
  • In a bowl, whisk melted butter, Parmesan, heavy cream, garlic powder, Italian seasoning, onion powder, salt, pepper, red pepper flakes, and minced garlic.
  • Pour sauce over chicken, coating evenly. Give a gentle stir or shake to combine.
  • Cover and cook on LOW for 4–6 hours or HIGH for 2–3 hours, until chicken reaches 165°F and is tender.
  • Remove chicken and shred or leave whole. Stir it back into the creamy sauce.
  • Serve hot, spooning sauce over each portion. Garnish with chopped parsley.

Notes

For a thicker sauce, remove lid for the last 30 minutes of cooking or add a pinch of xanthan gum. Try adding low-carb veggies like mushrooms or zucchini during the last hour for extra flavor and nutrition.
Calories: 520kcal
Cost: $10–12
Course: Dinner
Cuisine: American, Italian-Inspired
Keyword: Chicken, Keto, slow cooker

Coming home to a kitchen smelling of garlic and Parmesan is pure magic on a hectic day. As a busy mom, I know how comforting it is to find “a warm, hearty meal waiting for you at the end of a long day”snacknova.com. This Keto Slow Cooker Garlic Parmesan Chicken is exactly that kind of easy comfort food – just toss everything into your slow cooker, walk away, and dinner miraculously cooks itself while you relax or tackle other tasks. It feels indulgent and decadent (hello, butter, cream, and cheese) but is still super simple – perfect when you want an impressive meal without the fuss.

Why You’ll Love This Keto Slow Cooker Garlic Parmesan Chicken

  • Set-and-forget cooking: Just place the chicken and sauce in the slow cooker and go. It truly is a one-pot wonder that saves time on cleanupsnacknova.com.
  • Rich, creamy flavor: The sauce (with butter, heavy cream, Parmesan, and a hit of garlic) makes even plain chicken feel gourmet and indulgent.
  • Tender, juicy chicken: Cooking low and slow turns the chicken melt-in-your-mouth tender. You can shred it right in the pot or serve the breasts whole – either way it’s amazingly juicy.
  • Keto-friendly comfort food: This dish is high in healthy fats and very low in carbs, fitting perfectly into a keto diet. (In fact, keto diets typically limit carbs to under about 50g a day, and this meal is almost all fat and protein.)
  • Family-approved: It’s cheesy, flavorful, and mildly garlicky – even picky eaters will ask for seconds. Plus, leftovers make great lunches!

Ingredients

Gather the following simple ingredients (full amounts in the recipe card below):

  • 4 boneless, skinless chicken breasts or thighs (about 1.5–2 lbs)
  • ½ cup unsalted butter, melted
  • 1 cup grated Parmesan cheese
  • ½ cup heavy cream
  • 1 tbsp garlic powder
  • 1 tbsp Italian seasoning
  • 1 tsp onion powder
  • ½ tsp salt (or to taste)
  • ½ tsp black pepper (or to taste)
  • ½ tsp crushed red pepper flakes (optional, for heat)
  • 2–3 cloves garlic, minced
  • Fresh parsley, chopped (for garnish)

How to Make It

  1. Prepare the chicken: Place the chicken breasts or thighs in the bottom of the slow cooker. (Optional: Quickly searing the chicken in a skillet first adds extra brown color and flavor, but it’s not required. I often skip this step when I’m in a hurry – the slow cooker will do the work!)
  2. Make the sauce: In a bowl, whisk together the melted butter, grated Parmesan, heavy cream, garlic powder, Italian seasoning, onion powder, salt, pepper, red pepper flakes (if using), and minced garlic. The mixture may look a bit clumpy or chunky at first (thanks to the Parmesan), but don’t worry – it will melt down into a smooth, creamy sauce during cooking.
  3. Combine: Pour the sauce over the chicken in the slow cooker, making sure each piece is well coated. Give the pot a gentle shake or stir so the ingredients mingle.
  4. Cook: Cover and cook on LOW for 4–6 hours or HIGH for 2–3 hours, until the chicken is fully cooked and falls apart easily. It should reach an internal temperature of 165°F to be safe. Low and slow is best for tenderness, but high heat works in a pinch.
  5. Serve: Carefully remove the chicken and shred it with two forks (or leave the breasts whole, if you prefer). Stir the chicken back into the sauce in the slow cooker. Serve hot, spooning plenty of that creamy garlic-Parmesan sauce over each portion, and garnish with chopped parsley for a pop of color.

Cooking Tips & Tricks

  • No pan-sear? No problem: You can skip searing the chicken altogether if you’re short on time. The dish will still be amazingly flavorful, and slow cooking will give it a great crust.
  • Thickening the sauce: If you like your sauce extra thick, remove the lid during the last 30 minutes of cooking to let it reduce. Alternatively, sprinkle in a pinch of xanthan gum (a keto-friendly thickener) and stir; it will quickly thicken the sauce.
  • Don’t freak out at lumps: Parmesan can clump when wet, so the sauce might look grainy when you whisk it. That’s totally fine – it melts into silky goodness as it cooks. Think of it as part of the magic!
  • Extra cheesy topping: If you love a gooey cheese layer, pile on a bit more grated Parmesan on top of the chicken at the end and pop the dish under the broiler for a couple of minutes. You’ll get a beautifully browned, cheesy crust.
  • Add veggies if you like: Feel free to toss in some low-carb vegetables (like sliced mushrooms, bell peppers, or zucchini) during the last hour of cooking for extra nutrition and flavor.
  • Spice it up: If you enjoy heat, leave in the red pepper flakes or sprinkle extra (or use cayenne) before cooking. For a smoky kick, a dash of smoked paprika or a squirt of hot sauce can be fun.
  • Stress-free success: My family often asks me to make this on busy nights. One evening, I tossed everything in after a marathon of kid’s soccer practice – when dinner was ready, even my picky eater came back for thirds!

FAQs

Can I use chicken thighs instead of breasts? Absolutely. Boneless skinless thighs are actually a great choice here – they stay extra juicy and fall apart even more easily. The cooking time stays about the same. Thighs have a bit more fat, so you could reduce the butter slightly if you like, but it’s not necessary.

What if I don’t have heavy cream? You can substitute full-fat coconut milk (for a dairy-free keto option) or a mix of half-and-half plus a little extra butter. It won’t be as thick or rich as heavy cream, but the dish will still be delicious and keto-friendly.

How can I store leftovers? Cool any remaining chicken and sauce, then refrigerate in a covered container for 3–4 days. (It actually tastes even better the next day.) You can also freeze portions for up to 3 months – thaw overnight in the fridge. Reheat gently on the stove or microwave, adding a splash of broth or cream if it’s too thick.

Is this dish keto and low-carb? Yes! This recipe is high in fat and very low in carbohydrates, so it fits perfectly into a keto or low-carb diet. Remember, keto plans typically keep net carbs under about 50 grams per day, and this creamy chicken dish is almost all fat and protein with hardly any starch.

Can I make the sauce thicker or creamier? Beyond the slow-cook reduction or xanthan trick mentioned above, one tip is to drain off some of the cooking liquid before shredding the chicken if it seems very thin, then let the sauce simmer down a bit longer. You can also stir in a spoonful of cream cheese at the end for an extra indulgent kick (keto-friendly, of course!).

Serve & Enjoy!

Once you serve up this chicken (we did ours with a sprinkle of extra Parmesan and parsley), your kitchen will smell like a cozy Italian trattoria. It’s perfect over cauliflower “rice”, with steamed broccoli, or alongside zucchini noodles for a full keto-friendly feast. I love that it feels fancy and comforting all at once – and it took almost no effort. Next time you need a weeknight hero dish, try this Keto Slow Cooker Garlic Parmesan Chicken. Your family will be impressed, your kitchen will smell amazing, and you’ll feel like a cooking rock star for making something so simple taste so good!

Looking for more effortless dinners? Check out our easy Slow Cooker Chicken and Gravy or Healthy Slow Cooker BBQ Chicken recipes for more crowd-pleasing, set-it-and-forget-it meals. You can also browse our full Keto Recipes collection for even more low-carb inspiration to keep weeknight cooking a breeze.

Keto Slow Cooker Garlic Parmesan Chicken

Prep Time 10 minutes
Cook Time 4 hours
Total Time 4 hours 10 minutes
Servings 4 servings
Calories 520
This Keto Slow Cooker Garlic Parmesan Chicken is the ultimate easy comfort food—rich, creamy, and packed with flavor. Just toss everything in the slow cooker and let it work its magic while you relax or tackle your busy day.

Ingredients

Main Ingredients

  • 4 boneless, skinless chicken breasts or thighs (about 1.5–2 lbs)
  • 1/2 cup unsalted butter (melted)
  • 1 cup grated Parmesan cheese
  • 1/2 cup heavy cream
  • 1 tbsp garlic powder
  • 1 tbsp Italian seasoning
  • 1 tsp onion powder
  • 1/2 tsp salt (or to taste)
  • 1/2 tsp black pepper (or to taste)
  • 1/2 tsp crushed red pepper flakes (optional, for heat)
  • 2–3 cloves garlic (minced)
  • fresh parsley (chopped, for garnish)

Instructions 

  • Place chicken breasts or thighs at the bottom of the slow cooker. (Optional: Sear first for extra flavor.)
  • In a bowl, whisk melted butter, Parmesan, heavy cream, garlic powder, Italian seasoning, onion powder, salt, pepper, red pepper flakes, and minced garlic.
  • Pour sauce over chicken, coating evenly. Give a gentle stir or shake to combine.
  • Cover and cook on LOW for 4–6 hours or HIGH for 2–3 hours, until chicken reaches 165°F and is tender.
  • Remove chicken and shred or leave whole. Stir it back into the creamy sauce.
  • Serve hot, spooning sauce over each portion. Garnish with chopped parsley.

Notes

For a thicker sauce, remove lid for the last 30 minutes of cooking or add a pinch of xanthan gum. Try adding low-carb veggies like mushrooms or zucchini during the last hour for extra flavor and nutrition.
Calories: 520kcal
Cost: $10–12
Course: Dinner
Cuisine: American, Italian-Inspired
Keyword: Chicken, Keto, slow cooker

Are you ready to indulge in a delightful treat that’s not only quick to make but also incredibly satisfying? I’m talking about Air Fryer Dessert Pinwheels! These little bites of heaven can be whipped up in just 10 minutes, making them the perfect sweet snack for any occasion. Whether you’re looking for a quick family dinner dessert or just a little something to satisfy your sweet tooth, these pinwheels are sure to please. Plus, they’re a fantastic way to use up any leftover ingredients you might have on hand!

Why You’ll Love This Recipe

  • Quick and easy to prepare, perfect for busy weeknights.
  • Only requires a few simple ingredients that you probably already have.
  • Can be customized with your favorite fillings, making it versatile.
  • Perfect for satisfying sweet cravings without the guilt.
  • Great for family gatherings or as a fun dessert for kids!

Ingredients

To make these scrumptious Air Fryer Dessert Pinwheels, you’ll need the following ingredients:

  • 1 package of refrigerated crescent roll dough
  • 1/2 cup of cream cheese, softened
  • 1/4 cup of powdered sugar
  • 1 teaspoon of vanilla extract
  • 1/2 cup of your favorite fruit preserves or chocolate spread
  • Cinnamon and sugar mixture for sprinkling

Full ingredient list with measurements is provided in the printable recipe card below.

How to Make the Recipe

Now, let’s dive into the fun part—making these delicious pinwheels!

  1. Start by preheating your air fryer to 350°F (175°C).
  2. In a mixing bowl, combine the softened cream cheese, powdered sugar, and vanilla extract. Mix until smooth and creamy.
  3. Unroll the crescent roll dough and separate it into triangles. Spread a thin layer of the cream cheese mixture on each triangle.
  4. Add a spoonful of your favorite fruit preserves or chocolate spread on top of the cream cheese.
  5. Starting from the wide end, roll each triangle up tightly to form a pinwheel.
  6. Sprinkle the cinnamon and sugar mixture over the top of each pinwheel.
  7. Place the pinwheels in the air fryer basket, making sure they are not touching.
  8. Air fry for about 6-8 minutes or until they are golden brown and puffed up.
  9. Remove from the air fryer and let them cool slightly before serving.

Pro Tips for Making the Recipe

Here are some of my favorite tips to ensure your Air Fryer Dessert Pinwheels turn out perfectly:

  • Feel free to experiment with different fillings! Nutella, peanut butter, or even fresh fruit can be delicious alternatives.
  • If you want a little extra crunch, consider adding chopped nuts to the filling.
  • Make sure not to overcrowd the air fryer basket; this will help them cook evenly.
  • For a fun twist, drizzle some melted chocolate over the top before serving!

How to Serve

These pinwheels are best served warm, but they’re also delightful at room temperature. Here are some serving suggestions:

  • Pair them with a scoop of vanilla ice cream for an indulgent dessert.
  • Serve with a side of fresh fruit for a refreshing contrast.
  • Dust with additional powdered sugar for a beautiful presentation.
  • Enjoy them with a cup of coffee or tea for a cozy afternoon treat.

Make Ahead and Storage

If you want to prepare these pinwheels ahead of time, you can assemble them and store them in the refrigerator for up to 24 hours before air frying. Just cover them tightly with plastic wrap to keep them fresh. For storage:

  • Store any leftovers in an airtight container in the refrigerator for up to 3 days.
  • Reheat in the air fryer for a few minutes to regain that crispy texture.
  • These pinwheels also freeze well! Just make sure to wrap them tightly and store them in a freezer-safe bag. They can be frozen for up to 2 months.

So there you have it! A quick and easy dessert that’s perfect for any occasion. Whether you’re whipping up a sweet treat after one of your quick family dinners or just looking for a fun dessert to enjoy with your loved ones, these Air Fryer Dessert Pinwheels are sure to be a hit. And if you’re in the mood for more delicious recipes, don’t forget to check out my favorite easy pasta recipes for those busy weeknights. Happy cooking!

Air Fryer Dessert Pinwheels

Prep Time 10 minutes
Cook Time 6 minutes
Total Time 16 minutes
Servings 4 pieces
Calories 250
Delicious and easy-to-make dessert pinwheels crafted with tortillas, creamy filling, and chocolate chips, baked to perfection in the air fryer.

Ingredients

Tortillas

  • 4 ounces Cream Cheese (Fat Free)
  • 1 scoop Protein Powder (Your Choice Flavor)
  • 1 tablespoon Sweetener (Optional if your Protein Powder isn't sweet enough)
  • 1 teaspoon Vanilla Extract
  • 3 tablespoons Peanut Butter (1-2 T per small tortilla or use powdered peanut butter mixed with water)
  • 1 tablespoon Chocolate Chips (Sugar Free)
  • as needed Butter (Melted or Cooking Spray)

Instructions 

  • Mix cream cheese, protein powder, sweetener, and vanilla until smooth.
  • Spread some or all of the mixture onto a tortilla.
  • Distribute the mixture evenly around the tortilla.
  • Add peanut butter on top of the mixture.
  • Sprinkle chocolate chips over the peanut butter.
  • Repeat with additional tortillas if desired.
  • Roll up the tortillas tightly.
  • Brush with melted butter or spray with cooking spray.
  • Cut into pinwheels.
  • Place in the air fryer at 375°F (190°C) for about 6 minutes, optionally lined with parchment paper.

Notes

For best results, serve immediately or store in an airtight container for later.
Calories: 250kcal
Cost: $8
Course: Dessert
Keyword: Pinwheels

Are you ready to indulge in a sweet treat that’s not only delicious but also packed with protein? I know I am! Today, I’m excited to share my recipe for Microwave Protein Whoopie Pies. These delightful little desserts are perfect for satisfying your sweet tooth without the guilt. Plus, they’re super quick to whip up, making them a fantastic option for busy weeknights when you’re also juggling quick family dinners or looking for easy pasta recipes. Let’s dive into this fun and easy recipe!

Why You’ll Love This Recipe

  • Quick and easy to make in just 5 steps!
  • High in protein, making it a healthier dessert option.
  • Perfect for satisfying cravings without the guilt.
  • Great for meal prep or a sweet snack anytime.
  • Fun to customize with your favorite flavors!

Ingredients

To make these delightful Microwave Protein Whoopie Pies, you’ll need the following ingredients:

  • 1 cup of protein powder (your favorite flavor)
  • 1/2 cup of almond flour
  • 1/4 cup of cocoa powder (for a chocolatey twist)
  • 1/2 cup of unsweetened applesauce
  • 1/4 cup of honey or maple syrup
  • 1/2 teaspoon of baking powder
  • 1/4 teaspoon of salt
  • 1/2 cup of Greek yogurt (for the filling)
  • 1 teaspoon of vanilla extract

Full ingredient list with measurements is provided in the printable recipe card below.

How to Make the Recipe

Making these Microwave Protein Whoopie Pies is a breeze! Follow these simple steps:

  1. Mix the Dry Ingredients: In a large bowl, combine the protein powder, almond flour, cocoa powder, baking powder, and salt. Stir until well mixed.
  2. Add the Wet Ingredients: Add the applesauce, honey (or maple syrup), and vanilla extract to the dry ingredients. Mix until you have a smooth batter.
  3. Microwave the Batter: Using a spoon, drop small dollops of the batter onto a microwave-safe plate lined with parchment paper. Make sure to leave space between each dollop. Microwave for about 30-40 seconds, or until they are set but still soft.
  4. Prepare the Filling: While the whoopie pie shells are cooling, mix the Greek yogurt with a bit of honey and vanilla extract in a separate bowl. This will be your creamy filling!
  5. Assemble the Whoopie Pies: Once the shells are cool, spread a generous amount of the yogurt filling on one shell and top it with another. Press gently to create a sandwich.

Pro Tips for Making the Recipe

Here are some of my favorite tips to ensure your Microwave Protein Whoopie Pies turn out perfectly:

  • Experiment with different protein powder flavors to find your favorite!
  • Don’t overcook the batter in the microwave; it should be soft and chewy.
  • For a fun twist, add chocolate chips or nuts to the batter.
  • Let the whoopie pies cool completely before adding the filling for the best texture.
  • These are great for meal prep; make a batch and enjoy them throughout the week!

How to Serve

These whoopie pies are perfect for any occasion! Here are some serving suggestions:

  • Enjoy them as a post-workout snack to refuel your body.
  • Serve them at a family gathering or potluck for a healthy dessert option.
  • Pair them with a cup of coffee or tea for a delightful afternoon treat.
  • They also make a great addition to lunchboxes for a sweet surprise!

Make Ahead and Storage

These Microwave Protein Whoopie Pies are perfect for making ahead of time! Here’s how to store them:

  • Store them in an airtight container in the refrigerator for up to a week.
  • You can also freeze them! Just wrap each whoopie pie individually in plastic wrap and place them in a freezer-safe bag. They’ll last for up to a month.
  • When you’re ready to enjoy, simply thaw them in the fridge or microwave for a few seconds.

So there you have it! A delicious, protein-packed treat that’s easy to make and perfect for satisfying your sweet cravings. Whether you’re looking for quick family dinners or just a fun dessert to whip up, these Microwave Protein Whoopie Pies are sure to please. Don’t forget to check out my other easy pasta recipes for more quick and delicious meal ideas, including creamy garlic pasta and other 30-minute meals that are perfect for busy weeknights. Happy baking!

Microwave Protein Whoopie Pies

Prep Time 10 minutes
Cook Time 2 minutes
Total Time 12 minutes
Servings 2 pieces
Calories 250
Delicious and quick protein-packed whoopie pies made in the microwave for a satisfying treat.

Ingredients

Eggs & Dairy

  • 1 large Large Whole Egg
  • 2.65 ounces Greek Yogurt (Vanilla Fat Free)

Dry Ingredients

  • 3 tablespoons Coconut Flour
  • 2 tablespoons Cocoa Powder
  • 1 teaspoon Vanilla Extract
  • 1.5 scoops Protein Powder (Chocolate)
  • 1.5 tablespoons Chocolate Chips (Semi-Sweet)
  • ¼ teaspoon Baking Powder

Fruits & Vegetables

  • ½ banana Banana

Dairy & Alternatives

  • ½ cup Cottage Cheese (Fat Free)
  • 2.65 ounces Greek Yogurt (Vanilla Fat Free)
  • ½ teaspoon Vanilla Extract

Instructions 

  • Melt the chocolate chips.
  • Mix all ingredients for the whoopie pies in a bowl.
  • Pour batter into a greased mug and microwave for 30 seconds, stir, then microwave for 90 seconds.
  • Cut the mug cake into 4 pieces.
  • Mix filling ingredients until smooth, then spread between two cake pieces.

Notes

Use non-stick spray for easier removal from the mug.
Calories: 250kcal
Cost: $8
Course: Dessert
Cuisine: American
Keyword: Microwave, Protein, whoopie pie

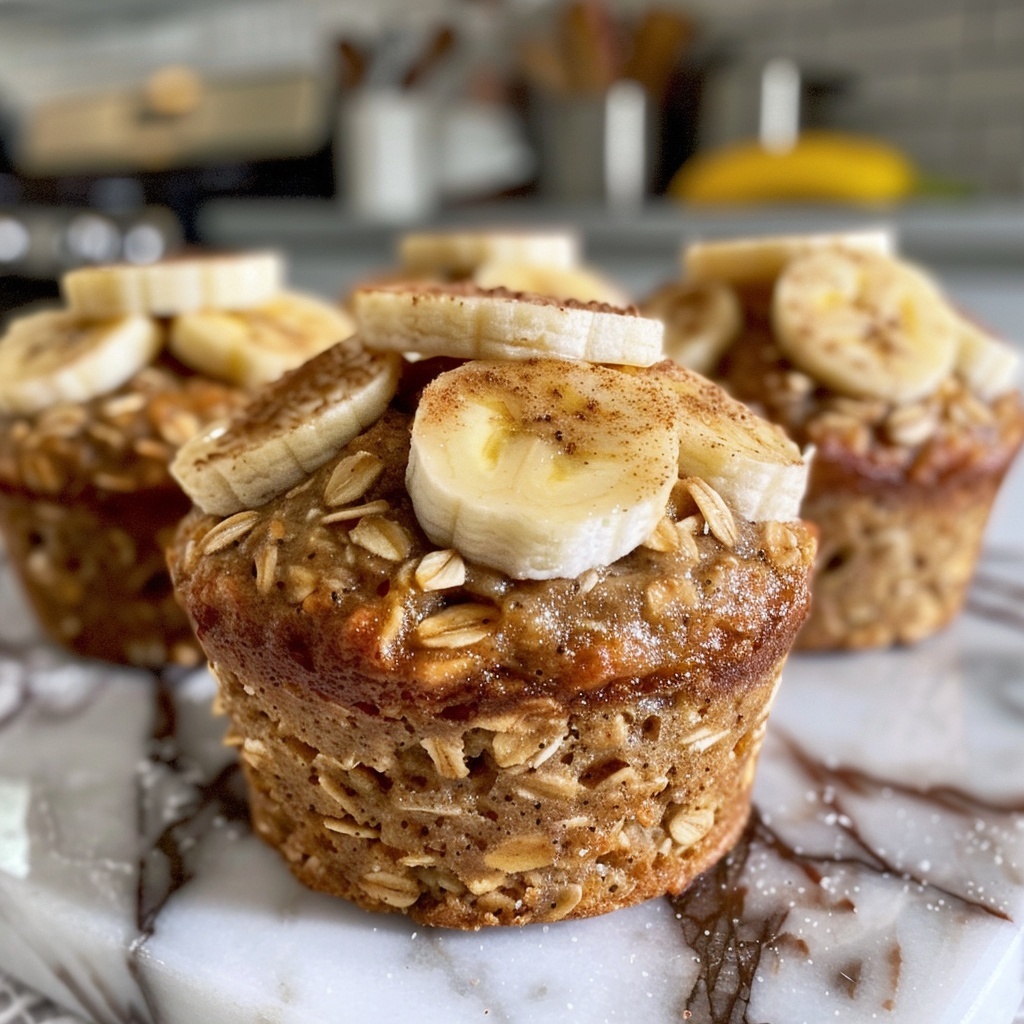
Are you looking for a nutritious breakfast that will kickstart your day with energy? Look no further! These Banana Oat Protein Muffins are not only delicious but also packed with wholesome ingredients that will keep you fueled throughout your busy morning. Plus, they’re perfect for those of us who love to whip up easy pasta recipes for quick family dinners or need some inspiration for 30-minute meals. Let’s dive into this delightful recipe that will surely become a staple in your kitchen!

Why You’ll Love This Recipe

  • Nutritious and filling: Packed with protein and fiber to keep you satisfied.
  • Quick and easy: Perfect for busy mornings or as a snack on the go.
  • Versatile: Customize with your favorite add-ins like nuts or chocolate chips.
  • Kid-friendly: A great way to sneak in healthy ingredients for picky eaters.
  • Meal prep friendly: Make a batch ahead of time for a week of delicious breakfasts!

Ingredients

To make these scrumptious muffins, you’ll need the following ingredients:

  • 2 ripe bananas, mashed
  • 1 cup rolled oats
  • 1/2 cup protein powder (vanilla or unflavored)
  • 1/4 cup honey or maple syrup
  • 1/2 cup milk (dairy or non-dairy)
  • 1/2 teaspoon baking powder
  • 1/2 teaspoon baking soda
  • 1/2 teaspoon cinnamon
  • 1/4 teaspoon salt
  • Optional: 1/2 cup chocolate chips or nuts

Full ingredient list with measurements is provided in the printable recipe card below.

How to Make the Recipe

Making these Banana Oat Protein Muffins is a breeze! Here’s how:

  1. Preheat your oven to 350°F (175°C) and line a muffin tin with paper liners or grease it lightly.
  2. In a large mixing bowl, combine the mashed bananas, honey (or maple syrup), and milk. Mix until well combined.
  3. Add the rolled oats, protein powder, baking powder, baking soda, cinnamon, and salt to the wet ingredients. Stir until just combined.
  4. If you’re adding chocolate chips or nuts, fold them in gently.
  5. Divide the batter evenly among the muffin cups, filling each about 2/3 full.
  6. Bake for 18-20 minutes, or until a toothpick inserted into the center comes out clean.
  7. Let the muffins cool in the pan for a few minutes before transferring them to a wire rack to cool completely.

Pro Tips for Making the Recipe

Here are some helpful suggestions to ensure your muffins turn out perfectly:

  • Use overripe bananas for the best flavor and sweetness.
  • Feel free to experiment with different protein powders to find your favorite.
  • For a fun twist, try adding a teaspoon of vanilla extract or a handful of dried fruit.
  • Don’t overmix the batter; it’s okay if there are a few lumps!
  • Check your muffins a minute or two early to avoid overbaking.

How to Serve

These muffins are delicious on their own, but you can elevate your breakfast experience by serving them with:

  • A dollop of Greek yogurt for added creaminess.
  • Fresh fruit like berries or sliced apples on the side.
  • A drizzle of nut butter for extra protein and flavor.
  • Pair them with a cup of coffee or tea for a cozy morning treat.

Make Ahead and Storage

These Banana Oat Protein Muffins are perfect for meal prep! Here’s how to store them:

  • Store cooled muffins in an airtight container at room temperature for up to 3 days.
  • For longer storage, freeze them in a single layer on a baking sheet, then transfer to a freezer bag. They’ll keep for up to 3 months.
  • To reheat, simply pop them in the microwave for 15-20 seconds or let them thaw at room temperature.

Now that you have this easy recipe in your arsenal, you can enjoy a nutritious breakfast that will boost your morning energy! And if you’re ever in need of weeknight dinner ideas, don’t forget to check out my favorite creamy garlic pasta or other easy pasta recipes for quick family dinners. Happy baking!

Banana Oat Protein Muffins

Prep Time 10 minutes
Cook Time 25 minutes
Total Time 35 minutes
Servings 12 muffins
Calories 180
Delicious and healthy banana oat muffins packed with protein, perfect for a quick breakfast or snack.

Ingredients

Dry Ingredients

  • 2 cups Rolled Oats
  • 1.5 cups Unsweetened Apple Sauce
  • 1 teaspoon Baking Powder
  • 1 teaspoon Baking Soda
  • 2 teaspoons Ground Cinnamon
  • 4 scoops Protein Powder (Vanilla or Banana)

Wet Ingredients

  • 2 large Bananas (or 3 small)
  • 4 large Egg Whites

Instructions 

  • Add and mix all of your ingredients together in a bowl
  • Coat a jumbo muffin pan with non-stick spray
  • Bake at 350F/176C for 25-30 minutes or 15-20 minutes for regular muffins

Notes

Use ripe bananas for best flavor and sweetness.
Calories: 180kcal
Cost: $15
Course: Breakfast
Cuisine: American
Keyword: Banana, Healthy, Protein

Are you ready to elevate your breakfast game? I know I am! Today, I’m excited to share my delightful recipe for Protein Greek Yogurt French Toast. This dish is not only delicious but also packed with protein, making it a perfect start to your day. Plus, it’s a fantastic way to sneak in some extra nutrition without sacrificing flavor. If you’re looking for easy pasta recipes or quick family dinners, you’ll love how this recipe fits into your busy lifestyle!

Why You’ll Love This Recipe

  • High in protein to keep you full and satisfied.
  • Quick and easy to prepare, perfect for busy mornings.
  • Deliciously sweet and customizable with your favorite toppings.
  • A great way to use up leftover bread.
  • Perfect for family breakfasts or brunch gatherings.

Ingredients

To whip up this scrumptious Protein Greek Yogurt French Toast, you’ll need the following ingredients:

  • 4 slices of whole-grain bread
  • 1 cup of Greek yogurt (plain or flavored)
  • 2 large eggs
  • 1 teaspoon vanilla extract
  • 1 teaspoon cinnamon
  • 1 tablespoon honey or maple syrup (optional)
  • Butter or oil for cooking
  • Fresh fruit, nuts, or syrup for topping

Full ingredient list with measurements is provided in the printable recipe card below.

How to Make the Recipe

Let’s get cooking! Follow these simple steps to create your own Protein Greek Yogurt French Toast:

  1. In a mixing bowl, whisk together the Greek yogurt, eggs, vanilla extract, cinnamon, and honey or maple syrup until smooth.
  2. Heat a non-stick skillet over medium heat and add a little butter or oil.
  3. Dip each slice of bread into the yogurt mixture, ensuring both sides are well-coated.
  4. Place the coated bread slices onto the skillet and cook for about 3-4 minutes on each side, or until golden brown.
  5. Remove from the skillet and serve warm with your favorite toppings like fresh fruit, nuts, or a drizzle of syrup.

Pro Tips for Making the Recipe

Here are some of my favorite tips to ensure your French toast turns out perfectly every time:

  • For a richer flavor, use brioche or challah bread instead of whole-grain.
  • Let the bread soak in the mixture for a few seconds longer for a creamier texture.
  • Experiment with different spices like nutmeg or cardamom for a unique twist.
  • If you’re short on time, prepare the mixture the night before and store it in the fridge.
  • Pair this dish with a side of creamy garlic pasta for a delightful brunch spread!

How to Serve

This Protein Greek Yogurt French Toast is incredibly versatile! Here are some serving suggestions:

  • Top with fresh berries, banana slices, or a sprinkle of nuts for added crunch.
  • Drizzle with honey or maple syrup for a touch of sweetness.
  • Serve alongside a refreshing fruit salad for a balanced meal.
  • Pair with a smoothie or a cup of coffee for a complete breakfast experience.
  • For a fun twist, serve it as a dessert with whipped cream and chocolate sauce!

Make Ahead and Storage

If you want to save time during the week, you can make the yogurt mixture ahead of time. Just store it in an airtight container in the fridge for up to 2 days. When you’re ready to enjoy, simply dip your bread and cook as directed. Leftover French toast can be stored in the fridge for up to 3 days. Reheat in the toaster or microwave for a quick breakfast option.

Now that you have this delicious recipe in your arsenal, you can enjoy a healthy breakfast that’s both satisfying and easy to make. Whether you’re looking for 30-minute meals or weeknight dinner ideas, this Protein Greek Yogurt French Toast is sure to become a family favorite. So, gather your ingredients and let’s get cooking!

Protein Greek Yogurt French Toast

Prep Time 5 minutes
Cook Time 10 minutes
Total Time 15 minutes
Servings 2 servings
Calories 350
A nutritious and delicious twist on classic French toast, packed with protein and flavor.

Ingredients

Eggs

  • 2 large Large Whole Eggs

Milk Substitute

  • 2 ounces Milk Substitute (or Milk)

Greek Yogurt

  • 1 container Greek Yogurt (Your Choice Flavor)

Ground Cinnamon

  • 1 teaspoon Ground Cinnamon

Ground Nutmeg

  • ¼ teaspoon Ground Nutmeg

Vanilla Extract

  • 1 teaspoon Vanilla Extract

Protein Powder

  • 1 scoop Protein Powder (Your Choice Flavor)

Salt

  • A little Salt (A little)

Protein Bar

  • 1 piece Protein Bar (For Topping)

Bread

  • 2 slices Bread (Your Choice)

Instructions 

  • Mix all ingredients in a bowl.
  • Dunk bread into the mixture for about a minute per side.
  • Heat a pan on medium and coat with non-stick spray.
  • Cook each side for 1-2 minutes until golden, repeat with remaining bread.
  • Top with protein bar before serving.

Notes

Use your favorite bread and yogurt flavor for variety.
Calories: 350kcal
Cost: $10
Course: Breakfast
Cuisine: American
Keyword: French Toast, Protein

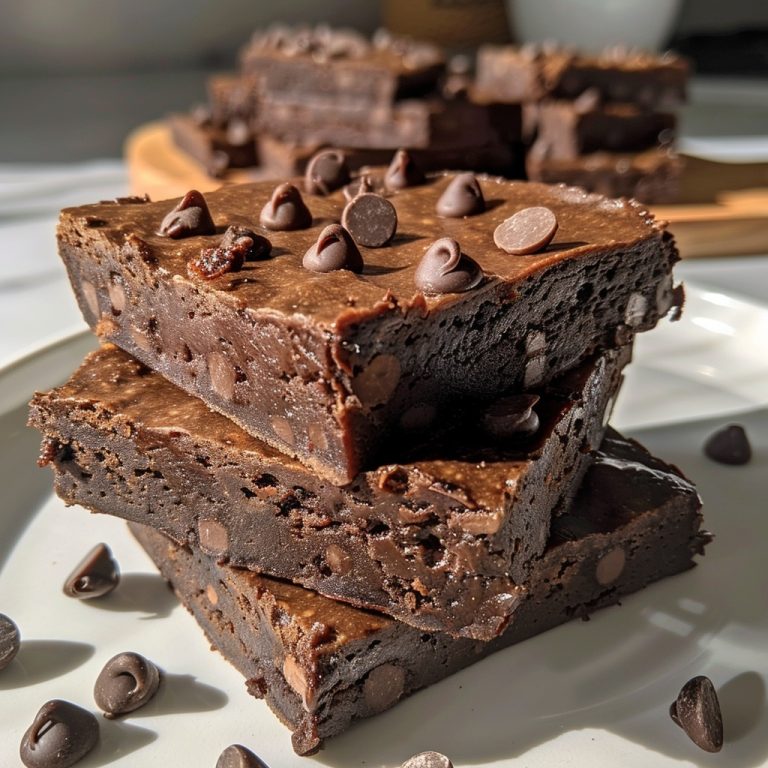
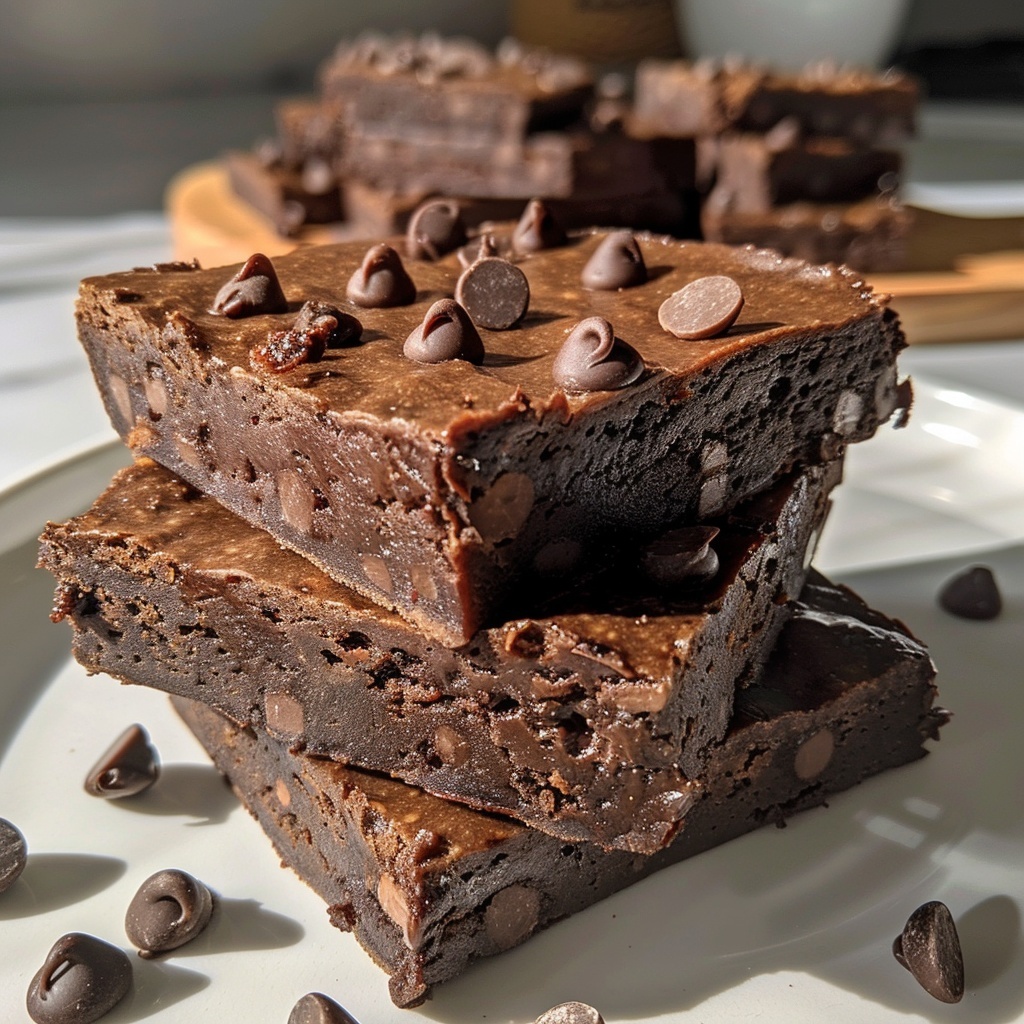
Are you ready to indulge in a delicious treat that’s not only satisfying but also packed with protein? I know I am! Today, I’m excited to share my recipe for Fudge Brownie Protein Bars. These bars are perfect for a quick snack, and they’re so easy to make that you’ll want to whip them up every week. Plus, they fit right into my busy lifestyle, especially when I’m juggling quick family dinners and looking for easy pasta recipes to keep things interesting. Let’s dive into this delightful recipe!

Why You’ll Love This Recipe

  • Rich, fudgy flavor that satisfies your chocolate cravings.
  • High in protein, making it a great post-workout snack.
  • Simple ingredients you probably already have in your pantry.
  • Perfect for meal prep—make a batch and enjoy throughout the week!
  • Great for kids and adults alike, making it a family favorite.

Ingredients

To make these scrumptious Fudge Brownie Protein Bars, you’ll need the following ingredients:

  • 1 cup of almond flour
  • 1/2 cup of cocoa powder
  • 1/2 cup of protein powder (chocolate or vanilla)
  • 1/4 cup of honey or maple syrup
  • 1/2 cup of almond butter or peanut butter
  • 1/4 cup of unsweetened applesauce
  • 1/2 teaspoon of vanilla extract
  • 1/4 teaspoon of salt
  • 1/2 cup of dark chocolate chips (optional)

Full ingredient list with measurements is provided in the printable recipe card below.

How to Make the Recipe

Now, let’s get to the fun part—making these delicious bars!

  1. Preheat your oven to 350°F (175°C) and line an 8×8 inch baking dish with parchment paper.
  2. In a large mixing bowl, combine the almond flour, cocoa powder, protein powder, and salt. Mix well.
  3. Add in the almond butter, honey (or maple syrup), applesauce, and vanilla extract. Stir until everything is well combined.
  4. If you’re using dark chocolate chips, fold them into the mixture now.
  5. Pour the batter into the prepared baking dish and spread it evenly.
  6. Bake for 20-25 minutes, or until a toothpick inserted in the center comes out clean.
  7. Let the bars cool completely in the pan before cutting them into squares.

Pro Tips for Making the Recipe

Here are some of my favorite tips to ensure your Fudge Brownie Protein Bars turn out perfectly:

  • For a richer flavor, try using dark cocoa powder instead of regular cocoa powder.
  • Feel free to substitute the almond flour with oat flour if you prefer.
  • Experiment with different nut butters for a unique taste—sunflower seed butter works great too!
  • Store the bars in an airtight container to keep them fresh for longer.
  • If you want to add a little crunch, sprinkle some chopped nuts on top before baking.

How to Serve

These Fudge Brownie Protein Bars are incredibly versatile! Here are some serving suggestions:

  • Enjoy them as a quick breakfast on the go.
  • Pair them with a glass of milk or a smoothie for a balanced snack.
  • Crush them up and sprinkle over your favorite yogurt for a delicious dessert.
  • Serve them at your next family gathering or potluck as a healthier dessert option.

Make Ahead and Storage

One of the best things about these bars is that they’re perfect for meal prep! Here’s how to store them:

  • Once cooled, cut the bars and store them in an airtight container in the fridge for up to a week.
  • You can also freeze them for up to three months. Just make sure to wrap them individually in plastic wrap before placing them in a freezer bag.
  • When you’re ready to enjoy, simply thaw them in the fridge overnight or at room temperature for a few hours.

So there you have it! A delicious, protein-packed snack that’s perfect for any time of day. Whether you’re looking for quick family dinners, easy pasta recipes, or just a sweet treat to satisfy your cravings, these Fudge Brownie Protein Bars are sure to hit the spot. I can’t wait for you to try them—happy baking!

Fudge Brownie Protein Bars

Prep Time 10 minutes
Cook Time 15 minutes
Total Time 25 minutes
Servings 8 bars
Calories 250
Delicious and nutritious protein bars made with black beans and cocoa, perfect for a quick snack or post-workout treat.

Ingredients

Main Ingredients

  • 15.5 ounces Black Beans (Reduced Sodium)
  • 4 tablespoons Peanut Oil (Your choice of neutral oil)
  • 1 tablespoon Ground Coffee
  • 4 tablespoons Cocoa Powder
  • 3 scoops Protein Powder (Chocolate)
  • 2-3 tablespoons Sweetener (Erythritol)
  • 0.25 teaspoon Salt
  • 2 ounces Milk Substitute (Add more if mixture is too thick)
  • 1 tablespoon Chocolate Chips (Optional)

Instructions 

  • Add all ingredients except chocolate chips into a food processor and blend until smooth.
  • Pour mixture into a prepared baking pan and spread evenly.
  • Top with chocolate chips and bake at 350°F (176°C) for 12-15 minutes.

Notes

Store in an airtight container for best freshness.
Calories: 250kcal
Cost: $10
Course: Snack
Keyword: Bars, Healthy, Protein