Are you craving bread while sticking to your keto diet? I totally get it! Bread can be one of the hardest things to give up, especially when you’re trying to whip up quick family dinners or enjoy a cozy meal at home. But fear not! I’m here to share my delightful recipe for Microwave Keto Bread that you can make in just 2 minutes! Yes, you heard that right! This easy recipe is perfect for those busy weeknights when you want something delicious without spending hours in the kitchen. Plus, it pairs wonderfully with my favorite easy pasta recipes for a complete meal!
Why You’ll Love This Recipe
- Quick and easy to make in just 2 minutes!
- Low-carb and keto-friendly, perfect for your diet.
- Versatile – enjoy it as a side or as a base for your favorite toppings.
- Great for quick family dinners or as a snack.
- Perfect for those who love 30-minute meals!
Ingredients
Making this Microwave Keto Bread requires just a handful of simple ingredients that you probably already have in your pantry. Here’s what you’ll need:
- 1/4 cup almond flour
- 1 tablespoon coconut flour
- 1/2 teaspoon baking powder
- 1/4 teaspoon salt
- 1 large egg
- 1 tablespoon melted butter or olive oil
- Optional: herbs or spices for flavor
Full ingredient list with measurements is provided in the printable recipe card below.
How to Make the Recipe
Now, let’s get to the fun part! Here’s how to whip up this delicious bread in no time:
- In a microwave-safe bowl, combine the almond flour, coconut flour, baking powder, and salt. Mix well.
- Add the egg and melted butter (or olive oil) to the dry ingredients. Stir until you have a smooth batter.
- If you want to add some extra flavor, feel free to mix in your favorite herbs or spices at this point!
- Microwave the mixture on high for about 90 seconds. Keep an eye on it to ensure it doesn’t overflow.
- Once done, let it cool for a minute before removing it from the bowl. You can slice it or enjoy it whole!
Pro Tips for Making the Recipe
Here are some of my favorite tips to ensure your Microwave Keto Bread turns out perfectly every time:
- Use a microwave-safe bowl that’s large enough to prevent overflow.
- Experiment with different flavors by adding garlic powder, Italian seasoning, or even cheese!
- If you prefer a denser bread, add a bit more almond flour.
- For a sweeter version, consider adding a touch of sweetener and cinnamon.
How to Serve
This Microwave Keto Bread is incredibly versatile! Here are some serving suggestions:
- Enjoy it warm with butter or cream cheese.
- Use it as a base for an open-faced sandwich with your favorite toppings.
- Pair it with a hearty soup or salad for a complete meal.
- Slice it and toast it for a crunchy snack!
Make Ahead and Storage
If you want to prepare this bread ahead of time, you can make a batch and store it in an airtight container in the fridge for up to 3 days. Just pop it in the microwave for a few seconds to warm it up before serving. It’s perfect for those busy weeknight dinner ideas when you need something quick and satisfying!
So, what are you waiting for? Try this Microwave Keto Bread today and enjoy the freedom of having delicious, low-carb bread at your fingertips! And if you’re looking for more quick family dinners, don’t forget to check out my collection of easy pasta recipes that can be made in 30 minutes or less, like my creamy garlic pasta. Happy cooking!
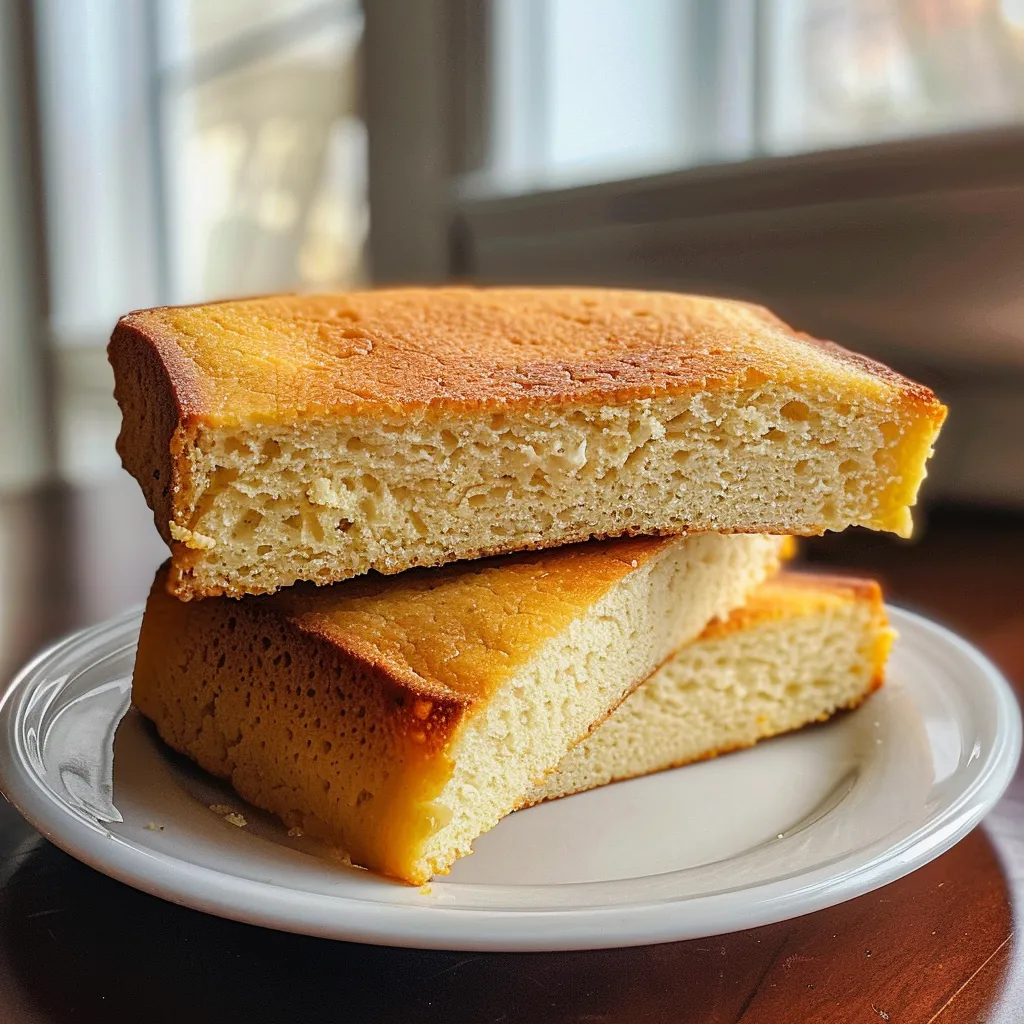
Microwave Keto Bread
Ingredients
Main
- 1.5 Tablespoons Butter
- 1 Large Whole Egg
- 3 Tablespoons Almond Flour
- 0.5 Teaspoon Garlic Seasoning ((or Other Seasoning *Optional))
- 0.5 Teaspoon Baking Powder
- 0.5 Scoop Protein Powder (Any flavor works *Optional)
- 1 Large Egg White (*Optional)
Instructions
- Melt your Butter
- Mix together your Butter and Egg
- Add and mix in the rest of your ingredients
- Top with desired toppings
- Microwave for around 2 minutes
- Cut in half and optionally toast