Author

Ava

Browsing

Are you ready to whip up a delicious treat that your kids will absolutely adore? I know I am! Today, I’m excited to share my recipe for Chocolate Protein Spread. This delightful spread is not only scrumptious but also packed with nutrition, making it a perfect addition to your family’s snack time. Plus, it’s a fantastic way to sneak in some healthy ingredients without anyone noticing! If you’re looking for easy pasta recipes to pair with this spread, you’re in for a treat!

Why You’ll Love This Recipe

  • Quick and easy to make, perfect for busy weeknights.
  • Nutritious ingredients like black beans and protein powder.
  • Kids will love the chocolatey flavor!
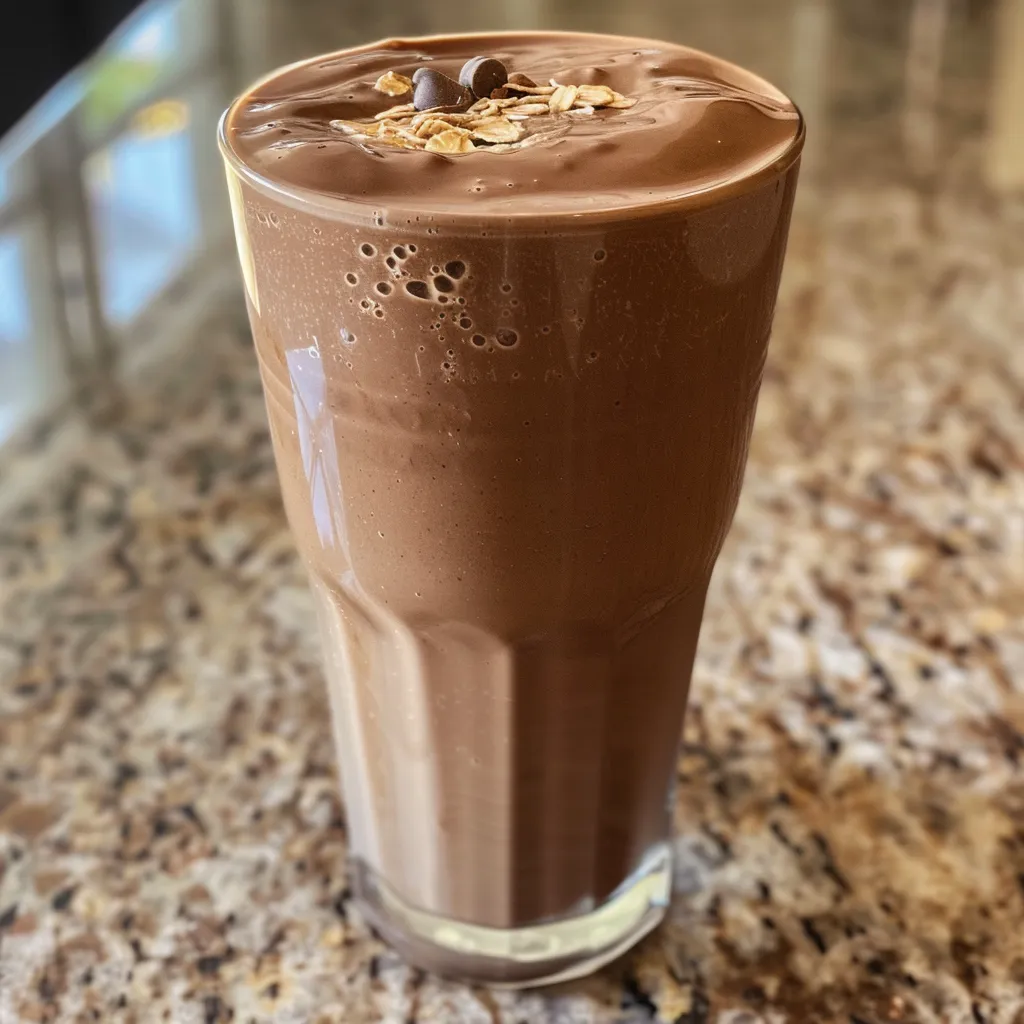
  • Versatile: use it as a spread, dip, or even in smoothies.
  • Great for healthy snacks and can be made ahead of time.

Ingredients

To make this delightful Chocolate Protein Spread, you’ll need the following ingredients:

  • 1 can of black beans, rinsed and drained
  • 1/4 cup of cocoa powder
  • 1/4 cup of honey or maple syrup
  • 1/4 cup of protein powder (chocolate or vanilla)
  • 1 teaspoon of vanilla extract
  • 1/4 cup of almond milk (or any milk of your choice)
  • A pinch of salt

Full ingredient list with measurements is provided in the printable recipe card below.

How to Make the Recipe

Making this Chocolate Protein Spread is as easy as pie! Here’s how you do it:

  1. In a food processor, combine the rinsed black beans, cocoa powder, honey (or maple syrup), protein powder, vanilla extract, almond milk, and a pinch of salt.
  2. Blend until smooth and creamy. You may need to scrape down the sides a couple of times to ensure everything is well mixed.
  3. Taste the spread and adjust sweetness if necessary by adding more honey or maple syrup.
  4. Once you achieve a creamy consistency, transfer the spread to a jar or airtight container.
  5. Refrigerate for at least 30 minutes to let the flavors meld together.

Pro Tips for Making the Recipe

Here are some of my favorite tips to ensure your Chocolate Protein Spread turns out perfectly:

  • Make sure to rinse the black beans thoroughly to remove any excess sodium.
  • If you prefer a sweeter spread, feel free to add more honey or maple syrup to taste.
  • For a creamier texture, add a little more almond milk until you reach your desired consistency.
  • Experiment with different protein powders to find your favorite flavor combination!
  • This spread can also be used as a filling for crepes or pancakes for a fun breakfast treat.

How to Serve

Now that you have your Chocolate Protein Spread ready, let’s talk about how to serve it! Here are some delicious ideas:

  • Spread it on whole-grain toast or bagels for a nutritious breakfast.
  • Use it as a dip for fresh fruits like apple slices, bananas, or strawberries.
  • Incorporate it into your 30-minute meals by using it as a sauce for a quick dessert.
  • Pair it with creamy garlic pasta for a unique flavor twist!
  • Make it a part of your quick family dinners by serving it alongside a cheese platter.

Make Ahead and Storage

This Chocolate Protein Spread is perfect for meal prep! Here’s how to store it:

  • Store the spread in an airtight container in the refrigerator for up to one week.
  • If you want to make it ahead of time, it can be prepared up to three days in advance.
  • For longer storage, consider freezing it in small portions. Just thaw in the refrigerator before serving.

With this Chocolate Protein Spread, you can create delightful snacks and desserts that your kids will love while keeping their nutrition in check. It’s a win-win! So, gather your ingredients and get ready to enjoy this delicious treat. And if you’re looking for more weeknight dinner ideas, don’t forget to check out my collection of easy pasta recipes for quick and satisfying meals!

Chocolate Protein Spread

Prep Time 10 minutes
Total Time 10 minutes
Servings 8 tablespoons
Calories 250
A delicious and healthy chocolate protein spread perfect for snacks or breakfast. Easy to make with simple ingredients and packed with protein.

Ingredients

Main Ingredients

  • 15.5 ounces Black Beans (Reduced Sodium)
  • 3 tablespoons Cocoa Powder
  • 2 ounces Milk Substitute (or Milk)
  • 3 scoops Protein Powder (Chocolate)
  • 1 teaspoon Vanilla Extract
  • 0.25 cup Rolled Oats (or Coconut Flour)
  • 1 tablespoon Chocolate Syrup

Instructions 

  • Drain and rinse your Black Beans
  • Add all ingredients into a powerful blender or food processor
  • Blend until creamy
  • Store in mason jars

Notes

For a smoother spread, process longer or add a splash of water if needed.
Calories: 250kcal
Cost: $8
Course: Spread
Cuisine: American
Keyword: chocolate, Protein

Are you ready to indulge in a rich, chocolatey treat without the guilt? I know I am! Today, I’m excited to share my recipe for Stuffed Low Carb Brownies that you can whip up in just 40 minutes. These brownies are not only delicious but also fit perfectly into a low-carb lifestyle. Plus, they’re a fantastic way to satisfy that sweet tooth while keeping your health goals in check. And if you’re looking for easy pasta recipes to pair with your brownies for a delightful dinner, I’ve got you covered!

Why You’ll Love This Recipe

  • Quick and easy to make in just 40 minutes.
  • Low in carbs, making it a guilt-free dessert option.
  • Rich, chocolatey flavor that satisfies any sweet craving.
  • Perfect for family gatherings or a cozy night in.
  • Can be made ahead and stored for later enjoyment.

Ingredients

To make these delightful brownies, you’ll need the following ingredients:

  • 1 cup almond flour
  • 1/2 cup unsweetened cocoa powder
  • 1/2 cup erythritol or your favorite low-carb sweetener
  • 1/4 cup unsalted butter, melted
  • 2 large eggs
  • 1 teaspoon vanilla extract
  • 1/2 teaspoon baking powder
  • 1/4 teaspoon salt
  • 1/2 cup sugar-free chocolate chips (for stuffing)

Full ingredient list with measurements is provided in the printable recipe card below.

How to Make the Recipe

Now, let’s dive into the fun part—making these scrumptious brownies!

  1. Preheat your oven to 350°F (175°C) and grease an 8×8 inch baking pan.
  2. In a large mixing bowl, combine the almond flour, cocoa powder, erythritol, baking powder, and salt.
  3. Add the melted butter, eggs, and vanilla extract to the dry ingredients. Mix until well combined.
  4. Fold in the sugar-free chocolate chips, reserving a few for topping.
  5. Pour half of the brownie batter into the prepared baking pan, spreading it evenly.
  6. Sprinkle the remaining chocolate chips over the batter, then pour the rest of the brownie batter on top.
  7. Top with the reserved chocolate chips for an extra chocolatey finish.
  8. Bake in the preheated oven for 20-25 minutes, or until a toothpick inserted in the center comes out clean.
  9. Let the brownies cool in the pan for about 10 minutes before slicing into squares.

Pro Tips for Making the Recipe

Here are some of my favorite tips to ensure your brownies turn out perfectly:

  • Make sure to measure your ingredients accurately for the best results.
  • Don’t overmix the batter; just mix until combined to keep the brownies fudgy.
  • For an extra touch, add a sprinkle of sea salt on top before baking.
  • Feel free to experiment with different low-carb sweeteners to find your favorite flavor.
  • If you want to make these brownies even more decadent, consider adding a layer of cream cheese filling!

How to Serve

These Stuffed Low Carb Brownies are perfect on their own, but if you want to elevate your dessert experience, here are some serving suggestions:

  • Serve warm with a dollop of whipped cream or a scoop of low-carb ice cream.
  • Pair with a cup of coffee or tea for a delightful afternoon treat.
  • For a fun twist, drizzle with sugar-free chocolate syrup or a sprinkle of nuts.
  • These brownies also make a great addition to a dessert platter for gatherings.

Make Ahead and Storage

If you’re like me and love to plan ahead, these brownies are perfect for making in advance. Here’s how to store them:

  • Once cooled, store the brownies in an airtight container at room temperature for up to 3 days.
  • For longer storage, keep them in the refrigerator for up to a week.
  • You can also freeze the brownies! Just wrap them tightly in plastic wrap and place them in a freezer-safe bag. They’ll last for up to 3 months.
  • When you’re ready to enjoy, simply thaw at room temperature or warm them in the microwave for a few seconds.

Now that you have this delightful recipe in your arsenal, you can enjoy a sweet treat without the carbs! And if you’re looking for more weeknight dinner ideas, don’t forget to check out my collection of 30-minute meals and creamy garlic pasta recipes. Happy baking!

Stuffed Low Carb Brownies

Prep Time 15 minutes
Cook Time 40 minutes
Total Time 55 minutes
Servings 8 pieces
Calories 350
Delight in these rich, low-carb brownies with a creamy filling, perfect for a healthy treat.

Ingredients

Main Ingredients

  • 4 tablespoons Chocolate Chips (Semi-Sweet or Sugar Free)
  • 2 large Whole Eggs
  • 0.25 cup Sweetener
  • 1 tablespoon Butter
  • 0.25 cup Unsweetened Apple Sauce
  • 2 teaspoons Vanilla Extract
  • 3 tablespoons Cocoa Powder
  • 0.5 cup Almond Flour
  • 2 tablespoons Coconut Flour
  • 1 scoop Protein Powder (Vanilla)
  • 0.5 teaspoon Baking Powder
  • 0.25 teaspoon Salt
  • 8 ounces Cream Cheese (Fat Free or Reduced Fat)
  • 2 tablespoons Sweetener
  • 0.5 scoop Protein Powder (Vanilla)
  • 1 teaspoon Vanilla Extract

Instructions 

  • Melt the Chocolate Chips and Butter.
  • Mix eggs, sweetener, apple sauce, vanilla, melted chocolate, and butter in a large bowl.
  • Combine dry ingredients in a separate bowl.
  • Mix dry ingredients into wet mixture until just combined.
  • Grease an 8x8 baking dish and pour ¾ of the batter, smoothing the top.
  • Prepare the filling by mixing cream cheese and sweetener until fluffy.
  • Spread filling over the batter, then top with remaining batter and smooth.
  • Bake at 325°F (162°C) for 35-40 minutes until a toothpick comes out clean.

Notes

For best results, let the brownies cool before slicing.
Calories: 350kcal
Cost: $15
Course: Dessert
Keyword: brownies, Healthy, Low Carb

Are you looking for a delicious and healthy snack that the whole family will love? Well, you’re in for a treat! Today, I’m excited to share my recipe for Low Carb Protein Pancake Bites. These little bites of goodness are not only easy to make, but they also pack a protein punch, making them perfect for a quick snack or even a light breakfast. Plus, if you’re like me and enjoy whipping up easy pasta recipes for quick family dinners, you’ll appreciate how these pancake bites can fit into your busy weeknight dinner ideas!

Why You’ll Love This Recipe

  • Quick and easy to prepare, perfect for busy mornings!
  • Low in carbs, making them a great option for those watching their intake.
  • High in protein, keeping you full and satisfied.
  • Versatile – customize with your favorite toppings!
  • Great for meal prep – make a batch and enjoy throughout the week.

Ingredients

To make these delightful Low Carb Protein Pancake Bites, you’ll need the following ingredients:

  • 1 cup almond flour
  • 1 scoop protein powder (vanilla or your favorite flavor)
  • 2 large eggs
  • 1/2 cup unsweetened almond milk
  • 1 teaspoon baking powder
  • 1 teaspoon vanilla extract
  • 1/4 teaspoon salt
  • Optional: sweetener of choice (like stevia or erythritol)

Full ingredient list with measurements is provided in the printable recipe card below.

How to Make the Recipe

Making these Low Carb Protein Pancake Bites is a breeze! Just follow these simple steps:

  1. In a mixing bowl, combine the almond flour, protein powder, baking powder, and salt. Mix well.
  2. In another bowl, whisk together the eggs, almond milk, vanilla extract, and sweetener (if using).
  3. Pour the wet ingredients into the dry ingredients and stir until just combined. Be careful not to overmix!
  4. Preheat a non-stick skillet or griddle over medium heat. You can lightly grease it with cooking spray if needed.
  5. Using a tablespoon, drop the batter onto the skillet, forming small pancake bites. Cook for about 2-3 minutes on each side, or until golden brown.
  6. Remove from the skillet and let cool slightly before serving.

Pro Tips for Making the Recipe

Here are some of my favorite tips to ensure your pancake bites turn out perfectly:

  • Make sure your skillet is hot enough before adding the batter to get that lovely golden color.
  • Feel free to add in some mix-ins like blueberries, chocolate chips, or nuts for extra flavor and texture!
  • If you want to make these ahead of time, you can double the batch and freeze them. Just pop them in the toaster or microwave to reheat!
  • Experiment with different protein powder flavors to keep things interesting!

How to Serve

These Low Carb Protein Pancake Bites are incredibly versatile! Here are some serving suggestions:

  • Top with fresh berries and a dollop of Greek yogurt for a refreshing snack.
  • Drizzle with sugar-free syrup or nut butter for a sweet treat.
  • Pair with a side of scrambled eggs for a protein-packed breakfast.
  • Enjoy them plain as a quick on-the-go snack!

Make Ahead and Storage

One of the best things about these pancake bites is how easy they are to make ahead! Here’s how to store them:

  • Store any leftovers in an airtight container in the refrigerator for up to 5 days.
  • For longer storage, freeze the pancake bites in a single layer on a baking sheet, then transfer to a freezer bag. They’ll keep for up to 3 months!
  • To reheat, simply pop them in the microwave for about 30 seconds or toast them for a few minutes.

So there you have it! A delicious, healthy snack that’s perfect for any time of day. I hope you enjoy making these Low Carb Protein Pancake Bites as much as I do. They’re not just a great snack; they can also be a part of your 30-minute meals or even a light addition to your weeknight dinner ideas. Happy cooking!

Low Carb Protein Pancake Bites

Prep Time 5 minutes
Cook Time 15 minutes
Total Time 20 minutes
Servings 6 bites
Calories 150
Delicious and healthy low carb pancake bites perfect for a quick breakfast or snack, packed with protein and flavor.

Ingredients

Dairy & Eggs

  • 2 Large Whole Eggs
  • 1 Large Egg White
  • 3 Tablespoons Almond Flour
  • 4 Tablespoons Coconut Flour
  • 1 Scoop Protein Powder (Your choice flavor)
  • 1-2 Tablespoons Sweetener
  • 0.5 Teaspoon Vanilla Extract
  • 1.5 Ounces Heavy Cream
  • 3 Ounces Cream Cheese (Full, Reduced, or Fat Free) (Reduced used)
  • 1.5 Teaspoons Baking Powder
  • 0.25 Teaspoon Salt

Instructions 

  • Mix all ingredients until smooth.
  • Pour mixture into a greased mini-muffin pan.
  • Add toppings if desired.
  • Bake at 350°F (176°C) for 10-15 minutes.

Notes

Store in an airtight container for up to 3 days.
Calories: 150kcal
Cost: $10
Course: Breakfast
Keyword: Low Carb, Protein

Have you ever craved a delicious, creamy spread that not only satisfies your taste buds but also packs a protein punch? Well, I have just the recipe for you! Today, I’m excited to share my Cinnamon Raisin Protein Peanut Butter recipe. This delightful spread is perfect for quick family dinners, slathered on toast, or even as a dip for your favorite fruits. Plus, it’s a fantastic addition to your smoothies! Let’s dive into this easy pasta recipes-inspired treat that will elevate your snacking game!

Why You’ll Love This Recipe

  • Quick and easy to make in just 4 simple steps!
  • Packed with protein to keep you energized throughout the day.
  • Perfect for spreading on toast, adding to smoothies, or enjoying straight from the jar.
  • Great for meal prep and can be stored for weeks.
  • Deliciously sweet and spiced with cinnamon, making it a family favorite!

Ingredients

To whip up this delightful Cinnamon Raisin Protein Peanut Butter, you’ll need the following ingredients:

  • 1 cup natural peanut butter
  • 1/2 cup protein powder (vanilla or unflavored)
  • 1/4 cup honey or maple syrup
  • 1/2 cup raisins
  • 1 tablespoon ground cinnamon
  • 1/4 teaspoon salt

Full ingredient list with measurements is provided in the printable recipe card below.

How to Make the Recipe

Making your own Cinnamon Raisin Protein Peanut Butter is a breeze! Follow these simple steps:

  1. Combine Ingredients: In a mixing bowl, combine the natural peanut butter, protein powder, honey (or maple syrup), ground cinnamon, and salt. Mix until well combined.
  2. Add Raisins: Gently fold in the raisins until they are evenly distributed throughout the mixture.
  3. Adjust Consistency: If the mixture is too thick, you can add a little water or more honey to reach your desired consistency.
  4. Store: Transfer the peanut butter to an airtight container and store it in the refrigerator.

Pro Tips for Making the Recipe

Here are some of my favorite tips to ensure your Cinnamon Raisin Protein Peanut Butter turns out perfectly:

  • Use high-quality natural peanut butter for the best flavor.
  • Feel free to experiment with different protein powders to find your favorite taste.
  • If you prefer a smoother texture, blend the mixture in a food processor.
  • For a fun twist, add chopped nuts or seeds for extra crunch!

How to Serve

This Cinnamon Raisin Protein Peanut Butter is incredibly versatile! Here are some delicious serving suggestions:

  • Spread it on whole-grain toast for a quick breakfast.
  • Use it as a dip for apple slices or celery sticks for a healthy snack.
  • Stir it into your morning oatmeal or yogurt for added flavor and protein.
  • Incorporate it into your favorite creamy garlic pasta dish for a unique twist!

Make Ahead and Storage

This recipe is perfect for meal prep! You can make a batch ahead of time and store it in the refrigerator for up to two weeks. Just make sure to keep it in an airtight container to maintain freshness. If you’re looking for more weeknight dinner ideas, consider pairing this peanut butter with some 30-minute meals that your family will love!

So there you have it! A simple, delicious, and nutritious way to enjoy peanut butter. I hope you give this Cinnamon Raisin Protein Peanut Butter a try. It’s sure to become a staple in your kitchen, just like those easy pasta recipes that save the day on busy weeknights. Happy cooking!

Cinnamon Raisin Protein Peanut Butter

Prep Time 10 minutes
Total Time 10 minutes
Servings 16 tablespoons
Calories 950
A delicious homemade peanut butter infused with cinnamon and raisins, perfect for a protein boost and snack time.

Ingredients

Main

  • 16 ounces Peanuts (Unsalted Dry Roasted)
  • ½ teaspoon Salt
  • 3 tablespoons Peanut Oil (or Coconut Oil)
  • 1 tablespoon Honey
  • 2 ½ teaspoons Ground Cinnamon
  • 3 scoops Protein Powder (Vanilla)
  • ½ cup Raisins

Instructions 

  • Process peanuts for 45 seconds until chopped but not creamy.
  • Add remaining ingredients except half the raisins and blend until creamy (3-4 minutes).
  • Mix in the remaining raisins lightly.

Notes

Store in an airtight container for up to two weeks.
Calories: 950kcal
Cost: $10
Course: Snack
Cuisine: American
Keyword: Peanut Butter

Are you ready to whip up a delicious and nutritious meal that the whole family will love? I know I am! Today, I’m excited to share my recipe for Healthy Chicken Salad with Cottage Cheese. This dish is not only packed with protein but also incredibly easy to make, making it perfect for those busy weeknights when you need quick family dinners. Plus, it’s a fantastic alternative to traditional chicken salad, and it’s just as creamy and satisfying as those easy pasta recipes we all adore!

Why You’ll Love This Recipe

  • Quick and easy to prepare in just 5 simple steps.
  • High in protein thanks to the cottage cheese and chicken.
  • Perfect for meal prep and can be enjoyed for lunch or dinner.
  • Versatile – customize it with your favorite veggies and herbs!
  • A refreshing and light option that’s still filling.

Ingredients

To make this delightful Healthy Chicken Salad with Cottage Cheese, you’ll need the following ingredients:

  • 2 cups cooked chicken, shredded
  • 1 cup cottage cheese
  • 1/2 cup diced celery
  • 1/2 cup diced red bell pepper
  • 1/4 cup chopped green onions
  • 1 tablespoon Dijon mustard
  • 1 tablespoon lemon juice
  • Salt and pepper to taste
  • Optional: fresh herbs like dill or parsley

Full ingredient list with measurements is provided in the printable recipe card below.

How to Make the Recipe

Now, let’s dive into the fun part – making this scrumptious chicken salad! Follow these easy steps:

  1. In a large mixing bowl, combine the shredded chicken and cottage cheese. Stir until well mixed.
  2. Add in the diced celery, red bell pepper, and green onions. Mix everything together until evenly distributed.
  3. In a small bowl, whisk together the Dijon mustard, lemon juice, salt, and pepper. Pour this dressing over the chicken mixture and stir until everything is coated.
  4. If you’re using fresh herbs, fold them in gently for an extra burst of flavor.
  5. Chill in the refrigerator for at least 30 minutes before serving to let the flavors meld together.

Pro Tips for Making the Recipe

Here are some of my favorite tips to ensure your chicken salad turns out perfectly:

  • For a creamier texture, use full-fat cottage cheese. If you prefer a lighter option, low-fat works just as well!
  • Feel free to add other veggies like diced cucumbers or shredded carrots for added crunch and nutrition.
  • This salad is a great base for other flavors – try adding a splash of hot sauce or a sprinkle of your favorite seasoning blend.
  • Make sure your chicken is cooked and cooled before mixing to prevent the salad from becoming watery.

How to Serve

This Healthy Chicken Salad with Cottage Cheese is incredibly versatile! Here are some serving suggestions:

  • Serve it on a bed of mixed greens for a light and refreshing salad.
  • Use it as a filling for whole-grain wraps or sandwiches.
  • Pair it with whole-grain crackers for a satisfying snack.
  • For a heartier meal, serve it alongside a side of creamy garlic pasta or your favorite grain.

Make Ahead and Storage

This chicken salad is perfect for meal prep! Here’s how to store it:

  • Store in an airtight container in the refrigerator for up to 3 days.
  • If you plan to make it ahead of time, consider adding the dressing just before serving to keep the salad fresh.
  • This salad can also be frozen, but the texture may change slightly upon thawing. I recommend enjoying it fresh for the best taste!

So there you have it! A delightful and healthy chicken salad that’s perfect for any occasion. Whether you’re looking for quick family dinners or a nutritious lunch option, this recipe has got you covered. I hope you enjoy making and sharing this Healthy Chicken Salad with Cottage Cheese as much as I do. Happy cooking!

Healthy Chicken Salad with Cottage Cheese

Prep Time 15 minutes
Total Time 15 minutes
Servings 4 servings
Calories 350
A nutritious and delicious chicken salad combining cottage cheese, fruits, and nuts for a satisfying meal.

Ingredients

Protein

  • 12 ounces Chicken (Precooked) (Canned or Rotisserie)
  • 2 cups Cottage Cheese
  • 2 tablespoons Mayonnaise (Use Light/Low Fat if desired)
  • ½ cup Onion (Chopped)
  • 1 cup Celery (Chopped)
  • 1 tablespoon Dijon Mustard
  • ¼ teaspoon Black Pepper
  • ¼ cup Nuts (Crushed) (Walnuts preferred)
  • 2 tablespoons Cranberries (Dried)
  • 1 apple Apple (Chopped)
  • ½ cup Grapes (Sliced)

Instructions 

  • Shred or break up your precooked Chicken into a bowl
  • Chop up all of your fruits and vegetables
  • Add all ingredients except Chicken into a large bowl
  • Mix everything together
  • Add and mix in your Chicken

Notes

This salad is perfect for a healthy lunch or light dinner.
Calories: 350kcal
Cost: $12
Course: Salad
Keyword: Chicken, Healthy, Salad

After a long workout, there’s nothing quite like treating myself to a delicious Post-Workout Chocolate Milkshake! Not only does it satisfy my sweet tooth, but it also helps me recover quickly and efficiently. If you’re like me and love easy pasta recipes for quick family dinners, then this milkshake is the perfect addition to your post-exercise routine. Let’s dive into this delightful recipe that’s packed with protein and flavor!

Why You’ll Love This Recipe

  • Deliciously creamy and chocolatey, making recovery feel like a treat.
  • Quick and easy to whip up, perfect for busy weeknights.
  • Packed with protein to help your muscles recover faster.
  • Customizable with your favorite ingredients for a personal touch.
  • Great for the whole family, making it a fun post-workout snack!

Ingredients

To make this scrumptious Post-Workout Chocolate Milkshake, you’ll need the following ingredients:

  • 1 cup of chocolate milk (or your favorite milk alternative)
  • 1 scoop of chocolate protein powder
  • 1 ripe banana
  • 1 tablespoon of peanut butter (or almond butter)
  • 1 tablespoon of honey or maple syrup (optional)
  • Ice cubes (as needed for thickness)

Full ingredient list with measurements is provided in the printable recipe card below.

How to Make the Recipe

Making this Post-Workout Chocolate Milkshake is as easy as pie! Here’s how:

  1. In a blender, combine the chocolate milk, chocolate protein powder, banana, and peanut butter.
  2. Add honey or maple syrup if you like it a bit sweeter.
  3. Throw in a handful of ice cubes to achieve your desired thickness.
  4. Blend until smooth and creamy, about 30 seconds.
  5. Pour into a tall glass and enjoy immediately!

Pro Tips for Making the Recipe

Here are some of my favorite tips to ensure your milkshake turns out perfectly every time:

  • For an extra boost of flavor, try adding a dash of vanilla extract.
  • If you want to make it even creamier, use frozen bananas instead of fresh ones.
  • Experiment with different nut butters or add a scoop of Greek yogurt for added protein.
  • For a fun twist, sprinkle some cocoa powder or chocolate chips on top before serving.

How to Serve

This Post-Workout Chocolate Milkshake is perfect on its own, but you can also pair it with some 30-minute meals or weeknight dinner ideas for a complete recovery feast! Here are a few serving suggestions:

  • Enjoy it alongside a light salad for a refreshing post-workout meal.
  • Pair it with a slice of whole-grain toast topped with avocado for a balanced snack.
  • Serve it as a dessert after a hearty dinner of creamy garlic pasta or other easy pasta recipes.

Make Ahead and Storage

If you want to prepare this milkshake in advance, you can blend all the ingredients (except the ice) and store the mixture in the fridge for up to 24 hours. Just add ice and blend again before serving. However, I recommend enjoying it fresh for the best taste and texture!

For any leftovers, you can store them in an airtight container in the fridge for up to a day, but keep in mind that the texture may change slightly. It’s best enjoyed right after blending!

So there you have it! A delightful Post-Workout Chocolate Milkshake that not only tastes amazing but also helps you recover quickly. I hope you give this recipe a try and enjoy every sip. Remember, recovery is just as important as the workout itself, and what better way to do it than with a delicious treat? Cheers to your health and happiness!

Post-Workout Chocolate Milkshake

Prep Time 5 minutes
Total Time 5 minutes
Servings 1 shake
Calories 350
A delicious and nutritious milkshake perfect for refueling after a workout. Packed with protein and chocolate flavor, it's quick to make and satisfying.

Ingredients

Liquid

  • 12 ounces Milk Substitute (or Milk)

Protein

  • 1 scoop Protein Powder (Chocolate)

Cocoa

  • 3 tablespoons Cocoa Powder

Oats

  • ½ cup Rolled Oats

Flavoring

  • 1 teaspoon Vanilla Extract

Dairy

  • ½ cup Cottage Cheese (Fat Free)

Chocolate Chips

  • 1 tablespoon Chocolate Chips (Dark) (Melt before adding)

Instructions 

  • Melt your Chocolate Chips
  • Combine all of your ingredients into a blender
  • Blend everything together

Notes

For a creamier texture, use chilled ingredients or add ice.
Calories: 350kcal
Cost: $10
Course: Post-Workout
Cuisine: American
Keyword: chocolate, Protein

Are you ready to indulge in a dessert that not only satisfies your sweet tooth but also packs a protein punch? I know I am! Today, I’m excited to share my recipe for Protein Red Velvet Cupcakes that will wow your family and friends. These delightful treats are perfect for any occasion, and they fit right into my repertoire of easy pasta recipes and quick family dinners. Let’s dive into this deliciously healthy dessert that you can whip up in no time!

Why You’ll Love This Recipe

  • Deliciously rich flavor that satisfies cravings.
  • High in protein, making it a guilt-free treat.
  • Simple ingredients you probably already have at home.
  • Perfect for special occasions or a sweet weeknight dinner idea.
  • Easy to make, so you can enjoy baking without the stress!

Ingredients

To make these scrumptious Protein Red Velvet Cupcakes, you’ll need the following ingredients:

  • 1 cup almond flour
  • 1/2 cup protein powder (vanilla or chocolate)
  • 1/2 cup unsweetened cocoa powder
  • 1/2 cup Greek yogurt
  • 1/2 cup honey or maple syrup
  • 2 large eggs
  • 1 teaspoon vanilla extract
  • 1 tablespoon red food coloring
  • 1 teaspoon baking soda
  • 1/2 teaspoon salt
  • 1/2 cup unsweetened almond milk

Full ingredient list with measurements is provided in the printable recipe card below.

How to Make the Recipe

Now, let’s get to the fun part—making these delightful cupcakes!

  1. Preheat your oven to 350°F (175°C) and line a muffin tin with cupcake liners.
  2. In a large mixing bowl, combine the almond flour, protein powder, cocoa powder, baking soda, and salt. Mix well.
  3. In another bowl, whisk together the Greek yogurt, honey (or maple syrup), eggs, vanilla extract, and red food coloring until smooth.
  4. Gradually add the wet ingredients to the dry ingredients, mixing until just combined.
  5. Pour in the almond milk and stir until the batter is smooth and well combined.
  6. Divide the batter evenly among the cupcake liners, filling each about 2/3 full.
  7. Bake for 18-20 minutes, or until a toothpick inserted into the center comes out clean.
  8. Let the cupcakes cool in the pan for 5 minutes before transferring them to a wire rack to cool completely.

Pro Tips for Making the Recipe

Here are some of my favorite tips to ensure your Protein Red Velvet Cupcakes turn out perfectly:

  • Make sure your ingredients are at room temperature for better mixing.
  • Don’t overmix the batter; it should be just combined for the best texture.
  • Feel free to add chocolate chips or nuts for an extra crunch!
  • If you want to make these cupcakes even more decadent, top them with a light cream cheese frosting.
  • Experiment with different protein powder flavors to find your favorite combination!

How to Serve

These Protein Red Velvet Cupcakes are perfect for any occasion! Here are some serving suggestions:

  • Serve them at birthday parties or family gatherings for a healthy dessert option.
  • Pair them with a scoop of vanilla ice cream for a delightful treat.
  • Enjoy them as a post-workout snack to refuel your body.
  • They also make a great addition to a brunch spread!

Make Ahead and Storage

If you want to prepare these cupcakes in advance, you can easily make the batter and store it in the fridge for up to 24 hours. Just bake them fresh when you’re ready to enjoy! For storage:

  • Keep the cupcakes in an airtight container at room temperature for up to 3 days.
  • For longer storage, freeze them in a freezer-safe container for up to 3 months.
  • Thaw frozen cupcakes in the fridge overnight before serving.

Now that you have this delightful recipe in your arsenal, you can impress your family and friends with these Protein Red Velvet Cupcakes that are not only delicious but also nutritious! They’re a fantastic way to satisfy your sweet cravings while keeping your protein intake up. So, what are you waiting for? Get baking and enjoy these scrumptious treats!

Protein Red Velvet Cupcakes

Prep Time 10 minutes
Cook Time 20 minutes
Total Time 30 minutes
Servings 12 cupcakes
Calories 150
Delicious and healthy red velvet cupcakes packed with protein, perfect for a guilt-free treat.

Ingredients

Dry Ingredients

  • 1 ¾ cups Rolled Oats (Processed into flour)
  • 3 tablespoons Cocoa Powder
  • 3 scoops Protein Powder (Vanilla or Chocolate)
  • ¼ teaspoon Salt
  • 1 tablespoon Baking Soda

Wet Ingredients

  • 4 large egg whites Egg Whites
  • 1 tablespoon Apple Cider Vinegar
  • 4 ounces Water
  • 1 cup Unsweetened Apple Sauce
  • ¾ cup Sweetener
  • 10 drops Liquid Sweetener
  • 2 teaspoons Red Food Coloring (*Optional)

Instructions 

  • Turn your Rolled Oats into flour by blending or processing them.
  • Add and mix your dry ingredients together in one bowl.
  • Add and mix your wet ingredients together in another bowl.
  • Slowly combine your wet ingredients into your dry ingredients.
  • Coat a cupcake pan or silicone cups with non-stick spray.
  • Fill cups ¾ full and bake at 350F/176C for 15-20 minutes.

Notes

Ensure not to overmix the batter for a light texture.
Calories: 150kcal
Cost: $15
Course: Dessert
Cuisine: American
Keyword: Protein, red velvet

Are you ready to indulge in a sweet treat that’s not only delicious but also packed with protein? I can’t wait to share my recipe for Triple Chocolate Protein Donuts with you! These delightful donuts are perfect for a quick breakfast or a healthy snack, and the best part? You can whip them up in just 8 minutes! If you’re like me and love easy pasta recipes for quick family dinners, you’ll appreciate how simple this recipe is. Let’s dive in!

Why You’ll Love This Recipe

  • Quick and easy to make in just 8 minutes!
  • Loaded with protein to keep you energized.
  • Decadent chocolate flavor that satisfies your sweet tooth.
  • Perfect for breakfast, snacks, or even dessert.
  • Great for meal prep and can be stored for later.

Ingredients

To make these scrumptious Triple Chocolate Protein Donuts, you’ll need the following ingredients:

  • 1 cup of protein powder (chocolate flavor works best!)
  • 1/2 cup of almond flour
  • 1/4 cup of cocoa powder
  • 1/2 cup of unsweetened applesauce
  • 1/4 cup of honey or maple syrup
  • 1/2 teaspoon of baking powder
  • 1/4 teaspoon of salt
  • 1/2 cup of dark chocolate chips
  • 1/4 cup of milk (dairy or non-dairy)

Full ingredient list with measurements is provided in the printable recipe card below.

How to Make the Recipe

Making these donuts is a breeze! Follow these simple steps:

  1. Preheat your oven to 350°F (175°C) and grease a donut pan.
  2. In a large mixing bowl, combine the protein powder, almond flour, cocoa powder, baking powder, and salt.
  3. Add the applesauce, honey (or maple syrup), and milk to the dry ingredients. Mix until well combined.
  4. Fold in the dark chocolate chips for that extra chocolatey goodness!
  5. Spoon the batter into the greased donut pan, filling each cavity about 3/4 full.
  6. Bake for 8-10 minutes, or until a toothpick inserted comes out clean.
  7. Let the donuts cool for a few minutes before transferring them to a wire rack.

Pro Tips for Making the Recipe

Here are some of my favorite tips to ensure your donuts turn out perfectly:

  • For a richer flavor, use high-quality cocoa powder.
  • Feel free to substitute the almond flour with oat flour if you prefer.
  • Experiment with different protein powder flavors for a unique twist!
  • Don’t overmix the batter; it should be just combined for the best texture.
  • For an extra treat, drizzle some melted dark chocolate on top once they cool!

How to Serve

These Triple Chocolate Protein Donuts are delicious on their own, but here are some fun serving suggestions:

  • Pair them with a dollop of Greek yogurt for a creamy contrast.
  • Serve with fresh berries for a pop of color and flavor.
  • Enjoy them with a cup of coffee or tea for a delightful afternoon snack.
  • Try them as a topping for your favorite creamy garlic pasta dish for a unique twist!

Make Ahead and Storage

These donuts are perfect for meal prep! Here’s how to store them:

  • Store in an airtight container at room temperature for up to 3 days.
  • For longer storage, keep them in the fridge for up to a week.
  • You can also freeze them! Just place them in a freezer-safe bag, and they’ll last for up to 3 months.
  • When you’re ready to enjoy, simply thaw at room temperature or pop them in the microwave for a few seconds.

Now that you have this delightful recipe in your arsenal, you can enjoy a sweet treat that’s both healthy and satisfying. Whether you’re looking for 30-minute meals or just a quick snack, these donuts are sure to please! So, gather your ingredients and let’s get baking!

Triple Chocolate Protein Donuts

Prep Time 10 minutes
Cook Time 10 minutes
Total Time 20 minutes
Servings 6 donuts
Calories 180
Delicious and healthy chocolate protein donuts perfect for a quick snack or breakfast.

Ingredients

Eggs

  • 1 large Large Whole Egg
  • 3 large Large Egg Whites

Flours

  • 6 tablespoons Coconut Flour (or Almond Flour)

Cocoa Powder

  • 3 tablespoons Cocoa Powder

Protein Powder

  • 1 scoop Protein Powder (Chocolate)

Milk Substitute

  • 1 ounce Milk Substitute (or Milk)

Dark Chocolate

  • 1.5 tablespoons Chocolate (Dark)

Baking Powder

  • 1 teaspoon Baking Powder

Instructions 

  • Melt your Dark Chocolate.
  • Combine all ingredients in a bowl.
  • Mix until smooth.
  • Pour into a greased donut pan and bake at 350F/176C for 8-10 minutes.
  • Top as desired and enjoy!

Notes

Use a non-stick spray for easy removal.
Calories: 180kcal
Cost: $12
Course: Breakfast
Cuisine: American
Keyword: chocolate, Protein

There’s something incredibly comforting about coming home to the aroma of a delicious meal waiting for you, isn’t there? Today, I’m excited to share my recipe for Slow Cooker Burrito Bowls that you can set and forget! This dish is not only packed with flavor but also makes for a fantastic option for quick family dinners. Plus, if you’re like me and love easy pasta recipes, you’ll appreciate how simple it is to whip up a hearty meal without spending hours in the kitchen. Let’s dive into this delightful recipe!

Why You’ll Love This Recipe

  • Effortless preparation—just toss everything in the slow cooker!
  • Perfect for busy weeknights when you need quick family dinners.
  • Flavorful and satisfying, making it a hit with both kids and adults.
  • Versatile—customize with your favorite toppings!
  • Great for meal prep; leftovers taste even better!

Ingredients

To make these scrumptious Slow Cooker Burrito Bowls, you’ll need the following ingredients:

  • 1 pound ground beef (or turkey for a lighter option)
  • 1 can (15 oz) black beans, drained and rinsed
  • 1 can (15 oz) corn, drained
  • 1 can (10 oz) diced tomatoes with green chilies
  • 1 packet taco seasoning
  • 1 cup beef broth
  • 1 cup uncooked rice (white or brown)
  • Salt and pepper to taste
  • Optional toppings: shredded cheese, sour cream, avocado, cilantro, lime wedges

Full ingredient list with measurements is provided in the printable recipe card below.

How to Make the Recipe

Making these Slow Cooker Burrito Bowls is as easy as 1-2-3! Here’s how:

  1. In your slow cooker, combine the ground beef, black beans, corn, diced tomatoes, taco seasoning, and beef broth. Stir well to combine.
  2. Add the uncooked rice on top of the mixture. Do not stir it in; just let it sit on top.
  3. Cover and cook on low for 8 hours or high for 4 hours. When done, fluff the rice with a fork and mix everything together.

And there you have it! A delicious meal ready to be served!

Pro Tips for Making the Recipe

Here are some of my favorite tips to ensure your Slow Cooker Burrito Bowls turn out perfectly:

  • For extra flavor, consider browning the ground beef before adding it to the slow cooker.
  • If you prefer a spicier kick, add some diced jalapeños or a splash of hot sauce.
  • Feel free to swap out the rice for quinoa or cauliflower rice for a healthier twist.
  • Don’t forget to taste and adjust the seasoning before serving!

How to Serve

Serving these burrito bowls is where the fun begins! Here are some ideas:

  • Top with shredded cheese, a dollop of sour cream, and fresh avocado slices.
  • Garnish with chopped cilantro and a squeeze of lime for a refreshing touch.
  • Serve with tortilla chips on the side for some crunch.
  • For a complete meal, pair with a side of creamy garlic pasta or a simple salad.

Make Ahead and Storage

These Slow Cooker Burrito Bowls are perfect for meal prep! Here’s how to store them:

  • Store leftovers in an airtight container in the refrigerator for up to 4 days.
  • To freeze, portion the burrito bowls into freezer-safe containers and freeze for up to 3 months.
  • When ready to eat, simply reheat in the microwave or on the stovetop until warmed through.

With this recipe, you’ll have a delicious and satisfying meal that’s perfect for busy weeknights. Whether you’re looking for quick family dinners or just a simple way to enjoy a flavorful dish, these Slow Cooker Burrito Bowls are sure to please. So, gather your ingredients, set your slow cooker, and get ready to enjoy a delightful meal that everyone will love!

Slow Cooker Burrito Bowls

Prep Time 10 minutes
Cook Time 7 hours
Total Time 7 hours 10 minutes
Servings 4 servings
Calories 450
A flavorful and easy-to-make slow cooker dish featuring tender chicken, beans, and spices, perfect for a hearty meal.

Ingredients

Main Ingredients

  • 2 pounds Chicken Breast
  • 2 cans Black Beans (439g Cans (Low Sodium))
  • 1 jar Salsa (24 Ounces)
  • 2 cups Corn (Frozen)
  • 4 ounces Water
  • 1.5 teaspoons Minced Garlic
  • 1 tablespoon Chili Powder
  • 2 teaspoons Ground Cumin
  • 1 teaspoon Cayenne Pepper
  • 1 teaspoon Oregano
  • to taste Black Pepper (Your choice)

Instructions 

  • Trim and cut chicken in half, then layer in slow cooker.
  • Drain and rinse black beans, add all ingredients, and mix.
  • Cover and cook on low for 7-8 hours or high for 4-5 hours.
  • Shred chicken with forks once cooked.

Notes

Feel free to add toppings like cheese, sour cream, or cilantro for extra flavor.
Calories: 450kcal
Cost: $15
Course: Main Course
Cuisine: Mexican
Keyword: Chicken

Are you ready to elevate your snacking game? I know I am! Today, I’m excited to share my recipe for a High Protein Tzatziki Dip that’s not only delicious but also packed with nutrients. This creamy dip is perfect for healthy snacking, and it pairs beautifully with fresh veggies, pita chips, or even as a topping for your favorite easy pasta recipes. Let’s dive into this delightful dish that will make your taste buds dance!

Why You’ll Love This Recipe

  • High in protein, thanks to Greek yogurt.
  • Quick and easy to prepare, making it perfect for 30-minute meals.
  • Versatile enough to use as a dip, sauce, or dressing.
  • Fresh ingredients that you can feel good about.
  • Great for family gatherings or a simple weeknight dinner.

Ingredients

To whip up this tasty tzatziki dip, you’ll need the following ingredients:

  • 1 cup Greek yogurt (preferably full-fat for creaminess)
  • 1 medium cucumber, grated and drained
  • 2 cloves garlic, minced
  • 1 tablespoon olive oil
  • 1 tablespoon fresh dill, chopped (or 1 teaspoon dried dill)
  • 1 tablespoon lemon juice
  • Salt and pepper to taste

Full ingredient list with measurements is provided in the printable recipe card below.

How to Make the Recipe

Making this High Protein Tzatziki Dip is a breeze! Follow these simple steps:

  1. In a mixing bowl, combine the Greek yogurt, grated cucumber, minced garlic, olive oil, dill, and lemon juice.
  2. Mix everything together until well combined.
  3. Season with salt and pepper to taste. Adjust the flavors as needed.
  4. Cover and refrigerate for at least 30 minutes to let the flavors meld together.
  5. Serve chilled and enjoy with your favorite snacks!

Pro Tips for Making the Recipe

Here are some of my favorite tips to ensure your tzatziki dip turns out perfectly:

  • Make sure to drain the grated cucumber well to avoid a watery dip.
  • For an extra kick, add a pinch of cayenne pepper or a dash of hot sauce.
  • Feel free to experiment with herbs; mint can be a refreshing alternative to dill.
  • This dip can also be used as a sauce for grilled meats or as a dressing for salads.

How to Serve

Now that you have your tzatziki dip ready, let’s talk about serving options! Here are some ideas:

  • Serve it with a platter of fresh veggies like carrots, bell peppers, and cherry tomatoes for a healthy snack.
  • Pair it with pita chips or toasted pita bread for a delightful crunch.
  • Use it as a sauce for grilled chicken or fish for a refreshing twist on your quick family dinners.
  • Drizzle it over creamy garlic pasta for a unique flavor boost!

Make Ahead and Storage

This tzatziki dip is perfect for meal prep! Here’s how to store it:

  • Store in an airtight container in the refrigerator for up to 3 days.
  • If you plan to make it ahead of time, I recommend preparing it a day in advance to enhance the flavors.
  • Do not freeze, as the texture may change once thawed.

With this High Protein Tzatziki Dip, you’ll have a delicious and healthy option for snacking or adding to your meals. It’s perfect for those busy weeknights when you need weeknight dinner ideas that are both quick and satisfying. So, gather your ingredients, and let’s get dipping!

High Protein Tzatziki Dip or Sauce

Prep Time 10 minutes
Total Time 10 minutes
Servings 4 servings
Calories 150
A delicious high-protein tzatziki that pairs perfectly with veggies, meats, or as a dip. Easy to make and packed with flavor and nutrition.

Ingredients

Main

  • 1 ½ cups Greek Yogurt (Plain (High Protein!))
  • 1 ½ teaspoons Dill Weed (Dried or 1 1/2 Tablespoons Fresh)
  • 2 teaspoons Lemon Juice
  • 1 tablespoon Olive Oil
  • 2 teaspoons Minced Garlic
  • ½-1 scoop Protein Powder (Unflavored (Optional))
  • 1 cucumber Cucumber
  • ¼ teaspoon Salt
  • ½ teaspoon Xanthan Gum (Optional to thicken!)

Instructions 

  • Mix Greek yogurt, dill, lemon juice, olive oil, garlic, salt, and xanthan gum in a bowl.
  • Grate cucumber and fold into the mixture.
  • Chill for 10 minutes before serving.

Notes

Use fresh cucumber for best flavor and texture.
Calories: 150kcal
Cost: $8
Course: Dip, Sauce
Cuisine: Greek
Keyword: High Protein, Tzatziki