Author

Ava

Browsing

Unleash Your Morning with Irresistible Apple Pie Toast!

Welcome to a cozy culinary adventure! If you’re looking to transform your breakfast routine into something magical and delicious, you’ve landed in the right place. This apple pie toast recipe combines the warm, inviting flavors of cinnamon and apples with a creamy twist, creating a delightful dish that feels like a warm hug on a plate. Perfect for those chilly mornings or whenever you need a sweet pick-me-up, this recipe is not just easy to make but also incredibly satisfying!

So, let’s dive into the world of warm cinnamon apples and discover how you can whip up this scrumptious treat in no time!

Why You’ll Love This Recipe

  • Quick and Easy: This recipe comes together in just a few minutes, making it perfect for busy mornings when you still want something special.
  • Healthy Indulgence: Packed with fiber and nutrients from the apples and topped with yogurt, this toast is a wholesome way to start your day.
  • Flavorful Bliss: The combination of sweet apples, rich almond butter, and creamy yogurt creates a flavor explosion that will brighten your mornings.
  • Versatile Meal Option: Enjoy this apple pie toast as a breakfast, snack, or even a light dessert—it’s perfect for any time of the day!
  • Crowd-Pleaser: Friends and family will love this delightful dish, making it an excellent choice for brunch gatherings or cozy family breakfasts.

Ingredient Breakdown

To embark on this delicious journey, you’ll need the following ingredients:

  • 4 apples: Diced (any variety works, but Honeycrisp or Fuji adds a delightful sweetness)
  • 1-2 tsp cinnamon: For that warm spice flavor
  • 1 small lemon: Juiced (to prevent browning and enhance flavor)
  • 3-4 tbsp water: As needed, to help cook the apples
  • 1 slice of bread: Toasted (your favorite type—sourdough, whole grain, or gluten-free)
  • 3-4 tbsp plain yogurt: To add creaminess (Greek yogurt for a protein boost!)
  • 1 tbsp almond butter: Optional, for added richness

Pro Tips for Perfect Apple Pie Toast

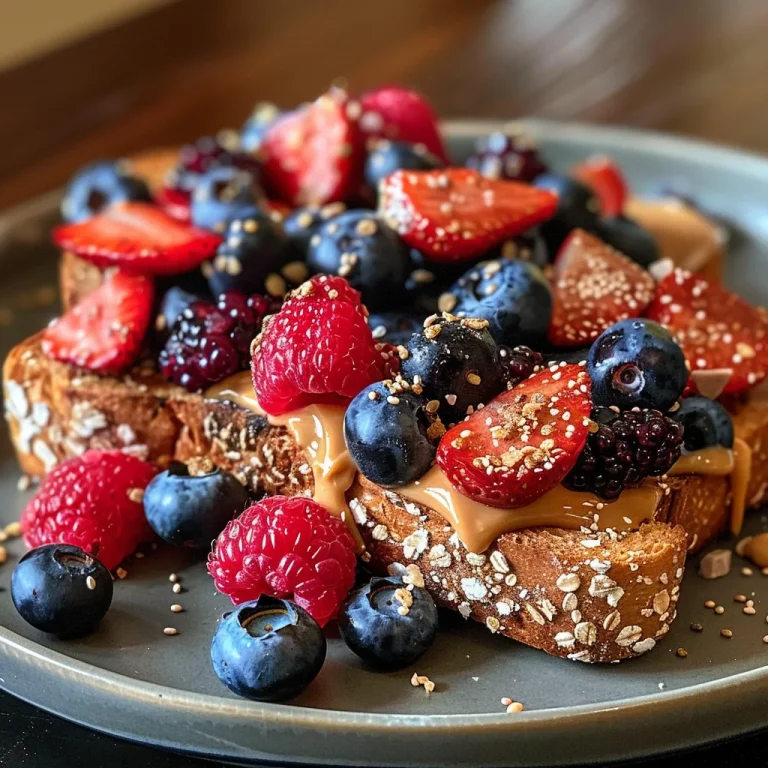
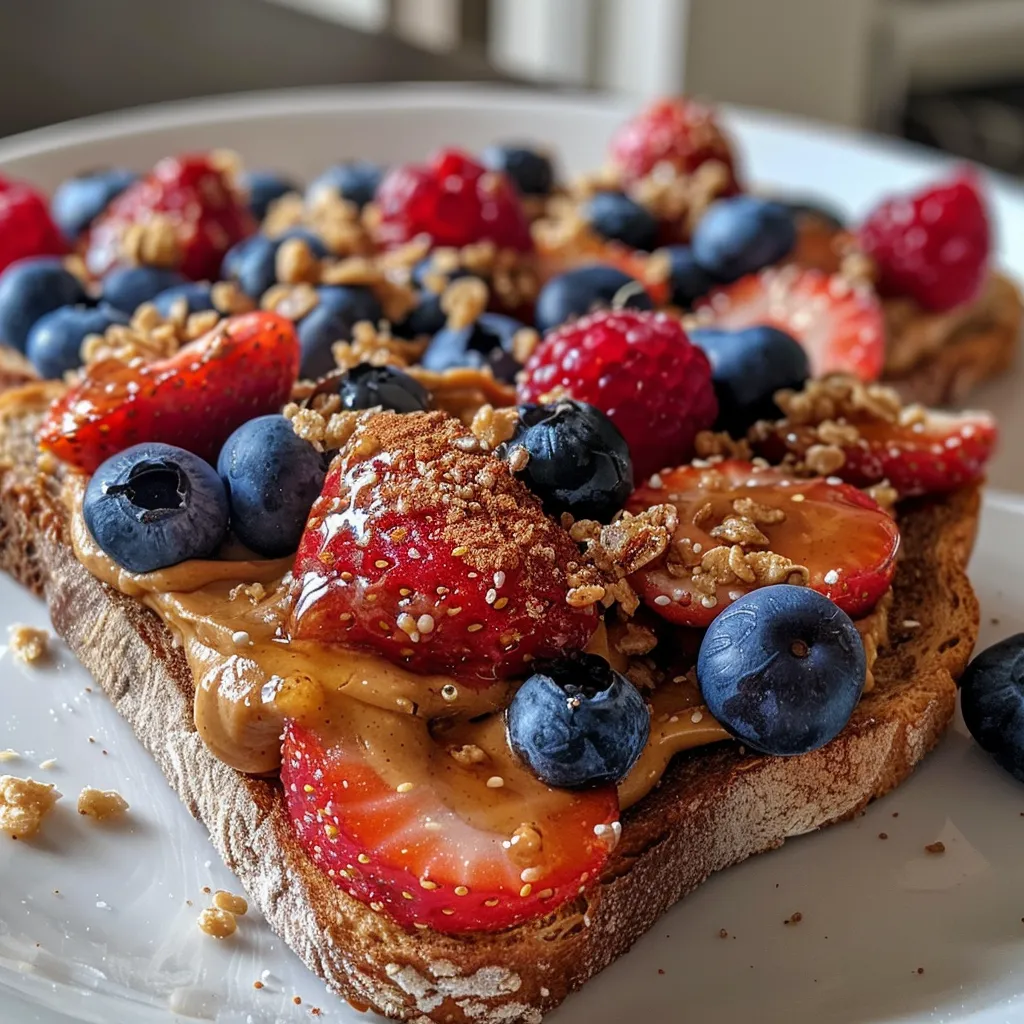
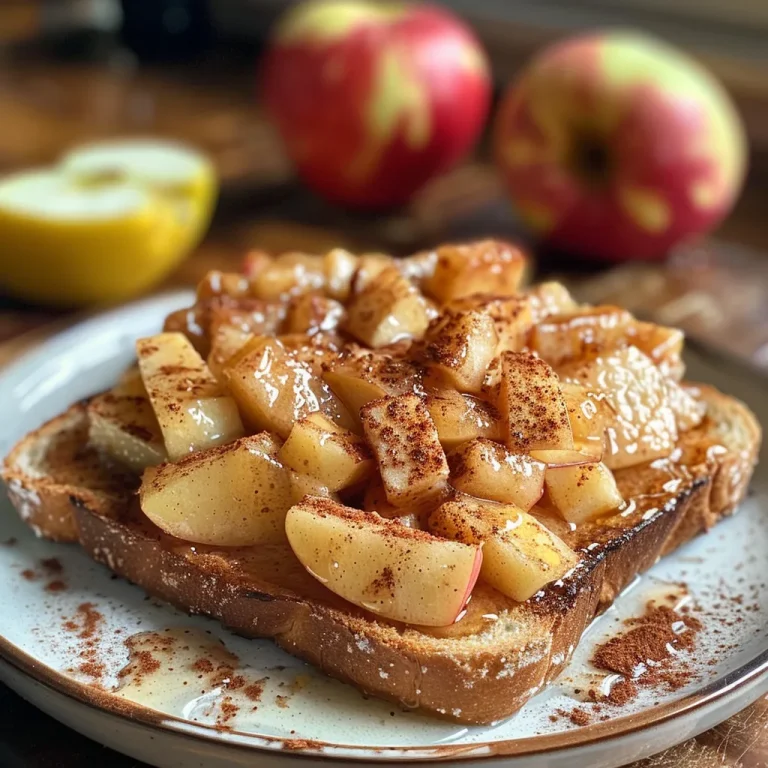
Side view of a slice of toasted bread topped with cinnamon apples and yogurt.
  • Choose the Right Apples: Opt for a mix of sweet and tart apples for a balanced flavor profile.
  • Don’t Rush the Cooking: Allow the apples to soften and caramelize slightly for enhanced flavor.
  • Customize Your Toast: Feel free to switch up the toppings—try peanut butter, Nutella, or even a sprinkle of granola!
  • Make It Ahead: Prepare the cinnamon apples in advance and store them in the fridge for a quick breakfast option.
  • Experiment with Bread: Try different types of bread like brioche or bagels for a unique twist.
  • Garnish for Style: A sprinkle of nuts, coconut flakes, or a drizzle of honey can elevate your toast.
  • Mind the Sugar: Adjust the sweetness of the apples based on your preference; you can add a touch of maple syrup if desired.
  • Serving Temperature: Enjoy warm for the best experience, but it’s still delicious cold!

Common Mistakes and Troubleshooting

Even the best chefs make mistakes! Here are a few common pitfalls and how to avoid them:

  • Apples Too Hard: If your apples are still crunchy, add a little more water and cook them longer until tender.
  • Toast Gets Soggy: Avoid this by letting your toast cool slightly before adding toppings or using thicker bread.
  • Too Much Cinnamon: Start with a smaller amount and adjust to your taste to avoid overpowering the other flavors.

Delicious Variations

Looking to shake things up? Here are some tasty variations on your apple pie toast:

  • Peanut Butter Delight: Swap almond butter for creamy peanut butter for a nutty twist.
  • Caramel Drizzle: Add a drizzle of caramel sauce for an extra indulgent treat.
  • Nutty Granola Crunch: Top with granola for added texture and crunch.
  • Spiced Up: Add a pinch of nutmeg or ginger for a spicier flavor profile.

Storage and Make-Ahead Instructions

If you want to enjoy this delightful dish throughout the week, here’s how to store and prepare it in advance:

  • For the Apples: Cooked cinnamon apples can be stored in an airtight container in the fridge for up to 5 days.
  • For the Toast: Toast your bread fresh each morning for the best texture.
  • Make-Ahead: Prepare the apple mixture the night before and simply reheat in the morning.

Frequently Asked Questions

Got questions? We’ve got answers! Here are some common queries about apple pie toast:

  • Can I use frozen apples? Yes! Just thaw and drain excess moisture before cooking.
  • What bread works best for this recipe? Any bread you love works, but thicker slices hold up better against toppings.
  • Is this recipe gluten-free? Absolutely! Use gluten-free bread and you’re good to go.
  • Can I make this vegan? Yes! Swap yogurt for a plant-based alternative and use nut butters without added sugars.
  • How can I make it sweeter? Add a drizzle of honey or maple syrup as a finishing touch.
  • Can I use a different fruit? Certainly! Try pears or peaches for a different flavor profile.
  • How do I know when the apples are done? They should be soft but still hold their shape, about 5-10 minutes of cooking.
  • Can I prepare this without cooking the apples? Yes! You can simply slice fresh apples and sprinkle them with cinnamon for a raw version.

Nutritional Tips and Dietary Adaptations

This apple pie toast is not just delicious; it can also fit into various dietary preferences:

  • Low-carb option: Use cloud bread or almond flour bread.
  • High-protein: Opt for Greek yogurt or cottage cheese as a topping.
  • Low-sugar: Skip the sweeteners and let the natural sweetness of the apples shine.

Essential Equipment Recommendations

Having the right tools can make all the difference:

  • Non-stick skillet: Ideal for cooking your cinnamon apples without sticking.
  • Toaster or toaster oven: For perfectly toasted bread every time.
  • Sharp knife and cutting board: For easy apple preparation.

Serving Suggestions

Want to elevate your apple pie toast experience? Consider these serving suggestions:

  • Add a sprinkle of nuts: Chopped walnuts or pecans add great crunch.
  • Side of fresh fruit: Serve with berries or banana slices for a colorful plate.
  • Pair with tea or coffee: A warm beverage complements this cozy breakfast perfectly.

Conclusion

Now that you have all the tools, tips, and tricks to create the ultimate apple pie toast, it’s time to get cooking! Remember, cooking should be a joyful experience filled with laughter and creativity. Don’t hesitate to experiment and make this recipe your own; the kitchen is your canvas! Enjoy each bite and celebrate those little victories along the way. Happy cooking, friends!

Apple Pie Toast

Prep Time 10 minutes
Cook Time 5 minutes
Total Time 15 minutes
Servings 1 serving
Calories 350
A delicious and quick treat combining warm cinnamon apples on toasted bread topped with yogurt and almond butter.

Ingredients

Fruits and Spices

  • 4 pieces apples (diced)
  • 1-2 tsp cinnamon
  • 1 small lemon (juiced)
  • 3-4 tbsp water (as needed)

Bread

  • 1 slice bread (toasted)

Dairy and Nuts

  • 3-4 tbsp plain yogurt
  • 1 tbsp almond butter

Instructions 

  • Cook diced apples with cinnamon, lemon juice, and water until soft.
  • Spread almond butter on toasted bread.
  • Top the toast with warm cinnamon apples and a dollop of yogurt.

Notes

Use fresh apples for the best flavor and adjust cinnamon to taste.
Calories: 350kcal
Cost: $8
Course: Breakfast
Cuisine: American
Keyword: apple, Toast

Welcome to Your New Favorite Fall Treat!

Are you ready to dive into the delightful world of Pumpkin Snickerdoodle Blondies? This easy and scrumptious recipe perfectly combines the warm flavors of pumpkin, cinnamon, and sugar, making it an ideal treat for any cozy fall gathering or just a sweet indulgence on a chilly evening. With a rich texture and a hint of spice, these blondies will have you coming back for seconds!

Let’s embrace the joy of baking together! In this article, you’ll find everything you need to know about making these snickerdoodle blondies, including tips, variations, and more. So roll up those sleeves, grab your apron, and let’s get started!

Why You’ll Love This Recipe

  • Quick and Easy: With simple steps and minimal equipment, this recipe is perfect for both beginners and seasoned bakers.
  • Fall Flavor Bliss: The combination of pumpkin and cinnamon sugar creates a delightful autumn taste that’s irresistible.
  • Soft and Chewy: These blondies are perfectly soft in the middle, giving you that mouthwatering chewy texture.
  • Customizable: Feel free to add your favorite mix-ins or toppings, from white chocolate chips to nuts!
  • Great for Sharing: Perfect for potlucks, parties, or cozy nights in, they’re sure to be a hit with everyone!

Ingredient Breakdown

Let’s take a closer look at the ingredients that make these Pumpkin Snickerdoodle Blondies so special:

  • Unsalted Butter: Essential for moisture and flavor. Make sure it’s melted to help combine with the sugars smoothly.
  • Pumpkin Pie Spice: This warm blend of spices adds depth to the recipe. If you don’t have it, you can make your own using cinnamon, nutmeg, ginger, and allspice.
  • Light Brown Sugar: Packed for sweetness and a hint of molasses flavor that pairs perfectly with pumpkin.
  • Eggs: Both the large egg and yolk contribute moisture and richness.
  • Pumpkin Purée: Use 100% pure pumpkin purée, not pumpkin pie filling, for the best flavor.
  • Vanilla Extract: Adds a lovely aromatic quality that enhances the overall flavor.
  • All-Purpose Flour: The base of the blondie batter. Be sure to use the spoon and level method to avoid dense blondies.
  • Cornstarch: Helps create a soft, chewy texture.
  • Cream of Tartar: Optional, but it adds to that classic snickerdoodle vibe!
  • Salt: A little salt enhances the sweetness of the blondies.
  • Baking Powder: Helps the blondies rise for that perfect texture.
  • White Chocolate Chips: Optional, but they add a sweet, creamy contrast to the spices.
  • Cinnamon Sugar Mixture: A simple blend of sugar and cinnamon to sprinkle on top for that classic snickerdoodle flavor.

Step-by-Step Directions

Close-up view of golden-brown pumpkin snickerdoodle blondies with white chocolate chips.

Ready to whip up these delicious blondies? Follow these simple steps:

  1. Preheat the Oven: Set your oven to 350°F (175°C). Line an 8×8-inch (20×20 cm) baking pan with parchment paper, allowing some overhang for easy removal later.
  2. Prepare the Butter Mixture: In a large mixing bowl, whisk together the melted butter, pumpkin pie spice, and brown sugar until well combined. This step helps bloom the spices for a deeper flavor.
  3. Add Wet Ingredients: Whisk in the large egg, egg yolk, blotted pumpkin purée, and vanilla extract. Mix until smooth and fully incorporated.
  4. Add Dry Ingredients: Gently stir in the flour, cornstarch, cream of tartar, salt, and baking powder. Be careful not to overmix; just combine until you see no dry flour.
  5. Incorporate Chocolate Chips: If using, gently fold in the white chocolate chips.
  6. Transfer to Pan: Spread the blondie batter evenly into the prepared pan.
  7. Add Topping: In a small bowl, mix the granulated sugar and cinnamon (or pumpkin pie spice) and sprinkle it evenly over the top of the batter.
  8. Bake: Place in the oven and bake for 20–25 minutes, or until the edges are set and a toothpick inserted in the center comes out with a few moist crumbs.
  9. Cool: For an extra touch, sprinkle some more white chocolate chips on top right after taking them out of the oven. Allow the blondies to cool completely in the pan. To get clean edges, chill briefly before slicing.
  10. Serve: Slice into squares and enjoy your delicious pumpkin snickerdoodle blondies!

Pro Tips for Perfect Blondies

  • Room Temperature Ingredients: Ensure your egg and egg yolk are at room temperature for better emulsification.
  • Don’t Overmix: Mix just until combined to keep the blondies soft and chewy.
  • Right Measuring Technique: Use the spoon and level method for flour to avoid dense blondies.
  • Chill Before Slicing: For cleaner cuts, chill the blondies for about 30 minutes before slicing.
  • Substitutions: Feel free to swap white chocolate chips for dark chocolate or even nuts for a crunchier texture.
  • Extra Flavor: Add a pinch of nutmeg for an extra kick of spice in the batter.
  • Keep an Eye on Baking Time: Ovens vary, so check your blondies a few minutes before the time is up.
  • Store Properly: Keep them in an airtight container to maintain freshness.

Common Mistakes & Troubleshooting

  • Blondies Turned Out Dry: This could be due to overbaking or too much flour. Make sure to measure accurately!
  • Too Dense: Overmixing the batter can lead to dense blondies. Mix just until everything is combined.
  • Not Enough Flavor: If you find the blondies a bit bland, consider adding a touch more pumpkin pie spice or vanilla extract next time.
  • Sticking to the Pan: Always line your pan with parchment paper for easy removal.

Delicious Variations

  • Pumpkin Chocolate Chip Blondies: Substitute the white chocolate chips with semi-sweet or dark chocolate chips for a richer flavor.
  • Nutty Twist: Add chopped walnuts or pecans for a delightful crunch.
  • Caramel Swirls: Drizzle caramel sauce on top before baking for a gooey, sweet twist.
  • Vegan Version: Substitute butter with coconut oil, eggs with flax eggs, and use a dairy-free chocolate option.

Storage and Make-Ahead Instructions

These Pumpkin Snickerdoodle Blondies can be made ahead of time and stored for later enjoyment:

  • Room Temperature: Store in an airtight container at room temperature for up to 3 days.
  • Refrigerator: For longer freshness, keep them in the fridge for up to a week.
  • Freezing: Wrap individual blondies in plastic wrap and store in a freezer-safe bag for up to 3 months. Thaw at room temperature when ready to enjoy.

Frequently Asked Questions

  • Can I use pumpkin pie filling instead of pumpkin purée? No, it’s best to use pure pumpkin purée for accurate flavor and consistency.
  • What if I don’t have cream of tartar? You can omit it; it’s optional for the snickerdoodle flavor.
  • Can I make these blondies gluten-free? Yes, you can substitute regular flour with a gluten-free all-purpose flour blend.
  • How do I know when they’re done baking? The edges should be set, and a toothpick should come out with a few moist crumbs.
  • Can I add nuts to the recipe? Absolutely! Chopped nuts can add a nice crunch to these blondies.
  • What’s the best way to serve them? Warm them up slightly and serve with a scoop of vanilla ice cream for an indulgent treat!
  • Can I double the recipe? Yes! Just use a larger baking pan and adjust the baking time accordingly.
  • What should I do with leftover blondies? Store them in an airtight container or freeze for later enjoyment!

Nutrition Tips and Dietary Adaptations

For those who are health-conscious, here are some suggestions to adapt this recipe:

  • Reduce Sugar: You can reduce the sugar amount slightly without affecting the texture too much.
  • Use Whole Wheat Flour: For added fiber, substitute half of the all-purpose flour with whole wheat flour.
  • Lower Fat Option: Replace half the butter with unsweetened applesauce for a lower-fat version.
  • Dairy-Free: Use coconut milk and dairy-free chocolate chips to make it completely dairy-free.

Essential Equipment for Baking

  • Mixing Bowls: A good set of mixing bowls in various sizes is essential for preparing the batter.
  • Measuring Cups and Spoons: Accurate measurements are key to successful baking.
  • Whisk: A sturdy whisk for mixing ingredients smoothly.
  • Spatula: Use a spatula for folding in ingredients and spreading the batter evenly in the pan.
  • Baking Pan: An 8×8-inch baking pan lined with parchment paper is ideal for this recipe.

Serving Suggestions

Want to elevate your pumpkin snickerdoodle blondies? Here are some delightful serving ideas:

  • With Ice Cream: Serve warm with a scoop of vanilla or cinnamon ice cream.
  • Drizzled with Caramel: A drizzle of caramel sauce adds a sweet touch.
  • With a Dusting of Powdered Sugar: For a simple and elegant presentation, dust with powdered sugar before serving.
  • Pair with Coffee or Tea: These blondies are perfect for an afternoon snack alongside your favorite hot beverage!

Conclusion

Baking these Pumpkin Snickerdoodle Blondies is not just about creating a delicious treat; it’s about enjoying the process and sharing joy with others. Whether you’re preparing for a gathering or just treating yourself at home, these blondies are sure to bring smiles and warmth to your kitchen. Remember, cooking is all about having fun and making memories, so don’t stress—just enjoy every step of the way!

So what are you waiting for? Gather your ingredients and let’s whip up some sweet magic together!

Pumpkin Snickerdoodle Blondies

Prep Time 15 minutes
Cook Time 25 minutes
Total Time 40 minutes
Servings 9 squares
Calories 250
These moist and flavorful blondies combine pumpkin spice and white chocolate chips for a perfect fall treat.

Ingredients

Dough

  • 1/2 cup unsalted butter (melted)
  • 1 tbsp pumpkin pie spice
  • 1 cup light brown sugar (packed)
  • 1 large egg (room temperature)
  • 1 large egg yolk (room temperature)
  • 1/2 cup 100% pure pumpkin purée (blotted to yield approximately 1/4 cup)
  • 1 tbsp vanilla extract
  • 1 cup all-purpose flour (spooned and leveled)
  • 1 tsp cornstarch
  • 3/4 tsp cream of tartar (optional for snickerdoodle vibe)
  • 1/2 tsp salt
  • 1/4 tsp baking powder
  • 3/4 cup white chocolate chips (optional) (plus more for garnish)
  • 2 tbsp granulated sugar
  • 1/2 tsp ground cinnamon or pumpkin pie spice

Instructions 

  • Preheat oven to 350°F (175°C) and line an 8×8-inch pan with parchment.
  • Mix melted butter, pumpkin spice, and brown sugar until fragrant. Add egg, yolk, pumpkin, and vanilla; mix well.
  • Stir in flour, cornstarch, cream of tartar, salt, and baking powder until just combined. Fold in white chocolate chips.
  • Spread batter in pan, then sprinkle cinnamon-sugar mixture on top. Bake for 20–25 minutes until edges are set.
  • Cool completely, garnish with extra white chocolate chips if desired, then slice and serve.

Notes

Chill blondies before slicing for cleaner edges.
Calories: 250kcal
Cost: $15
Course: Dessert
Cuisine: American
Keyword: blondies, pumpkin

Delight in the Creamy Goodness of One Pot Creamy Tomato Beef Pasta

Welcome to a delightful adventure in the kitchen with this One Pot Creamy Tomato Beef Pasta! This recipe isn’t just about cooking; it’s about creating a delicious meal that brings joy and satisfaction to your dining table. Perfect for busy weeknights, this dish combines the heartiness of ground beef with the lusciousness of creamy tomato sauce, all while keeping cleanup to a minimum. Let’s jump right in and explore why this recipe will become a staple in your home!

Why You’ll Love This Recipe

Here are just a few reasons to make this creamy pasta dish a regular in your meal rotation:

  • Quick and Easy: Ready in around 30 minutes, it’s perfect for those hectic evenings when time is short.
  • One-Pot Wonder: Enjoy all the flavors with minimal cleanup; everything cooks in a single pot!
  • Family-Friendly Flavor: The rich and creamy sauce is a total crowd-pleaser, loved by kids and adults alike!
  • Customizable: With simple ingredient swaps, you can make this recipe your own, tailoring it to your family’s tastes.
  • Comfort Food at Its Best: The combination of savory beef and creamy tomato sauce makes for a warm, comforting meal that feels like a hug on a plate.

Ingredients You’ll Need

Here’s your shopping list for this delicious meal, along with some handy substitutions:

  • 1 lb ground beef: You can use lean or regular beef for different flavor profiles.
  • 8 oz pasta (penne or rotini): Feel free to experiment with your favorite pasta shapes!
  • 1 small onion, chopped: Yellow or white onions work best, but red onions can add a nice sweetness.
  • 2 cloves garlic, minced: Fresh garlic gives the best flavor; however, garlic powder works in a pinch.
  • 2 cups beef broth: For a lighter dish, substitute with chicken broth or vegetable broth.
  • 1 can (15 oz) crushed tomatoes: Diced tomatoes can be used if you prefer a chunkier sauce.
  • 1 1/2 cup heavy cream: Half-and-half or whole milk can be used for a lighter version.
  • 1 tsp Italian seasoning: A mix of basil, oregano, and thyme works well if you’re out of Italian seasoning.
  • Salt and pepper to taste: Don’t forget to season your dish well for maximum flavor!
  • 1 cup shredded mozzarella (optional): Consider using parmesan or cheddar for a different twist!

How to Make One Pot Creamy Tomato Beef Pasta

Side view of One Pot Creamy Tomato Beef Pasta with melted cheese and fresh herbs.

Let’s dive into the cooking process! Follow these simple steps to create your creamy delight:

  • Step 1: Brown the Beef: In a large pot over medium heat, brown the ground beef with the chopped onion and minced garlic until cooked through. Drain excess fat.
  • Step 2: Combine Ingredients: Stir in the pasta, crushed tomatoes, beef broth, Italian seasoning, salt, and pepper. Mix everything well!
  • Step 3: Cook the Pasta: Bring the mixture to a boil over high heat, then reduce to low, cover, and simmer for 10-12 minutes, until the pasta is tender.
  • Step 4: Add Cream: Stir in the heavy cream and mozzarella cheese if desired. Cook uncovered for another 2-3 minutes until the sauce is creamy and thickened.
  • Step 5: Serve: Enjoy hot, garnished with freshly chopped parsley for a pop of color.

Pro Tips for Success

Here are my top tips to ensure your creamy pasta turns out perfectly every time:

  • Ingredient Quality: Use fresh, high-quality ingredients for the best flavor.
  • Don’t Overcook the Pasta: Keep an eye on the timing to avoid mushy pasta; it should be al dente.
  • Customize the Sauce: Feel free to add in your favorite vegetables like spinach or bell peppers for extra nutrition.
  • Adjust Seasoning: Taste your dish before serving and adjust the seasoning to your preference.
  • Use Leftovers Wisely: Leftover pasta can be reheated with a little extra cream or broth to restore its creamy texture.
  • Garnish Creatively: Fresh herbs or a sprinkle of cheese can elevate the dish visually and flavor-wise.
  • Experiment with Proteins: Swap ground beef for turkey, chicken, or even plant-based meat alternatives for a quick twist.
  • Make it Spicy: Add red pepper flakes for a kick of heat!

Common Mistakes to Avoid

Here are some typical pitfalls and how to avoid them:

  • Overcrowding the Pot: Make sure there’s enough room for the pasta to cook evenly.
  • Skipping the Sauté: Don’t skip browning the beef and sautéing the onions and garlic; this builds flavor!
  • Not Tasting: Always taste your dish before serving to ensure it’s seasoned to perfection.
  • Forgetting to Stir: Stir occasionally to prevent pasta from sticking to the bottom of the pot.

Variations to Try

Get creative! Here are a few variations to try:

  • Vegetable-Loaded: Add in zucchini, mushrooms, or bell peppers for a veggie boost.
  • Spicy Tomato Beef: Incorporate jalapeños or hot sauce for a fiery kick.
  • Cheesy Delight: Mix in different types of cheese like gouda or cheddar for a unique flavor.
  • Herbaceous Twist: Experiment with fresh herbs like basil or parsley for added freshness.

Storage and Make-Ahead Instructions

This dish is perfect for making ahead and storing. Here’s how:

  • Storing Leftovers: Keep any leftovers in an airtight container in the refrigerator for up to 3 days.
  • Freezing: This pasta can be frozen for up to 2 months. Just make sure to store it in a freezer-safe container.
  • Reheating: Reheat gently in a pot over low heat, adding a splash of broth or cream to restore creaminess.
  • Make-Ahead: You can prepare the beef and sauce in advance, so all you have to do is cook the pasta when you’re ready to eat!

Frequently Asked Questions

Here are some common questions about this recipe:

  • Can I use other types of pasta? Yes! Feel free to use any short pasta shape you enjoy.
  • Is it possible to make this dish vegetarian? Absolutely! Use plant-based ground meat or lentils, and vegetable broth instead.
  • What can I serve with this dish? A simple green salad or garlic bread complements this creamy pasta beautifully.
  • How do I avoid a watery sauce? Make sure to drain excess fat and avoid adding too much broth.
  • Can I make it gluten-free? Yes! Use gluten-free pasta and ensure your broth is also gluten-free.
  • Is this dish spicy? It’s not spicy unless you add chili flakes or hot sauce. Feel free to adjust to your taste!
  • How do I make this dish dairy-free? Use coconut milk or a dairy-free cream alternative.
  • Can I add more vegetables? Yes! Feel free to incorporate your favorite vegetables for added nutrition and flavor.

Nutritional Tips and Dietary Adaptations

This dish can be tailored to fit various dietary preferences:

  • Low-Carb: Swap pasta for zucchini noodles or spaghetti squash for a low-carb option.
  • High-Protein: Add more protein by including beans or chickpeas along with the beef.
  • Heart-Healthy: Use lean ground turkey or chicken and add in fiber-rich veggies.
  • Dietary Restrictions: Always check labels for gluten-free or dairy-free products if needed.

Kitchen Equipment Recommendations

To make this recipe, you’ll need the following:

  • Large Pot: A sturdy pot or Dutch oven is perfect for this one-pot dish.
  • Wooden Spoon: Ideal for stirring and mixing your ingredients.
  • Measuring Cups and Spoons: Accurate measurements ensure your dish tastes just right.
  • Sharp Knife: For chopping ingredients efficiently.

Serving Suggestions

Make your meal even more delightful with these serving suggestions:

  • Garnish: Top with fresh parsley or basil for a burst of flavor and color.
  • Pair with Bread: Serve with warm garlic bread or a slice of crusty baguette to soak up the sauce.
  • Complementary Salad: A simple green salad with vinaigrette balances the richness of the pasta.

Conclusion

This One Pot Creamy Tomato Beef Pasta is more than just a meal; it’s a celebration of flavors and comfort that brings loved ones together. With its easy preparation, rich taste, and endless possibilities for customization, it’s bound to become a favorite in your household. So grab your ingredients, gather around the table, and enjoy the deliciousness that awaits. Happy cooking!

One Pot Creamy Tomato Beef Pasta

Prep Time 10 minutes
Cook Time 15 minutes
Total Time 25 minutes
Servings 4 servings
Calories 650
A quick and hearty one-pot meal combining ground beef, pasta, and a creamy tomato sauce for a satisfying dinner.

Ingredients

Meat

  • 1 lb ground beef
  • 8 oz pasta (penne or rotini)
  • 1 small onion, chopped
  • 2 cloves garlic, minced
  • 2 cups beef broth
  • 1 can 15 oz crushed tomatoes
  • 0.5 cup heavy cream
  • 1 tsp Italian seasoning
  • to taste Salt and pepper
  • 1 cup shredded mozzarella (optional)

Instructions 

  • Brown ground beef with chopped onion and minced garlic in a large pot; drain excess fat.
  • Add pasta, crushed tomatoes, beef broth, Italian seasoning, salt, and pepper; stir well.
  • Bring to a boil, then reduce heat, cover, and simmer for 10-12 minutes until pasta is tender.
  • Stir in heavy cream and mozzarella; cook uncovered for 2-3 minutes until creamy.
  • Serve hot, garnished with chopped parsley if desired.

Notes

For a richer flavor, let the sauce simmer longer before adding cream.
Calories: 650kcal
Cost: $15
Course: Main Course
Cuisine: American
Keyword: Beef, Pasta, Tomato

Unleashing the Joy of Baking: Your Guide to Incredible Hazelnut Brownies

Welcome to the delightful world of baking, where joy and flavor intertwine to create something truly special! Today, we’re diving into a recipe that’s bound to become your new favorite: hazelnut brownies. These rich and fudgy treats are not just desserts; they are an experience, packed with the warm, nutty flavor of roasted hazelnuts and the irresistible allure of chocolate. Whether you’re a seasoned baker or a kitchen newbie, this guide will help you whip up something magical! So, grab your apron, and let’s get started!

Why You’ll Love This Recipe

Here are just a few reasons why these incredible hazelnut brownies will steal your heart:

  • Decadent Flavor: The combination of rich chocolate and toasted hazelnuts creates a flavor profile that is simply divine.
  • Easy to Make: This recipe is straightforward, with step-by-step instructions that make baking a breeze.
  • Perfect for Any Occasion: Whether it’s a celebration or just a cozy night in, these brownies are perfect for sharing or savoring solo.
  • Customizable: With various mix-ins and toppings, you can tailor these brownies to suit your taste!
  • Make-Ahead Friendly: Bake in advance and store for a quick dessert fix whenever the craving strikes.

Ingredients Breakdown

Here’s what you’ll need to create these hazelnut brownies:

  • 7-ounce package skinned and roasted hazelnuts (1¾ cups, divided): These are the star of the show, providing that signature nutty flavor. If you can’t find roasted hazelnuts, you can roast them yourself in the oven!
  • 2 cups granulated sugar: For that perfect sweetness, balancing the rich chocolate.
  • 3 whole eggs: They help bind the ingredients together, creating a moist and fudgy texture.
  • 1½ teaspoons vanilla extract: This adds depth to the chocolate flavor.
  • 1½ teaspoons ground cinnamon: A hint of warmth that complements the hazelnuts beautifully.
  • 1 teaspoon espresso powder (optional): Enhances the chocolate flavor. If you prefer, you can skip this.
  • 1 cup all-purpose flour: The base of our brownies, giving them structure.
  • 1 cup butter (2 sticks): Melted butter is key to achieving that rich, fudgy texture.
  • 4 ounces Baker’s unsweetened chocolate: The heart of the brownies, lending intense chocolate flavor.
  • 1½ cups semisweet chocolate chips: For extra chocolatey goodness!
  • ½ cup heavy cream: This makes the frosting incredibly smooth and creamy.
  • 1 tablespoon butter: To enhance the texture of the frosting.
  • ¾ cup Nutella: The ultimate hazelnut spread, adding richness and creaminess.
  • ½ cup confectioners’ sugar: For sweetening the frosting and giving it that perfect consistency.

Step-by-Step Instructions

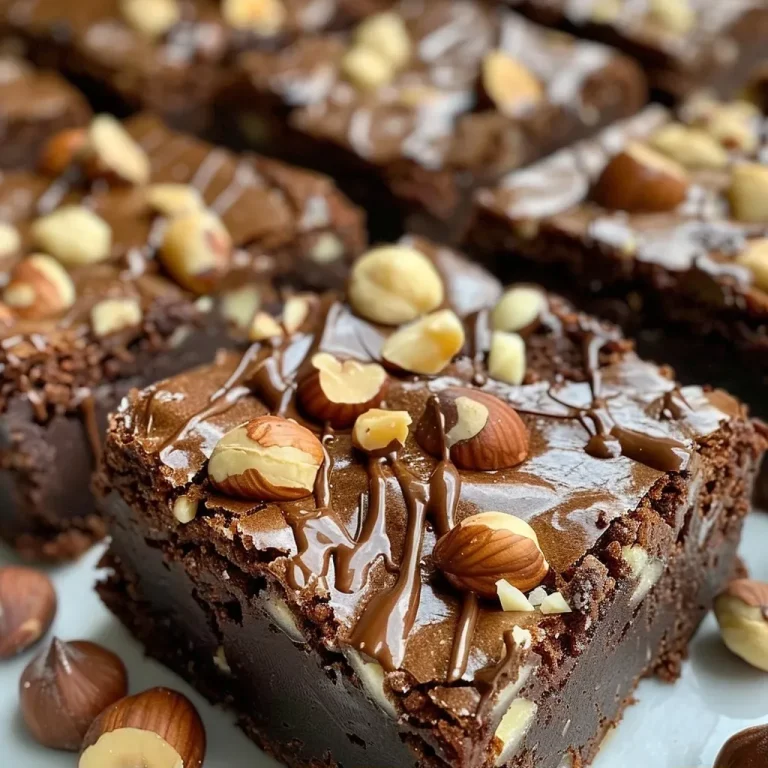
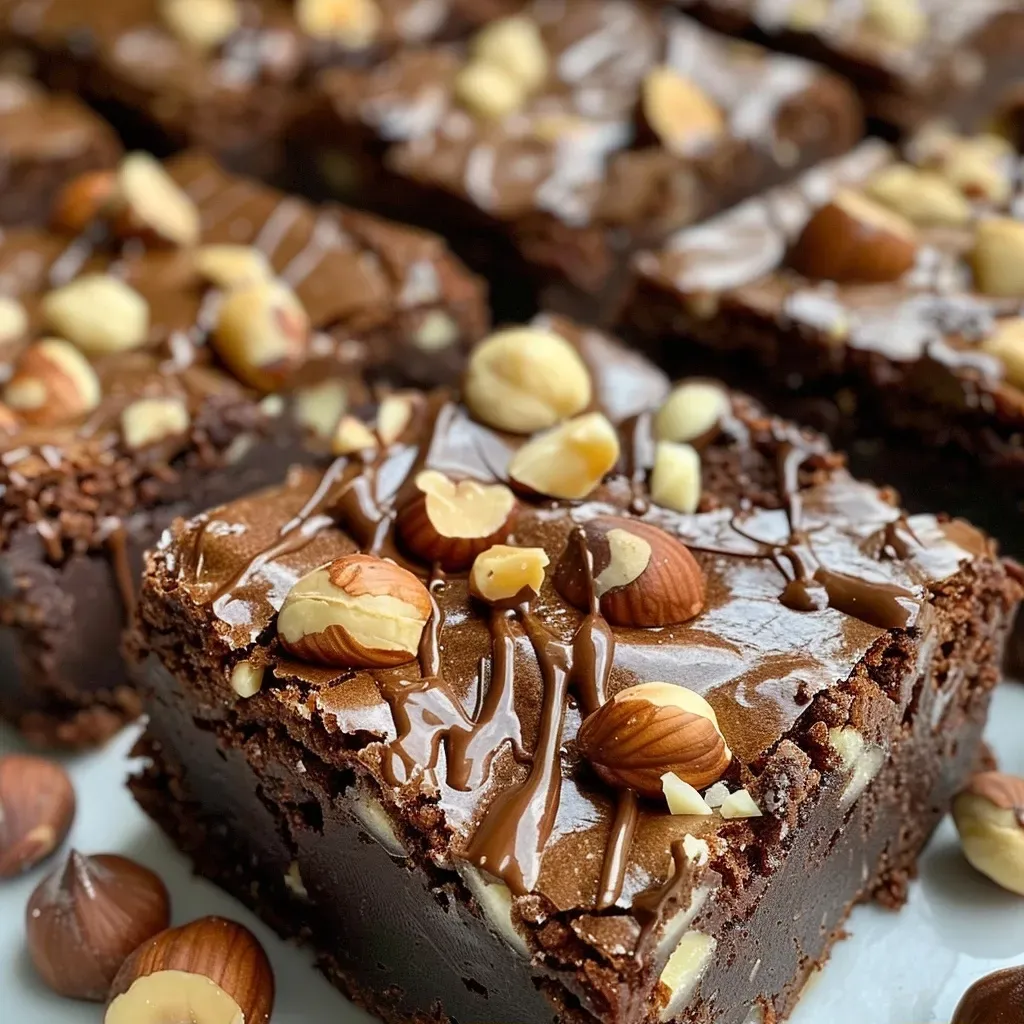
Close-up side view of fudgy hazelnut brownies topped with a dusting of confectioners’ sugar.

Let’s bring these ingredients together into a batch of brownie bliss!

  1. Preheat your oven to 350 degrees F.
  2. Prepare a 9×9-inch pan by lining it with two sheets of folded aluminum foil, ensuring the handles stick up on all four sides. Spray the inside with kitchen pan spray for easy removal.
  3. Place 1¼ cups of roasted peeled hazelnuts in a food processor and pulse a few times to break them up. Add the granulated sugar and process until the mixture resembles beach sand.
  4. Add the eggs and vanilla to the food processor and pulse to combine.
  5. In a large microwave-safe bowl, melt the butter and Baker’s chocolate together in three 30-second bursts, stirring each time until fully melted and combined.
  6. Mix the contents of the food processor into the melted chocolate mixture and stir until fully combined.
  7. Pour the batter into the prepared pan and bake for 35 minutes, or until a toothpick inserted into the center comes out clean. Start checking at the 30-minute mark.
  8. Allow to cool for 5 minutes in the pan, then use the foil handles to transfer to a cooling rack to cool completely.
  9. For the frosting: In a medium microwave-safe bowl, combine the semisweet chocolate chips and heavy cream. Microwave for 30 seconds, stir, then add the butter and espresso powder. Microwave for another 30 seconds and stir until smooth.
  10. Mix in the Nutella and confectioners’ sugar until you achieve a creamy texture.
  11. Spread the frosting over the cooled brownies.
  12. For the final touch, crush the remaining ½ cup of hazelnuts between a folded sheet of parchment paper using the bottom of a heavy pan, leaving some larger pieces. Sprinkle these on top of the frosted brownies.
  13. Cut into 9 (3×3) or 12 (3×4) portions and serve. Enjoy every bite!

Pro Tips for Perfect Brownies

Want to take your hazelnut brownies to the next level? Here are some expert insights:

  • Use Room Temperature Ingredients: Bringing eggs and butter to room temperature ensures a smoother batter and better blending.
  • Do Not Overmix: When combining the wet and dry ingredients, mix just until incorporated to keep your brownies fudgy.
  • Check for Doneness Early: Ovens can vary; check your brownies a few minutes earlier than the recommended time to avoid overbaking.
  • Cool Completely Before Frosting: Allowing the brownies to cool fully prevents the frosting from melting and ensures a beautiful finish.
  • Experiment with Mix-Ins: Feel free to add chocolate chunks, caramel swirls, or even dried fruit to customize your brownies.
  • Store Properly: Keep your brownies in an airtight container at room temperature for up to a week for the best texture.
  • Try Different Frostings: While Nutella frosting is divine, you can also experiment with cream cheese frosting or ganache.
  • Utilize Leftovers: Crumble leftover brownies over ice cream for a delicious sundae!

Common Mistakes and Troubleshooting

Even the most seasoned bakers can run into a few hiccups. Here are some common mistakes and how to avoid them:

  • Dry Brownies: This usually happens from overbaking. Always check for doneness with a toothpick and pull them when moist crumbs cling.
  • Hard Edges: If your brownies have tough edges, the oven might be too hot. Consider adjusting the temperature down by 25 degrees F.
  • Uneven Baking: Rotate your pan halfway through baking for even heat distribution.
  • Frosting Melting Off: Be sure to allow your brownies to cool completely before frosting them.

Delicious Variations

Feel free to mix things up with these fun variations:

  • Nut-Free Version: Substitute the hazelnuts with chocolate chips or coconut for a nut-free treat.
  • Mint Chocolate Hazelnut Brownies: Add peppermint extract to the batter for a refreshing twist.
  • Salted Caramel Hazelnut Brownies: Drizzle caramel sauce over the brownies before serving for a sweet and salty combo.
  • Spicy Hazelnut Brownies: Mix in a pinch of cayenne or chili powder for a surprising kick!

Storage and Make-Ahead Instructions

Want to be prepared? Here’s how to store and make your brownies in advance:

  • Room Temperature: Store brownies in an airtight container at room temperature for up to 1 week.
  • Refrigeration: For longer freshness, you can refrigerate brownies, but they may lose some of their fudgy texture.
  • Freezing: Wrap individual brownies in plastic wrap and place them in a freezer bag for up to 3 months. Thaw at room temperature before enjoying.
  • Make-Ahead: You can prepare the batter a day in advance and store it in the fridge. Just bring it to room temperature before baking.

Frequently Asked Questions (FAQ)

Let’s address some common questions about hazelnut brownies:

  • Can I use different nuts? Yes! You can swap hazelnuts for walnuts, pecans, or even almonds.
  • What can I use instead of eggs? For a vegan option, use flaxseed meal mixed with water or unsweetened applesauce.
  • How can I make brownies more chocolatey? Add more chocolate chips or replace some of the flour with cocoa powder.
  • Can I bake these in a different size pan? Yes, just adjust the baking time accordingly. A larger pan will require less baking time.
  • What if my brownies are too gooey? They may need more baking time. Check for doneness and bake a few minutes longer if needed.
  • How do I know when brownies are done? Insert a toothpick; it should come out with a few moist crumbs, not wet batter.
  • Can I add frosting on top? Absolutely! Frosting adds extra richness and flavor—try cream cheese or ganache!
  • What’s the best way to cut brownies? Use a sharp knife and clean it between cuts for neat slices.

Nutritional Information and Dietary Adaptations

Here’s how you can adapt this recipe for various dietary needs:

  • Gluten-Free: Substitute all-purpose flour with gluten-free flour blend.
  • Dairy-Free: Use dairy-free chocolate and coconut oil instead of butter.
  • Lower Sugar: Substitute some sugar with a sugar alternative such as stevia or monk fruit.

Recommended Equipment

Here’s what you’ll need to successfully bake these brownies:

  • 9×9-inch baking pan: Essential for the perfect brownie size.
  • Parchment paper: Great for lining the pan and easy removal.
  • Food processor: For achieving that sandy texture of hazelnuts.
  • Microwave-safe bowls: For melting chocolate and butter.
  • Mixing spatula: Ideal for folding ingredients together.

Serving Suggestions

How to take your brownie experience to the next level:

  • Pair with Ice Cream: Serve warm brownies with a scoop of vanilla or hazelnut ice cream.
  • Add Fresh Berries: A side of strawberries or raspberries adds freshness and color.
  • Drizzle with Caramel Sauce: A sweet finish that complements the nutty flavor.
  • Top with Whipped Cream: For a light and fluffy contrast to the fudgy brownies.

So there you have it! A comprehensive guide to making incredible hazelnut brownies that are sure to spark joy in your kitchen. Happy baking, and don’t forget to share your creations with us at Snack Nova! Remember, cooking is all about having fun, so embrace the process and enjoy every delicious bite!

Hazelnut Brownies

Prep Time 20 minutes
Cook Time 35 minutes
Total Time 55 minutes
Servings 12 pieces
Calories 420
Decadent and rich hazelnut brownies with a chocolate-hazelnut frosting, perfect for chocolate lovers.

Ingredients

Hazelnuts

  • 1.75 cups skinned and roasted hazelnuts (divided)
  • 2 cups granulated sugar
  • 3 whole eggs
  • 1.5 teaspoons vanilla extract
  • 1.5 teaspoons ground cinnamon
  • 1 teaspoon espresso powder, optional
  • 1 cup all-purpose flour
  • 2 sticks butter
  • 4 ounces Baker’s unsweetened chocolate
  • 1.5 cups semi-sweet chocolate chips
  • 0.5 cup heavy cream
  • 1 tablespoon butter
  • 0.5 teaspoon espresso powder, optional
  • 0.75 cup Nutella (see Notes)
  • 0.5 cup confectioners’ sugar

Instructions 

  • Preheat oven to 350°F (175°C). Line a 9x9-inch pan with foil and spray.
  • Process 1¼ cups hazelnuts with sugar, then add eggs, vanilla, cinnamon, espresso, and flour; mix.
  • Melt butter and chocolate in microwave, stir until smooth.
  • Combine chocolate mixture with hazelnut mixture, pour into pan, and bake for 35 minutes.
  • Cool, then prepare frosting by melting chocolate chips with cream, adding butter, espresso, Nutella, and sugar; spread over cooled brownies.
  • Crush remaining hazelnuts, sprinkle on top, cut into portions, and serve.

Notes

For extra crunch, sprinkle more chopped hazelnuts on top before serving.
Calories: 420kcal
Cost: $15
Course: Dessert
Keyword: chocolate, Hazelnuts

Unleash Your Inner Baker: The Joy of No-Yeast Irish Soda Bread

Welcome to your new favorite baking adventure! Today, we’re diving into the world of no-yeast Irish soda bread, a delightful and cozy treat that’s perfect for any occasion. Whether you’re a seasoned baker or just starting out, this recipe is designed to be incredibly accessible and fun. With just a handful of ingredients, you can whip up a loaf of bread that’s not only satisfying but also bursting with flavor. Let’s celebrate those little wins in the kitchen together!

Why You’ll Love This Recipe

This no-yeast Irish soda bread is a game changer! Here are a few reasons why you’ll be reaching for this recipe time and time again:

  • Quick and Easy: No waiting for dough to rise means you can have freshly baked bread in under an hour!
  • Minimal Ingredients: With just six pantry staples, you won’t need to make an extra trip to the store.
  • Perfect for Beginners: Great for those new to baking, this recipe requires no special skills or equipment.
  • Deliciously Versatile: Enjoy it plain, with butter, or as a side to your favorite soups and stews.
  • Crowd-Pleaser: This bread is a hit at gatherings, making it a wonderful addition to any meal.

Gather Your Ingredients

Before we get started, let’s gather everything you need:

  • 3 ½ cups all-purpose flour: The base of your bread. Feel free to experiment with whole wheat or gluten-free blends!
  • 1 teaspoon baking soda: Our leavening agent that gives the bread its lift.
  • 1 teaspoon salt: Essential for flavor.
  • 1 tablespoon sugar: Just a touch to enhance the sweetness.
  • 1 ¾ cups buttermilk: The key ingredient that adds moisture and a slight tang.
  • 2 tablespoons unsalted butter, melted: Adds richness and a lovely crust.

Step-by-Step Instructions

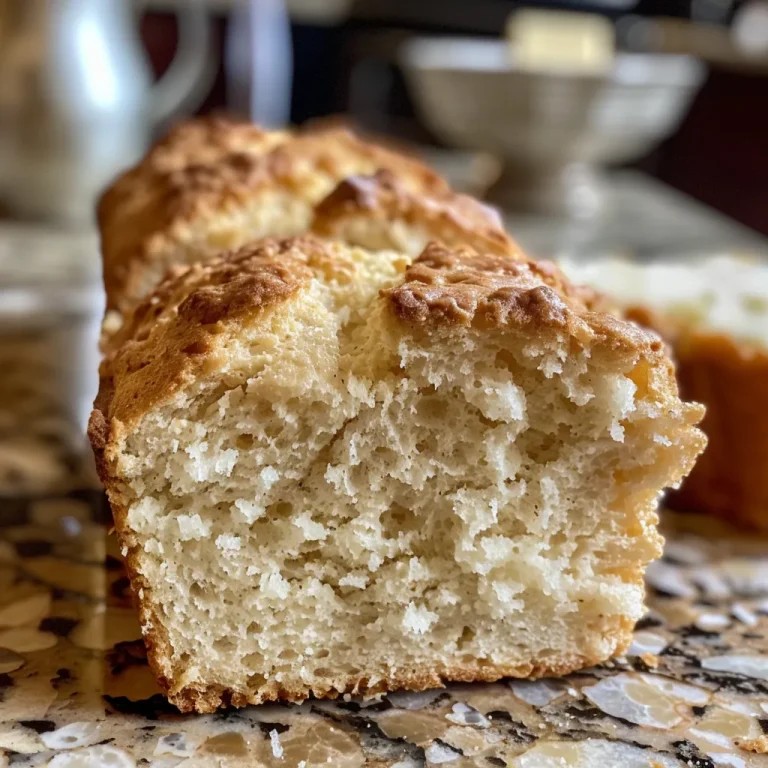
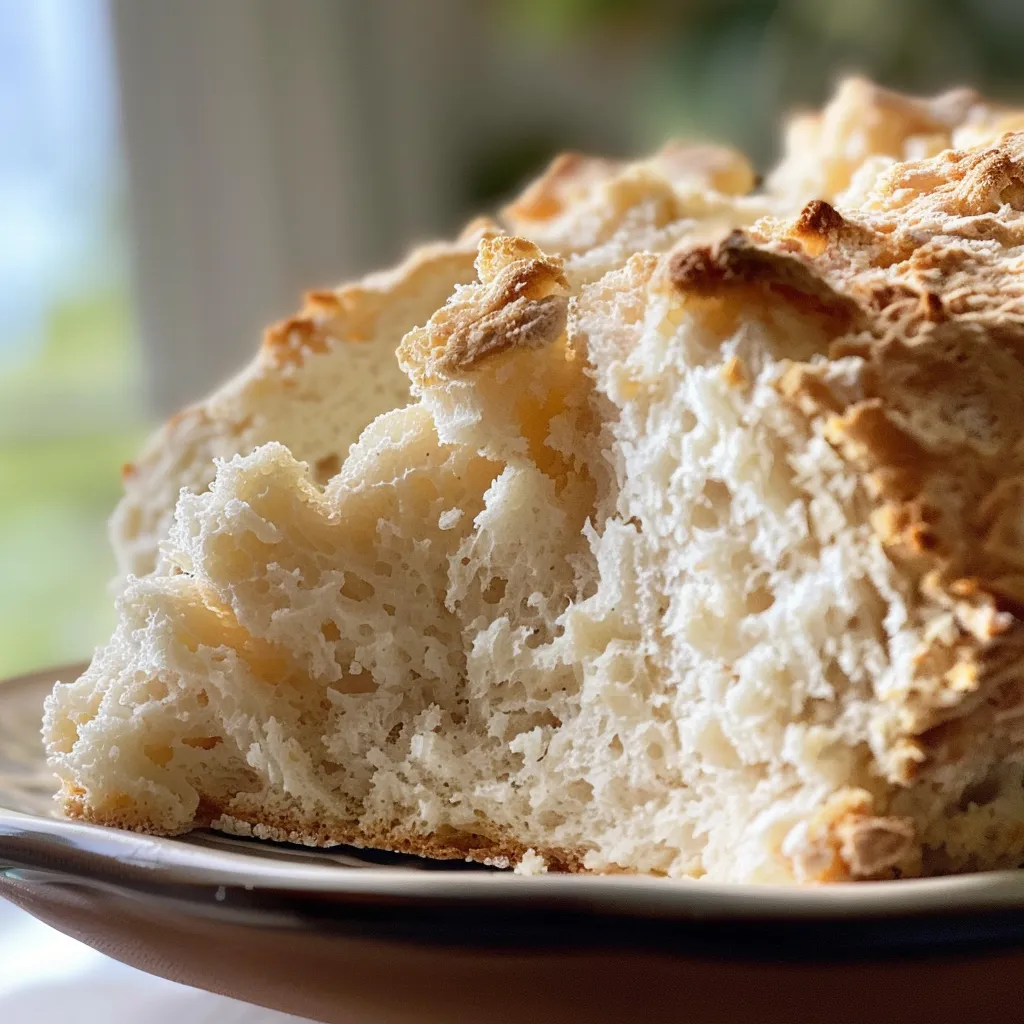
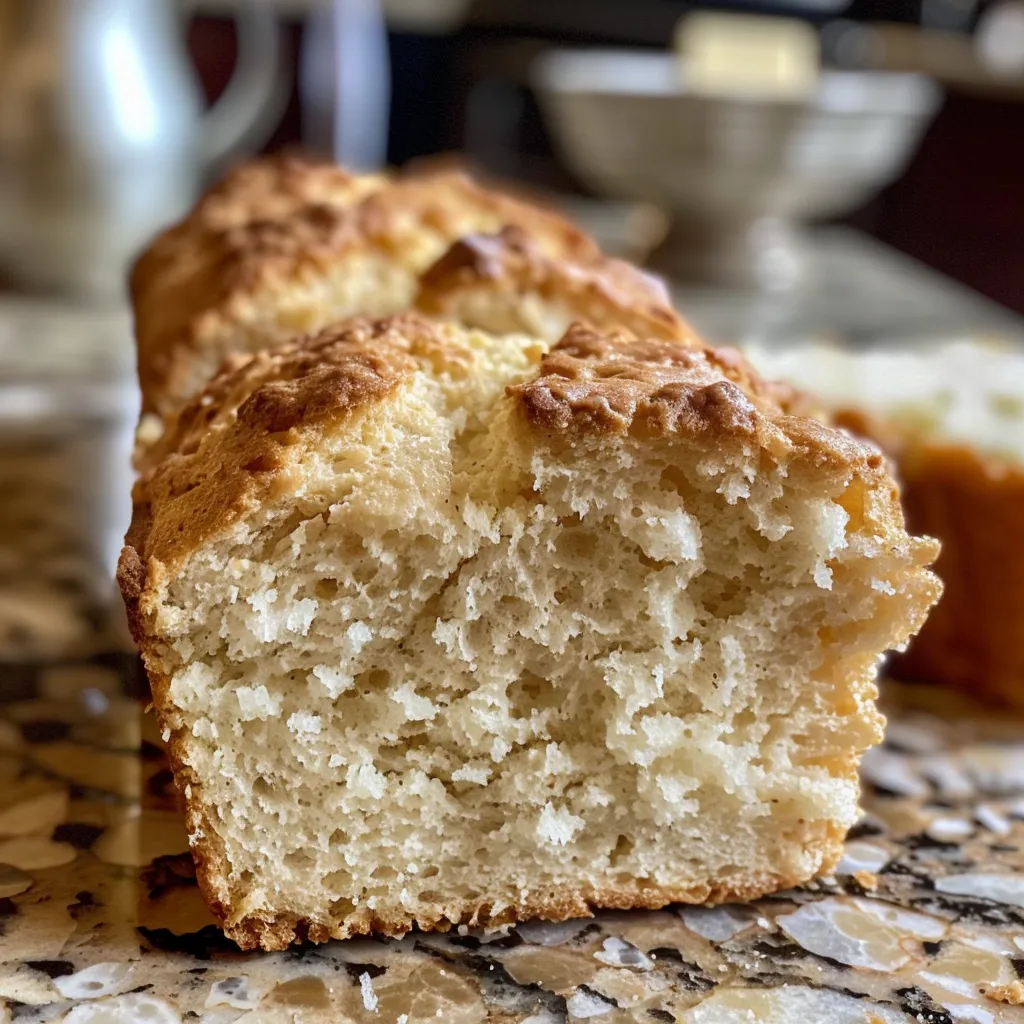
Side view of freshly baked Irish Soda Bread, cut to reveal soft interior.

Let’s roll up our sleeves and get baking! Follow these simple steps:

  1. Preheat your oven: Set it to 425°F (220°C). Prepare a baking sheet by lightly greasing it or lining it with parchment paper.
  2. Mix dry ingredients: In a large bowl, whisk together the flour, baking soda, salt, and sugar until evenly combined.
  3. Add wet ingredients: Pour in the buttermilk and melted butter. Stir gently with a wooden spoon or your hands until the dough just comes together. Avoid overmixing to keep that tender crumb!
  4. Shape the dough: Turn the dough onto a lightly floured surface and shape it into a round loaf about 7 inches in diameter.
  5. Prepare for baking: Transfer the loaf to the prepared baking sheet. Use a sharp knife to cut a deep X on top of the dough—this helps the bread bake evenly.
  6. Bake: Pop it in the oven and bake for 30-35 minutes, until the crust is golden and a toothpick inserted in the center comes out clean.
  7. Cool and enjoy: Let the bread cool slightly before slicing. It’s best enjoyed warm or toasted!

Pro Tips for Perfect Bread

To ensure your no-yeast Irish soda bread turns out perfectly every time, here are some expert insights:

  • Don’t overmix: Overworking the dough can lead to a tough texture. Mix just until combined!
  • Use fresh baking soda: Ensure your baking soda is fresh for optimal leavening. Old baking soda won’t give you the rise you need.
  • Check the oven temperature: An oven thermometer can help ensure your bread bakes evenly.
  • Experiment with flour: Mixing in whole wheat flour can add a nutty flavor and extra nutrition.
  • Add herbs or spices: For an exciting twist, consider adding herbs like rosemary or spices like cinnamon to the dough.
  • Brush with melted butter: For a richer flavor and beautiful golden crust, brush the top with melted butter right after baking.

Common Mistakes and Troubleshooting

Even the best bakers make mistakes! Here are some common pitfalls and how to avoid them:

  • Dense texture: This often results from overmixing or using old baking soda. Remember, gentle mixing is key!
  • Too dry: If your dough feels crumbly, add a splash more buttermilk until it comes together.
  • Uneven baking: Ensure the oven is preheated and avoid opening the oven door frequently while baking.

Variations to Try

Feel free to get creative! Here are some fun variations to make this recipe your own:

  • Cheese and Herb Soda Bread: Add shredded cheese and fresh herbs like chives or parsley for a savory twist.
  • Dried Fruit Bread: Mix in raisins or cranberries for a sweet version that pairs beautifully with butter.
  • Spicy Jalapeño Bread: Add diced jalapeños and cheddar for a kick!
  • Gluten-Free Adaptation: Substitute all-purpose flour with a gluten-free blend for a gluten-free option.

Storage and Make-Ahead Instructions

Want to enjoy your bread later? Here’s how to store it:

  • Room Temperature: Keep your bread wrapped in a clean kitchen towel or in a bread box for up to 2 days.
  • Refrigeration: If you need to store it longer, place it in an airtight container in the fridge for up to a week.
  • Freezing: Wrap the bread tightly in plastic wrap and foil, then freeze for up to 3 months. Thaw at room temperature before enjoying!

Frequently Asked Questions

Got questions? We’ve got answers! Here are some common queries:

  • Can I use regular milk instead of buttermilk? Absolutely! Just add 1 tablespoon of vinegar or lemon juice to regular milk and let it sit for 5 minutes.
  • What if I don’t have baking soda? You can substitute with baking powder, but use 3 teaspoons as it’s less potent.
  • Can I make this bread vegan? Yes! Use a plant-based milk and replace the butter with coconut oil or vegan butter.
  • How can I tell when the bread is done? Look for a golden crust and a hollow sound when tapped on the bottom!
  • What should I serve with Irish soda bread? It pairs wonderfully with butter, cheese, or soups!
  • Can I add nuts or seeds? Definitely! Walnuts or sunflower seeds can add a delightful crunch.
  • How do I reheat leftover bread? Warm slices in the oven or a toaster for that fresh-baked taste!
  • Is this recipe suitable for kids to help with? Yes! It’s a great recipe for kids to get involved in the kitchen.

Nutritional Tips and Dietary Adaptations

This bread is not only delicious but can also fit various dietary needs:

  • Higher Fiber: Use whole wheat flour or add flaxseed for added fiber and nutrients.
  • Lower Sugar: Feel free to reduce the sugar for a less sweet bread.
  • Allergy-Friendly: With simple swaps, this recipe can cater to gluten-free and dairy-free diets!

Equipment Recommendations

Here’s what you’ll need for this recipe:

  • Mixing Bowl: A large bowl to combine your ingredients.
  • Measuring Cups and Spoons: Precision is key in baking!
  • Wooden Spoon or Dough Scraper: For mixing and shaping the dough.
  • Baking Sheet: A sturdy sheet for baking your loaf.
  • Sharp Knife: For scoring the top of the bread.

Serving Suggestions

Now that your bread is ready, how should you enjoy it? Here are some delightful ideas:

  • Slather with Butter: A classic way to enjoy freshly baked bread.
  • Pair with Soup: Serve alongside your favorite soup for a comforting meal.
  • Toast with Jam: A perfect sweet treat for breakfast or snacks.
  • Make a Sandwich: Use it as a base for a delicious sandwich filled with your favorites.

And there you have it—your ultimate guide to making delicious no-yeast Irish soda bread! Whether you’re celebrating a special occasion or just craving something warm and comforting, this recipe has got you covered. So grab your ingredients and let’s bake together! I can’t wait to hear about your baking adventures!

No-Yeast Irish Soda Bread

Prep Time 10 minutes
Cook Time 35 minutes
Total Time 45 minutes
Servings 8 slices
Calories 180
This traditional Irish soda bread is quick to make and perfect for a hearty, crusty loaf without yeast.

Ingredients

Dry ingredients

  • 3.5 cups all-purpose flour
  • 1 teaspoon baking soda
  • 1 teaspoon salt
  • 1 tablespoon sugar

Wet ingredients

  • 1.75 cups buttermilk
  • 2 tablespoons unsalted butter, melted

Instructions 

  • Preheat oven to 425°F (220°C). Grease or line a baking sheet.
  • Mix flour, baking soda, salt, and sugar in a large bowl.
  • Add buttermilk and melted butter; stir until just combined.
  • Shape dough into a round loaf, place on prepared sheet, and cut a deep X on top.
  • Bake for 30-35 minutes until golden and a toothpick comes out clean.
  • Cool slightly before slicing. Best enjoyed warm or toasted.

Notes

For a softer crust, cover with foil during the first 20 minutes of baking.
Calories: 180kcal
Cost: $10
Course: Bread
Cuisine: Irish
Keyword: Soda Bread

Unleash Your Inner Baker with High-Protein Whole-Wheat Sandwich Bread!

Welcome to the wonderful world of baking! If you’ve ever wanted to make your own bread but felt intimidated, you’re in the right place. This high-protein whole-wheat sandwich bread is not just nutritious; it’s also delicious and easy to make! In this comprehensive guide, we’ll walk through everything you need to know to whip up the perfect loaf.

Whether you’re a seasoned baker or trying your hand at homemade bread for the first time, this recipe will boost your confidence in the kitchen. Let’s dive into why you’ll love this bread and how to make it a staple in your home!

Why You’ll Love This Recipe

  • Nutrition-packed: This bread is rich in protein and fiber, thanks to the use of whole wheat flour and vital wheat gluten, making it a wholesome choice for your meals.
  • Perfect for sandwiches: Its sturdy structure makes it ideal for sandwiches, ensuring your fillings stay intact without the bread falling apart.
  • Simple ingredients: With just a few pantry staples, you can create a delicious loaf that’s both satisfying and healthy.
  • Customizable: Feel free to experiment with different seeds, nuts, or spices to personalize your bread to your taste.
  • Cost-effective: Making your own bread can save you money in the long run, especially compared to store-bought options.

Ingredient Breakdown

Let’s look at what you’ll need to make this high-protein whole-wheat sandwich bread, including some helpful substitutions!

  • Active dry yeast (4 teaspoons): This is essential for making the bread rise. You can substitute with instant yeast, but the rising time may vary.
  • Maple syrup (2 tablespoons): This adds a touch of sweetness. You can use honey or agave syrup instead if preferred.
  • Warm water (¾ cup): Make sure it’s not too hot or it will kill the yeast! Ideal temperature is around 110°F (43°C).
  • Neutral oil (2 tablespoons): I used avocado oil, but you can also go for olive oil or sunflower oil.
  • Nondairy milk (1½ cups): Almond milk, soy milk, or any plant-based milk works perfectly here.
  • Vital wheat gluten (½ cup): This ingredient boosts the protein content and adds elasticity. If gluten-free, use a gluten-free flour blend without vital wheat gluten.
  • Whole wheat flour (4 cups): This is the base of your bread. You can substitute with spelt flour for a nutty flavor or all-purpose flour for a lighter loaf.
  • Salt (1 teaspoon): Essential for flavor; don’t skip it!

How to Make High-Protein Whole-Wheat Sandwich Bread

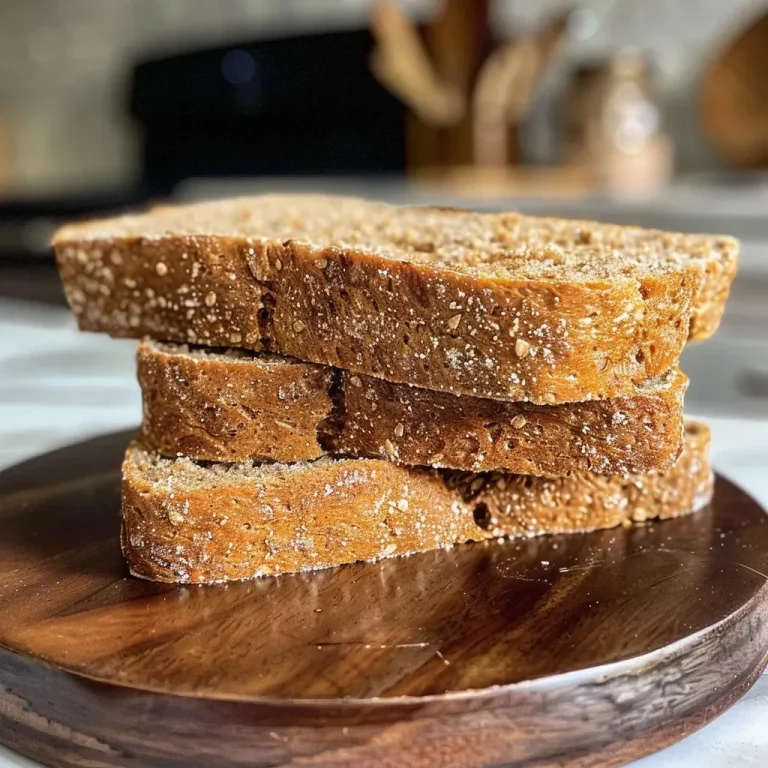
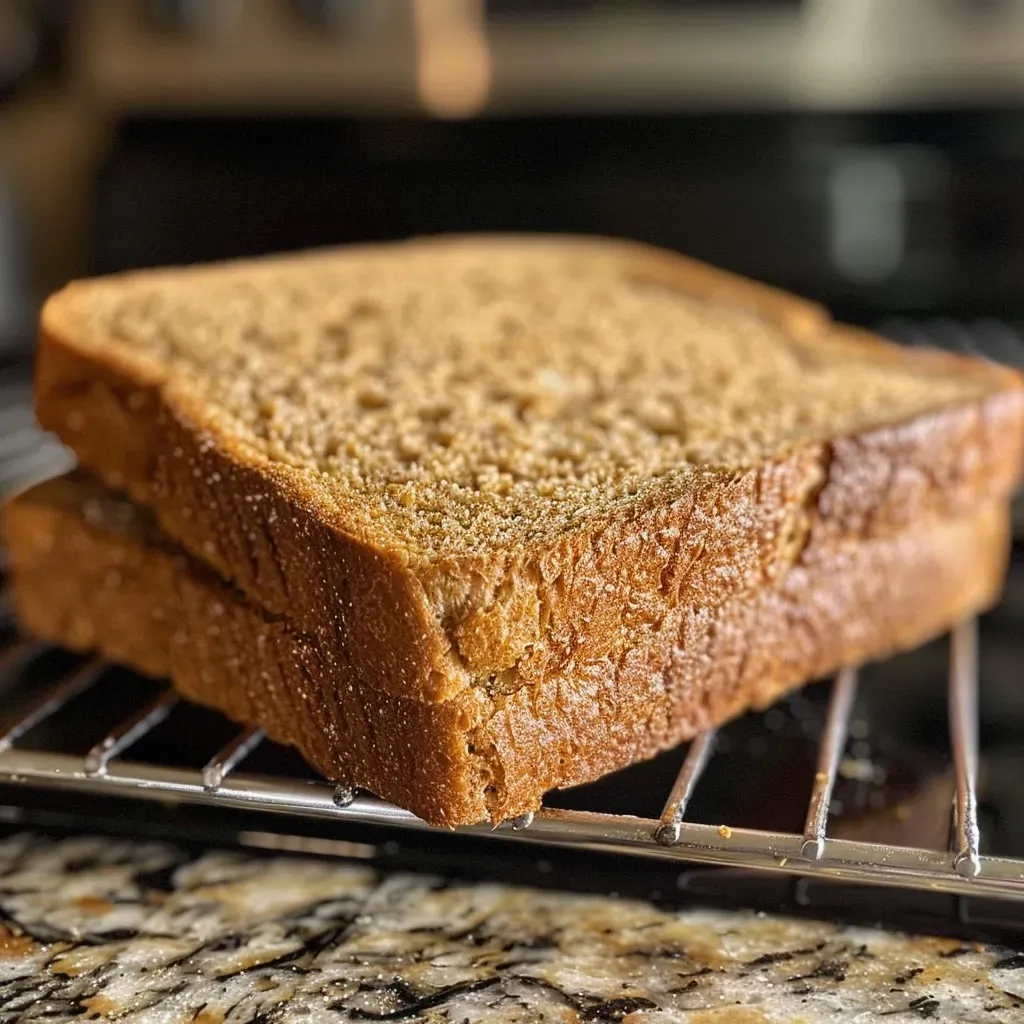
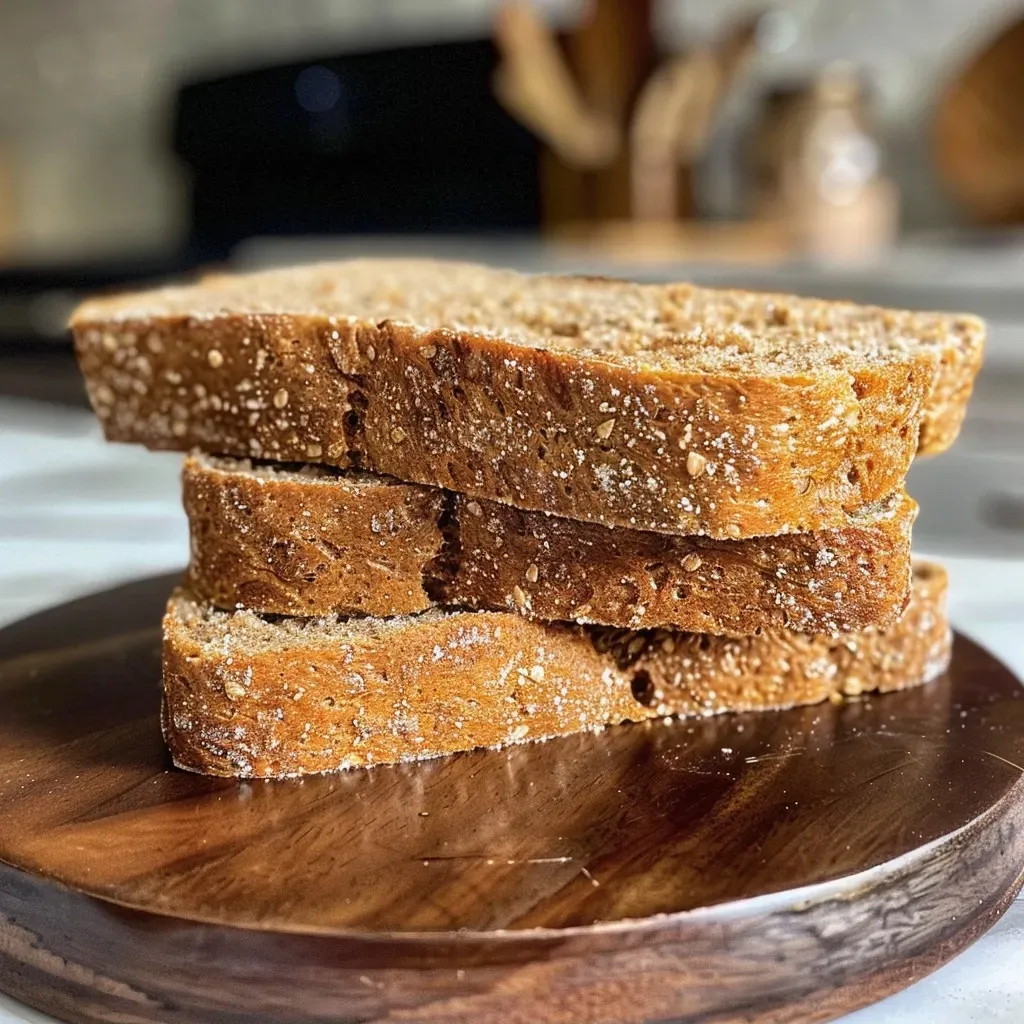
Side view of a loaf of golden-brown high-protein whole wheat sandwich bread on a wooden cutting board.

Ready to get baking? Follow these simple steps for delicious homemade bread!

  1. In a large bowl, mix the yeast, maple syrup, and warm water. Let it sit for about five minutes until bubbly.
  2. Add the nondairy milk, oil, vital wheat gluten, and 2 cups of whole wheat flour. Mix until well combined, then add the salt.
  3. Gradually mix in the remaining flour, a quarter cup at a time, until the dough pulls away from the sides of the bowl. You might need about 3¼ cups depending on humidity.
  4. Knead the dough on a floured surface for about 10 minutes until smooth and elastic.
  5. Place the dough in a lightly oiled bowl, cover it with a damp cloth, and let it rise in a warm spot for 45 minutes or until doubled in size.
  6. Punch down the dough and divide it into two pieces. Roll each piece into a rectangle and then roll it up tightly into a loaf shape.
  7. Place the loaves seam-side down into oiled loaf pans. Cover and let them rise again for about 1 hour until domed over the pans.
  8. Preheat your oven to 450°F (232°C) about 15 minutes before baking. Once ready, bake the loaves for 10 minutes, then reduce the temperature to 350°F (177°C) and bake for an additional 30 minutes.
  9. Cool on a wire rack for about an hour before slicing. Enjoy!

Pro Tips for Perfect Bread

  • Measure accurately: Use a kitchen scale for precise measurements, especially for flour.
  • Don’t rush the rising: Allow the dough to rise until it has doubled for the best texture.
  • Humidity matters: Adjust the flour based on your environment; use more or less depending on the moisture in the air.
  • Experiment with flavors: Add herbs, garlic powder, or seeds for a flavor boost!
  • Use a bread machine: If you have one, it can make the process even easier. Just follow the manufacturer’s instructions.
  • Check for doneness: The bread should sound hollow when tapped on the bottom.
  • Slice only when cool: This helps keep the bread from becoming gummy.
  • Store properly: Keep in an airtight container to maintain freshness.

Common Mistakes and Troubleshooting

Even the best bakers face challenges! Here are some common pitfalls and how to avoid them:

  • Dough too sticky: If your dough is sticky, add flour a tablespoon at a time until it becomes manageable.
  • Dense bread: This can happen if the dough hasn’t risen enough or if you’ve added too much flour. Make sure to allow adequate rising time!
  • Overbaking: Watch your bread closely towards the end of the baking time to prevent it from drying out.

Variations to Try

Want to mix things up? Here are some fun variations on this high-protein bread:

  • Herb-infused: Add dried rosemary, thyme, or oregano to the dough for a flavorful twist.
  • Seeded topping: Sprinkle sesame or poppy seeds on top before baking for a crunchy finish.
  • Sweet version: Mix in dried fruit like raisins or cranberries for a delightful breakfast bread.
  • Nutty addition: Fold in chopped nuts like walnuts or pecans for added texture and flavor.

Storage and Make-Ahead Instructions

Once you’ve baked your bread, you’ll want to keep it fresh:

  • Room temperature: Store in an airtight container for up to 3 days.
  • Freezing: Wrap cooled loaves tightly in plastic wrap and then foil. They can be frozen for up to 3 months! Just thaw at room temperature when ready to enjoy.
  • Make-ahead: You can prepare the dough ahead of time and refrigerate it overnight before the first rise, then continue with the recipe as normal.

Comprehensive FAQs

Got questions? Here are some frequently asked questions about this recipe:

  • Can I use all-purpose flour instead of whole wheat flour? Yes, but the texture and nutrition will differ.
  • What if my bread doesn’t rise? Check your yeast freshness; it might be inactive. Also, ensure your rising environment is warm enough.
  • How do I know when my bread is done? The bread should be golden brown and sound hollow when tapped on the bottom.
  • Can I double the recipe? Absolutely! Just make sure you have enough space for the dough to rise.
  • Is this bread vegan? Yes, all the ingredients are plant-based!
  • Can I add other ingredients? Definitely! Feel free to add seeds, nuts, or spices to suit your taste.
  • How can I make this gluten-free? Substitute the whole wheat flour and vital wheat gluten with a gluten-free flour mix, but results may vary.
  • Can I use a bread machine for this recipe? Yes, follow your machine’s guidelines and add the ingredients in the order specified by the manufacturer.

Nutritional Tips and Dietary Adaptations

This high-protein whole-wheat sandwich bread is not just filling; it’s also versatile for various diets:

  • High-protein diet: This recipe boosts protein content with vital wheat gluten, making it great for fitness enthusiasts.
  • Vegetarian and vegan-friendly: All ingredients are plant-based, perfect for any vegetarian or vegan meal plan.
  • Low-fat option: Reduce the oil or substitute with applesauce for a lower fat content.

Equipment Recommendations

Having the right tools can make your baking experience even smoother:

  • Stand mixer: Makes kneading a breeze, but you can also knead by hand.
  • Loaf pans: Standard size ensures even baking of your bread.
  • Measuring cups and spoons: Accurate measurements are key to a successful loaf!
  • Baking thermometer: Checking the internal temperature can help you understand doneness.

Serving Suggestions

This high-protein whole-wheat sandwich bread is incredibly versatile:

  • Classic sandwiches: Use it for your favorite deli meats or veggie fillings.
  • Toast it up: A slice of toasted bread pairs wonderfully with avocado, nut butter, or jam.
  • French toast: This bread makes for a delicious base for a protein-packed breakfast treat.

Final Thoughts

There you have it! A complete guide to making high-protein whole-wheat sandwich bread that’s not only good for you but also fun to make. Remember, the kitchen is a place for creativity and joy, so don’t hesitate to experiment and make this recipe your own. Happy baking, and enjoy your delicious homemade bread!

High-Protein Whole-Wheat Sandwich Bread

Prep Time 20 minutes
Cook Time 50 minutes
Total Time 1 hour 10 minutes
Servings 16 slices
Calories 150
This hearty, protein-packed whole-wheat bread is perfect for sandwiches and healthy snacking. Easy to make at home with wholesome ingredients.

Ingredients

Yeast and liquids

  • 4 teaspoons active dry yeast
  • 2 tablespoons maple syrup (or sugar)
  • ¾ cups warm water
  • 1½ cups warm nondairy milk
  • 2 tablespoons avocado oil or neutral oil (olive or vegetable oil fine)

Dry ingredients

  • ½ cup vital wheat gluten flour
  • 4 cups whole wheat flour (may not need all)
  • 1 teaspoon salt

Instructions 

  • Mix yeast, maple syrup, and warm water; let sit 5 minutes to bloom.
  • Add milk, oil, vital wheat gluten, 2 cups of flour, then salt; mix thoroughly.
  • Gradually add remaining flour until dough is no longer sticky; knead for 10 minutes.
  • Shape into two loaves, place in oiled pans, cover, and proof 1 hour.
  • Preheat oven to 450°F (230°C), bake loaves for 10 minutes, then reduce to 350°F (175°C) and bake 30 more minutes.
  • Cool on racks for about an hour before slicing.

Notes

Using warm liquids helps activate the yeast for better rise.
Calories: 150kcal
Cost: $10
Course: Bread
Cuisine: Homemade
Keyword: High Protein, whole wheat

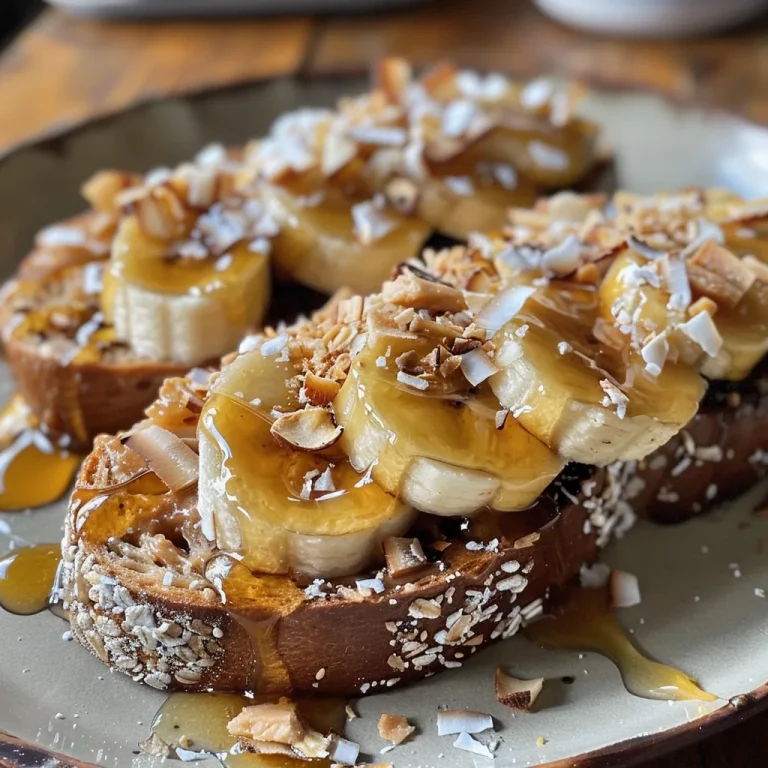
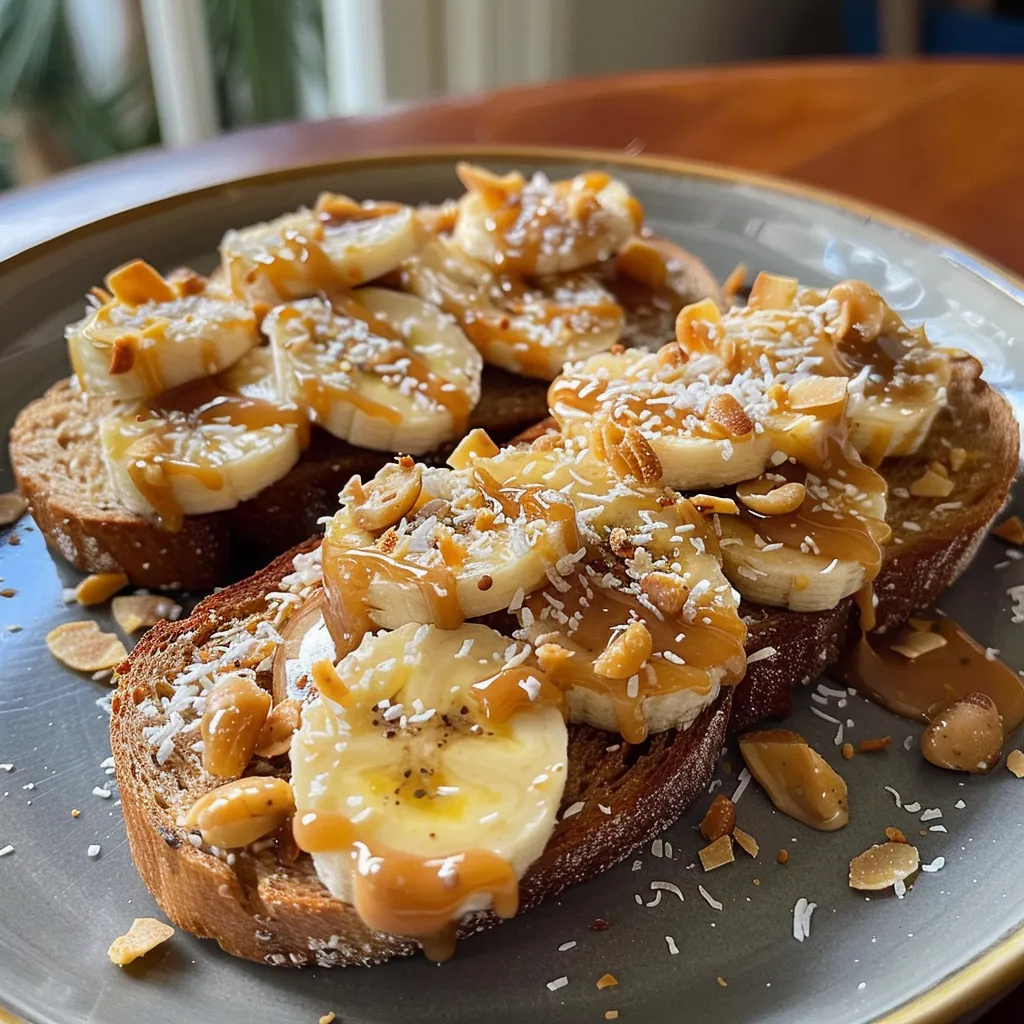
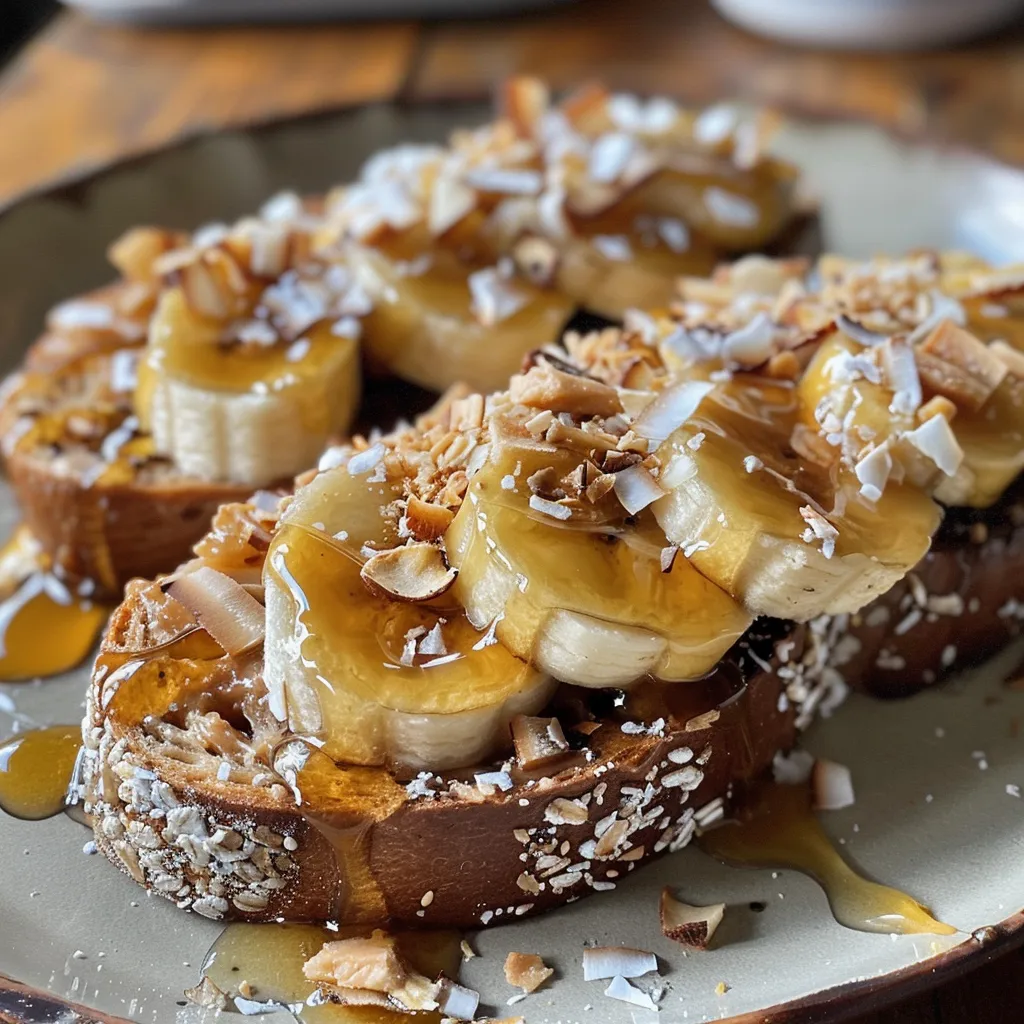
Welcome to a delightful culinary adventure where we transform simple ingredients into a mouthwatering masterpiece! Today, we’re diving into the world of Peanut Butter Banana Honey Toast—a quick and satisfying dish that’s perfect for breakfast, a snack, or even a light dessert. In just a few minutes, you can whip up this delicious toast that’s not only tasty but also packed with nutrients. Let’s get started!

Why You’ll Love This Recipe

This recipe isn’t just easy to make; it’s also a fantastic way to enjoy wholesome ingredients. Here are some reasons why you’ll fall head over heels for this toast:

  • Quick and Simple: Ready in under 10 minutes, it’s perfect for busy mornings or when you need a quick snack.
  • Nutritious Boost: Packed with protein from the peanut butter and potassium from the bananas, it’s a healthful choice!
  • Customizable Flavors: Feel free to switch up the toppings to match your mood—honey, cinnamon, or even some chocolate chips!
  • Kid-Friendly: A fun and tasty way to get kids involved in the kitchen—let them build their own toast creations!
  • Perfect for Any Occasion: Whether it’s breakfast, an afternoon pick-me-up, or a sweet treat, this toast fits right in.

Ingredients Breakdown

Let’s gather our ingredients for this delicious toast. Here’s what you’ll need:

  • 2 seeded pieces of bread: Choose your favorite variety—whole grain, sourdough, or even gluten-free options work wonderfully!
  • 1 ripe banana: Make sure it’s ripe for the best sweetness and flavor.
  • 4 tbsp organic, unsalted, unsweetened nut butter: While peanut butter is a classic choice, almond or cashew butter can also add unique flavors.
  • 1 tbsp of toasted coconut chips: These add a delightful crunch and tropical twist!
  • Maldon sea salt flakes: A pinch of salt enhances all the flavors beautifully.
  • Brazilian Quince Honey or any high-quality honey: Choose a honey that you love for drizzling on top.

Making the Perfect Peanut Butter Banana Honey Toast

Now that we have our ingredients ready, let’s dive into the steps to create this delicious toast:

  • Toast your bread: Grill the bread slices until they’re perfectly crispy and golden brown.
  • Spread the nut butter: Evenly slather the nut butter across the warm toasted bread.
  • Slice the banana: Cut the banana into circles and arrange them on the nut butter.
  • Add toppings: Sprinkle the toasted coconut chips and a pinch of Maldon sea salt on top for extra flavor.
  • Drizzle with honey: Generously drizzle the toast with your choice of honey.
  • Enjoy your creation: Your Peanut Butter Banana Honey Toast is now ready to enjoy!

Pro Tips for Toasting Success

Side view of two pieces of bread topped with peanut butter, banana slices, and honey.

Want to take your toast to the next level? Here are some expert insights:

  • Perfect Banana: Use bananas that are ripe but still firm to prevent them from becoming mushy on the toast.
  • Warm the Honey: Slightly warming the honey makes it easier to drizzle and enhances its flavor.
  • Experiment with Nut Butters: Try different nut butters for a variety of tastes—hazelnut, almond, or even sunflower seed butter!
  • Texture Matters: Lightly toasting the bread creates a warm contrast with the creamy nut butter.
  • Go for Garnishes: Consider adding toppings like chia seeds, sliced strawberries, or a sprinkle of cinnamon for an extra flavor kick.
  • Make it a Meal: Pair your toast with yogurt or a smoothie for a well-rounded breakfast.
  • Portion Control: Adjust the quantity of nut butter based on your dietary needs—more for a filling snack, less for a lighter option.
  • Check for Allergies: Always consider nut allergies when serving to others—opt for seed-based butters if needed.

Common Mistakes to Avoid

Even the best of us can make a few missteps in the kitchen. Here are some common mistakes to watch out for:

  • Over-toasting: Keep an eye on your bread to ensure it doesn’t burn—golden is the goal!
  • Too Much Nut Butter: While delicious, too much can make the toast overly rich—balance is key.
  • Unripe Bananas: Using bananas that are too firm can lead to a less sweet and flavorful toast.
  • Skipping the Salt: A sprinkle of salt can elevate the flavors, so don’t skip it!
  • Ignoring Texture: Ensure your toppings add a nice texture contrast to the creamy nut butter.

Delicious Variations

Feeling adventurous? Here are some fun variations to try:

  • Chocolate Lovers: Drizzle melted dark chocolate over the top for a decadent treat.
  • Berry Burst: Top with fresh strawberries or blueberries for a fruity twist.
  • Spicy Kick: Add a sprinkle of cayenne pepper to the nut butter for a surprising heat.
  • Nutty Crunch: Incorporate chopped nuts like walnuts or pecans for added crunch.

Storage and Make-Ahead Instructions

If you want to prep ahead, here’s how to store your toast components:

  • Make Ahead: You can prepare the nut butter and slice the bananas in advance. Store them separately in airtight containers.
  • Storage: Toast is best enjoyed fresh, but you can keep leftover components in the fridge for up to 2 days.
  • Reassembly: When ready to eat, simply toast the bread and assemble with the toppings fresh!

Frequently Asked Questions

Here are some common questions about Peanut Butter Banana Honey Toast:

  • Can I use gluten-free bread? Absolutely! Gluten-free bread works just as well for this recipe.
  • What nut butter is best? Use whatever you prefer—peanut, almond, or cashew are all delicious options!
  • Can I add protein powder? Yes, you can mix in protein powder with the nut butter for an extra boost.
  • Is this recipe kid-friendly? Definitely! Kids love building their own toast creations.
  • How can I make it vegan? Use a plant-based nut butter and agave syrup instead of honey.
  • What if I don’t have toasted coconut chips? No worries! You can skip them or use crushed nuts for crunch.
  • Can I freeze the toast? It’s best fresh, but you can freeze the bread beforehand and toast it when ready.
  • How can I elevate the flavors? Don’t skip the salt! It enhances the overall flavor of the toast.

Nutritional Tips and Dietary Adaptations

This toast is naturally healthful, but here are a few tips to adapt it to your dietary needs:

  • For a Low-Sugar Option: Use less honey or a sugar-free alternative.
  • For a Protein Boost: Add a scoop of protein powder to your nut butter mix.
  • For a Vegan Version: Substitute honey with maple syrup or agave nectar.
  • For a Nut-Free Option: Use sunflower seed butter instead of nut butter.

Equipment Recommendations

Here’s what you’ll need to make this toast:

  • Toaster or Grill: For perfectly toasted bread.
  • Spreading Knife: For easy nut butter application.
  • Cutting Board: To slice your banana with ease.
  • Measuring Spoons: For accurate ingredient measurements.

Serving Suggestions

Your Peanut Butter Banana Honey Toast can shine as a standalone snack, but here are some ideas for pairing:

  • Smoothies: Pair with a refreshing smoothie for a complete breakfast.
  • Yogurt Bowls: Serve alongside a yogurt bowl topped with granola and berries.
  • Fruit Salad: Complement with a side of mixed fruit for a colorful plate.
  • Herbal Tea: Enjoy with a warm cup of herbal tea for a cozy treat.

In conclusion, Peanut Butter Banana Honey Toast is not just a recipe; it’s an experience that you can enjoy, share, and create with your loved ones. Whether you’re a seasoned chef or a beginner in the kitchen, this toast will become a favorite in your culinary repertoire. So grab your ingredients, invite a friend over, and let’s make some toast that’s sure to bring smiles and satisfaction to your day!

Peanut Butter Banana Honey Toast

Prep Time 5 minutes
Cook Time 5 minutes
Total Time 10 minutes
Servings 2 pieces
Calories 350
A delicious and nutritious toast topped with banana, coconut, and honey for a perfect breakfast or snack.

Ingredients

Bread

  • 2 pieces seeded bread
  • 1 piece banana
  • 4 tbsp organic, unsalted, unsweetened nut butter
  • 1 tbsp toasted coconut chips
  • to taste Maldon sea salt flakes
  • 1 tbsp Brazilian Quince Honey or any high-quality sustainably sourced honey

Instructions 

  • Enjoy your Peanut Butter Banana Honey Toast!

Notes

Use ripe bananas for best flavor.
Calories: 350kcal
Cost: $8
Course: Breakfast
Cuisine: American
Keyword: Toast

Welcome to a delicious journey where we transform everyday ingredients into the most delightful chai cookies! Imagine the aroma of warm spices wafting through your kitchen, making it the coziest place to be. This recipe is not just about baking; it’s about creating moments of joy and indulgence. So, grab your apron, and let’s get started on making the best ever chai cookies that are perfect for sharing or enjoying all by yourself!

Why You’ll Love This Recipe

Let’s talk about why these chai cookies are truly special:

  • Irresistible Flavor: Each bite is infused with a blend of spices that capture the warmth of chai tea.
  • Perfect Texture: These cookies are crispy on the outside and delightfully chewy on the inside, creating a heavenly contrast.
  • Quick and Easy: You can whip these up in under an hour, making them a great option for last-minute gatherings.
  • Versatile Treat: Enjoy them plain, glazed, or even as part of a dessert spread with chai lattes!
  • Customizable: This recipe allows for several variations, so you can play around with flavors and ingredients!

Ingredient Breakdown: What You’ll Need

Here’s a detailed look at what goes into these chai cookies, along with some handy substitutions:

  • All-Purpose Flour: 2 1/2 cups. For a gluten-free option, use a 1:1 gluten-free flour blend.
  • Cake Flour: 1 1/2 cups. This gives the cookies a tender texture; feel free to replace with more all-purpose flour if needed.
  • Cornstarch: 2 tsp. Helps create a soft and chewy cookie; you can omit it if you don’t have any.
  • Baking Soda and Baking Powder: 1 tsp each. Essential for the perfect rise!
  • Salt: 1 tsp. Enhances the flavors of the spices.
  • Chai Spice Blend: 2 Tbsp, divided. Use a mix of cinnamon, cardamom, ginger, cloves, nutmeg, and allspice for that authentic chai flavor.
  • Unsalted Butter: 16 Tbsp (1 cup), cold and cubed. You can use vegan butter for a dairy-free version.
  • Sugars: 1 cup sugar and 1/4 cup packed brown sugar. The brown sugar adds moisture and depth to the flavor.
  • Eggs: 2 large eggs and 2 large egg yolks. If you’re vegan, substitute with flax eggs (1 tbsp flaxseed meal + 2.5 tbsp water per egg).
  • Vanilla Extract: 2 tsp. A must-have for flavor!
  • Confectioners’ Sugar: For glazing, about 1 1/2 cups.
  • Milk: 3 Tbsp, plus more as needed for the glaze.
  • Vanilla Bean Paste: 1 tsp. This can be swapped with extra vanilla extract.

Step-by-Step Directions to Make Chai Cookies

Ready to bake? Follow these simple steps for cookie perfection:

  1. Preheat your oven to 400°F (200°C). Line a baking sheet with parchment paper or a silicone baking mat.
  2. In a small bowl, whisk together the ingredients for the chai spice blend.
  3. In a large bowl, combine the dry ingredients: all-purpose flour, cake flour, cornstarch, 1 heaping tablespoon of the chai spice, baking soda, baking powder, and salt.
  4. Using a stand mixer, cream the cubed butter and both sugars together on medium speed until smooth, about 1-2 minutes.
  5. Add in the eggs, egg yolks, and vanilla extract. Mix until well combined, scraping down the sides as needed.
  6. Gradually add the dry ingredients, about 1/4 cup at a time, mixing until just incorporated.
  7. Roll the dough into large balls (about 6-7) or smaller ones for more cookies. You should have about 20-22 cookies.
  8. Mix 1 Tbsp. sugar with the remaining chai spice and roll the cookie dough balls in this mixture.
  9. Place the rolled cookie dough on the prepared baking sheet and bake for 10-11 minutes for large cookies or 8-10 minutes for smaller cookies.
  10. Cool completely before glazing.

Pro Tips for Perfect Chai Cookies Every Time

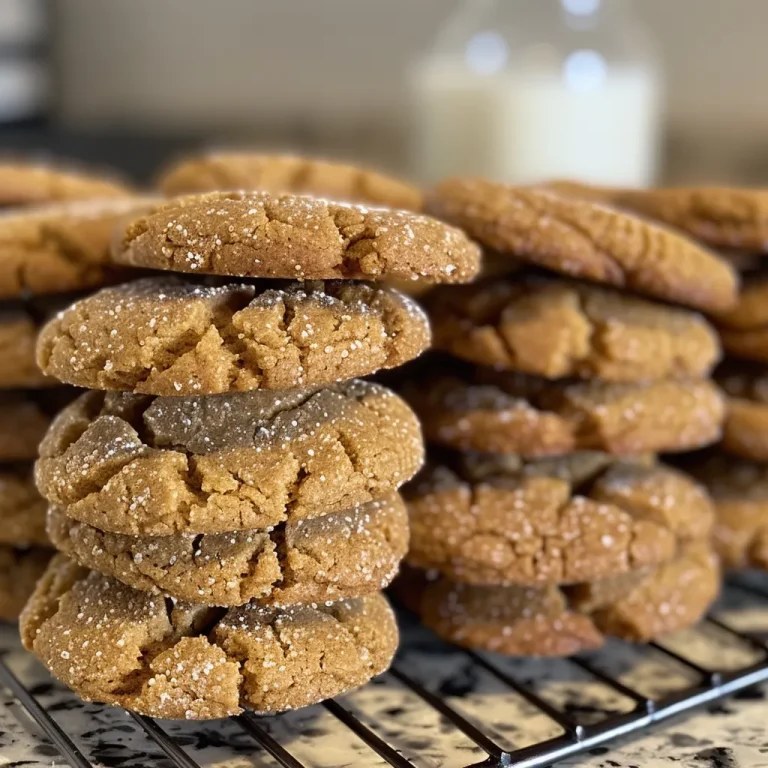
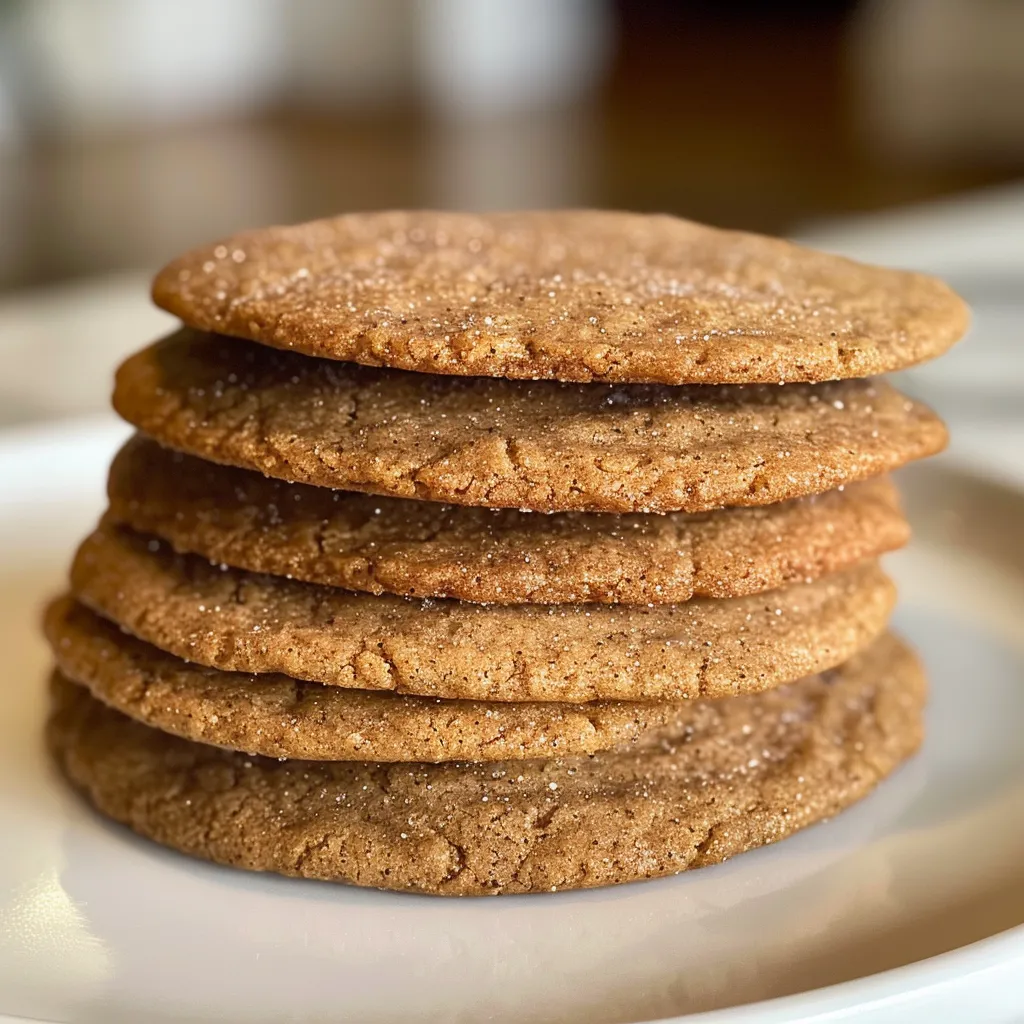
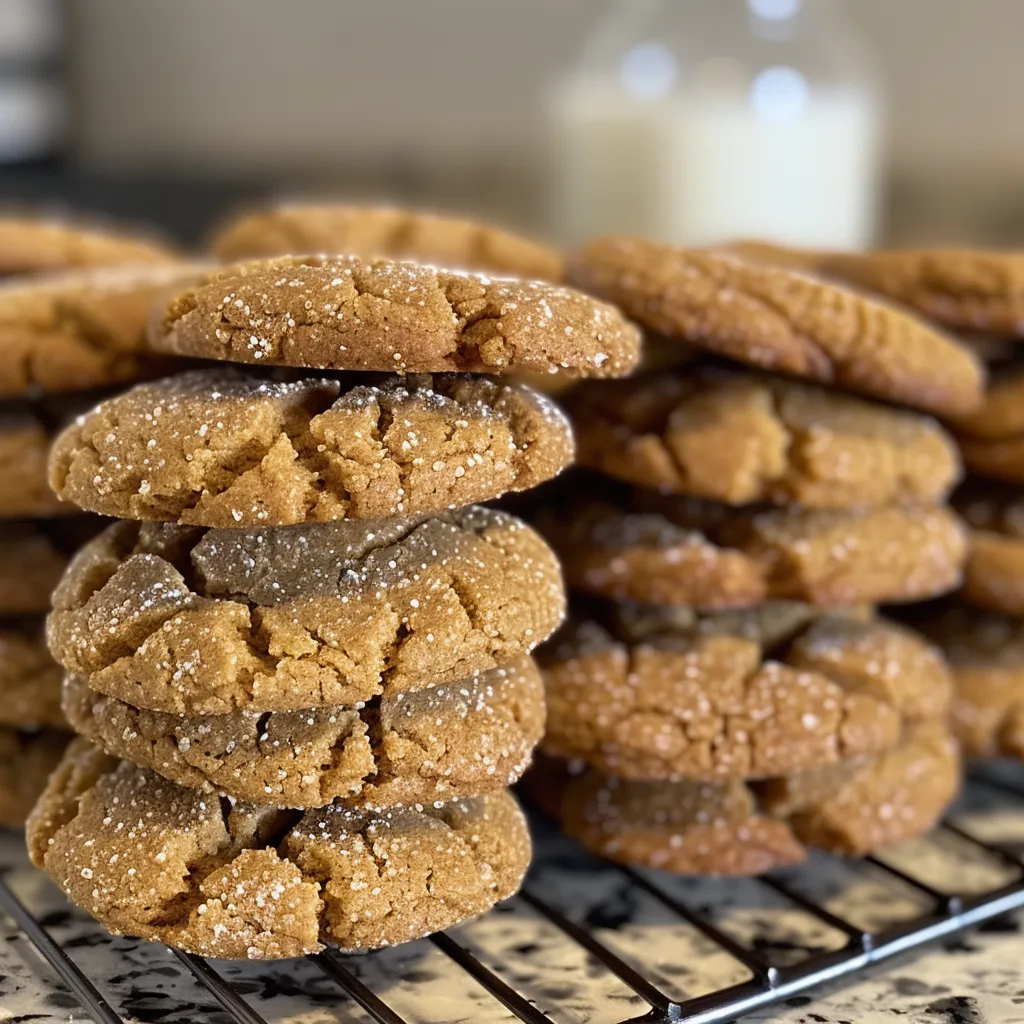
Close-up view of freshly baked chai cookies with a golden-brown crust and powdered sugar on top.

Here are some expert insights to ensure your cookies turn out fantastic:

  • Chill the Dough: For even better flavor, chill the cookie dough for at least 30 minutes before baking.
  • Don’t Overmix: Once you add the dry ingredients, mix just until combined to keep the cookies tender.
  • Use Fresh Spices: Fresh spices make a huge difference. Check your spice cabinet and replace any old jars!
  • Check the Oven Temperature: Always use an oven thermometer to ensure accurate baking temperatures.
  • Experiment with Sizes: Make smaller cookies for bite-sized treats and adjust the baking time accordingly.
  • Use a Cookie Scoop: This helps ensure uniform cookies that bake evenly.
  • Don’t Skip the Glaze: A simple glaze adds an extra layer of sweetness and also makes the cookies visually appealing!
  • Store Properly: Keep cookies in an airtight container to maintain freshness.

Common Mistakes and Troubleshooting

Even the best bakers can run into issues. Here’s how to avoid common pitfalls:

  • Cookies Spread Too Much: Ensure your butter is cold when mixing. Also, chilling the dough can help prevent excessive spreading.
  • Dry Cookies: Measure flour correctly—spoon it into the measuring cup and level it off. Too much flour can lead to dryness.
  • Too Soft or Crumbly: If your dough is too soft, refrigerate it for 15-20 minutes before baking.
  • Uneven Baking: Rotate your baking sheet halfway through for even cooking.

Delicious Variations to Try

Feeling creative? Here are some fun variations to try:

  • Chocolate Chip Chai Cookies: Fold in 1 cup of semi-sweet chocolate chips for a delightful twist.
  • Chai Oatmeal Cookies: Add 1 cup of oats to the dough for a heartier cookie.
  • Nutty Chai Cookies: Stir in 1/2 cup of chopped nuts like pecans or walnuts for added crunch.
  • Frosted Chai Cookies: Top with a cream cheese frosting for an indulgent dessert.

Storage and Make-Ahead Instructions

Want to prepare in advance? Here’s how to store and make these chai cookies ahead of time:

  • Store Baked Cookies: Keep them in an airtight container at room temperature for up to 5 days. For longer storage, freeze them for up to 3 months.
  • Freeze Cookie Dough: Roll the dough into balls and freeze on a baking sheet until solid, then transfer to a zip-top bag for up to 3 months. Bake from frozen, adding a minute or two to the baking time.
  • Make-Ahead Glaze: Prepare the glaze a day in advance and store it in the refrigerator. Mix well before using.

Comprehensive FAQ

Got questions? We’ve got answers!

  • Can I use all-purpose flour instead of cake flour? Yes, but the texture may be slightly different. Cake flour helps achieve a lighter cookie.
  • Can I make these cookies vegan? Absolutely! Substitute the eggs with flax eggs and use vegan butter.
  • How can I make these cookies spicier? Increase the amount of chai spice blend to suit your taste.
  • What’s the best way to measure flour? Spoon the flour into the measuring cup and level it off with a knife for accuracy.
  • Can I add other spices? Sure! Feel free to experiment with your favorite spices like nutmeg or cardamom.
  • Why are my cookies flat? This could be due to melted butter or too much flour. Make sure to chill the dough if needed.
  • Can I use a hand mixer instead of a stand mixer? Yes, a hand mixer works perfectly fine for this recipe!
  • How do I get a thicker glaze? Add more confectioners’ sugar to achieve your desired consistency.

Nutrition Tips and Dietary Adaptations

For those watching their diet, here are some tips:

  • Reduce Sugar: You can cut down on sugar by using a sugar substitute suitable for baking.
  • Whole Wheat Flour: Swap out half of the all-purpose flour for whole wheat flour for added fiber.
  • Less Butter: Use less butter or substitute with applesauce to reduce the fat content.

Equipment Recommendations

Here’s what you’ll need to make these cookies:

  • Stand Mixer: For effortless mixing; a hand mixer is a great alternative.
  • Baking Sheets: Ensure they are heavy-duty for even baking.
  • Parchment Paper: Prevents sticking and makes cleanup a breeze.
  • Cookie Scoop: For uniform cookie sizes.

Serving Suggestions

Enjoy your chai cookies with:

  • A Hot Cup of Chai: Complement the flavors and cozy up with a warm drink.
  • Ice Cream: Serve with a scoop of vanilla or chai-flavored ice cream for a delightful dessert.
  • Gift Wrapping: Present these cookies in cute boxes for a thoughtful gift!

With this comprehensive guide, you’re all set to bake the most delightful chai cookies that will warm your heart and fill your home with cozy aromas. Remember, cooking is all about having fun, experimenting, and enjoying the little moments. Happy baking!

Best Ever Chai Cookies

Prep Time 20 minutes
Cook Time 10 minutes
Total Time 30 minutes
Servings 20 cookies
Calories 150
Delight in these aromatic chai-spiced cookies, topped with a sweet glaze for the perfect treat.

Ingredients

Dry Ingredients

  • 2 1/2 cups all-purpose flour
  • 1 1/2 cups cake flour
  • 2 tsp. cornstarch
  • 1 tsp. baking soda
  • 1 tsp. baking powder
  • 1 tsp. salt
  • 2 Tbsp. chai spice blend, divided (see below)
  • 16 Tbsp. unsalted butter, cold, cubed (1 cup)
  • 1 cup sugar (plus 1 Tbsp. for rolling)
  • 1/4 cup brown sugar, packed (light or dark)
  • 2 large eggs
  • 2 large egg yolks
  • 2 tsp. vanilla extract
  • 2 tsp. ground cinnamon
  • 1 tsp. ground ginger
  • 1 tsp. cardamom
  • 1/2 tsp. allspice
  • 1/2 tsp. nutmeg
  • 1/2 tsp. cloves

Glaze

  • 1 1/2 cups confectioners' sugar
  • 3 Tbsp. milk (plus more as needed)
  • 1 tsp. vanilla bean paste

Instructions 

  • Preheat oven to 400°F (200°C). Line baking sheet with parchment.
  • Mix dry ingredients and chai spice blend. Cream butter and sugars, then add eggs and vanilla.
  • Gradually incorporate dry ingredients. Form dough balls, roll in chai spice and sugar.
  • Bake for 8-11 minutes, cool completely before glazing.
  • Mix confectioners' sugar, milk, and vanilla bean paste for glaze. Apply to cooled cookies.

Notes

Chill dough if too soft. Adjust milk for glaze consistency.
Calories: 150kcal
Cost: $15
Course: Dessert
Cuisine: Fusion
Keyword: chai, cookies

Unlock Deliciousness with Your New Go-To Teriyaki Chicken Bowl Recipe

Dive into this easy and flavorful Teriyaki Chicken Bowl recipe! With tender chicken, vibrant veggies, and a sweet-savory sauce, dinner is about to get a whole lot more exciting. Let’s cook with joy! This teriyaki chicken bowl is not just a meal; it’s a delightful experience that brings the goodness of homemade cooking right to your table. Perfect for busy weeknights, this dish is both satisfying and quick to prepare, making it a staple for anyone looking to elevate their dinner game.

Why You’ll Love This Recipe

Here are some reasons this teriyaki chicken bowl will become your new favorite:

  • Quick and Easy: This dish can be made in just 30 minutes, making it perfect for busy weeknights.
  • Flavor-Packed: The rich homemade teriyaki sauce offers a delicious sweet and salty flavor that everyone will adore.
  • Customizable: Feel free to swap in whatever vegetables you have on hand. Broccoli, bell peppers, or even snap peas work wonderfully!
  • Healthy and Wholesome: Packed with lean protein and colorful veggies, this bowl is nutritious without skimping on flavor.
  • Meal Prep Friendly: Make a batch ahead of time for easy lunches or dinners throughout the week.

Ingredients Breakdown

To make the perfect teriyaki chicken bowl, you will need the following ingredients:

  • 1 pound boneless skinless chicken breasts: Cut into uniform pieces for even cooking.
  • 1 cup broccoli florets: Provides a nice crunch and vibrant color.
  • 1 cup sliced bell peppers: Add sweetness and texture; feel free to use different colors for a beautiful presentation.
  • 1/4 cup low-sodium soy sauce: Low-sodium helps control salt intake while still providing that classic teriyaki flavor.
  • 2 tablespoons brown sugar: Enhances the sweetness of the sauce, balancing the soy sauce’s saltiness.
  • 1 tablespoon minced garlic: Adds a wonderful aromatic flavor.
  • 1 teaspoon ground ginger: A little goes a long way in enhancing the teriyaki flavor.
  • Cooked rice or quinoa: Use as a base for your bowl; both options are delicious!

How to Make the Best Teriyaki Chicken Bowl

Side view of a vibrant Teriyaki Chicken Bowl with chicken, broccoli, and bell peppers.

Follow these simple steps to create your Teriyaki Chicken Bowl:

  1. Prepare all ingredients by chopping vegetables and cutting the chicken into uniform pieces.
  2. In a small saucepan over medium heat, combine soy sauce, brown sugar, minced garlic, and ground ginger. Stir until the sugar dissolves.
  3. Heat oil in a skillet over medium-high heat. Add chicken and cook until golden brown, about 5-7 minutes.
  4. Add broccoli and bell peppers. Stir-fry for an additional 3-5 minutes until the vegetables are tender-crisp.
  5. Pour the teriyaki sauce over the chicken and vegetables. Cook for another minute to coat everything evenly.
  6. Serve immediately over cooked rice or quinoa, garnished with sesame seeds or green onions if desired.

Pro Tips for Success

To ensure your teriyaki chicken bowl turns out perfectly, keep these tips in mind:

  • Prep Ahead: Chop your veggies and chicken in advance for a quicker cooking process.
  • Use High Heat: Cooking on medium-high heat helps achieve that nice sear on the chicken.
  • Don’t Overcook: Keep an eye on your veggies to maintain their vibrant color and crunch.
  • Adjust Sweetness: Feel free to tweak the amount of brown sugar based on your taste preferences.
  • Add a Kick: For some heat, toss in a pinch of red pepper flakes or serve with sriracha.
  • Garnish Generously: Fresh herbs or nuts can elevate the dish to the next level.
  • Watch the Sauce: If it’s too thick, add a splash of water to thin it out to your desired consistency.
  • Experiment: Don’t hesitate to try different proteins like shrimp or tofu for variety!

Common Mistakes and Troubleshooting

Even the best of us can encounter hiccups in the kitchen. Here’s how to avoid common mistakes:

  • Chicken Sticking: Ensure your skillet is properly heated and oiled to prevent sticking.
  • Sauce Too Salty: Balance the flavor by adding a bit of sugar or water if the sauce is too salty.
  • Overcooked Veggies: Add veggies in stages; denser ones like broccoli should be added first.
  • Uneven Cooking: Cut chicken pieces uniformly to ensure even cooking throughout.

Delicious Variations

Make this teriyaki chicken bowl your own with these fun variations:

  • Teriyaki Salmon Bowl: Swap chicken for salmon fillets, cooking them until flaky and tender.
  • Vegetarian Option: Use tofu or tempeh as a protein substitute, and keep the veggies vibrant and fresh.
  • Grain Swap: Try using quinoa, farro, or brown rice for a different flavor profile.
  • Spicy Teriyaki Bowl: Incorporate chili paste or jalapeños for a spicy twist!

Storage and Make-Ahead Instructions

This teriyaki chicken bowl is great for meal prep! Here’s how to store it:

  • Refrigeration: Store leftovers in an airtight container in the fridge for up to 3 days.
  • Freezing: You can freeze the chicken and veggies separately for up to 2 months. Thaw overnight in the fridge before reheating.
  • Make-Ahead: Prepare the teriyaki sauce and chop veggies a day ahead to save time.

Frequently Asked Questions

Have questions? Here are some common ones:

  • Can I use frozen vegetables? Yes! Just add them to the pan straight from the freezer.
  • Can I use chicken thighs instead of breasts? Absolutely! Thighs are juicier and will work wonderfully.
  • How can I make this dish gluten-free? Use tamari instead of soy sauce for a gluten-free option.
  • Can I meal prep this dish? Yes! It’s perfect for meal prepping and reheats well.
  • What other proteins can I use? Shrimp, beef, or even seitan can be delicious alternatives.
  • How do I store leftovers? Keep in an airtight container in the fridge for up to 3 days.
  • Can I make this teriyaki sauce ahead of time? Yes, it stores well in the fridge for up to a week!
  • What can I serve with this dish? It pairs beautifully with steamed rice, quinoa, or a fresh salad.

Nutrition Tips and Dietary Adaptations

This teriyaki chicken bowl can be easily adapted to fit various dietary needs:

  • Low-Carb: Serve over cauliflower rice instead of regular rice for a low-carb option.
  • Dairy-Free: The recipe is naturally dairy-free; just ensure your sauces are as well.
  • Low-Calorie: Use less sugar in the sauce and load up on veggies to keep calories down.

Equipment Recommendations

Here are some essential tools to make your cooking experience smooth:

  • Non-stick Skillet: Ideal for cooking chicken without sticking.
  • Measuring Cups and Spoons: Ensures accurate ingredient measurements for perfect flavor.
  • Cutting Board: A sturdy board for chopping veggies and chicken safely.
  • Small Saucepan: Perfect for making your teriyaki sauce without a fuss.

Serving Suggestions

Elevate your teriyaki chicken bowl with these serving tips:

  • Garnish: Top with sesame seeds, green onions, or crushed peanuts for added flavor.
  • Side Dishes: Serve with a light cucumber salad or steamed edamame for a complete meal.
  • Flavor Boost: A drizzle of sriracha or chili oil can add a delightful kick!

In conclusion, this teriyaki chicken bowl is not just a meal; it’s a flavorful journey that you can create in your own kitchen. With its versatility, ease of preparation, and vibrant flavors, it’s sure to become a staple in your weekly menu. So gather your ingredients, embrace the cooking process, and enjoy every delicious bite. Happy cooking, my friends!

Teriyaki Chicken Bowl

Prep Time 10 minutes
Cook Time 15 minutes
Total Time 25 minutes
Servings 4 servings
Calories 450
A quick and flavorful Asian-inspired dish featuring tender chicken and crisp vegetables in a savory teriyaki sauce.

Ingredients

Protein

  • 1 pound boneless skinless chicken breasts

Vegetables

  • 1 cup broccoli florets
  • 1 cup sliced bell peppers

Sauce and flavorings

  • 0.25 cup low-sodium soy sauce
  • 2 tablespoons brown sugar
  • 1 tablespoon minced garlic
  • 1 teaspoon ground ginger

For serving

  • as needed cooked rice or quinoa

Instructions 

  • Chop vegetables and cut chicken into uniform pieces.
  • Combine soy sauce, brown sugar, garlic, and ginger in a small saucepan; stir until sugar dissolves.
  • Heat oil in a skillet, cook chicken until golden brown (5-7 minutes).
  • Add broccoli and bell peppers; stir-fry for 3-5 minutes until tender-crisp.
  • Pour sauce over chicken and vegetables; cook for 1 minute to coat evenly. Serve over rice or quinoa.

Notes

Garnish with sesame seeds or green onions if desired for extra flavor.
Calories: 450kcal
Cost: $15
Course: Main Course
Cuisine: Asian
Keyword: Chicken, Teriyaki

Are you looking for a breakfast or snack that’s not only delicious but also quick and easy to whip up? Look no further than Peanut Butter Berry Toast! This delightful creation is as simple as it is satisfying, combining creamy peanut butter with fresh berries on a slice of your favorite bread. In just 10 minutes, you can enjoy a meal that’s packed with flavor and nutrients. Let’s get started on this culinary adventure that promises to brighten your mornings!

Why You’ll Love This Recipe

Peanut Butter Berry Toast is not just a treat for your taste buds; it comes with a treasure trove of benefits that make it a perfect addition to your morning routine or afternoon pick-me-up.

  • Quick and Easy: Ready in under 10 minutes, this toast is perfect for busy mornings when you need a nutritious meal fast.
  • Nutritious Powerhouse: Packed with protein from peanut butter and antioxidants from berries, this snack supports your energy levels.
  • Customizable: Use your favorite type of bread, whether it’s whole grain, gluten-free, or a bagel, and switch up the toppings to suit your taste!
  • Kid-Friendly: This is a fun toast that kids will love to help make, encouraging healthy eating habits from a young age.
  • Great for Meal Prep: Make multiple servings ahead of time for quick breakfasts throughout the week.

Ingredients Breakdown

The beauty of Peanut Butter Berry Toast lies in its simplicity. Here’s what you’ll need to create this delightful dish:

  • Two slices of your favorite bread: Choose from whole wheat, sourdough, gluten-free, or any bread you adore.
  • Peanut butter: Go for creamy or crunchy, depending on your preference. Natural peanut butter with minimal ingredients is a fantastic choice.
  • Fresh berries: Strawberries, blueberries, raspberries, or a mix of all three bring vibrant flavor and nutrition.
  • Optional toppings: Consider adding a sprinkle of cinnamon, a drizzle of honey or maple syrup, chia seeds, sliced banana, or granola for extra flair!

Step-by-Step Instructions

Let’s dive into the delicious process of making your Peanut Butter Berry Toast!

  1. Toast Your Bread: Start by toasting your bread until it’s golden brown and crispy.
  2. Spread the Peanut Butter: Generously spread your peanut butter over the warm toast, allowing it to melt slightly.
  3. Add Fresh Berries: Top with a colorful assortment of fresh berries for a burst of flavor and nutrients.
  4. Customize with Optional Toppings: Add any extra toppings you love for an added layer of deliciousness.

Pro Tips for Success

Side angle of peanut butter spread on toast, garnished with vibrant strawberries, blueberries, and raspberries.

To ensure your Peanut Butter Berry Toast is nothing short of perfection, here are some expert insights:

  • Choose ripe berries: Look for berries that are vibrant and slightly firm for the best flavor.
  • Experiment with nut butters: Try almond butter or sunflower seed butter for a different twist on flavor.
  • Layer flavors: Consider adding a sprinkle of sea salt to enhance the sweetness of the berries and the richness of the peanut butter.
  • Toast variations: Use flavored breads like cinnamon raisin or even bagels for a unique taste experience.
  • Make it a meal: Pair your toast with a side of Greek yogurt or a smoothie for a balanced breakfast.
  • Watch your toast: Keep an eye on your bread while it’s toasting to prevent it from burning.
  • Layer wisely: Spread peanut butter thickly, but not so much that it overpowers the berries.
  • Clean up your workspace: Cooking is more fun when everything is tidy! Keep your kitchen organized.

Common Mistakes and Troubleshooting

Even the best of us can make mistakes in the kitchen! Here’s how to avoid common pitfalls:

  • Burnt toast: If you find your toast is burnt, try adjusting your toaster settings or watch it closely next time.
  • Berry juice mess: To prevent berries from rolling off, gently press them into the peanut butter.
  • Too much peanut butter: If it’s overpowering, spread a thinner layer next time to balance flavors.
  • Stale bread: Always use fresh bread for the best texture and flavor.

Variations to Explore

Once you master the classic Peanut Butter Berry Toast, why not experiment with different flavors? Here are some tasty variations:

  • Chocolate Peanut Butter Berry Toast: Drizzle melted dark chocolate over your toast for a decadent treat.
  • Banana Berry Toast: Add sliced bananas along with the berries for extra sweetness and creaminess.
  • Savory Toast: Swap peanut butter for avocado and top with berries for a unique flavor twist.
  • Nutty Granola Toast: Sprinkle your favorite granola on top for added crunch and texture.

Storage and Make-Ahead Instructions

If you want to prepare this toast in advance, here’s how to do it:

  • Make-ahead: You can pre-slice your bread and store it in an airtight container in the fridge for up to three days.
  • Berry prep: Wash and slice your berries ahead of time, storing them in the fridge for quick access.
  • Assembly: Toast your bread fresh each time for the best flavor and texture.

Comprehensive FAQ

Let’s tackle some common questions about Peanut Butter Berry Toast:

  • Can I use frozen berries? Yes! Just let them thaw a bit before topping your toast.
  • Is this recipe gluten-free? Absolutely! Just use gluten-free bread for the base.
  • Can I use almond butter instead of peanut butter? Definitely! Almond butter works beautifully in this recipe.
  • How can I make this nut-free? Consider using sunflower seed butter as a nut-free alternative.
  • What are the health benefits of berries? Berries are low in calories and high in vitamins, fiber, and antioxidants.
  • How do I store leftover toast? Toast is best enjoyed fresh, but you can store toppings separately in the fridge.
  • Can I add protein powder? Yes! Mix a scoop of protein powder into your peanut butter for an extra boost.
  • Is this recipe suitable for kids? Absolutely! It’s a fun and healthy snack that kids will love to help prepare.

Nutrition Tips and Dietary Adaptations

This toast can easily fit into various dietary needs:

  • For a Vegan Option: Use plant-based peanut butter and maple syrup.
  • For a Low-Carb Option: Choose low-carb bread alternatives like cloud bread.
  • For Added Fiber: Incorporate chia seeds or flaxseeds into your toppings.

Equipment Recommendations

To make your Peanut Butter Berry Toast, you might find these kitchen tools helpful:

  • Toaster: A reliable toaster ensures your bread is perfectly toasted every time.
  • Cutting board: Great for slicing your bread and fresh fruits with ease.
  • Spreading knife: A good spreading knife makes applying peanut butter a breeze.

Serving Suggestions

Serve your Peanut Butter Berry Toast alongside:

  • A smoothie: Pair with a berry smoothie for a refreshing breakfast.
  • Yogurt: A side of Greek yogurt can add protein and creaminess.
  • Tea or coffee: Enjoy with your favorite warm beverage for a cozy vibe.

As you can see, Peanut Butter Berry Toast is more than just a quick snack; it’s a canvas for creativity and nutrition! So gather your ingredients, experiment with flavors, and enjoy this magical toast that’s sure to kickstart your day. Remember, cooking is about having fun and making memories, so don’t be afraid to add your personal touch. Happy cooking, my friend!

Peanut Butter Berry Toast

Prep Time 5 minutes
Cook Time 5 minutes
Total Time 10 minutes
Servings 2 servings
Calories 350
A quick and delicious breakfast or snack featuring toasted bread topped with creamy peanut butter and fresh berries, customizable with your favorite toppings.

Ingredients

Bread

  • 2 slices bread (Your favorite type)

Peanut Butter

  • 2 tablespoons peanut butter (Creamy or crunchy)

Fresh Berries

  • 1/2 cup cups mixed berries (Strawberries, blueberries, raspberries)

Optional Toppings

  • to taste cinnamon, honey, maple syrup, chia seeds, hemp seeds, sliced banana, granola (Choose your favorites)

Instructions 

  • Toast the bread slices until golden brown.
  • Spread peanut butter evenly over each slice.
  • Top with fresh berries and optional toppings as desired.
  • Drizzle with honey or maple syrup if using.
  • Sprinkle with cinnamon, chia seeds, hemp seeds, or granola for extra flavor and crunch.

Notes

Feel free to customize toppings to suit your taste and dietary preferences.
Calories: 350kcal
Cost: $5
Course: Breakfast, Snack
Cuisine: American
Keyword: Berries, Peanut Butter, Toast