Author

Ava

Browsing

Have you ever found yourself in a dinner rut, staring blankly at the fridge, wondering what to whip up for your family? I know I have! That’s why I’m excited to share my Cottage Cheese Flatbread recipe with you. It’s a delightful dish that comes together in just 35 minutes, making it perfect for those busy weeknights when you need quick family dinners. Plus, it’s a fantastic base for all sorts of toppings, and it pairs beautifully with easy pasta recipes like creamy garlic pasta!

Why You’ll Love This Recipe

  • Quick and easy to make in just 35 minutes.
  • Healthy and packed with protein from cottage cheese.
  • Versatile—top it with your favorite ingredients!
  • Perfect for quick family dinners or as a snack.
  • Great for meal prep and can be stored for later use.

Ingredients

To make this delicious Cottage Cheese Flatbread, you’ll need the following simple ingredients:

  • 1 cup cottage cheese
  • 1 cup all-purpose flour
  • 1 large egg
  • 1 teaspoon baking powder
  • 1/2 teaspoon salt
  • 1 tablespoon olive oil
  • Optional: herbs and spices for flavor

Full ingredient list with measurements is provided in the printable recipe card below.

How to Make the Recipe

Now, let’s dive into the fun part—making the flatbread!

  1. In a mixing bowl, combine the cottage cheese, flour, egg, baking powder, and salt. Stir until well combined.
  2. Add the olive oil and mix until the dough forms. If it’s too sticky, sprinkle in a little more flour.
  3. On a floured surface, knead the dough gently for about 1 minute.
  4. Divide the dough into 4 equal pieces and roll each piece into a ball.
  5. Flatten each ball into a round shape, about 1/4 inch thick.
  6. Heat a non-stick skillet over medium heat. Cook each flatbread for about 2-3 minutes on each side, or until golden brown.
  7. Remove from the skillet and let cool slightly before serving.

Pro Tips for Making the Recipe

Here are some of my favorite tips to ensure your Cottage Cheese Flatbread turns out perfectly every time:

  • Feel free to experiment with different herbs and spices in the dough for added flavor.
  • If you want a crispier flatbread, cook it a little longer on each side.
  • For a gluten-free version, substitute the all-purpose flour with a gluten-free blend.
  • Make sure your skillet is hot enough before adding the flatbread to get that lovely golden color.

How to Serve

This Cottage Cheese Flatbread is incredibly versatile! Here are some serving suggestions:

  • Top with fresh veggies, hummus, or avocado for a healthy snack.
  • Use it as a base for a quick pizza—add tomato sauce, cheese, and your favorite toppings!
  • Pair it with a side salad for a light lunch or dinner.
  • Serve it alongside your favorite easy pasta recipes, like creamy garlic pasta, for a complete meal.

Make Ahead and Storage

If you want to prepare ahead, you can make the flatbread dough and store it in the fridge for up to 2 days. Just remember to wrap it tightly! Once cooked, the flatbread can be stored in an airtight container at room temperature for up to 3 days. You can also freeze the flatbread for up to a month—just reheat it in a skillet or oven when you’re ready to enjoy!

So there you have it! A quick and easy recipe that’s perfect for those busy weeknights. I hope you give this Cottage Cheese Flatbread a try and enjoy it as much as I do. It’s a fantastic addition to your collection of weeknight dinner ideas, and I can’t wait to hear how you customize it!

Cottage Cheese Flatbread

Prep Time 10 minutes
Cook Time 35 minutes
Total Time 45 minutes
Servings 4 pieces
Calories 250
A quick and healthy flatbread made with cottage cheese and eggs, perfect for a nutritious snack or meal.

Ingredients

Main

  • 2 Large Eggs
  • 1 cup Cottage Cheese ((Full, Reduced, or Fat Free, low sodium preferred))
  • ¾ teaspoon Garlic Powder (Optional)
  • 1 teaspoon Italian Seasoning (Optional)
  • Oregano optional Oregano (for topping)

Instructions 

  • Add all ingredients to a blender and blend until smooth.
  • Line a baking sheet with parchment, lightly spray with cooking spray.
  • Pour the batter onto the sheet, spread evenly, and top with oregano.
  • Bake at 350°F (176°C) for 30-35 minutes until browned.
  • Let cool completely before slicing.

Notes

You can add herbs or spices to customize the flavor.
Calories: 250kcal
Cost: $10
Course: Breakfast, Snack
Cuisine: American
Keyword: Cottage Cheese, Flatbread

Are you ready to take your family dinners to the next level? If you’re like me, you love finding new ways to make meals exciting and delicious. Today, I’m thrilled to share my recipe for Rice Pizza Meatballs! This dish is not only a fun twist on traditional pizza but also a fantastic way to sneak in some healthy ingredients. Plus, it’s one of those easy pasta recipes that can be whipped up in no time, making it perfect for those busy weeknights!

Why You’ll Love This Recipe

  • Quick and easy to prepare, perfect for 30-minute meals.
  • Deliciously flavorful, combining the best of pizza and meatballs.
  • Great for the whole family, even picky eaters will love them!
  • Versatile – you can customize the ingredients to suit your taste.
  • Perfect for meal prep and leftovers!

Ingredients

To make these delightful Rice Pizza Meatballs, you’ll need the following ingredients:

  • 1 cup cooked rice
  • 1 pound ground beef or turkey
  • 1 cup shredded mozzarella cheese
  • 1/2 cup grated Parmesan cheese
  • 1/2 cup pizza sauce (plus more for serving)
  • 1/4 cup chopped fresh basil or parsley
  • 1 teaspoon garlic powder
  • 1 teaspoon onion powder
  • Salt and pepper to taste
  • 1 egg

Full ingredient list with measurements is provided in the printable recipe card below.

How to Make the Recipe

Now, let’s dive into the fun part – making these scrumptious meatballs!

  1. Preheat your oven to 400°F (200°C).
  2. In a large mixing bowl, combine the cooked rice, ground meat, mozzarella cheese, Parmesan cheese, pizza sauce, chopped herbs, garlic powder, onion powder, salt, pepper, and the egg. Mix until well combined.
  3. Using your hands, form the mixture into meatballs, about 1.5 inches in diameter.
  4. Place the meatballs on a baking sheet lined with parchment paper.
  5. Bake in the preheated oven for 20-25 minutes, or until they are cooked through and golden brown.
  6. Serve with additional pizza sauce for dipping and enjoy!

Pro Tips for Making the Recipe

Here are some of my favorite tips to ensure your Rice Pizza Meatballs turn out perfectly:

  • Feel free to mix in your favorite pizza toppings, like diced bell peppers or olives, into the meatball mixture.
  • If you want a little kick, add some crushed red pepper flakes to the mix!
  • For a creamier texture, consider adding a splash of cream or a dollop of ricotta cheese to the mixture.
  • These meatballs can also be cooked in a skillet on the stovetop if you prefer that method.

How to Serve

These Rice Pizza Meatballs are incredibly versatile! Here are some serving suggestions:

  • Serve them over a bed of creamy garlic pasta for a hearty meal.
  • Pair them with a fresh salad for a lighter option.
  • Make a meatball sub by placing them in a hoagie roll with extra pizza sauce and cheese.
  • They also make a great appetizer for parties or game day!

Make Ahead and Storage

If you’re looking for weeknight dinner ideas that can be prepped in advance, these meatballs are perfect! Here’s how to make them ahead of time:

  • You can prepare the meatball mixture and form the meatballs a day in advance. Just cover and refrigerate until you’re ready to bake.
  • Cooked meatballs can be stored in an airtight container in the fridge for up to 3 days.
  • They also freeze beautifully! Just place them in a freezer-safe container or bag, and they’ll last for up to 3 months. Thaw in the fridge before reheating.

So there you have it! A delicious and fun recipe that’s sure to become a family favorite. I can’t wait for you to try these Rice Pizza Meatballs. They’re perfect for quick family dinners and will have everyone asking for seconds. Enjoy cooking and happy eating!

Rice Pizza Meatballs

Prep Time 10 minutes
Cook Time 30 minutes
Total Time 40 minutes
Servings 4 servings
Calories 350
Delicious and healthy meatballs made with rice and cheese, perfect for a quick meal or snack.

Ingredients

Meatball Mixture

  • 1 Pound Ground Turkey (or Beef/Chicken (Lean))
  • 1 Cup Pizza Cheese (Fat Free/Reduced Fat)
  • 0.5 Cup Parmesan Cheese (Grated)
  • 0.5 Teaspoon Italian Seasoning
  • 0.5 Teaspoon Garlic Seasoning (or Powder)
  • to taste Salt (Your choice)
  • 0.5 Cup Rolled Oats
  • 1 Cup Rice (Cooked Brown)
  • 1 Large Whole Egg
  • 1 Large Egg White
  • 4 Tablespoons Tomato Paste
  • for topping Pizza Sauce (*For Topping (Your choice))

Instructions 

  • Combine and mix all ingredients together.
  • Shape into balls and place on a lined baking pan.
  • Bake at 350°F (176°C) for 25-30 minutes.
  • Top with Pizza Sauce before serving.

Notes

Use lean meat for healthier options and adjust salt to taste.
Calories: 350kcal
Cost: $10
Course: Main Course
Cuisine: American
Keyword: Meatballs

Are you ready to spice up your weeknight dinners? I know I am! Today, I’m excited to share my recipe for Slow Cooker Chicken Fajitas. This dish is not only bursting with flavor but also incredibly easy to prepare. In just four hours, you can have a delicious meal that your whole family will love. Plus, if you’re looking for quick family dinners, this recipe is a must-try! And if you’re in the mood for something different later, don’t forget to check out my favorite easy pasta recipes!

Why You’ll Love This Recipe

  • Perfect for busy weeknights – just set it and forget it!
  • Flavorful and tender chicken that melts in your mouth.
  • Loaded with fresh peppers and beans for a nutritious boost.
  • Great for meal prep – leftovers are just as delicious!
  • Customizable to suit your family’s taste preferences.

Ingredients

To make these scrumptious Slow Cooker Chicken Fajitas, you’ll need the following ingredients:

  • 2 lbs boneless, skinless chicken breasts
  • 1 red bell pepper, sliced
  • 1 green bell pepper, sliced
  • 1 yellow bell pepper, sliced
  • 1 onion, sliced
  • 1 can (15 oz) black beans, drained and rinsed
  • 2 tablespoons olive oil
  • 2 tablespoons fajita seasoning (store-bought or homemade)
  • Salt and pepper to taste
  • Tortillas for serving
  • Optional toppings: sour cream, guacamole, salsa, cheese

Full ingredient list with measurements is provided in the printable recipe card below.

How to Make the Recipe

Making these Slow Cooker Chicken Fajitas is a breeze! Just follow these simple steps:

  1. Start by placing the chicken breasts at the bottom of your slow cooker.
  2. Add the sliced bell peppers and onion on top of the chicken.
  3. In a small bowl, mix the olive oil and fajita seasoning together. Pour this mixture over the chicken and veggies.
  4. Sprinkle with salt and pepper to taste.
  5. Cover and cook on low for 4 hours or high for 2 hours, until the chicken is cooked through and tender.
  6. Once done, shred the chicken with two forks and mix everything together in the slow cooker.
  7. Stir in the black beans and let it warm through for an additional 10 minutes.
  8. Serve in warm tortillas with your favorite toppings!

Pro Tips for Making the Recipe

Here are some of my favorite tips to ensure your Slow Cooker Chicken Fajitas turn out perfectly:

  • Feel free to add other vegetables like zucchini or corn for extra flavor and nutrition.
  • If you like it spicy, add some sliced jalapeños or a dash of cayenne pepper.
  • For a creamy twist, try adding a dollop of creamy garlic pasta sauce on top before serving!
  • Make sure to shred the chicken while it’s still warm for easier shredding.
  • Don’t skip the toppings! They add a wonderful texture and flavor contrast.

How to Serve

These Slow Cooker Chicken Fajitas are incredibly versatile! Here are some serving suggestions:

  • Serve in warm tortillas with toppings like sour cream, guacamole, and salsa.
  • For a low-carb option, serve over a bed of lettuce or in a bowl.
  • Pair with a side of rice or quinoa for a heartier meal.
  • Use leftovers in salads or wraps for a quick lunch the next day.

Make Ahead and Storage

If you’re like me and love to plan ahead, you’ll be happy to know that these fajitas are perfect for meal prep! Here’s how to store them:

  • Store any leftovers in an airtight container in the refrigerator for up to 3 days.
  • To freeze, place the cooled fajitas in a freezer-safe container for up to 3 months.
  • Reheat in the microwave or on the stovetop until warmed through.
  • These fajitas also make a great filling for 30-minute meals like quesadillas or burritos!

So there you have it! My delicious Slow Cooker Chicken Fajitas recipe is not only easy to make but also perfect for busy weeknights. I hope you enjoy making this dish as much as I do. Don’t forget to check out my other weeknight dinner ideas and easy pasta recipes for more inspiration. Happy cooking!

Slow Cooker Chicken Fajitas

Prep Time 15 minutes
Cook Time 4 hours
Total Time 4 hours 15 minutes
Servings 4 servings
Calories 350
Enjoy flavorful and tender chicken fajitas cooked effortlessly in your slow cooker, perfect for a quick and satisfying meal.

Ingredients

Main Ingredients

  • 15 ounces Black Beans (Reduced Sodium or Dark Red Kidney Beans)
  • 2 teaspoons Lime Juice
  • 16 ounces Salsa
  • 14.5 ounces Diced Tomatoes (No Salt Added)
  • 2.5 teaspoons Minced Garlic (or 5 Cloves Garlic)
  • 1 packet Fajita Seasoning Mix (1.12 Ounces Low Sodium)
  • 0.5 cup Red Onion
  • 0.5 cup Green Pepper
  • 0.5 cup Yellow Pepper
  • 0.25 teaspoon Cayenne Pepper
  • 3 pounds Chicken Breast

Instructions 

  • Drain and rinse the black beans.
  • Chop red onion, green pepper, and yellow pepper.
  • Trim fat and cut chicken breasts in half.
  • Add all ingredients into the slow cooker.
  • Mix everything well.
  • Cook on High for 3-4 hours or Low for 6-8 hours.

Notes

For extra flavor, add fresh cilantro or a squeeze of lime before serving.
Calories: 350kcal
Cost: $15
Course: Main Course
Cuisine: Mexican
Keyword: Chicken

Are you ready to indulge in a delicious snack that’s not only quick to make but also incredibly satisfying? I’m talking about Air Fryer Pizza Egg Rolls & Wontons! These crispy, cheesy delights are perfect for those busy weeknights when you want something fun and tasty without spending hours in the kitchen. Plus, they’re a fantastic addition to your repertoire of easy pasta recipes, making them a great option for quick family dinners!

Why You’ll Love This Recipe

  • Quick and easy to prepare in just 15 minutes!
  • Perfect for satisfying those pizza cravings without the guilt.
  • Great for family gatherings or as a fun appetizer.
  • Versatile – customize with your favorite pizza toppings!
  • Ideal for busy weeknights or as a snack while watching your favorite show.

Ingredients

To whip up these delightful Air Fryer Pizza Egg Rolls & Wontons, you’ll need a few simple ingredients that you probably already have in your pantry. Here’s what you’ll need:

  • 1 package of egg roll wrappers
  • 1 cup shredded mozzarella cheese
  • 1/2 cup pepperoni slices, chopped
  • 1/4 cup pizza sauce (plus more for dipping!)
  • Cooking spray or olive oil
  • Optional: Italian seasoning for extra flavor

Full ingredient list with measurements is provided in the printable recipe card below.

How to Make the Recipe

Making these Air Fryer Pizza Egg Rolls & Wontons is a breeze! Follow these simple steps:

  1. Start by preheating your air fryer to 375°F (190°C).
  2. In a mixing bowl, combine the shredded mozzarella cheese, chopped pepperoni, and pizza sauce. If you like, sprinkle in some Italian seasoning for an extra kick!
  3. Take an egg roll wrapper and place about 2 tablespoons of the pizza filling in the center.
  4. Moisten the edges of the wrapper with a little water, then fold it over to create a triangle or roll it up like a burrito, sealing the edges tightly.
  5. Repeat with the remaining wrappers and filling.
  6. Lightly spray the egg rolls with cooking spray or brush them with olive oil for that perfect golden crisp.
  7. Place the egg rolls in the air fryer basket in a single layer, making sure they’re not touching.
  8. Air fry for about 8-10 minutes, flipping halfway through, until they are golden brown and crispy.
  9. Serve hot with extra pizza sauce for dipping!

Pro Tips for Making the Recipe

Here are some of my favorite tips to ensure your Air Fryer Pizza Egg Rolls & Wontons turn out perfectly every time:

  • Don’t overfill the wrappers; otherwise, they may burst open while cooking.
  • Experiment with different fillings! Try adding veggies like bell peppers or mushrooms for a twist.
  • If you’re making these for a crowd, double the recipe – they’ll disappear fast!
  • For a healthier option, use whole wheat egg roll wrappers.
  • Make sure to preheat your air fryer for even cooking.

How to Serve

These Air Fryer Pizza Egg Rolls & Wontons are perfect for any occasion! Here are some serving suggestions:

  • Serve them as a fun appetizer at your next gathering.
  • Pair them with a fresh salad for a quick family dinner.
  • Enjoy them as a snack while watching your favorite movie or TV show.
  • They also make a great addition to a game day spread!

Make Ahead and Storage

If you want to prepare these delicious treats in advance, you can assemble the egg rolls and store them in the refrigerator for up to 24 hours before cooking. Just remember to cover them with a damp paper towel to keep them from drying out. You can also freeze them for up to 2 months! Just make sure to separate them with parchment paper to prevent sticking. When you’re ready to enjoy, cook them straight from the freezer, adding a couple of extra minutes to the cooking time.

So there you have it! A quick and easy recipe for Air Fryer Pizza Egg Rolls & Wontons that’s sure to become a family favorite. Whether you’re looking for 30-minute meals or just a fun snack, these little bites of joy are perfect for any occasion. I can’t wait for you to try them!

Air Fryer Pizza Egg Rolls & Wontons

Prep Time 10 minutes
Cook Time 12 minutes
Total Time 22 minutes
Servings 3 pieces
Calories 250
Enjoy these crispy, cheesy pizza-inspired egg rolls and wontons cooked effortlessly in your air fryer.

Ingredients

Dairy

  • 3 ounces Cream Cheese (Ricotta or Cottage Cheese work too)
  • 0.25 cup Pizza Cheese

Seasonings

  • 0.5 teaspoon Italian Seasoning

Sauces

  • 0.25 cup Pizza Sauce

Proteins

  • 0.5 ounce Cooked Chicken, Beef, or Turkey

Wraps

  • 3 egg roll wraps Egg Roll Wraps (Makes 3 egg rolls)
  • 6 wonton wraps Wonton Wraps (Makes 6 wontons)

Instructions 

  • Mix cream cheese, pizza cheese, and Italian seasoning until smooth.
  • Take out your wraps and evenly distribute the mixture inside.
  • Top with pizza sauce and cooked protein.
  • Wet edges of wraps with finger or brush.
  • Fold and seal egg rolls or fold wontons, removing air and sealing edges.
  • Lightly oil the wraps or wontons.
  • Cook in air fryer at 365°F/185°C for 10-12 minutes, flipping halfway, or bake at 325°F/162°C for 10 minutes per side.

Notes

Ensure wraps are sealed properly to prevent filling from leaking during cooking.
Calories: 250kcal
Cost: $10
Course: Appetizer
Cuisine: American
Keyword: Egg Rolls, Pizza, Wontons

Are you ready to embark on a culinary adventure that will make your taste buds dance with joy? I know I am! Today, I’m excited to share my recipe for Slow Cooker Beef Teriyaki. This dish is not only packed with flavor but also incredibly easy to prepare, making it a perfect choice for quick family dinners. With just a few simple ingredients, you can create a mouthwatering meal that will have everyone asking for seconds. So, let’s dive in!

Why You’ll Love This Recipe

  • It’s a set-it-and-forget-it meal that cooks while you go about your day.
  • Perfectly tender beef that melts in your mouth.
  • Rich, savory teriyaki sauce that elevates the dish.
  • Great for meal prep and leftovers!
  • Pairs wonderfully with rice or noodles, making it a versatile option for weeknight dinner ideas.

Ingredients

To make this delicious Slow Cooker Beef Teriyaki, you’ll need the following ingredients:

  • 2 pounds of beef chuck roast, cut into bite-sized pieces
  • 1 cup of soy sauce
  • 1/2 cup of brown sugar
  • 1/4 cup of rice vinegar
  • 2 tablespoons of sesame oil
  • 4 cloves of garlic, minced
  • 1 tablespoon of fresh ginger, grated
  • 1/4 cup of cornstarch (for thickening)
  • 1/4 cup of water
  • Sesame seeds and green onions for garnish

Full ingredient list with measurements is provided in the printable recipe card below.

How to Make the Recipe

Now, let’s get cooking! Follow these simple steps to create your own Slow Cooker Beef Teriyaki:

  1. In a large bowl, combine the soy sauce, brown sugar, rice vinegar, sesame oil, minced garlic, and grated ginger. Stir until the sugar is dissolved.
  2. Add the beef pieces to the slow cooker and pour the sauce over the top, ensuring all the beef is well coated.
  3. Cover and cook on low for 6 hours, or until the beef is tender and flavorful.
  4. About 30 minutes before serving, mix the cornstarch and water in a small bowl to create a slurry. Stir this into the slow cooker to thicken the sauce.
  5. Once done, serve the beef over rice or noodles, and garnish with sesame seeds and chopped green onions.

Pro Tips for Making the Recipe

Here are some of my favorite tips to ensure your Slow Cooker Beef Teriyaki turns out perfectly:

  • For extra flavor, marinate the beef in the sauce for a few hours before cooking.
  • If you prefer a thicker sauce, let it cook uncovered for the last 30 minutes.
  • Feel free to add vegetables like bell peppers or broccoli during the last hour of cooking for a complete meal.
  • This dish pairs beautifully with creamy garlic pasta if you want to switch things up!

How to Serve

Serving your Slow Cooker Beef Teriyaki is just as fun as making it! Here are some ideas:

  • Serve it over fluffy white rice or brown rice for a hearty meal.
  • Pair it with steamed vegetables for a nutritious boost.
  • For a twist, try it with easy pasta recipes like creamy garlic pasta for a fusion dish!
  • Don’t forget to sprinkle some sesame seeds and green onions on top for that extra pop of flavor and color.

Make Ahead and Storage

This Slow Cooker Beef Teriyaki is perfect for meal prep! Here’s how to store it:

  • Store leftovers in an airtight container in the refrigerator for up to 4 days.
  • You can also freeze the beef teriyaki for up to 3 months. Just thaw it in the fridge overnight before reheating.
  • Reheat in the microwave or on the stovetop, adding a splash of water or broth to keep it moist.

Now that you have this fantastic recipe in your arsenal, you’ll never run out of weeknight dinner ideas again! Whether you’re cooking for your family or hosting friends, this Slow Cooker Beef Teriyaki is sure to impress. So, roll up your sleeves, gather your ingredients, and let’s make some magic in the kitchen!

Slow Cooker Beef Teriyaki

Prep Time 15 minutes
Cook Time 6 hours
Total Time 6 hours 15 minutes
Servings 4 servings
Calories 350
A delicious and easy slow cooker beef teriyaki recipe with tender meat and flavorful sauce.

Ingredients

Meat

  • 2 Pounds Beef (Lean Cut – I like Top Round)

Sauces and liquids

  • 0.25 Cup Soy Sauce (Low Sodium)
  • 0.5 Cup Teriyaki Sauce (Low Carb/Sugar)
  • 3 Ounces Pineapple Juice

Oils and sweeteners

  • 1.5 Tablespoons Olive Oil
  • 1 Tablespoon Brown Sugar Substitute (I like Sukrin Gold)

Spices

  • 0.25 Teaspoon Ground Ginger

Thickeners and aromatics

  • 2 Teaspoons Xanthan Gum
  • 2 Teaspoons Minced Garlic
  • 0.5 Large White Onion Large White Onion
  • 1 Tablespoon Sesame Seeds

Instructions 

  • Cut beef into cubes and chop onion.
  • Add all ingredients into slow cooker and mix.
  • Cook on Low for 6-8 hours or High for around 4 hours.

Notes

Adjust cooking time based on your slow cooker for best results.
Calories: 350kcal
Cost: $15
Course: Main Course
Cuisine: Asian
Keyword: Beef

Are you ready to indulge in a deliciously gooey treat that won’t derail your healthy eating goals? I know I am! Today, I’m excited to share with you my favorite recipe for The Best Microwave Protein Brownie. This delightful dessert is not only quick to whip up but also packed with protein, making it a perfect snack for those busy afternoons or a sweet finish to your day. Plus, it’s so easy to make that you can even prepare it while you’re cooking up some easy pasta recipes for dinner!

Why You’ll Love This Recipe

  • Quick and easy to make in just minutes!
  • High in protein, perfect for a post-workout snack.
  • Gooey and delicious, satisfying your sweet tooth without the guilt.
  • Customizable with your favorite mix-ins like nuts or chocolate chips.
  • Great for busy weeknights when you need a quick treat after 30-minute meals.

Ingredients

To make this scrumptious brownie, you’ll need just a few simple ingredients that you probably already have in your pantry. Here’s what you’ll need:

  • 1 scoop of your favorite protein powder
  • 2 tablespoons of unsweetened cocoa powder
  • 1 tablespoon of almond flour (or any flour you prefer)
  • 1 tablespoon of honey or maple syrup
  • 1/4 cup of water (or almond milk for creaminess)
  • A pinch of salt
  • Optional: chocolate chips or nuts for added texture

Full ingredient list with measurements is provided in the printable recipe card below.

How to Make the Recipe

Making this brownie is as easy as pie (or should I say brownie?). Here’s how you can whip it up in no time:

  1. In a microwave-safe bowl, combine the protein powder, cocoa powder, almond flour, and salt. Mix well.
  2. Add in the honey (or maple syrup) and water (or almond milk). Stir until you have a smooth batter.
  3. If you’re feeling adventurous, fold in some chocolate chips or nuts for an extra treat!
  4. Microwave the mixture on high for about 30-40 seconds. Keep an eye on it to avoid overcooking.
  5. Let it cool for a minute, then enjoy your gooey brownie straight from the bowl or transfer it to a plate.

Pro Tips for Making the Recipe

Here are some of my favorite tips to ensure your brownie turns out perfectly every time:

  • Don’t overmix the batter; just stir until combined for the best texture.
  • Adjust the cooking time based on your microwave’s wattage. Start with 30 seconds and add more time if needed.
  • Experiment with different protein powders to find your favorite flavor combination.
  • For a richer taste, try adding a splash of vanilla extract.
  • Pair your brownie with a scoop of ice cream for a decadent dessert!

How to Serve

This brownie is delicious on its own, but if you want to elevate it, here are some serving suggestions:

  • Top with a dollop of Greek yogurt and fresh berries for a refreshing twist.
  • Drizzle with a bit of melted dark chocolate for an indulgent treat.
  • Serve alongside a warm cup of coffee or tea for a cozy afternoon snack.
  • Pair it with a side of creamy garlic pasta for a delightful contrast of flavors during your next weeknight dinner ideas.

Make Ahead and Storage

If you want to prepare this brownie in advance, you can mix the dry ingredients and store them in an airtight container. When you’re ready to enjoy, just add the wet ingredients and microwave! For storage:

  • Keep any leftovers in the fridge for up to 3 days.
  • Reheat in the microwave for a few seconds before serving to restore its gooey goodness.
  • Don’t freeze, as the texture may change when thawed.

Now that you know how to make the best microwave protein brownie, I hope you’re as excited as I am to try it! It’s the perfect quick treat that fits into your busy lifestyle, whether you’re preparing quick family dinners or just need a little something sweet after a long day. Enjoy every bite, and don’t forget to share this recipe with your friends and family!

The Best Microwave Protein Brownie

Prep Time 2 minutes
Cook Time 2 minutes
Total Time 4 minutes
Servings 1 serving
Calories 150
This quick and easy microwave protein brownie is perfect for a healthy, satisfying treat in minutes.

Ingredients

Dairy & Sweeteners

  • 0.5 container Greek Yogurt (Your Choice Flavor)
  • 2 tablespoons Cocoa Powder
  • 2 teaspoons Sweetener (Erythritol)
  • 1 teaspoon Baking Powder
  • 1 scoop Protein Powder
  • 1 ounce Water

Instructions 

  • Mix all ingredients until smooth.
  • Pour into a non-stick microwave-safe dish.
  • Microwave for 40-45 seconds.
  • Stir and microwave for an additional 20-30 seconds.
  • Optional: Bake at 350°F (176°C) for 15-20 minutes.

Notes

Ensure not to over-microwave to keep the brownie gooey.
Calories: 150kcal
Cost: $3
Course: Dessert
Cuisine: American
Keyword: brownie, Protein

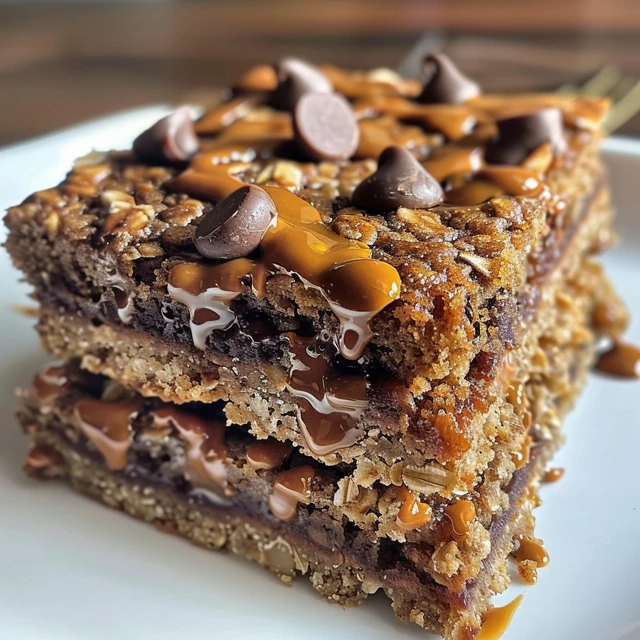
Are you on the lookout for a delicious and nutritious snack that can give you a healthy boost? Well, you’re in for a treat! Today, I’m excited to share my recipe for Protein Cake Bars. These bars are not only packed with protein but also bursting with flavor, making them the perfect choice for a quick pick-me-up. Plus, they’re super easy to whip up, just like my favorite easy pasta recipes that I love to prepare for my family. Let’s dive into this delightful recipe!

Why You’ll Love This Recipe

  • Perfect for a quick snack or a post-workout treat.
  • High in protein to keep you feeling full and satisfied.
  • Customizable with your favorite mix-ins like nuts or dried fruit.
  • Easy to make ahead for busy weeknights.
  • Great for kids and adults alike!

Ingredients

To make these scrumptious Protein Cake Bars, you’ll need the following ingredients:

  • 2 cups rolled oats
  • 1 cup protein powder (vanilla or chocolate)
  • 1/2 cup nut butter (peanut, almond, or your favorite)
  • 1/2 cup honey or maple syrup
  • 1/2 cup milk (dairy or non-dairy)
  • 1 teaspoon vanilla extract
  • 1/2 cup chocolate chips (optional)
  • 1/4 cup chopped nuts (optional)

Full ingredient list with measurements is provided in the printable recipe card below.

How to Make the Recipe

Making these Protein Cake Bars is a breeze! Here’s how to do it:

  1. In a large mixing bowl, combine the rolled oats and protein powder.
  2. Add in the nut butter, honey (or maple syrup), milk, and vanilla extract. Mix until well combined.
  3. If you’re using chocolate chips or nuts, fold them into the mixture now.
  4. Line an 8×8 inch baking dish with parchment paper and pour the mixture into the dish, spreading it evenly.
  5. Bake in a preheated oven at 350°F (175°C) for about 20-25 minutes, or until the edges are golden brown.
  6. Let the bars cool completely before cutting them into squares.

Pro Tips for Making the Recipe

Here are some of my favorite tips to ensure your Protein Cake Bars turn out perfectly:

  • Feel free to experiment with different flavors of protein powder to find your favorite.
  • If you prefer a softer bar, reduce the baking time slightly.
  • For added flavor, consider mixing in spices like cinnamon or nutmeg.
  • These bars can be frozen for up to three months, making them a great option for meal prep!

How to Serve

These Protein Cake Bars are incredibly versatile! Here are some serving suggestions:

  • Enjoy them as a quick breakfast on the go.
  • Pair them with a piece of fruit for a balanced snack.
  • Crush them over yogurt for a delicious parfait.
  • Serve them alongside a glass of milk or a smoothie for a complete meal.

Make Ahead and Storage

One of the best things about these Protein Cake Bars is that they can be made ahead of time! Here’s how to store them:

  • Once cooled, cut the bars and store them in an airtight container at room temperature for up to a week.
  • For longer storage, wrap each bar individually in plastic wrap and freeze them. Just grab one when you need a quick snack!
  • These bars are perfect for busy weeknights when you need quick family dinners or even as a healthy dessert option after a creamy garlic pasta dish.

So there you have it! A simple, delicious, and nutritious recipe for Protein Cake Bars that you can enjoy any time of the day. Whether you’re looking for a quick snack or a healthy dessert, these bars are sure to satisfy. I hope you give this recipe a try and enjoy every bite!

Protein Cake Bars

Prep Time 10 minutes
Cook Time 20 minutes
Total Time 30 minutes
Servings 8 bars
Calories 250
Delicious and healthy protein cake bars perfect for a quick snack or post-workout treat.

Ingredients

Dry Ingredients

  • 1 ¼ cups Rolled Oats
  • 2 scoops Protein Powder (Chocolate)
  • ¼ teaspoon Salt

Wet Ingredients

  • 1 large Whole Egg
  • 2 large Egg Whites
  • ¼ cup Sweetener
  • ½ teaspoon Baking Soda
  • 3 tablespoons Cocoa Powder
  • 2 ounces Milk Substitute (or Milk)
  • â…“ cup Unsweetened Apple Sauce
  • ¼ cup Greek Yogurt (Plain)
  • 3 tablespoons Chocolate Chips

Instructions 

  • Blend oats until flour-like consistency.
  • Mix dry ingredients in a bowl.
  • Mix wet ingredients in another bowl.
  • Combine wet into dry gradually.
  • Spray baking dish with non-stick spray.
  • Pour mixture into dish.
  • Add toppings if desired.
  • Bake at 350F/176C for 20-25 minutes.

Notes

Use a non-stick spray for easy removal.
Calories: 250kcal
Cost: $10
Course: Snack
Cuisine: American
Keyword: cake, Protein

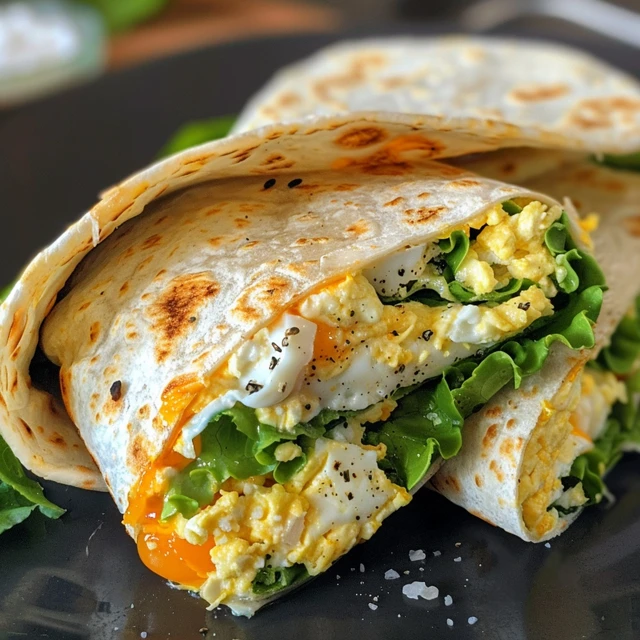
Are you looking for a quick and healthy meal that you can whip up in no time? Well, you’re in for a treat! Today, I’m excited to share my recipe for Quick Egg White Low Carb Wraps. These wraps are not only delicious but also perfect for those busy weeknights when you need something nutritious and satisfying. Plus, they’re a fantastic alternative to traditional wraps, making them a great option for anyone watching their carb intake. And if you’re like me and love easy pasta recipes, you’ll appreciate how versatile these wraps can be!

Why You’ll Love This Recipe

  • Quick and easy to make in just 10 minutes!
  • Low in carbs, making them perfect for a healthy lifestyle.
  • Great for meal prep and can be customized with your favorite fillings.
  • Perfect for quick family dinners or a nutritious snack.
  • Can be paired with a variety of sauces or sides, including creamy garlic pasta!

Ingredients

To make these delightful wraps, you’ll need just a few simple ingredients:

  • 4 large egg whites
  • 1 tablespoon of water
  • Salt and pepper to taste
  • Cooking spray or a little olive oil
  • Your choice of fillings (think veggies, lean meats, or cheese!)

Full ingredient list with measurements is provided in the printable recipe card below.

How to Make the Recipe

Making these wraps is a breeze! Here’s how you can do it:

  1. In a mixing bowl, whisk together the egg whites and water until well combined. Season with salt and pepper.
  2. Heat a non-stick skillet over medium heat and lightly coat it with cooking spray or olive oil.
  3. Pour half of the egg white mixture into the skillet, swirling it around to create a thin layer.
  4. Cook for about 2-3 minutes, or until the edges start to lift and the center is set.
  5. Carefully flip the wrap and cook for an additional minute.
  6. Remove from the skillet and repeat with the remaining egg white mixture.
  7. Once all wraps are cooked, fill them with your favorite ingredients and roll them up!

Pro Tips for Making the Recipe

Here are some of my favorite tips to ensure your wraps turn out perfectly every time:

  • For a fluffier wrap, beat the egg whites until they are slightly frothy before cooking.
  • Experiment with different seasonings to add flavor—try garlic powder, paprika, or Italian herbs!
  • If you want to make these wraps ahead of time, you can store them in the fridge for up to 3 days.
  • Don’t be afraid to get creative with your fillings! Think of your favorite 30-minute meals and adapt them into these wraps.

How to Serve

These wraps are incredibly versatile! Here are some serving suggestions:

  • Fill them with grilled chicken, spinach, and a dollop of hummus for a satisfying lunch.
  • Pair them with a side of fresh salsa or guacamole for a tasty snack.
  • For a comforting dinner, serve them alongside a bowl of creamy garlic pasta or a light salad.
  • They also make a great base for breakfast wraps—add scrambled eggs, avocado, and salsa!

Make Ahead and Storage

If you’re planning to make these wraps in advance, here’s how to store them:

  • Once cooked, let the wraps cool completely before stacking them with parchment paper in between to prevent sticking.
  • Store them in an airtight container in the fridge for up to 3 days.
  • To reheat, simply pop them in the microwave for about 20-30 seconds or warm them in a skillet.
  • These wraps are perfect for quick family dinners or as a grab-and-go snack!

So there you have it! My Quick Egg White Low Carb Wraps are not only easy to make but also a fantastic way to enjoy a healthy meal without sacrificing flavor. I hope you give this recipe a try and enjoy it as much as I do. Happy cooking!

Quick Egg White Low Carb Wraps

Prep Time 5 minutes
Cook Time 4 minutes
Total Time 9 minutes
Servings 2 wraps
Calories 80
Enjoy a healthy, low-carb wrap made with simple ingredients in just minutes.

Ingredients

Egg Whites

  • 6 tablespoons Liquid Egg Whites (92g)
  • 2 tablespoons Almond Flour
  • to taste optional Salt (Optional)
  • to taste optional Black Pepper (Optional)
  • to taste optional Seasoning (Your choice)

Instructions 

  • Mix together your ingredients
  • Coat an 8’’ pan with non-stick spray, heat over medium, pour mixture in
  • Cook each side for 1-2 minutes

Notes

Use a non-stick pan for best results and enjoy your healthy wraps!
Calories: 80kcal
Cost: $5
Course: Breakfast, Snack
Cuisine: American
Keyword: Egg Whites, Low Carb

Are you ready to indulge in a delicious treat that’s not only satisfying but also packed with protein? I know I am! Today, I’m excited to share my favorite recipe for Protein Coffee Cake. This delightful snack is perfect for those busy afternoons when you crave something sweet yet nutritious. Plus, it’s a fantastic option for quick family dinners or even as a delightful addition to your brunch table. And if you’re looking for easy pasta recipes to pair with it, I’ve got you covered! Let’s dive into this scrumptious recipe that will surely become a staple in your home.

Why You’ll Love This Recipe

  • High in protein to keep you energized throughout the day.
  • Easy to make, perfect for busy weeknights.
  • Deliciously moist and flavorful, satisfying your sweet tooth.
  • Great for meal prep, making it a convenient snack option.
  • Pairs wonderfully with coffee or tea for a delightful afternoon treat.

Ingredients

To whip up this delightful Protein Coffee Cake, you’ll need the following ingredients:

  • 1 cup whole wheat flour
  • 1 cup protein powder (vanilla or unflavored)
  • 1/2 cup coconut sugar or brown sugar
  • 1/2 cup unsweetened applesauce
  • 1/2 cup Greek yogurt
  • 2 large eggs
  • 1 teaspoon baking powder
  • 1 teaspoon baking soda
  • 1 teaspoon vanilla extract
  • 1/2 teaspoon cinnamon
  • 1/4 teaspoon salt
  • 1/2 cup chopped nuts or chocolate chips (optional)

Full ingredient list with measurements is provided in the printable recipe card below.

How to Make the Recipe

Now, let’s get to the fun part—making this delicious cake!

  1. Preheat your oven to 350°F (175°C) and grease a 9-inch round cake pan or line it with parchment paper.
  2. In a large mixing bowl, combine the whole wheat flour, protein powder, coconut sugar, baking powder, baking soda, cinnamon, and salt. Mix well.
  3. In another bowl, whisk together the applesauce, Greek yogurt, eggs, and vanilla extract until smooth.
  4. Pour the wet ingredients into the dry ingredients and stir until just combined. Be careful not to overmix!
  5. If you’re adding nuts or chocolate chips, fold them in gently.
  6. Pour the batter into the prepared cake pan and smooth the top with a spatula.
  7. Bake for 25-30 minutes, or until a toothpick inserted into the center comes out clean.
  8. Let the cake cool in the pan for about 10 minutes before transferring it to a wire rack to cool completely.

Pro Tips for Making the Recipe

Here are some of my favorite tips to ensure your Protein Coffee Cake turns out perfectly every time:

  • For a richer flavor, try using almond flour in place of some of the whole wheat flour.
  • Experiment with different protein powder flavors to customize your cake.
  • If you prefer a sweeter cake, feel free to add a bit more sugar or a drizzle of honey on top.
  • Don’t skip the cooling step; it helps the flavors meld beautifully!

How to Serve

This Protein Coffee Cake is incredibly versatile! Here are some serving suggestions:

  • Enjoy it warm with a dollop of Greek yogurt on top.
  • Pair it with your favorite coffee or tea for a delightful afternoon snack.
  • Serve it as a healthy dessert option after a family dinner.
  • Slice it up and pack it for a nutritious snack on the go!

Make Ahead and Storage

This cake is perfect for meal prep! Here’s how to store it:

  • Store any leftovers in an airtight container at room temperature for up to 3 days.
  • For longer storage, wrap the cake tightly in plastic wrap and freeze for up to 2 months.
  • To enjoy frozen cake, simply thaw it in the refrigerator overnight before serving.

Now that you have this delightful recipe in your arsenal, you can enjoy a healthy snack that satisfies your cravings without the guilt. And if you’re looking for more quick and easy meal ideas, check out my favorite 30-minute meals and weeknight dinner ideas that will make your evenings stress-free. Don’t forget to try my creamy garlic pasta for a delicious side dish that pairs perfectly with this cake. Happy baking!

Protein Coffee Cake

Prep Time 10 minutes
Cook Time 25 minutes
Total Time 35 minutes
Servings 8 pieces
Calories 350
A delicious and healthy protein coffee cake perfect for breakfast or a snack, combining oats, protein, and coffee flavors.

Ingredients

Dry Ingredients

  • 2 cups Rolled Oats
  • ½ teaspoon Salt
  • 2 teaspoons Baking Powder
  • 1.5 teaspoons Ground Cinnamon
  • 4 scoops Protein Powder (Vanilla)
  • 2 teaspoons Light Brown Sugar

Wet Ingredients

  • â…“ cup Sweetener
  • 5.3 ounces Greek Yogurt (Fat Free)
  • 1 teaspoon Vanilla Extract
  • 1 teaspoon Caramel Extract
  • 3 teaspoons Coffee Extract
  • 2 extra large Whole Eggs
  • 1 cup Unsweetened Apple Sauce
  • 1 tablespoon Peanut Butter
  • 1 tablespoon Honey
  • 2 teaspoons Light Brown Sugar

Instructions 

  • Process oats into flour.
  • Mix wet ingredients in a large bowl.
  • Combine dry ingredients (except chocolate chips and brown sugar) in another bowl.
  • Gradually mix dry into wet ingredients.
  • Pour batter into a prepared pan and top with chocolate chips, brown sugar, and cinnamon.
  • Bake at 350°F (176°C) for 20-25 minutes.

Notes

Using non-stick spray helps prevent sticking. Adjust baking time as needed.
Calories: 350kcal
Cost: $15
Course: Breakfast
Cuisine: American
Keyword: Coffee, Healthy, Protein

Are you looking to boost your muscle gains while enjoying the process? I know I am! Making your own homemade weight gainer protein powder is not only a fun kitchen project, but it also allows you to control the ingredients and tailor it to your taste. Plus, it’s a fantastic way to ensure you’re getting the nutrients you need without any unnecessary additives. And let’s be honest, who doesn’t love a good DIY project? This recipe is perfect for those busy weeknights when you want something nutritious and satisfying. If you’re also on the lookout for easy pasta recipes or 30-minute meals, you’re in for a treat!

Why You’ll Love This Recipe

  • Customizable to your taste and dietary needs.
  • Simple ingredients you probably already have at home.
  • Perfect for post-workout recovery or as a meal replacement.
  • Helps you bulk up without the hassle of store-bought powders.
  • Great for quick family dinners when you need a protein boost!

Ingredients

To make your own homemade weight gainer protein powder, you’ll need a few simple ingredients. Here’s what you’ll need:

  • 2 cups rolled oats
  • 1 cup protein powder (whey or plant-based)
  • 1 cup nut butter (peanut, almond, or cashew)
  • 1/2 cup honey or maple syrup
  • 1/2 cup cocoa powder (optional for chocolate flavor)
  • 1/2 cup dried fruit (like raisins or cranberries)
  • 1/4 cup chia seeds or flaxseeds

Full ingredient list with measurements is provided in the printable recipe card below.

How to Make the Recipe

Now that you have your ingredients ready, let’s dive into the fun part—making your homemade weight gainer protein powder!

  1. Start by blending the rolled oats in a food processor until they reach a fine flour-like consistency.
  2. In a large mixing bowl, combine the oat flour, protein powder, cocoa powder (if using), chia seeds, and dried fruit.
  3. Add the nut butter and honey (or maple syrup) to the dry ingredients. Mix well until everything is combined. You may need to use your hands to get it all mixed together!
  4. Once everything is well combined, spread the mixture onto a baking sheet lined with parchment paper.
  5. Let it cool for about 30 minutes, then break it into small pieces or store it in an airtight container.

Pro Tips for Making the Recipe

Here are some of my favorite tips to ensure your homemade weight gainer protein powder turns out perfectly:

  • Feel free to experiment with different nut butters or sweeteners to find your favorite flavor combination.
  • If you prefer a smoother texture, you can blend the entire mixture in the food processor after mixing.
  • For added flavor, consider adding spices like cinnamon or vanilla extract.
  • Make a double batch and store it for those busy weeknights when you need quick family dinners!

How to Serve

Your homemade weight gainer protein powder can be enjoyed in various ways! Here are some serving suggestions:

  • Mix it into smoothies for a protein-packed breakfast.
  • Stir it into oatmeal or yogurt for a nutritious snack.
  • Use it in creamy garlic pasta dishes for an extra protein boost.
  • Incorporate it into baked goods like muffins or pancakes for a delicious treat.

Make Ahead and Storage

This homemade weight gainer protein powder is perfect for meal prep! Store it in an airtight container in a cool, dry place for up to a month. You can also portion it out into smaller containers for easy access during the week. If you’re looking for weeknight dinner ideas, consider using this protein powder in your favorite recipes to keep your meals nutritious and satisfying.

So there you have it! Making your own homemade weight gainer protein powder is not only easy but also incredibly rewarding. I hope you enjoy this recipe as much as I do. Happy cooking!

Homemade Weight Gainer Protein Powder

Prep Time 10 minutes
Total Time 10 minutes
Servings 10 servings
Calories 350
Boost your calorie and protein intake with this easy homemade weight gainer protein powder, perfect for muscle building and recovery.

Ingredients

Main Ingredients

  • 0.75 cup Rolled Oats
  • 1.5 scoops Protein Powder
  • 2 tablespoons Cocoa Powder
  • 3 tablespoons Powdered Peanut Butter
  • 2 tablespoons Chocolate Mix

Instructions 

  • Combine all ingredients into a food processor or blender.
  • Process until everything is powder.
  • Store in a sealed container or mix into a shake.

Notes

Adjust servings as needed for your calorie goals.
Calories: 350kcal
Cost: $12
Course: Supplement
Keyword: Protein, Weight Gain