Author

Ava

Browsing

Dive into the delightful world of baking with this easy Cinnamon Sugar Loaf Cake recipe! Perfectly sweet, moist, and bursting with flavor, it’s sure to become a favorite in your kitchen. Let’s bake together and celebrate the joy of cooking!

Why You’ll Love This Recipe

This Cinnamon Sugar Loaf Cake is more than just a dessert; it’s a comforting hug in food form! Here are five reasons why you’ll adore this recipe:

  • Delightful Flavor: The warm notes of cinnamon combined with the sweetness of sugar make every bite a delightful experience.
  • Moist Texture: Thanks to the buttermilk, this loaf cake remains incredibly moist, ensuring it stays fresh and delicious for days.
  • Simple Ingredients: With everyday ingredients, you can whip this up without a trip to the specialty store.
  • Versatile Variations: Whether you want to add nuts, fruits, or a glaze, this cake is a versatile base for your creativity.
  • Perfect for Sharing: This cake makes a lovely gift for friends and family, perfect for any occasion!

Ingredient Breakdown

To create this delectable Cinnamon Sugar Loaf Cake, you’ll need the following ingredients:


Silicone Baking Cups Set

★ Recommended Kitchen Tool

Silicone Baking Cups Set

Make this recipe even easier with a quality Silicone Baking Cups Set — a must-have kitchen staple!


🛒 Check Price on Amazon →

As an Amazon Associate, we earn from qualifying purchases.
  • 2 cups all-purpose flour: The backbone of your cake, providing structure.
  • 1 cup granulated sugar: Adds sweetness and helps with moisture.
  • 1 teaspoon baking soda: This leavening agent helps the cake rise.
  • ½ teaspoon kosher salt: Enhances flavor and balances the sweetness.
  • 1 cup buttermilk: Keeps the cake moist and adds a slight tang.
  • 1 large egg: Binds the ingredients together for a cohesive texture.
  • ¼ cup vegetable oil: Ensures a tender crumb.
  • ¼ cup granulated sugar (for sugar mixture): For the sweet cinnamon topping.
  • 1 tablespoon ground cinnamon: The star of the show, providing that warm, cozy flavor.

Substitutions and Variations

If you’re missing an ingredient or want to make this recipe your own, here are some useful substitutions:

  • Flour: Whole wheat flour can be used for a nuttier flavor. You can also try gluten-free flour blends.
  • Buttermilk: In a pinch, mix 1 cup of milk with 1 tablespoon of vinegar or lemon juice and let it sit for 5 minutes.
  • Vegetable oil: Melted butter or coconut oil can also work well in this recipe.
  • Egg: For a vegan option, try using a flax egg (1 tablespoon of ground flaxseed mixed with 2.5 tablespoons of water).

How to Make Your Cinnamon Sugar Loaf Cake
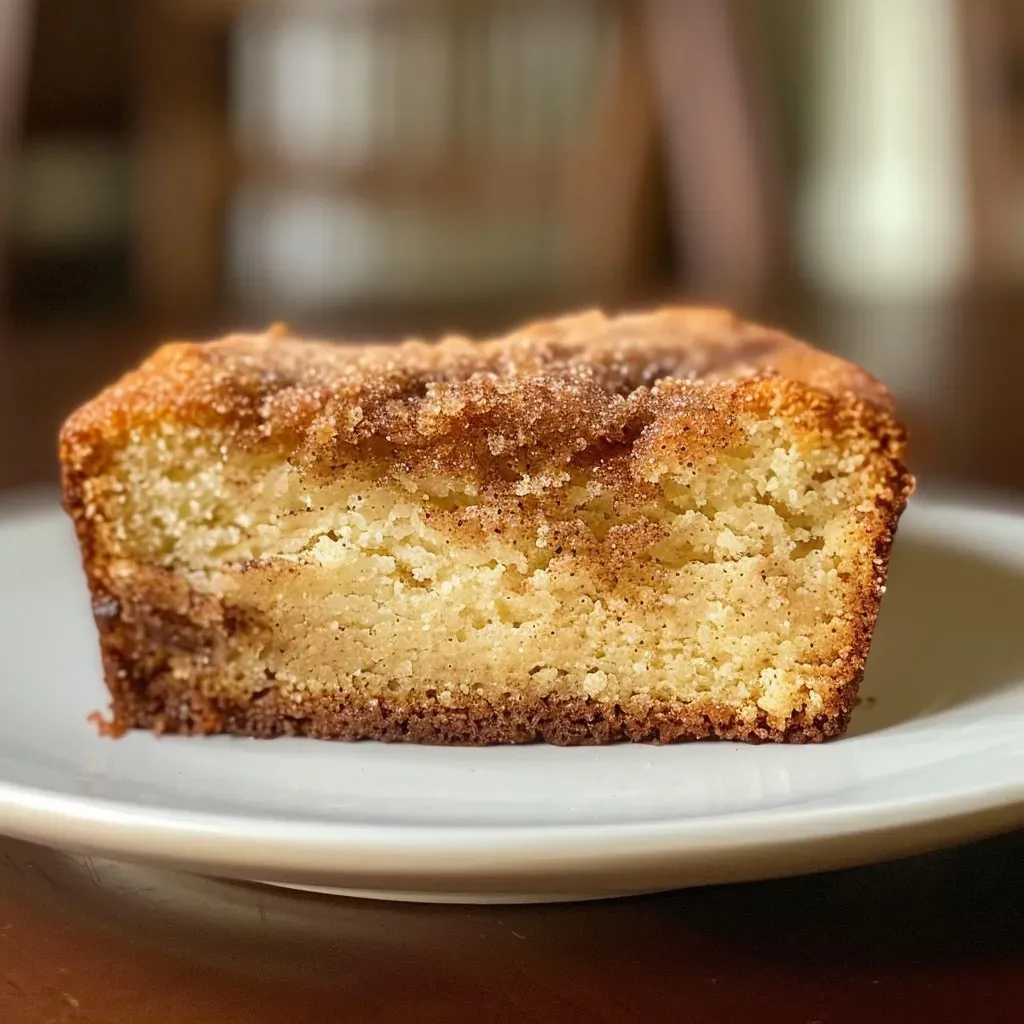
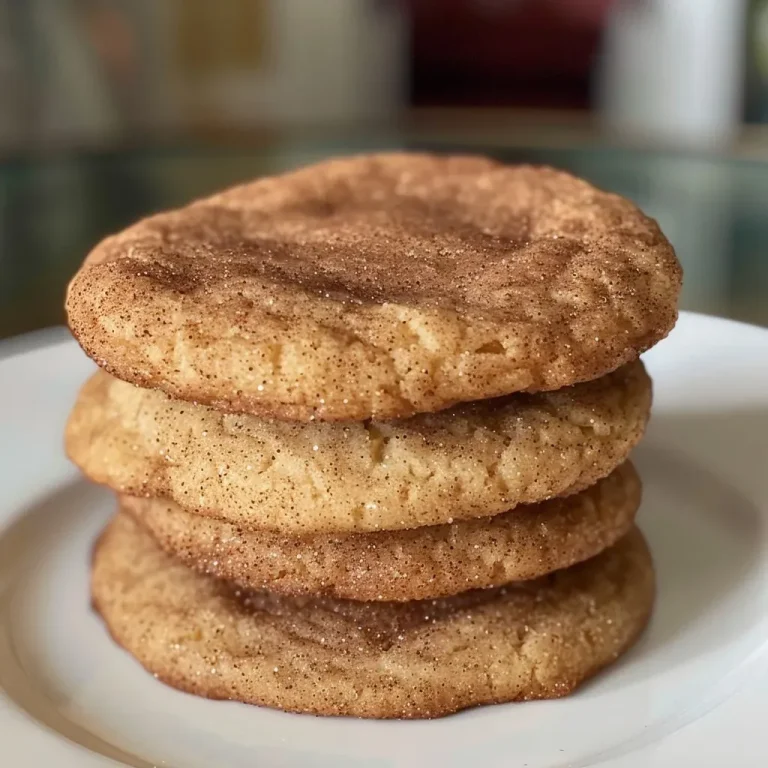
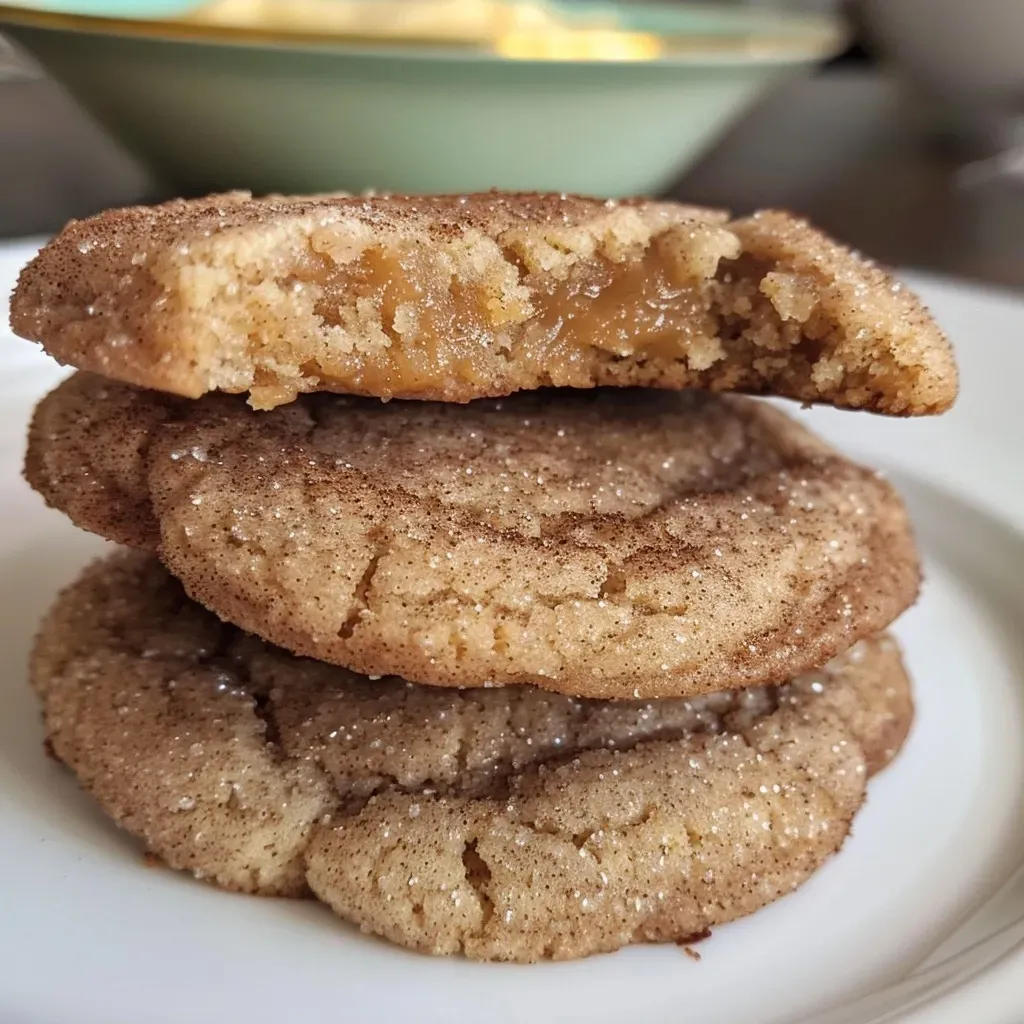
Close-up side view of a moist cinnamon sugar loaf cake showcasing a golden-brown crust.

Follow these simple steps to create your wonderful Cinnamon Sugar Loaf Cake:

  1. Preheat your oven to 350°F (175°C) and grease a loaf pan. Set aside.
  2. In a large bowl, whisk together all the dry ingredients: flour, sugar, baking soda, and salt.
  3. Add the buttermilk, egg, and vegetable oil to the dry mixture. Mix until just combined—be careful not to overmix!
  4. Pour half of the batter into the prepared loaf pan. Sprinkle a generous amount of the cinnamon-sugar mixture on top.
  5. Pour the remaining batter over the sugar layer, then sprinkle more of the cinnamon-sugar mixture on top.
  6. Using a knife, swirl the batter in a figure-8 motion to create a beautiful marbled effect.
  7. Bake for 45-55 minutes, or until a toothpick inserted comes out clean.
  8. Let it cool in the pan for 10 minutes before transferring it to a wire rack to cool completely.

Pro Tips for Success

To ensure your Cinnamon Sugar Loaf Cake turns out perfectly every time, consider these expert insights:

  • Room Temperature Ingredients: Make sure your egg and buttermilk are at room temperature for better mixing and texture.
  • Don’t Overmix: Mix until just combined to avoid a dense cake.
  • Check for Doneness: Oven temperatures can vary, so start checking your cake around the 45-minute mark.
  • Cool Properly: Allow your cake to cool before cutting to maintain its structure.
  • Experiment with Spices: Add a pinch of nutmeg or vanilla extract for an extra flavor dimension.
  • Use a Toothpick: Insert a toothpick into the center; if it comes out clean, your cake is ready!
  • Don’t Skip the Swirl: The cinnamon-sugar swirl adds a delightful surprise in every slice!
  • Store Wisely: Keep your cake in an airtight container to maintain moisture.

Common Mistakes and Troubleshooting

Even the best bakers make mistakes! Here are some common issues and how to fix them:

  • Dense Texture: Likely due to overmixing. Mix just until combined.
  • Too Sweet: You can reduce the sugar in the batter if desired.
  • Dry Cake: This can happen if it’s overbaked; always check for doneness early!
  • Cinnamon Sugar Separation: If it sinks, try sprinkling it on top before swirling.

Storage and Make-Ahead Instructions

Your Cinnamon Sugar Loaf Cake can be made ahead of time and stored properly:

  • Room Temperature: Store in an airtight container for up to 3 days.
  • Refrigeration: It can last up to a week in the fridge if well wrapped.
  • Freezing: Wrap the cooled loaf tightly in plastic wrap, then in foil. It can be frozen for up to 3 months. Thaw overnight in the fridge before serving.

Nutrition Tips and Dietary Adaptations

To make this recipe fit your dietary needs, consider these adaptations:

  • Lower Sugar: Reduce the sugar or use a sugar substitute.
  • Gluten-Free: Use a gluten-free flour blend.
  • Vegan Option: Use plant-based milk and a flax egg as mentioned above.

Equipment Recommendations

To achieve the best results, here’s some kitchen equipment you’ll need:

  • Loaf Pan: A good-quality non-stick loaf pan ensures easy release.
  • Mixing Bowls: Have a set of various sizes for easy ingredient management.
  • Measuring Cups and Spoons: Accurate measurements are key to baking success!
  • Whisk: A sturdy whisk helps combine your ingredients effortlessly.

Serving Suggestions

Enjoy your stunning Cinnamon Sugar Loaf Cake in a variety of ways:

  • With a Glaze: Drizzle a simple cream cheese glaze over the top for added sweetness.
  • As a Breakfast Treat: Toast slices and serve with butter or jam for a delightful start to your day.
  • Pair with Coffee: This loaf makes a perfect companion to your morning coffee or afternoon tea.

Frequently Asked Questions (FAQs)

Here are some common questions about making Cinnamon Sugar Loaf Cake:

  • Can I use almond flour instead of all-purpose flour? Yes, but you may need to adjust the liquid content.
  • What can I substitute for eggs in this recipe? A flax egg or applesauce work well as egg replacements.
  • How do I know when my cake is done? Insert a toothpick in the center; it should come out clean.
  • Can I add nuts to the batter? Absolutely! Chopped walnuts or pecans add a lovely crunch.
  • How do I store leftovers? Keep in an airtight container at room temperature for up to 3 days.
  • Can I freeze this cake? Yes, you can freeze it for up to 3 months. Just wrap it well!
  • What’s the best way to serve it? It’s delicious on its own or warmed with butter!
  • Can I scale the recipe? Yes, feel free to double or halve it as needed!

In conclusion, this Cinnamon Sugar Loaf Cake is not just a recipe—it’s a chance to create joyful memories in the kitchen. So grab your ingredients, gather your loved ones, and let’s bake this together! Remember, cooking is all about having fun, experimenting, and enjoying the delicious results. Happy baking!
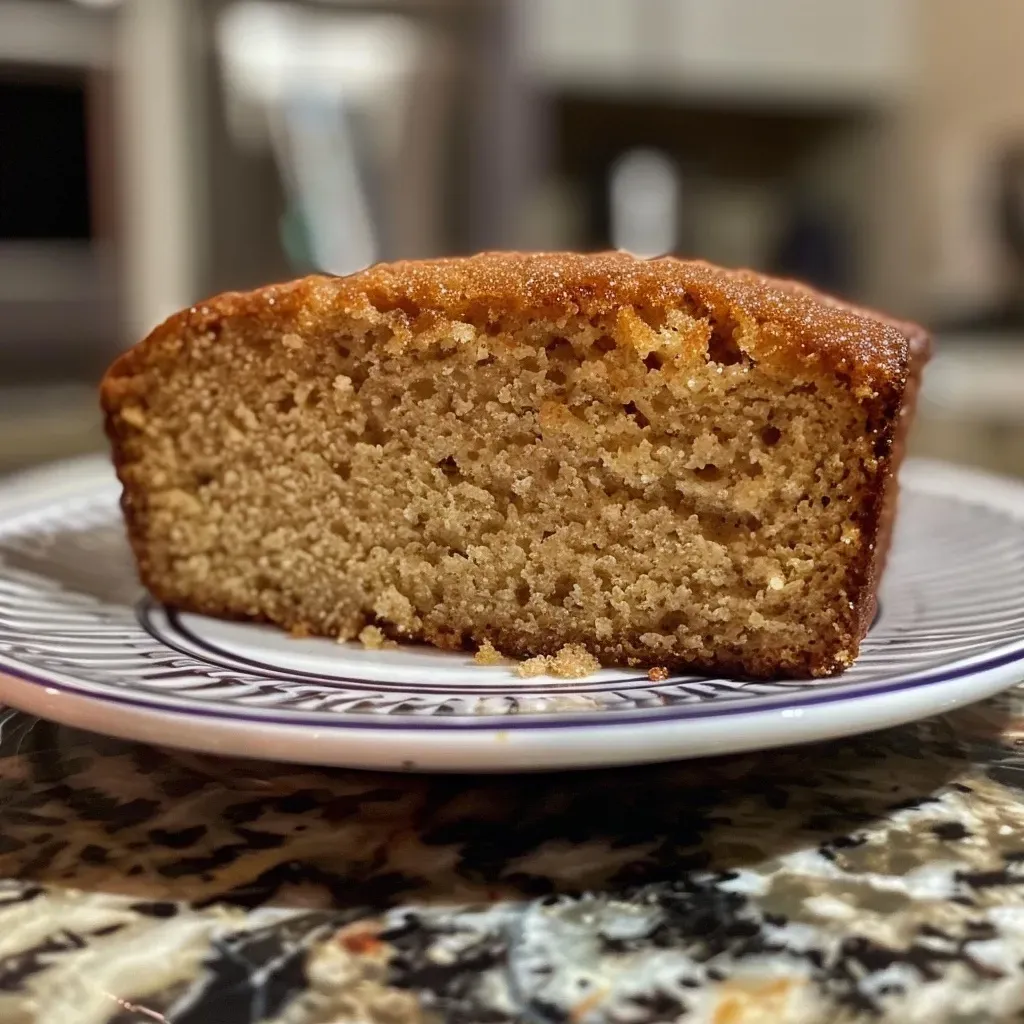
Cinnamon Sugar Loaf Cake

Prep Time 10 minutes
Cook Time 50 minutes
Total Time 1 hour
Servings 8 slices
Calories 350
A moist and flavorful loaf cake infused with cinnamon and topped with a sweet cinnamon sugar swirl. Perfect for breakfast or a sweet snack.

Ingredients

Dry ingredients

  • 2 cups all purpose flour
  • 1 cup granulated sugar
  • 1 teaspoon baking soda
  • ½ teaspoon kosher salt
  • 1 cup buttermilk
  • 1 large egg
  • ¼ cup vegetable oil
  • ¼ cup granulated sugar (for sugar mixture)
  • 1 tablespoon ground cinnamon

Instructions 

  • Preheat oven to 350°F (175°C) and grease a loaf pan.
  • Mix dry ingredients, then add buttermilk, egg, and oil; stir until combined.
  • Pour half batter into pan, sprinkle with cinnamon sugar, then add remaining batter and top with more sugar.
  • Swirl batter with a knife to create a marbled effect.
  • Bake for 45-55 minutes until a toothpick inserted comes out clean.
Notes

Store in an airtight container for up to 2 days for best freshness.
Calories: 350kcal
Cost: $15
Course: Breakfast, Dessert
Cuisine: American
Keyword: Cinnamon, loaf cake

Dive into the Delight of Cheesy Garlic Pull-Apart Bread!

If you’re looking for a dish that’s equal parts comforting and indulgent, you’ve landed in the right spot. This Cheesy Garlic Pull-Apart Bread is not just a recipe; it’s a culinary experience that turns simple ingredients into a heavenly loaf that will steal the show at any gathering. With every pull, you’ll reveal layers of gooey cheese and aromatic garlic enveloped in soft, warm bread. Perfect for sharing—and let’s be honest, it’s hard to resist sneaking a few pieces before serving! Let’s roll up our sleeves and make some kitchen magic together!

Why You’ll Love This Recipe

This recipe stands out for many reasons. Here are just a few:

  • Easy to Follow: With straightforward steps, even novice bakers will feel like pros!
  • Perfect for Sharing: This warm, tear-apart loaf is ideal for parties, family gatherings, or a cozy night in.
  • Customizable: Feel free to experiment with different cheese blends or add herbs for a personalized touch.
  • Make Ahead Friendly: Prepare the dough ahead of time and bake it fresh when you need it!
  • Comforting Flavors: The combination of garlic and cheese is a proven winner that appeals to everyone.

Ingredient Breakdown and Substitutions

Before we get cooking, let’s take a look at what you’ll need for this delicious bread.


Meal Prep Container Set

★ Recommended Kitchen Tool

Meal Prep Container Set

Make this recipe even easier with a quality Meal Prep Container Set — a must-have kitchen staple!


🛒 View on Amazon →

As an Amazon Associate, we earn from qualifying purchases.
  • All-Purpose Flour (2 ¼ cups / 281 g): This is the base of your dough. For a gluten-free version, you can substitute with a gluten-free flour blend.
  • Granulated Sugar (2 tablespoons): This helps activate the yeast. You can use honey or maple syrup as a natural alternative.
  • Instant Yeast (2 teaspoons): Ensures a quick rise. If using active dry yeast, you’ll need to proof it first.
  • Kosher Salt (1 ½ teaspoons): Essential for flavor. Sea salt works too; just adjust the quantity slightly.
  • Whole Milk (¾ cup / 184 g, warmed to 105°F to 115°F): Adds richness to the bread. You can replace it with almond milk or oat milk for a dairy-free version.
  • Unsalted Butter (3 tablespoons, softened): Adds moisture and flavor. Coconut oil can be used for a dairy-free option.
  • Minced Garlic (1 tablespoon): The star of the show! Fresh is always best, but you can also use garlic powder in a pinch.
  • Chopped Parsley (1 tablespoon, plus extra for garnish): Adds freshness; feel free to substitute with dried herbs.
  • Kosher Salt (½ teaspoon): For the garlic butter mixture, enhancing flavor.
  • Mozzarella Cheese (1 cup / 113 g, shredded): This is the gooey goodness in the pull-apart bread. Feel free to use provolone or Monterey Jack for a twist.
  • Sharp Cheddar Cheese (½ cup / 56.5 g, shredded): For a kick of flavor. You can mix it up with your favorite cheese varieties.
  • Melted Unsalted Butter (1 tablespoon): Brush on top for an irresistible finish. Use olive oil for a lighter option.
  • Kosher Salt (for garnish): Just a sprinkle to finish it off.

How to Make Cheesy Garlic Pull-Apart Bread

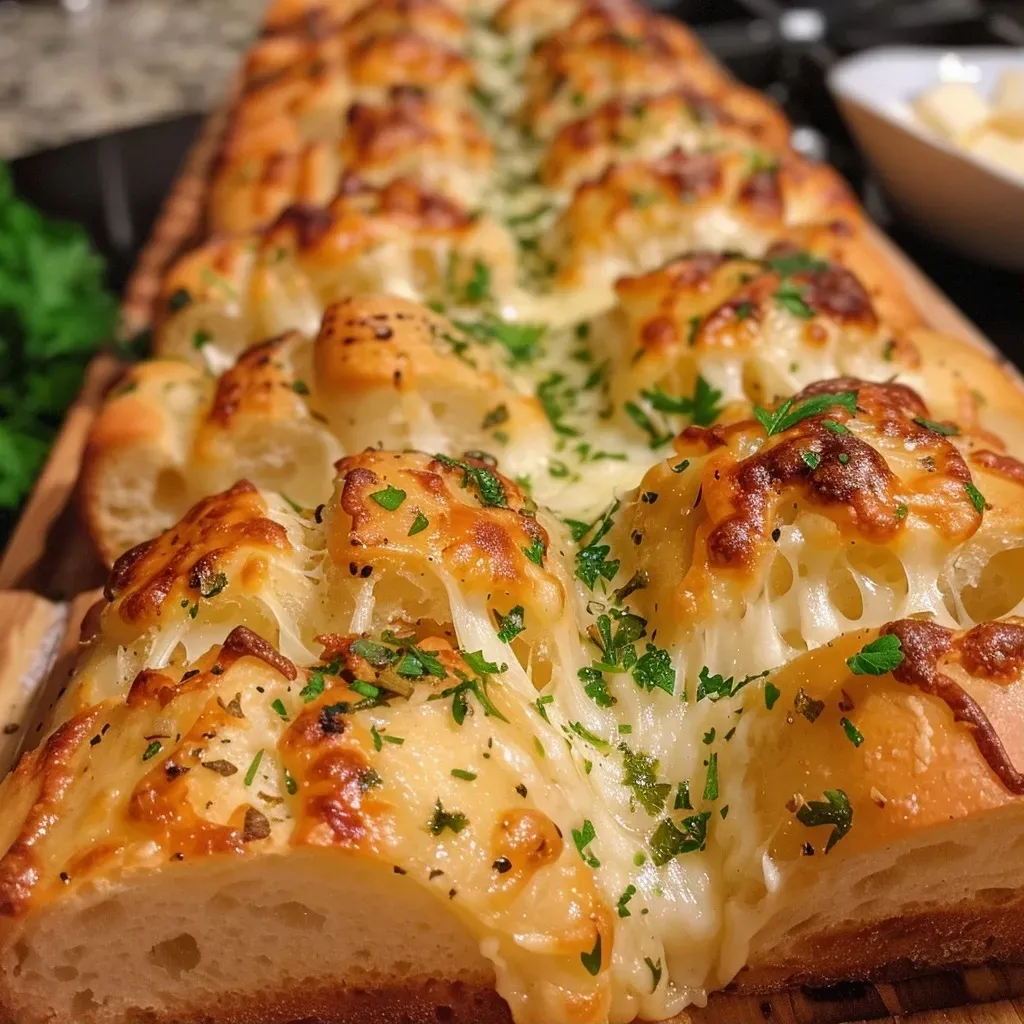
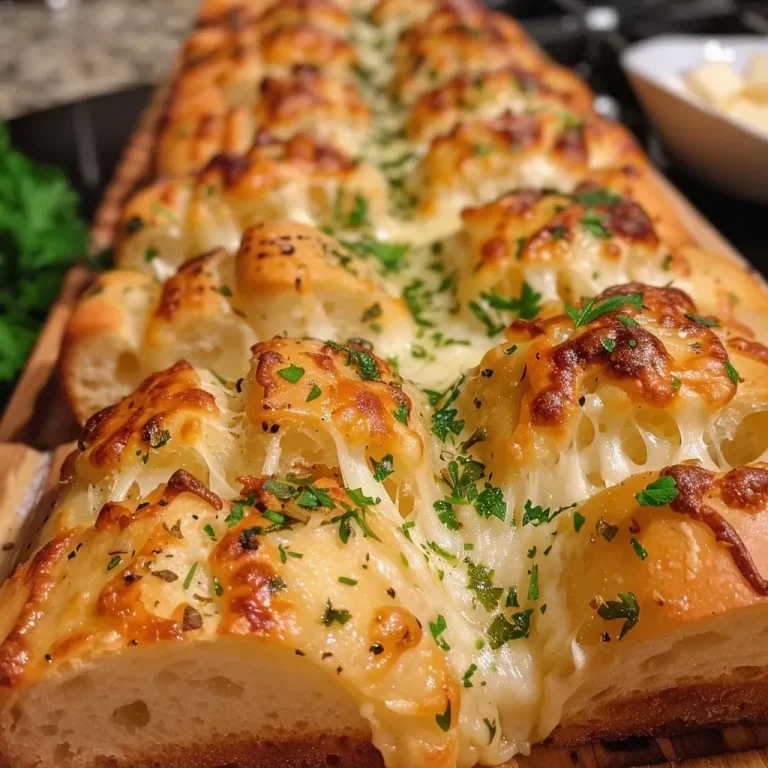
Close-up view of cheesy garlic pull-apart bread topped with melted butter and parsley.

Ready to get your hands doughy? Follow these steps to create your masterpiece:

Step 1: Prepare the Dough

In a large mixing bowl, combine the all-purpose flour, granulated sugar, instant yeast, and kosher salt. Mix well. In a separate bowl, combine the warmed milk and softened butter. Gradually add this mixture to the dry ingredients, stirring until a soft dough forms.

Step 2: Knead the Dough

Transfer the dough to a floured surface and knead for 5-7 minutes until smooth and elastic. This step is crucial for developing the right texture. If you have a stand mixer, you can use the dough hook attachment for ease!

Step 3: First Rise

Place the dough in a lightly greased bowl, cover it with a clean kitchen towel, and let it rise in a warm area for about 1 hour, or until it has doubled in size.

Step 4: Prepare the Garlic Butter

While the dough is rising, mix the minced garlic, chopped parsley, and kosher salt with the softened butter in a small bowl.

Step 5: Shape the Bread

Once the dough has risen, punch it down to release air. Roll it out on a floured surface into a rectangle about ½ inch thick. Spread the garlic butter mixture evenly over the surface of the dough, leaving a small border. Sprinkle the mozzarella and cheddar cheese evenly across the top.

Step 6: Cut and Stack

Using a sharp knife or pizza cutter, slice the dough into strips (about 1 inch wide). Then, cut the strips into squares. Stack the squares on top of each other and place them in a greased loaf pan.

Step 7: Second Rise

Cover the pan with a towel and let the stacked dough rise for another 30 minutes, allowing it to puff up beautifully.

Step 8: Preheat the Oven

Preheat your oven to 350°F (175°C). Brush the top of the dough with melted butter and sprinkle with a pinch of kosher salt.

Step 9: Bake

Bake in the preheated oven for 25-30 minutes, or until the bread is golden brown and sounds hollow when tapped. Your kitchen will smell delightful!

Step 10: Enjoy!

Once baked, let the bread cool slightly before serving. Garnish with extra chopped parsley for a pop of color and flavor. Enjoy the warm hugs of cheesy goodness!

Pro Tips for Perfect Pull-Apart Bread

Before you dive in, here are some expert tips to ensure your bread is a hit:

  • Use Warm Ingredients: Ensure your milk is warm but not hot to activate the yeast properly. It should feel like a warm bath!
  • Knead Well: The more you knead, the better the texture. Aim for a smooth, elastic dough.
  • Don’t Rush the Rise: Allow the dough to rise fully. This step is crucial for a light and airy bread.
  • Experiment with Cheeses: Mix different types of cheese for unique flavors. Consider adding gouda, fontina, or even blue cheese!
  • Make It Your Own: Add herbs like rosemary or thyme to the garlic butter for an aromatic twist.
  • Use a Loaf Pan: A loaf pan helps maintain the bread’s shape while baking, ensuring even cooking.
  • Cool Before Slicing: Let the bread cool for a few minutes to prevent it from becoming gummy when slicing.
  • Enjoy Warm: This bread is best enjoyed warm, straight out of the oven, with a side of marinara or garlic dipping sauce!

Common Mistakes and Troubleshooting

Even the best bakers make mistakes! Here’s how to avoid common pitfalls:

  • Dense Bread: This usually happens if the dough was not kneaded enough or if it didn’t rise properly. Ensure you follow the rise times!
  • Too Much Flour: If the dough feels dry, you may have added too much flour. Always measure flour accurately using the spoon-and-level method.
  • Burnt Tops: If the top browns too quickly, cover it loosely with foil during the last few minutes of baking.
  • Sticking to the Pan: Always grease your pan well or line it with parchment paper to ensure easy removal.

Variations to Try

Feeling adventurous? Here are some fun variations to switch things up:

  • Spicy Jalapeño Cheese Bread: Add diced jalapeños and pepper jack cheese for a spicy kick!
  • Herb-Infused Bread: Mix in dried Italian herbs into the dough for an aromatic infusion.
  • Sun-Dried Tomato & Feta: Incorporate chopped sun-dried tomatoes and crumbled feta for a Mediterranean twist.
  • Sweet Cinnamon Pull-Apart Bread: Replace the garlic butter with a cinnamon-sugar mix and add raisins for a sweet treat!

Storage and Make-Ahead Instructions

Want to prepare this dish ahead of time? Here’s how to do it:

  • Make Ahead: Prepare the dough and stack it in the loaf pan. Cover tightly and refrigerate overnight. Allow it to rise at room temperature for about an hour before baking.
  • Storage: Store any leftovers in an airtight container at room temperature for up to 2 days. For longer storage, wrap tightly in plastic wrap and freeze for up to 2 months.
  • Reheating: To reheat, wrap the bread in aluminum foil and warm in a 350°F oven for about 10-15 minutes.

Frequently Asked Questions (FAQs)

Got questions? We’ve got answers! Here are some FAQs about this recipe:

  • Can I use whole wheat flour? Yes, but the texture will be denser. Consider a mix of all-purpose and whole wheat for better results.
  • What can I serve with this bread? It pairs beautifully with marinara sauce, garlic butter, or a fresh salad.
  • Can I make this bread vegan? Absolutely! Substitute the butter with vegan butter and the milk with plant-based alternatives.
  • How do I know when the bread is done? The bread should be golden brown and sound hollow when tapped on the bottom.
  • Can I add other ingredients to the filling? Definitely! Feel free to add cooked bacon, sautéed mushrooms, or spinach for extra flavor.
  • How do I prevent the bread from sticking? Make sure you grease your pan well or line it with parchment paper.
  • What if my bread doesn’t rise? This could be due to expired yeast or cold ingredients. Always check the expiration date on your yeast!
  • Is it safe to eat cold? Yes, but it’s best enjoyed warm for the ultimate flavor experience.

Nutritional Tips and Dietary Adaptations

For those watching their nutrition, here’s how to adapt the recipe:

  • Lower Calorie Option: Use reduced-fat cheese and less butter to cut down on calories.
  • Gluten-Free: Use a gluten-free flour blend and ensure all other ingredients are certified gluten-free.
  • Dairy-Free: Substitute all dairy products with plant-based alternatives.
  • Low Carb: Use a low-carb flour like almond flour and reduce the sugar for a keto-friendly version.

Equipment Recommendations

Having the right tools can make all the difference! Here’s what I recommend:

  • Mixing Bowls: A set of mixing bowls in varying sizes is essential for combining ingredients and rising dough.
  • Loaf Pan: A good-quality loaf pan will help shape your bread perfectly.
  • Kitchen Scale: For accuracy in measurements, especially with flour.
  • Rolling Pin: A sturdy rolling pin makes rolling out the dough a breeze.
  • Silicone Spatula: Great for scraping down the sides of bowls and mixing ingredients without damaging your cookware.

Serving Suggestions

This pull-apart bread is versatile! Here are some ideas for serving:

  • As an Appetizer: Serve warm with a side of marinara sauce for dipping.
  • As a Side Dish: Pair it with soups, stews, or salads for a delightful meal.
  • For a Snack: Enjoy it on its own as a delicious snack or light lunch.
  • At Parties: Make it the centerpiece of your snack table for gatherings and watch it disappear!

Now you’re all set to create the most delicious Cheesy Garlic Pull-Apart Bread that will leave everyone wanting more! Remember, cooking is about enjoying the process, so have fun with it! If you experience any mishaps, laugh them off and keep going—each attempt is a step closer to perfection. Happy baking, friends!

From Scratch Cheesy Garlic Pull-Apart Bread

Prep Time 15 minutes
Cook Time 20 minutes
Total Time 35 minutes
Servings 8 pieces
Calories 350
A deliciously cheesy and garlicky pull-apart bread perfect for sharing. Easy to make from scratch with flavorful cheeses and herbs.

Ingredients

Dough

  • 2 ¼ cups all-purpose flour
  • 2 tablespoons granulated sugar
  • 2 teaspoons instant yeast
  • 1 ½ teaspoons kosher salt
  • ¾ cup whole milk (warmed 105°F to 115°F)
  • 3 tablespoons unsalted butter (softened)
  • ½ cup unsalted butter (softened)
  • 1 tablespoon garlic (minced)
  • 1 tablespoon parsley (chopped, plus extra for garnish)
  • ½ teaspoon kosher salt
  • 1 cup mozzarella cheese (shredded)
  • ½ cup sharp cheddar cheese (shredded)
  • 1 tablespoon unsalted butter (melted)

Garnish

  • kosher salt (for garnish) kosher salt

Instructions 

  • Mix warm milk, sugar, and yeast; let sit until frothy.
  • Add flour, salt, softened butter; knead into a smooth dough. Let rise until doubled.
  • Roll out dough, spread garlic, parsley, and shredded cheeses. Cut into pieces and layer in a baking dish.
  • Brush with melted butter, sprinkle with extra parsley and salt. Bake at 375°F (190°C) for 20 minutes.
  • Garnish with additional parsley and salt before serving.

Notes

For extra flavor, add a sprinkle of red pepper flakes or herbs.
Calories: 350kcal
Cost: $15
Course: Appetizer
Cuisine: American
Keyword: Bread, Cheese, Garlic

Unlock the Joy of Homemade Chai Spiced Granola

Welcome to your new favorite recipe! Making your own Chai Spiced Granola is not just a fun kitchen project, but a delightful way to elevate your snack game. This granola is packed with wholesome nuts and warm spices, making it perfect for breakfast or an afternoon pick-me-up. In this guide, I’m going to walk you through the ins and outs of this recipe, ensuring you feel confident and excited to get started!

This homemade granola is not only easy to whip up, but it also offers a multitude of health benefits and can be customized to suit your taste. Let’s dive into why you’ll absolutely love this recipe!

Why You’ll Love This Recipe

  • Easy to Make: With just a few simple steps, you can create a delicious and nutritious granola in your own kitchen.
  • Customizable: Use your favorite nuts and seeds to create a blend that’s uniquely yours.
  • Healthy Snack Option: Packed with nutrients, this granola is a great alternative to store-bought snacks.
  • Great for Meal Prep: Make a big batch and store it for quick breakfasts or snacks throughout the week.
  • Versatile Use: Enjoy it on its own, sprinkle it on yogurt, or mix it with your favorite fruits!

Ingredients for Chai Spiced Granola

Here’s what you’ll need to make this Chai Spiced Granola:


Glass Mason Jars for Oats

★ Recommended Kitchen Tool

Glass Mason Jars for Oats

Make this recipe even easier with a quality Glass Mason Jars for Oats — a must-have kitchen staple!


🛒 View on Amazon →

As an Amazon Associate, we earn from qualifying purchases.
  • 2 cups almonds: A great source of protein and healthy fats.
  • ¾ cup pecans: Adds a rich flavor and crunch.
  • 1 cup sunflower seeds: Packed with vitamins and minerals.
  • 1 cup pumpkin seeds: Rich in magnesium and zinc.
  • ½ cup cashews: Creamy texture that complements the mix.
  • 1 tablespoon cinnamon: Warm spice that’s a staple in chai.
  • 1 teaspoon ginger: Adds a zesty kick.
  • 1 teaspoon cardamom: Sweet and aromatic, perfect for chai.
  • ½ teaspoon allspice: Enhances the flavor profile.
  • 2 tablespoons organic blackstrap molasses: Adds depth and a hint of sweetness.
  • â…“ cup honey or maple syrup: Sweetens the granola naturally.
  • 2 teaspoons vanilla extract: For a lovely aroma and flavor.

How to Make Chai Spiced Granola

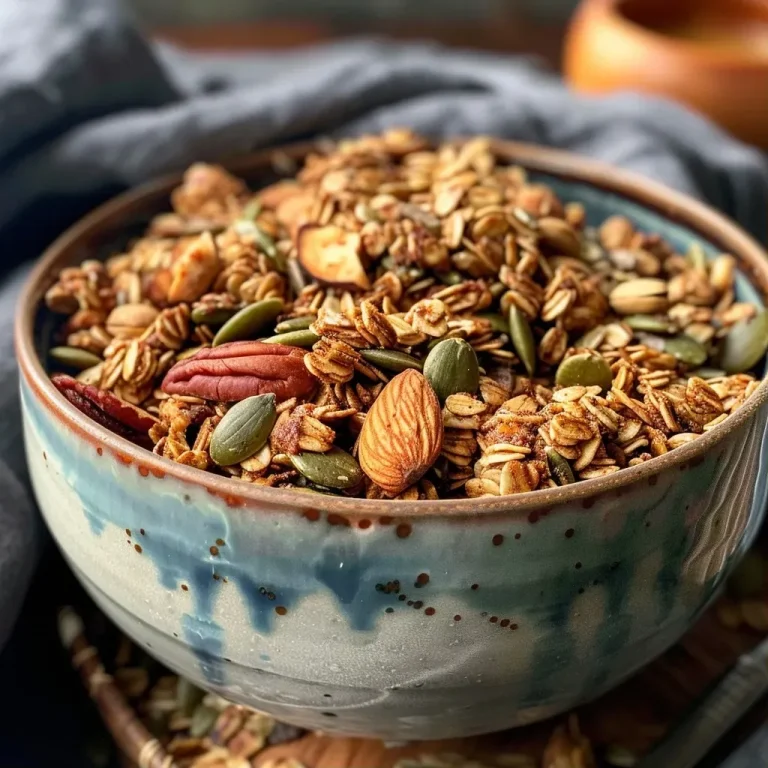
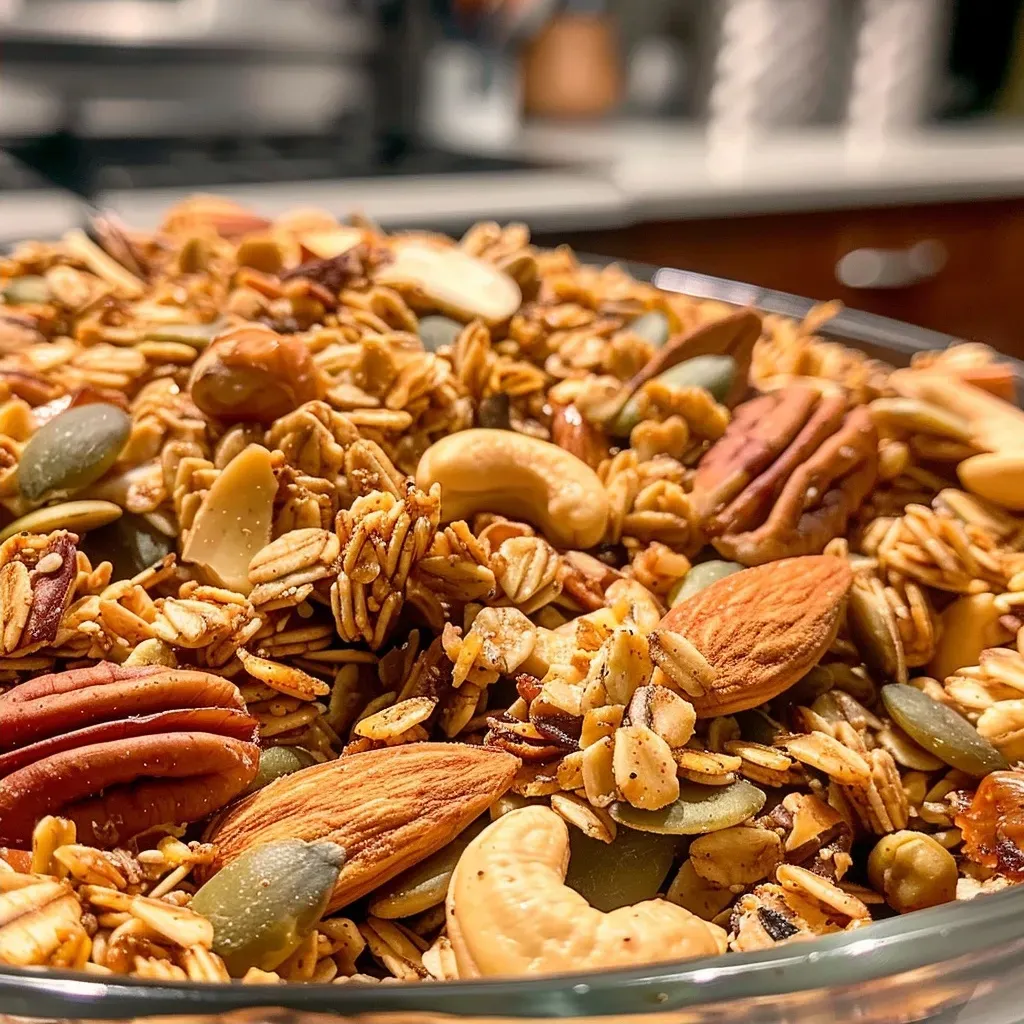
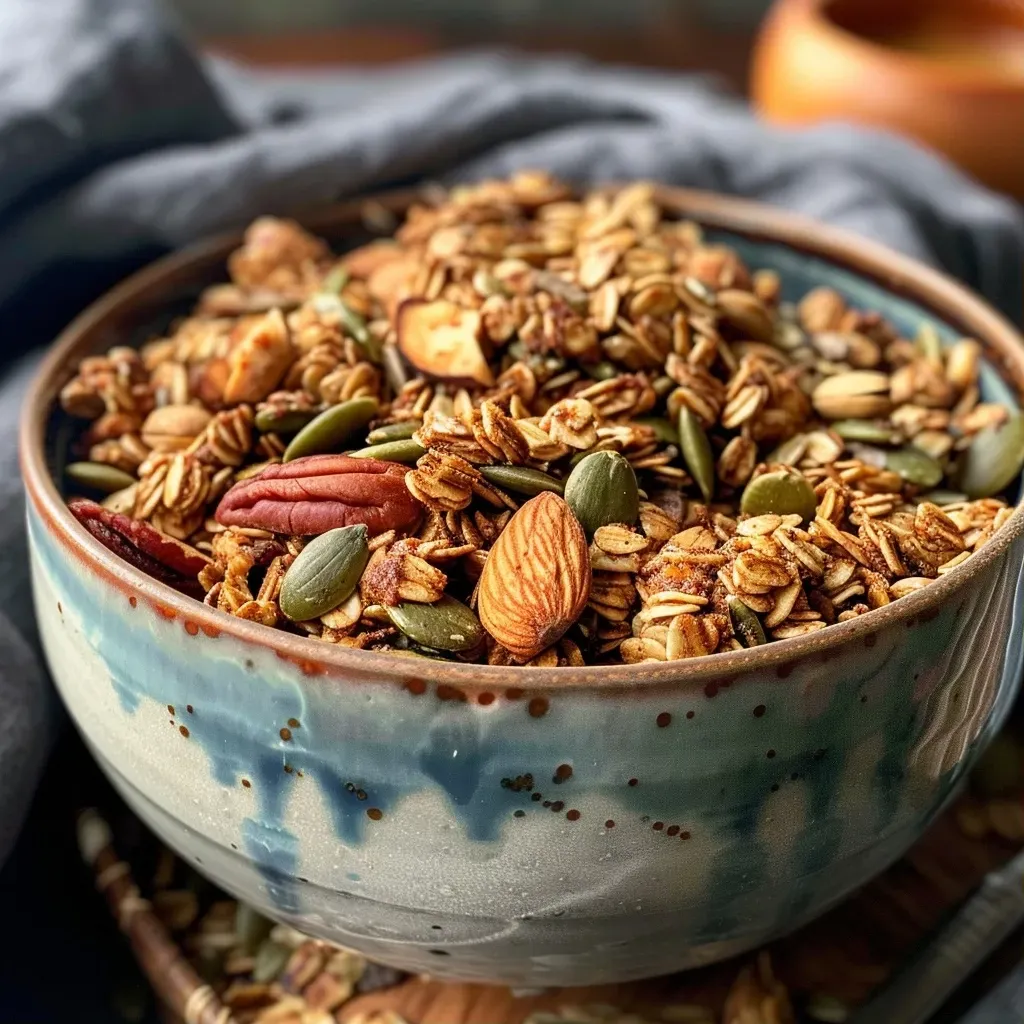
Close-up view of a bowl filled with Chai Spiced Granola, showcasing nuts and seeds.

Ready to dive into the cooking process? Let’s get started!

  1. Preheat your oven: Set your oven to 275°F (135°C) to ensure your granola bakes evenly.
  2. Prepare the nuts and seeds: Place your nuts and seeds in a food processor and pulse until chopped to a medium texture. Alternatively, you can chop them with a knife for a more rustic feel.
  3. Mix the ingredients: In a large mixing bowl, combine the chopped nuts and seeds with the spices, molasses, honey, and vanilla extract. Stir thoroughly until everything is well combined.
  4. Prepare baking sheets: Line two baking sheets with parchment paper. Spread the granola mixture evenly across the sheets in a single layer.
  5. Bake the granola: Bake for 10 minutes, then stir the granola. Rotate the pans and continue baking for another 10 to 15 minutes. Watch closely to avoid burning; it can go from golden to burnt very quickly.
  6. Cool and store: Once baked, remove the granola from the oven and let it cool for about 30 minutes. This is when it will harden up nicely. Store it in a sealed container for future enjoyment!

Pro Tips for Perfect Granola

  • Don’t skip the cooling: Allowing the granola to cool completely is key for achieving that crunchy texture you love.
  • Experiment with spices: Feel free to add more spices like nutmeg or cloves for an extra flavor boost!
  • Watch the baking time: Every oven is different, so keep an eye on your granola to prevent burning.
  • Use old-fashioned oats: If you’d like to add oats, they can provide a great texture and additional fiber.
  • Mix in dried fruits: Add dried cranberries or apricots after baking for a sweet touch!
  • Store it properly: Keep your granola in an airtight container to maintain its freshness.
  • Go nut-free: If you have nut allergies, substitute with more seeds or puffed rice.
  • Use a scale: If you’re serious about precision, weighing your ingredients can help with consistency.

Common Mistakes and Troubleshooting

Even the best cooks have mishaps! Here are some common mistakes to avoid:

  • Overbaking: Keep an eye on the granola. It should be golden, not dark brown.
  • Not mixing enough: Ensure all ingredients are well combined for even flavor.
  • Skipping the cooling step: Failing to cool can result in soft granola instead of crunchy.

Variations to Try

If you’re looking to switch things up, here are some fun variations:

  • Chocolate Chai Granola: Add cocoa powder and dark chocolate chips for a sweet twist.
  • Spicy Chai Granola: Incorporate cayenne pepper for an unexpected heat.
  • Maple Pecan Granola: Swap honey for maple syrup and use only pecans for a nutty flavor.
  • Fruit & Nut Granola: Mix in dried fruits like raisins or chopped dates after baking.

Storage and Make-Ahead Instructions

To keep your granola fresh and delicious:

  • Cool completely: Always allow it to cool completely before storing to maintain crunchiness.
  • Airtight container: Store in an airtight container for up to 2 weeks at room temperature.
  • Freezing tips: You can freeze granola for up to 3 months; just thaw before enjoying!

FAQ: Your Chai Spiced Granola Questions Answered

  • Can I use other nuts? Absolutely! Feel free to substitute with any nuts you love.
  • Is this recipe gluten-free? Yes, as long as you ensure all ingredients are gluten-free.
  • Can I make this vegan? Yes, simply replace honey with maple syrup.
  • How can I make it sweeter? Add a bit more honey or some brown sugar to your mix.
  • What’s the best way to serve granola? Enjoy it with yogurt, as a cereal with milk, or even as a topping on smoothie bowls!
  • How do I know if it’s done baking? It should be golden brown but will still feel soft when taken out of the oven.
  • Can I add oats to this recipe? Yes! Old-fashioned oats work great for added texture.
  • What if I don’t have molasses? You can substitute with honey or agave syrup for a different flavor.

Nutrition Tips and Dietary Adaptations

This granola is not only delicious but can also be adapted to meet various dietary needs:

  • Protein boost: Add protein powder to increase the protein content.
  • Low sugar option: Reduce the honey or replace it with a sugar substitute.
  • Nut-free: Substitute nuts with seeds like sunflower and pumpkin for a safe option.

Equipment Recommendations

Here’s what you’ll need for this recipe:

  • Food processor: For chopping nuts and seeds easily.
  • Baking sheets: Two large sheets lined with parchment paper.
  • Mixing bowls: For combining all your ingredients.

Serving Suggestions

Now that your Chai Spiced Granola is ready, here are some fun serving ideas:

  • As a breakfast cereal: Serve with milk or a dairy-free alternative.
  • On yogurt: Sprinkle over Greek yogurt with fresh fruit for a delicious parfait.
  • Trail mix: Combine with dried fruits and chocolate for a portable snack.
  • Baking topping: Use it as a topping for muffins or baked oatmeal for extra crunch!

Conclusion: Celebrate Your Granola Journey

Congratulations on making your own Chai Spiced Granola! I’m so glad you’re here to explore the joy of cooking with me. This recipe is sure to become a staple in your household, and I can’t wait to hear how you make it your own. Remember, cooking is all about having fun, so don’t be afraid to experiment. Enjoy every crunchy, flavorful bite!

Chai Spiced Granola

Prep Time 10 minutes
Cook Time 20 minutes
Total Time 30 minutes
Servings 8 servings
Calories 350
Enjoy this aromatic, crunchy granola infused with warm chai spices, perfect for a healthy breakfast or snack.

Ingredients

Nuts and Seeds

  • 2 cups almonds
  • 0.75 cup pecans
  • 1 cup sunflower seeds
  • 1 cup pumpkin seeds
  • 0.5 cup cashews
  • 1 tablespoon cinnamon
  • 1 teaspoon ginger
  • 1 teaspoon cardamom
  • 0.5 teaspoon allspice
  • 2 tablespoons organic blackstrap molasses
  • 0.33 cup honey or maple syrup
  • 2 teaspoons vanilla extract

Instructions 

  • Preheat oven to 275°F (135°C). Chop nuts and seeds, then mix with spices, molasses, honey, and vanilla.
  • Spread mixture evenly on parchment-lined baking sheets.
  • Bake for 10 minutes, stir, then bake another 10-15 minutes until golden. Cool before storing.

Notes

Keep a close eye during baking to prevent burning.
Calories: 350kcal
Cost: $15
Course: Breakfast
Cuisine: Fusion
Keyword: Granola

Welcome to the World of Caramel Scones!

Are you ready to whip up something truly delightful? These caramel scones are not just a treat for your taste buds but a warm hug for your soul! Imagine indulging in buttery, sweet scones topped with a sprinkle of sea salt, perfect for breakfast or an afternoon snack. With this easy recipe, you’ll discover the joy of baking, and I promise, it will become a favorite in your kitchen!

Why You’ll Love This Recipe

This recipe isn’t just about great flavor; it’s about creating an experience. Here are five reasons to get excited:

  • Quick & Easy: With only a handful of ingredients and straightforward steps, you can have these scones ready in under 30 minutes!
  • Perfectly Flaky: The cold butter creates a flaky texture that melts in your mouth with each bite.
  • Versatile Add-Ins: Customize your scones with chocolate chips, nuts, or dried fruits to make them uniquely yours.
  • Impress Your Friends: These scones are bakery-level delicious, making you look like a pro in the kitchen!
  • Great for Any Occasion: Whether it’s brunch with friends or a cozy evening at home, these scones fit every occasion beautifully.

Essential Ingredients & Substitutions

Before we dive into the recipe, let’s take a closer look at what you’ll need. Each ingredient plays a vital role in the flavor and texture of your scones.


Silicone Baking Cups Set

★ Recommended Kitchen Tool

Silicone Baking Cups Set

Make this recipe even easier with a quality Silicone Baking Cups Set — a must-have kitchen staple!


🛒 Shop This Tool →

As an Amazon Associate, we earn from qualifying purchases.
  • 2 1/2 cups all-purpose flour: The base of your scones. You can substitute with whole wheat flour for a healthier option.
  • 1/3 cup granulated sugar: Adds sweetness. Brown sugar can be used for a richer flavor.
  • 1 1/2 teaspoons baking powder: This gives the scones their rise. Make sure it’s fresh for the best results!
  • 1/4 teaspoon table salt: Balances the sweetness. Sea salt can enhance the flavor even further.
  • 8 tablespoons cold unsalted butter: Key for flakiness. Margarine can be used in a pinch, but the flavor won’t be as rich.
  • 1 cup salted caramel chips: For that delicious caramel flavor! Chocolate chips can be a delightful alternative.
  • 3/4 cup heavy cream: This adds moisture. You can use half-and-half or milk, but the scones may not be as rich.
  • 1 tablespoon instant espresso (optional): Adds depth to the flavor. You can omit this if you’re not a coffee fan.
  • 1 large egg: Binds everything together. A flax egg can be a great vegan substitute.
  • 1 teaspoon vanilla extract: Enhances the overall flavor. Almond extract can also add a lovely twist.
  • 1/2 cup white chocolate chips: For a sweet drizzle! Feel free to skip this if you prefer a simpler scone.
  • 1-2 teaspoons coconut oil: Used for the drizzle. You can substitute with butter or omit it entirely.
  • Coarse ground sea salt: A sprinkle on top for that perfect finish!

Step-by-Step Instructions for Caramel Scones

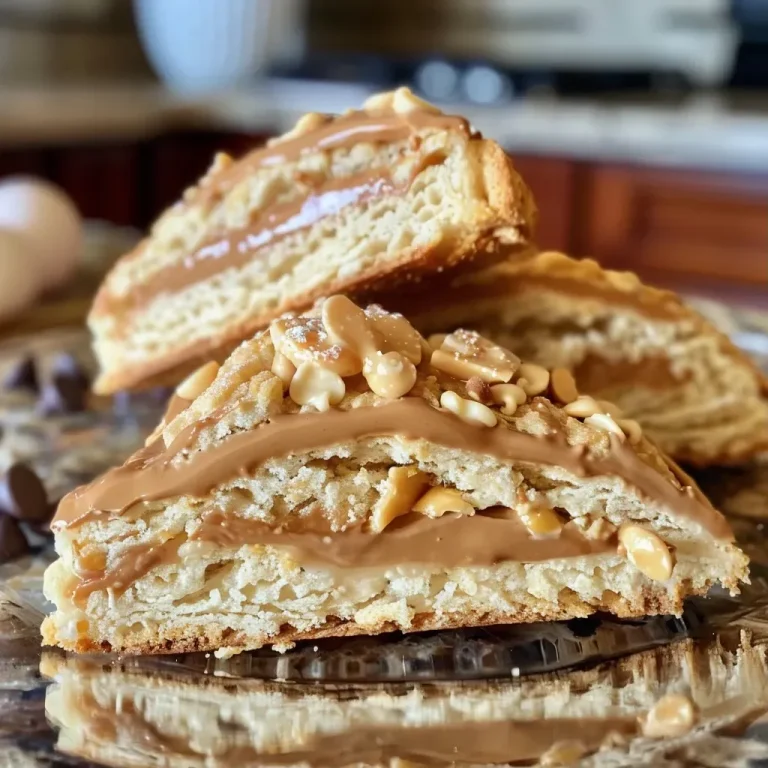
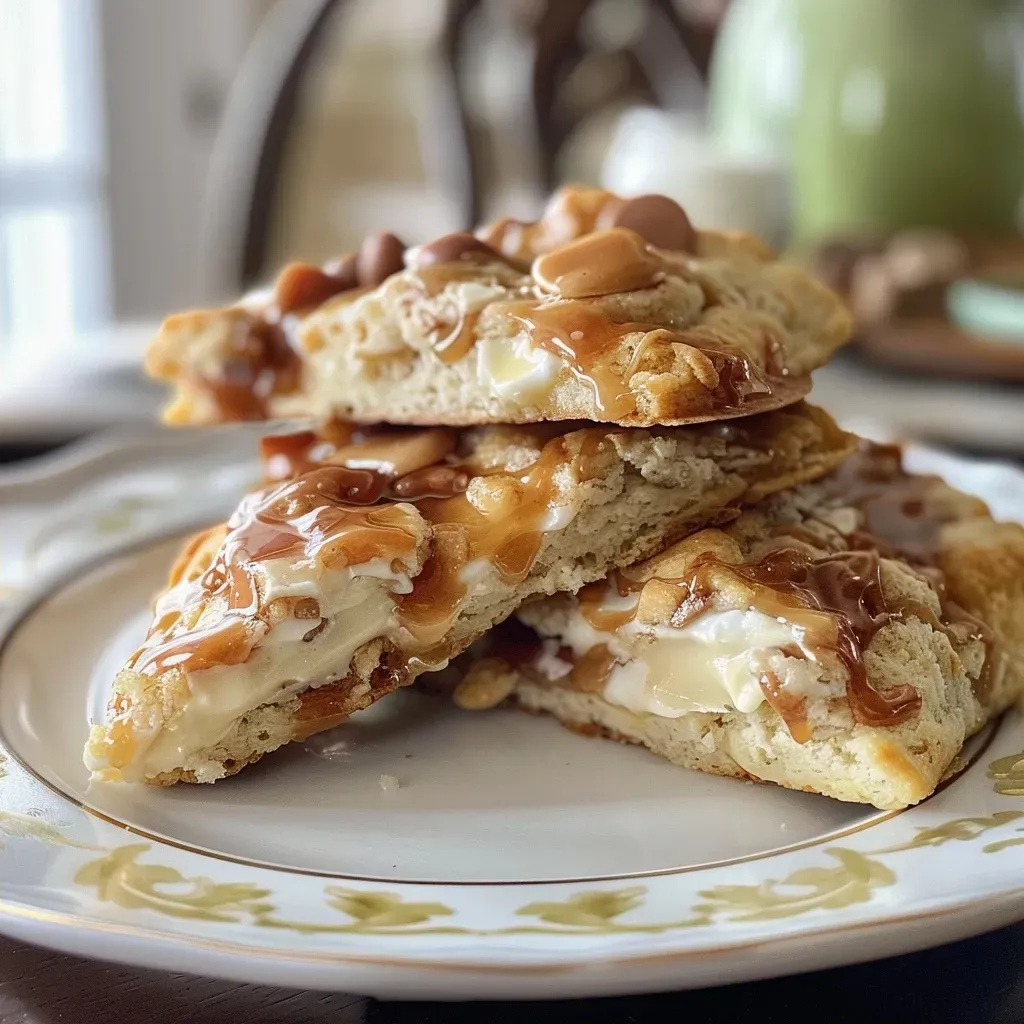
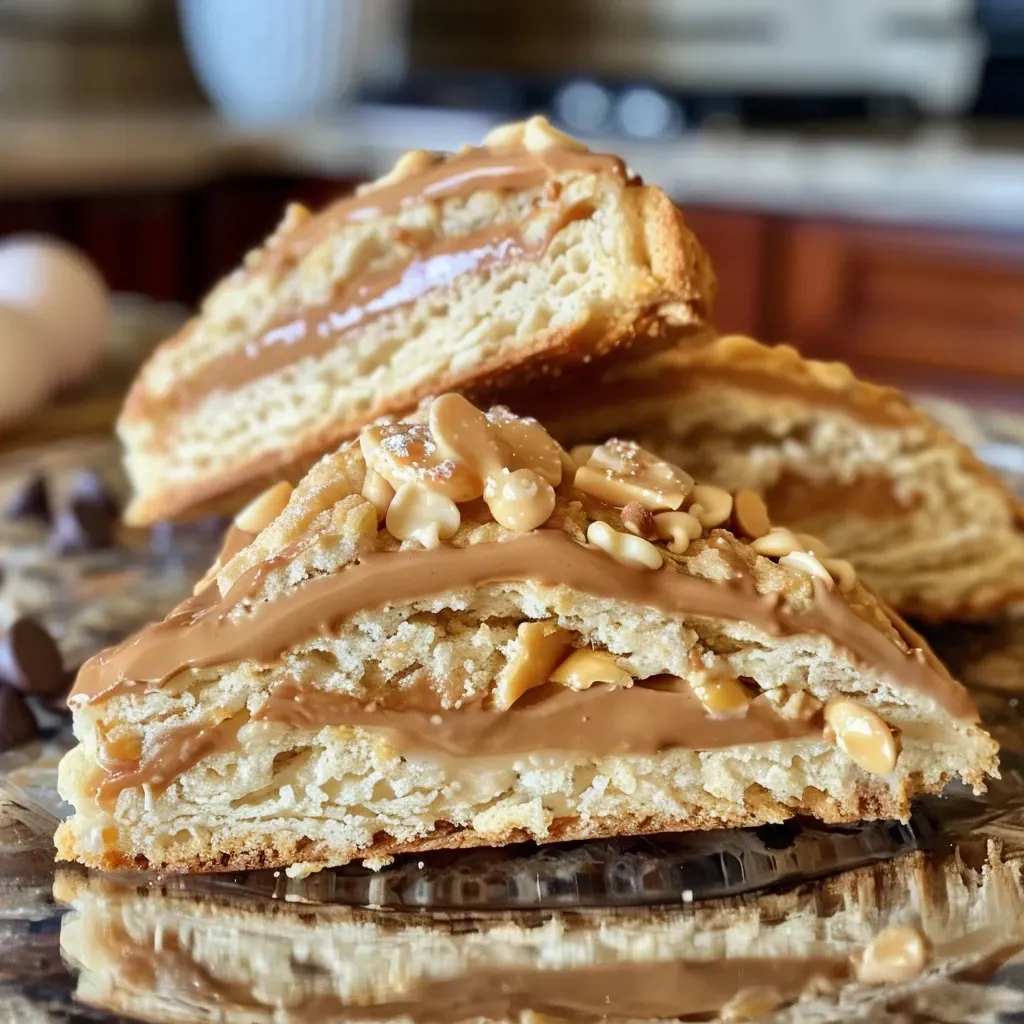
Close-up of golden Caramel Scones with a drizzle of caramel.

Now, let’s get baking! Follow these detailed steps to create your scones:

  1. Preheat your oven to 400° F (200° C). Line a large baking sheet with parchment paper or a Silpat.
  2. In a large bowl, combine the flour, sugar, baking powder, and salt. Using a pastry blender, cut in the cold butter until the mixture resembles small peas.
  3. Stir in the salted caramel chips and refrigerate the bowl for about 10 minutes to keep the butter cold.
  4. In another bowl, whisk the heavy cream with the espresso powder, egg, and vanilla extract. Make a well in the center of the flour mixture and pour in the cream mixture.
  5. Using a fork, gently pull the flour into the cream until a soft dough forms. Be careful not to overmix!
  6. Divide the dough into two equal balls and flatten them into 6-inch circles on your prepared baking sheet.
  7. Chill the dough in the refrigerator for 20 minutes while the oven heats up.
  8. Bake for 23-24 minutes until golden brown. Let the scones cool on the pan for a few minutes before cutting each circle into 6 wedges.
  9. If adding white chocolate, melt it in a microwave-safe bowl for 30 seconds, then stir in the coconut oil until creamy.
  10. Drizzle the white chocolate over the cooled scones and immediately sprinkle with sea salt for that extra touch of flavor.
  11. Store any leftovers in an airtight container. Reheat each scone in the microwave for about 10 seconds for that fresh-out-of-the-oven taste!

Pro Tips for Scone Success

Make your baking experience even better with these expert insights:

  • Use cold ingredients: Keeping your butter and cream cold helps create flaky layers.
  • Don’t overmix: Stir just until combined to avoid tough scones.
  • Experiment with flavors: Try adding lemon zest or dried fruits for a twist!
  • Check your oven temperature: An oven thermometer can ensure you’re baking at the right temp.
  • Use a sharp knife: For cutting the scones, a sharp knife prevents them from flattening.
  • Rotate the baking sheet: Halfway through baking, rotate the sheet for even browning.
  • Let them cool: If you’re adding chocolate, let the scones cool completely first to prevent melting.
  • Make ahead: You can freeze the unbaked scones and bake them fresh whenever you want!

Common Mistakes & Troubleshooting

Even the best bakers face challenges! Here are some common pitfalls and how to avoid them:

  • Dry scones: This can happen if you overmix or add too much flour. Keep an eye on your measurements!
  • Flat scones: Ensure your baking powder is fresh and that you’re using cold butter.
  • Burnt bottoms: This could mean your oven is too hot. Consider using parchment paper to prevent burning.
  • Too crumbly: If your dough is too dry, try adding a bit more cream to bring it together.

Delicious Variations to Try

Feeling adventurous? Here are some fun variations for your caramel scones:

  • Chocolate Chip Caramel Scones: Add a cup of semi-sweet chocolate chips for a double dose of sweetness.
  • Pecan Caramel Scones: Mix in 1/2 cup of chopped pecans for a nutty crunch.
  • Cranberry Orange Scones: Substitute caramel chips with dried cranberries and add orange zest for a seasonal twist.
  • Maple Bacon Scones: Incorporate crumbled cooked bacon and a drizzle of maple syrup for a savory-sweet treat.

Storage & Make-Ahead Instructions

Want to enjoy these scones later? Here’s how to store and prepare them in advance:

  • In the fridge: Store in an airtight container for up to 3 days.
  • In the freezer: Freeze unbaked scone dough for up to 3 months. Just thaw and bake when you’re ready!
  • Reheating: Warm individual scones in the microwave for 10 seconds for that fresh-from-the-oven taste.

Frequently Asked Questions (FAQs)

Here are some common questions about caramel scones:

  • Can I make these scones gluten-free? Yes! Substitute the all-purpose flour with a 1:1 gluten-free flour blend.
  • What can I use instead of caramel chips? Chocolate chips or butterscotch chips work great as alternatives!
  • How do I know when the scones are done baking? They should be golden brown and firm to the touch.
  • Can I add fresh fruit? Yes! Blueberries or raspberries would be delicious in these scones.
  • Is it okay to make the dough ahead of time? Absolutely! Just chill it in the fridge until you’re ready to bake.
  • What’s the best way to serve scones? Enjoy them warm with butter, jam, or clotted cream.
  • Can I use a different type of cream? Yes! You can substitute heavy cream with half-and-half for a lighter option.
  • Can I leave out the espresso powder? Yes, it’s optional! Just skip it if you prefer a milder flavor.

Nutritional Tips & Dietary Adaptations

Here are some tips to keep in mind for a healthier take:

  • Reduce sugar: You can cut down the granulated sugar by a couple of tablespoons if you prefer less sweetness.
  • Use whole wheat flour: For added fiber and nutrients, swap out half of the all-purpose flour for whole wheat.
  • Lower-fat options: Substitute heavy cream with low-fat yogurt or a non-dairy milk for a lighter version.

Equipment Recommendations

To ensure your scone-making goes smoothly, here are some handy tools:

  • Pastry Blender: Great for cutting in butter.
  • Baking Sheet: A sturdy, non-stick baking sheet will help prevent sticking.
  • Mixing Bowls: Have a variety of sizes on hand for mixing dry and wet ingredients.
  • Measuring Cups and Spoons: Accurate measurements are key!
  • Silpat or Parchment Paper: For easy cleanup and perfect baking.

Serving Suggestions

Make your scones shine at your next gathering with these serving ideas:

  • With Coffee or Tea: Pair your scones with a hot cup of coffee or tea for a cozy treat.
  • With Fresh Fruit: Serve alongside seasonal fruit for a refreshing contrast.
  • As a Dessert: Top with whipped cream and fresh berries for a delightful dessert option.

In conclusion, baking caramel scones is not just about the final product; it’s about the joy and warmth that fills your kitchen. So gather your ingredients, embrace the process, and most importantly, have fun! I can’t wait for you to take that first bite and share your sweet success. Happy baking!

Caramel Scones

Prep Time 15 minutes
Cook Time 24 minutes
Total Time 39 minutes
Servings 12 pieces
Calories 350
Delight in these buttery scones filled with caramel chips and topped with white chocolate drizzle and sea salt for a perfect treat.

Ingredients

Dough

  • 2 1/2 cups flour
  • 1/3 cup granulated sugar
  • 1 1/2 teaspoons baking powder
  • 1/4 teaspoon table salt
  • 8 tablespoons cold unsalted butter
  • 1 cup salted caramel chips
  • 3/4 cup heavy cream
  • 1 tablespoon instant espresso (optional)
  • 1 large egg
  • 1 teaspoon vanilla extract
  • 1/2 cup white chocolate chips
  • 1-2 teaspoons coconut oil

Sea Salt Topping

  • coarse ground sea salt coarse ground sea salt

Instructions 

  • Preheat oven to 400°F (200°C). Mix dry ingredients, cut in butter until pea-sized, then stir in caramel chips. Chill dough.
  • Whisk espresso into cream, beat egg and vanilla. Combine wet and dry to form dough, divide into two.
  • Shape each into 6-inch circles on baking sheet, chill for 20 minutes.
  • Bake for 23-24 minutes, cool slightly, then cut into 6 wedges each.
  • Melt white chocolate with coconut oil, drizzle over cooled scones, sprinkle with sea salt.

Notes

For extra flavor, add a splash of vanilla or espresso.
Calories: 350kcal
Cost: $15
Course: Breakfast
Cuisine: American
Keyword: caramel

Experience the Joy of Layered Delights: Your Ultimate Trifle Adventure!

Welcome to a delightful culinary journey where we’ll explore the delicious world of trifle in a tray. This easy and visually stunning dessert combines luscious layers of raspberry jelly, mixed berries, fluffy whipped cream, and rich chocolate cake, making it the perfect centerpiece for any occasion. Whether you’re hosting a gathering or simply treating yourself, this trifle recipe will surely impress!

In this guide, you’ll find everything you need to know about crafting your own trifle, including expert tips, variations, and answers to common questions. So, grab your apron, and let’s dive into the world of layered desserts!

Why You’ll Love This Recipe

  • Effortless Preparation: With straightforward steps, this recipe is perfect for both novice cooks and seasoned chefs—no prior experience needed!
  • Stunning Presentation: A trifle in a tray is not only delicious but visually appealing, making it an instant showstopper on your dining table.
  • Customizable Layers: Feel free to mix and match your favorite fruits and cake types, allowing for endless variations that cater to your taste.
  • Make-Ahead Friendly: Prepare your trifle a day in advance, saving you time and stress on the day of your event.
  • Perfect for Any Occasion: Whether it’s a birthday party, holiday gathering, or a simple family dinner, this dessert is a crowd-pleaser!

Essential Ingredients for Your Trifle

Before we get cooking, let’s take a closer look at the key ingredients you’ll need for this delightful trifle and some possible substitutions:


Professional Chef Knife Set

★ Recommended Kitchen Tool

Professional Chef Knife Set

Make this recipe even easier with a quality Professional Chef Knife Set — a must-have kitchen staple!


🛒 Shop This Tool →

As an Amazon Associate, we earn from qualifying purchases.
  • Raspberry Jelly: You’ll need 2 packets (85g each) of raspberry jelly. For a vegetarian option, consider using agar-agar instead of gelatin.
  • Frozen Mixed Berries: 500g adds flavor and color. You can substitute with fresh berries when they are in season.
  • Sugar: ¼ cup to sweeten the berry coulis. Adjust to taste if you prefer a less sweet dessert.
  • Mini Lamingtons: Two packets (200g each) provide a delightful texture. You can replace them with sponge cake or ladyfingers if desired.
  • Store-Bought Chocolate Cake: One (360g) chocolate cake adds richness. Feel free to bake your own for an extra special touch!
  • Strawberries: 200g, stalks removed, for added freshness. You can use other berries or fruit as alternatives.
  • Whipped Cream: 500ml, for a light and airy finish. You can use dairy or non-dairy alternatives based on dietary preferences.
  • Custard: 1kg, for creaminess. You can make your own or use store-bought custard for convenience.
  • Flake Bar: 30g, to sprinkle on top for a crunchy texture. You can use any chocolate bar or omit it entirely.

Step-by-Step Instructions for Your Trifle

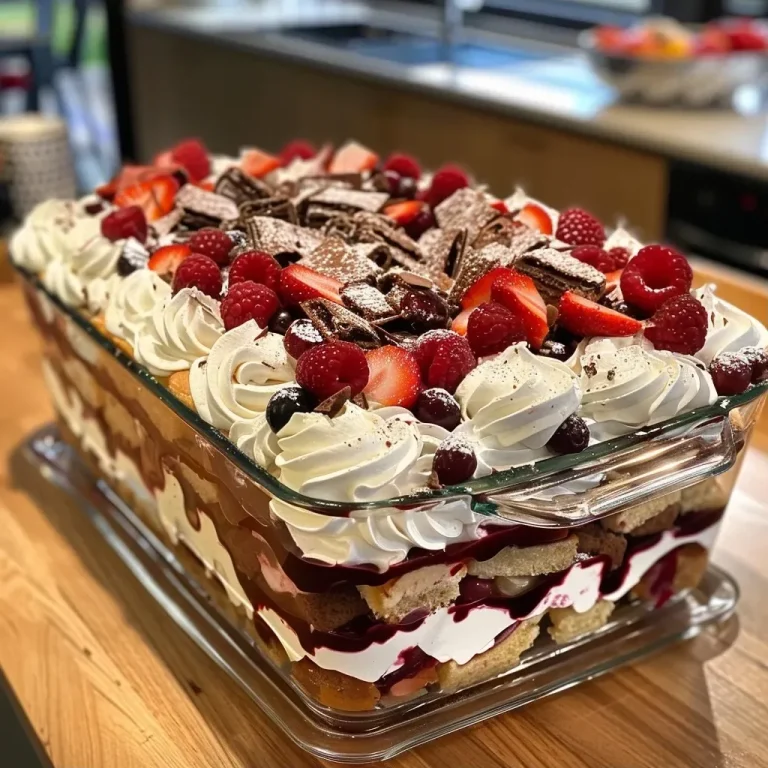
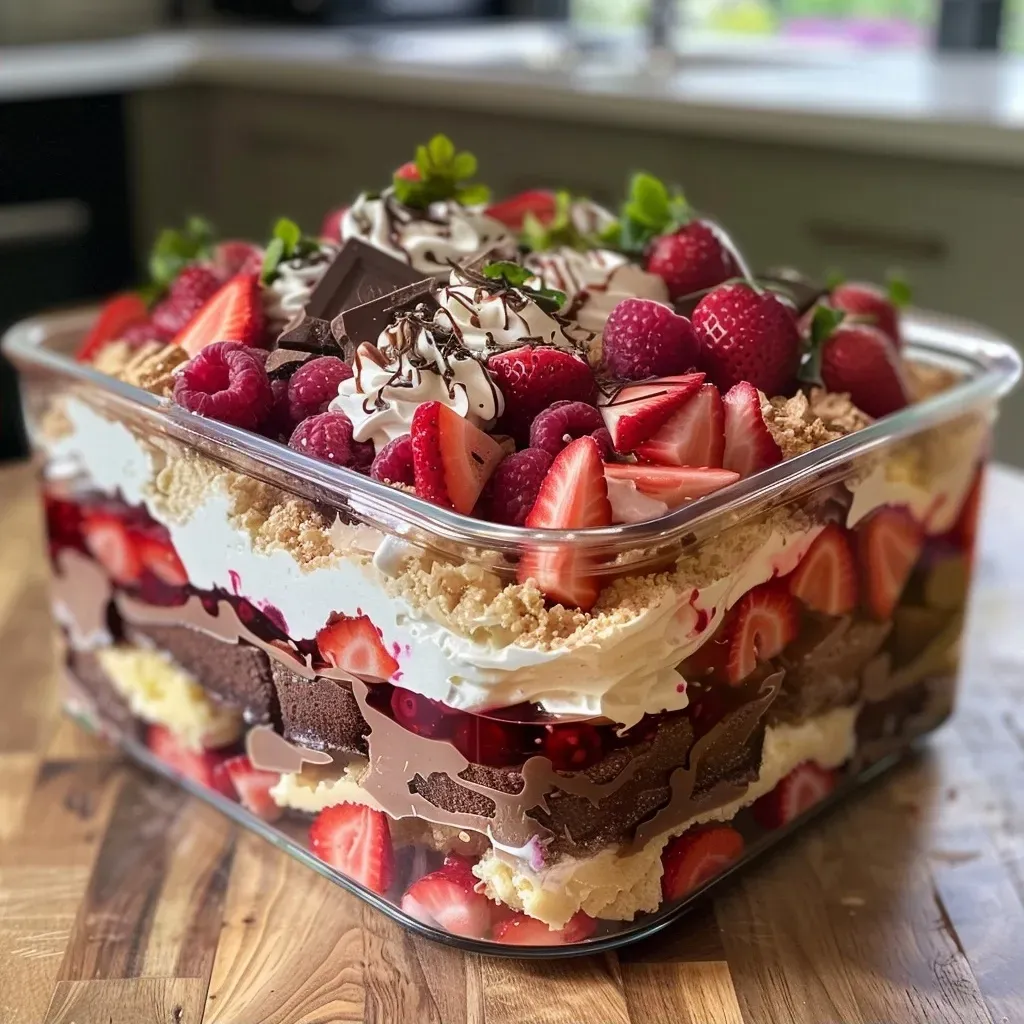
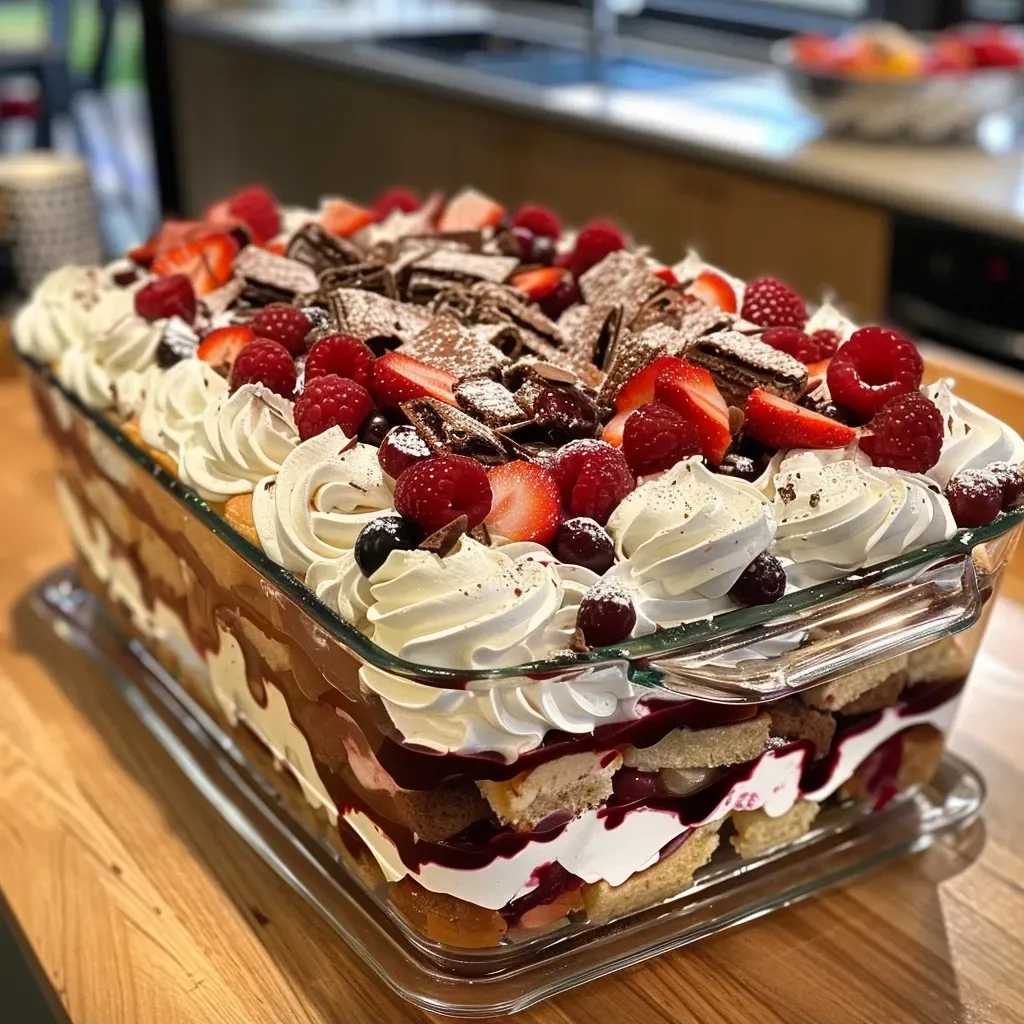
A close-up view of a colorful trifle displayed in a tray, showcasing layers of berries and cream.

Let’s bring all these ingredients together into a beautiful trifle! Here’s how to make your delicious masterpiece:

  1. Make the Raspberry Jelly: Prepare the jelly according to package instructions, using the double portion. Pour into a large dish (23cm x 33cm) and refrigerate overnight to set.
  2. Prepare the Berry Coulis: In a saucepan, combine frozen mixed berries and sugar. Simmer on low heat for about 20 minutes, then set aside to cool. This can also be made a day in advance.
  3. Assemble the Layers: Chop the mini lamingtons and chocolate cake into bite-sized pieces. Slice the strawberries in half and whip the cream until fluffy.
  4. Layer the Ingredients: Once the jelly is set, place half of the strawberries around the edge of the dish for a beautiful presentation. Then, layer the chopped lamingtons on top of the jelly, followed by the remaining strawberries.
  5. Add the Berry Coulis: Drizzle the berry coulis over the lamingtons, ensuring a delightful burst of flavor in every bite.
  6. Pour the Custard: Carefully pour the custard on top of the berry coulis, spreading it evenly with a spatula.
  7. Top with Chocolate Cake: Scatter the chopped chocolate cake pieces on top of the custard for added richness.
  8. Finish with Whipped Cream: Dollop the whipped cream generously over the chocolate cake, and sprinkle crumbled flake bar on top for a delightful crunch.
  9. Chill and Serve: Place your trifle in the fridge until ready to serve. Let it chill for at least an hour to allow the flavors to meld together.

Expert Tips for a Flawless Trifle

Want to make sure your trifle turns out perfectly? Here are some expert tips to keep in mind:

  • Use a Clear Dish: A clear trifle dish or glass bowl allows the beautiful layers to shine through, making your dessert even more appealing.
  • Don’t Rush the Chilling: Allow the jelly to set completely in the fridge overnight for the best texture and flavor.
  • Whip the Cream Just Right: Be careful not to over-whip your cream; it should be fluffy but still smooth enough to spread easily.
  • Layer Generously: Don’t skimp on the layers! More layers mean more flavor and texture in each bite.
  • Experiment with Flavors: Try different flavored jellies or fruits to create unique variations of your trifle.
  • Make Ahead: As mentioned, this dessert can be made a day in advance. Just hold off on adding the whipped cream until serving.
  • Store Properly: If you have leftovers, cover them with plastic wrap and keep them in the fridge for up to 2 days.
  • Be Creative with Toppings: Consider adding nuts, shavings of chocolate, or fresh mint leaves for an extra touch of sophistication.

Common Mistakes and Troubleshooting

Even the best of us can run into hiccups in the kitchen! Here are some common mistakes and how to avoid them:

  • Jelly Not Setting: Ensure you’re using the correct ratio of water to jelly powder, and chill it long enough to set.
  • Overmixed Cream: If your whipped cream turns grainy, you’ve overwhipped it. Start again with fresh cream and whip just until soft peaks form.
  • Too Much Liquid: If your trifle becomes watery, it might be from excess fruit juice. Drain fruits if necessary.
  • Unbalanced Layers: Ensure each layer complements the others in flavor and texture. Adjust sweetness or acidity as needed.

Delicious Variations to Try

Get creative with your trifle by trying these fun variations:

  • Citrus Burst: Swap the raspberry jelly for orange jelly and include segments of oranges and mandarins.
  • Chocolate Lovers: Use chocolate pudding instead of custard, and add chocolate chips for an indulgent twist.
  • Tropical Delight: Incorporate pineapple and mango with coconut cream for a refreshing tropical trifle.
  • Nutty Flavors: Add layers of crushed nuts, like almonds or pecans, for a crunchy texture and nutty flavor.

How to Store and Make Ahead

Storing your trifle properly ensures it remains fresh and delicious:

  • Make Ahead: You can prepare the jelly and berry coulis the day before. Assemble the trifle a few hours in advance, but add whipped cream right before serving.
  • Storing Leftovers: Cover the trifle with plastic wrap and store in the fridge. Consume within 2 days for the best taste and texture.
  • Freezing: We do not recommend freezing this dessert, as the texture of the whipped cream and jelly can change.

Your Trifle Questions Answered: FAQ

Got questions? We’ve got answers! Here are some frequently asked questions about making trifle:

  • Can I use fresh berries instead of frozen? Yes, fresh berries can be used! They will add a lovely texture and flavor.
  • Can I substitute the custard? Absolutely! You can use vanilla pudding or even yogurt for a lighter option.
  • How long can I keep the trifle in the fridge? It’s best enjoyed within 2 days, but it can last up to 3 days in the fridge.
  • What can I use instead of whipped cream? You can substitute with whipped coconut cream or a dairy-free whipped topping.
  • Can I add alcohol? Yes! A splash of liqueur can be added to the berry coulis for an adult twist.
  • How do I prevent the layers from mixing? Allow each layer to set before adding the next to keep them distinct.
  • What type of dish is best for a trifle? A clear glass bowl or trifle dish works best to showcase the beautiful layers.
  • Is this dessert gluten-free? To make it gluten-free, ensure you use gluten-free cake and desserts.

Serving Suggestions for Your Trifle

When it’s time to serve your stunning trifle, consider these tips:

  • Garnish Creatively: Top with fresh mint leaves or edible flowers for an elegant touch.
  • Pair with Coffee: Serve alongside a cup of coffee or tea for a delightful afternoon treat.
  • Classic Pairing: This dessert pairs beautifully with a scoop of vanilla ice cream for extra indulgence.

Conclusion: Your Trifle Adventure Awaits!

Now that you have all the tools and tips to create your very own trifle in a tray, it’s time to get cooking! Remember, cooking is all about joy and exploration—don’t hesitate to make this recipe your own. Enjoy the process, share your creation with loved ones, and celebrate every bite! Happy cooking!

Trifle in a Tray

Prep Time 30 minutes
Cook Time 20 minutes
Total Time 50 minutes
Servings 8 servings
Calories 450
A delicious layered dessert combining berries, jelly, cake, and cream for a delightful treat.

Ingredients

Jelly

  • 170 g Raspberry Jelly (double portion, prepared as per packet)

Fruits

  • 500 g frozen mixed berries
  • 200 g punnet strawberries (stalks removed)

Sweeteners

  • 60 g sugar

Cake and Biscuits

  • 400 g Mini Lamingtons (2 packets (200g each))
  • 360 g store bought chocolate cake

Dairy & Cream

  • 200 g whipped cream
  • 1000 ml custard

Chocolate & Confectionery

  • 30 g Flake bar

Instructions 

  • Prepare the raspberry jelly as per packet instructions and chill overnight.
  • Simmer berries and sugar for 20 minutes to make berry coulis; cool.
  • Chop lamingtons and cake; slice strawberries and whip cream.
  • Layer half of the strawberries around the edge of the dish, then add chopped lamingtons and remaining strawberries.
  • Dollop berry coulis over lamingtons, pour custard, then top with chopped cake and whipped cream. Finish with Flake bar and chill until serving.

Notes

Chill the assembled trifle for at least 2 hours before serving for best results.
Calories: 450kcal
Cost: $15
Course: Dessert
Keyword: trifle

Welcome, fellow food lovers! Get ready to embark on a delightful journey into the world of Maple Apple Dutch Babies. These fluffy pancakes are not only a feast for your eyes but also a warm hug for your taste buds. Perfect for a cozy brunch or a special morning treat, this recipe combines the airy goodness of Dutch babies with the sweet, caramelized flavor of apples and a drizzle of maple syrup. Let’s dive in and create something magical together!

Why You’ll Love This Recipe

This Maple Apple Dutch Baby recipe is packed with irresistible qualities that make it a breakfast favorite for everyone. Here’s why you’ll want to whip it up:

  • Quick and Easy: With just a handful of ingredients and simple steps, you can have a delicious breakfast on the table in under 30 minutes.
  • Fluffy Perfection: The unique baking method ensures a light, airy texture that puffs up beautifully in the oven.
  • Customizable: You can easily adapt this recipe by swapping in your favorite fruits or toppings—think berries, bananas, or even a sprinkle of chocolate!
  • Great for Sharing: Perfect for family breakfasts or brunch gatherings, these Dutch babies are as fun to make as they are to eat.
  • Gourmet Presentation: Serve them straight from the oven for an impressive yet effortless display that will wow your guests.

Essential Ingredients for Maple Apple Dutch Babies

Before we start cooking, let’s gather our ingredients! Here’s what you’ll need:


Cake Decorating Set

★ Recommended Kitchen Tool

Cake Decorating Set

Make this recipe even easier with a quality Cake Decorating Set — a must-have kitchen staple!


🛒 See Deals on Amazon →

As an Amazon Associate, we earn from qualifying purchases.
  • 1/2 cup all-purpose flour: The base for our batter—spooned and leveled for accuracy.
  • 1 Tablespoon cornstarch: Helps create a tender texture.
  • 1/2 cup milk: Room temperature for the best results.
  • 2 large eggs: Also at room temperature to blend smoothly.
  • 1 Tablespoon granulated sugar: Adds a touch of sweetness to the batter.
  • 1 Tablespoon melted butter: For richness and flavor.
  • 1/2 teaspoon vanilla extract: A hint of warmth and sweetness.
  • Pinch of salt: Enhances all the flavors.
  • 1 large apple: Peeled and thinly sliced for that lovely caramelized topping.
  • 2 Tablespoons salted butter: For cooking the apples.
  • 2 Tablespoons light brown sugar: Gives a deep, rich sweetness.
  • 2 Tablespoons maple syrup: The star ingredient that ties everything together.
  • 1/4 teaspoon cinnamon: A warm spice that complements the apples beautifully.
  • Chopped walnuts or pecans: For an added crunch and flavor.
  • Icing sugar: For dusting, adding a touch of sweetness and elegance.

Step-by-Step Instructions

Now that we have our ingredients at the ready, let’s get cooking! Follow these simple steps to create your Maple Apple Dutch Babies:

  1. Preheat the Oven: Preheat your oven to 430°F (non-convection setting). Place 3 crème brûlée ramekins on a baking sheet and set aside—this will help with easy transfer.
  2. Prepare the Batter: In a large bowl, whisk together the flour and cornstarch. In another bowl, combine the milk, eggs, sugar, melted butter, vanilla, and salt. Pour about 1/3 of this mixture into the flour mixture and stir until smooth. Gradually add the remaining egg mixture, whisking until combined. Let the batter rest.
  3. Make the Maple Apples: In a skillet, melt 2 tablespoons of butter over medium heat. Add the sliced apples, brown sugar, maple syrup, and cinnamon. Stir to coat the apples, cooking until softened and syrupy, about 5-7 minutes. Remove from heat.
  4. Prepare the Ramekins: When the oven is preheated, divide 1 1/2 tablespoons of butter between the ramekins. Place them in the oven for about 2 minutes until the butter is melted.
  5. Fill with Batter: Carefully remove the ramekins from the oven and stir the batter again. Immediately pour the batter into the hot ramekins, filling them about 1/3 full.
  6. Bake: Return the baking sheet with the ramekins to the oven. Bake for 12-15 minutes, or until puffed and golden brown.
  7. Warm the Apples: While the Dutch babies bake, return the skillet with the apples to low heat to warm.
  8. Serve: Once baked, remove the Dutch babies from the oven. They will deflate quickly, leaving a lovely cavity in the center. Spoon the warm maple apples into this cavity, dividing them among the ramekins. Top with chopped walnuts or pecans, and dust with icing sugar. Enjoy immediately!

Pro Tips for Perfect Maple Apple Dutch Babies

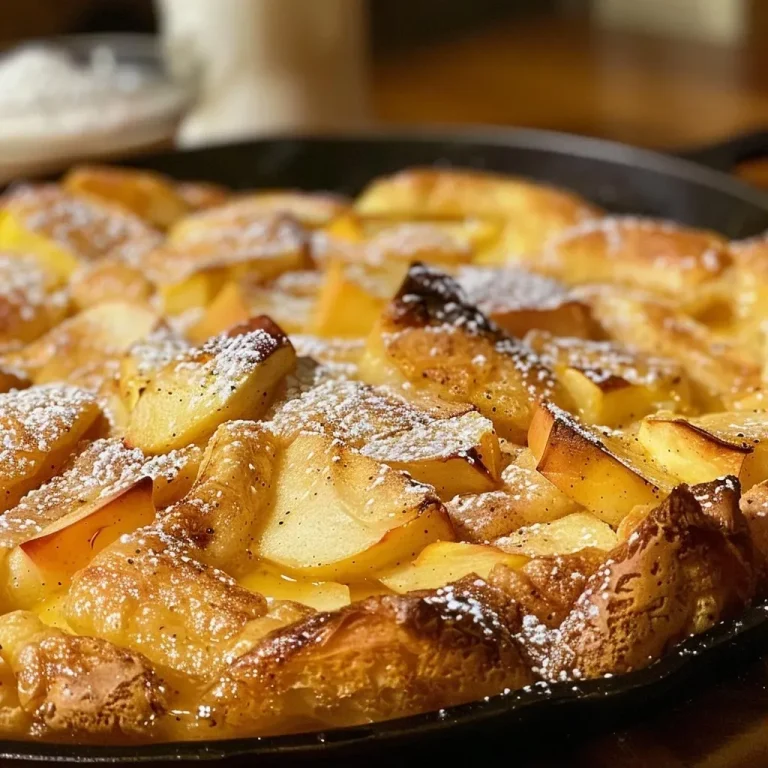
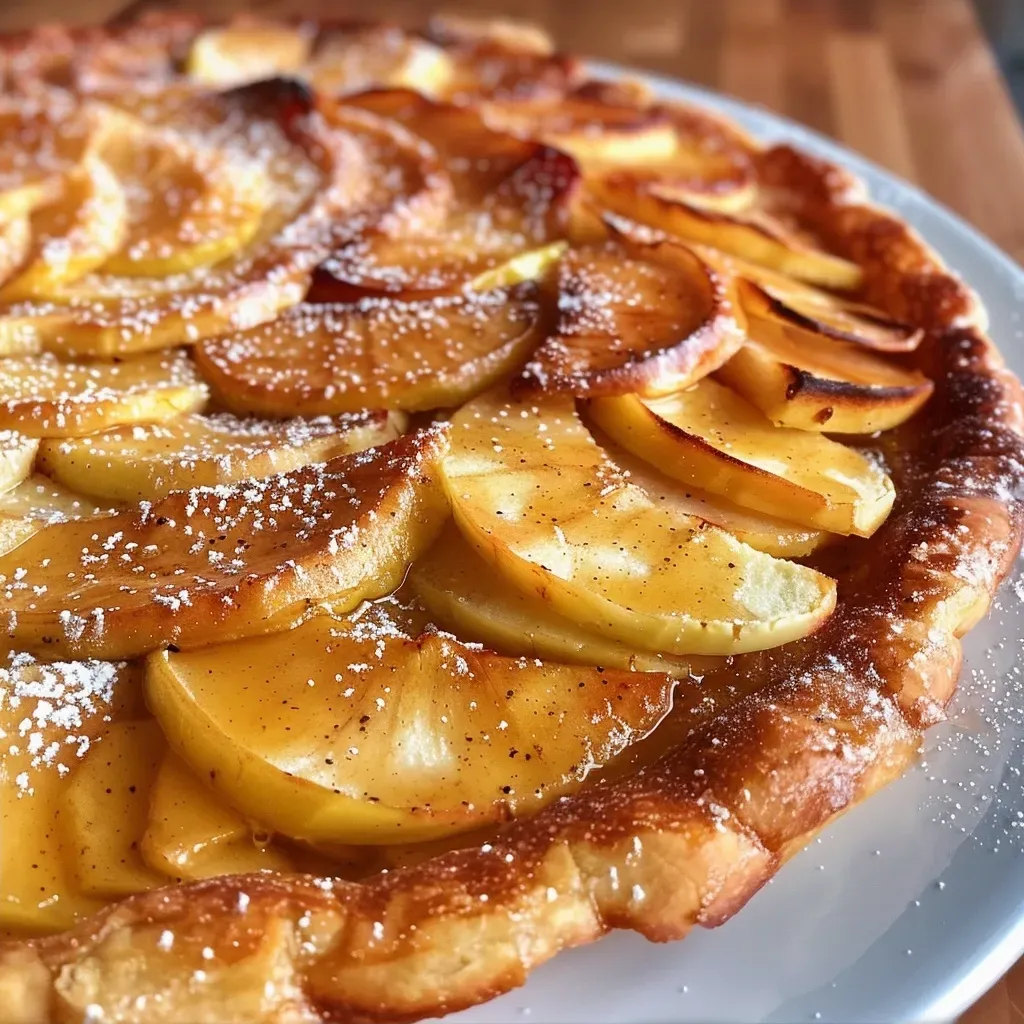
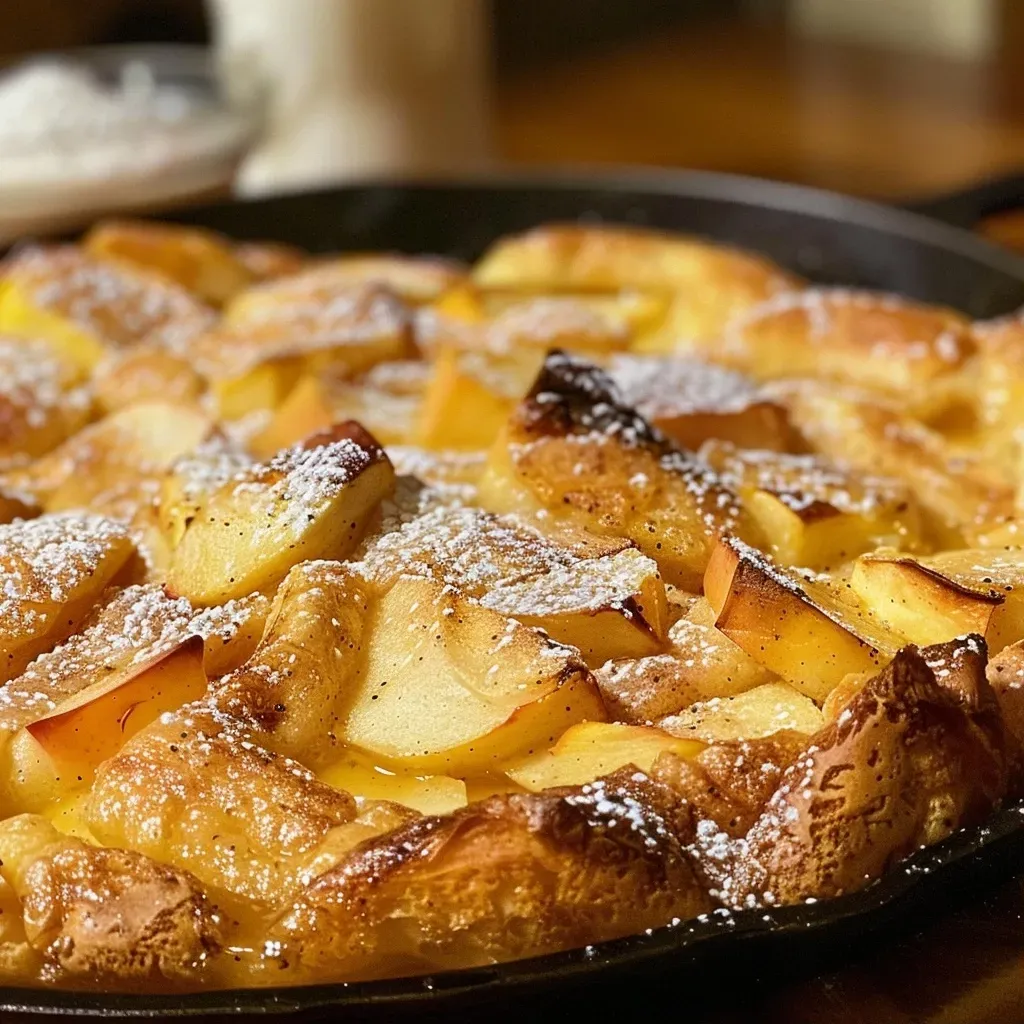
Close-up of a golden Maple Apple Dutch Baby with sliced apples on top.

Let’s make sure your Dutch babies turn out perfectly each time with these expert tips:

  • Room Temperature Ingredients: Using eggs and milk at room temperature helps create a smoother batter and better rise.
  • Hot Ramekins: Preheating the ramekins ensures a quick puff and keeps the Dutch babies from becoming soggy.
  • Don’t Overmix: Mix just until combined to keep the batter light and airy.
  • Watch the Oven: Keep an eye on them as they bake; they can go from perfectly puffed to overcooked quickly!
  • Experiment with Flavors: Feel free to try different fruits and spices; peaches, blueberries, or even a hint of nutmeg can add a delightful twist.
  • Serving Style: These Dutch babies are best served right out of the oven, so plan to gather everyone around the table for immediate enjoyment.
  • Perfect Pairing: Serve with a side of crispy bacon or sausage for a balanced breakfast experience.
  • Presentation: A drizzle of extra maple syrup or a dollop of whipped cream can elevate the dish even further.

Common Mistakes and Troubleshooting

Even the best chefs make mistakes! Here are some common pitfalls and how to avoid them:

  • Dense Dutch Babies: If your Dutch babies turn out heavy, it may be due to overmixing the batter. Mix just until combined!
  • Underbaked Center: Ensure your oven is properly preheated and consider using an oven thermometer to ensure accuracy.
  • Soggy Bottoms: Make sure to use hot ramekins and avoid overfilling them with batter.
  • Flat Appearance: If they don’t puff up as expected, your batter may need more resting time or your oven temperature may be too low.

Delicious Variations to Try

Get creative in the kitchen! Here are some delicious variations you can try:

  • Berry Bliss: Substitute the apples with a mix of fresh berries for a refreshing twist.
  • Cinnamon Sugar Delight: Add a sprinkle of cinnamon sugar on top before baking for an extra sweet crust.
  • Banana Nut: Use sliced bananas and top with crushed walnuts for a different flavor profile.
  • Chocolate Lovers: Add chocolate chips to the batter for a decadent breakfast treat!

Storage and Make-Ahead Instructions

Want to prepare ahead of time? Here’s how to store and reheat your Dutch babies:

  • Make-Ahead: You can prepare the batter the night before and store it in the fridge. Let it come to room temperature before baking.
  • Storing Leftovers: If you have leftovers (though it’s unlikely!), store them in an airtight container in the fridge for up to 2 days.
  • Reheating: Reheat in the oven at 350°F until warmed through—microwaving can make them chewy.

Frequently Asked Questions

Let’s tackle some common questions about this delicious recipe:

  • Can I use gluten-free flour? Yes, gluten-free all-purpose flour can be used as a substitute, but the texture may vary slightly.
  • What type of apples work best? Granny Smith or Honeycrisp apples are fantastic for this recipe, as they hold up well during cooking.
  • Can I make this recipe dairy-free? Absolutely! Substitute the milk with a non-dairy alternative and use dairy-free butter.
  • How do I prevent the Dutch babies from deflating? Serve them immediately after baking for the best puffed effect!
  • What if I don’t have ramekins? You can use a cast iron skillet or a baking dish, but adjust the baking time accordingly.
  • Can I freeze Dutch babies? It’s best to eat them fresh, but you can freeze individual servings—just reheat in the oven.
  • What’s the best way to serve them? Serve warm with a drizzle of maple syrup, a sprinkle of nuts, or a dollop of whipped cream!
  • How can I make them sweeter? Add additional sugar to the batter or serve with a sweetened topping like caramel sauce.

Nutrition Tips and Dietary Adaptations

Keeping your health in mind? Here are some tips:

  • Reduce Sugar: You can cut down on sugar in the batter or use a sugar substitute.
  • Boost Nutrients: Add ground flaxseed or chia seeds to the batter for added fiber and omega-3s.
  • Heart-Healthy Fats: Substitute butter with avocado oil or coconut oil for healthier fats.

Equipment Recommendations

Here’s what you’ll need to make this recipe a success:

  • Mixing Bowls: A set of mixing bowls for combining your ingredients.
  • Whisk: A good whisk will help you mix the batter smoothly.
  • Skillet: A non-stick skillet is essential for making the maple apples.
  • Ramekins: Choose ramekins that can withstand high oven temperatures.
  • Baking Sheet: A sturdy baking sheet will help with easy transport to and from the oven.

Serving Suggestions

To elevate your breakfast experience, consider these serving ideas:

  • Fresh Fruit: Serve alongside seasonal fruit for a refreshing contrast.
  • Yogurt: A dollop of Greek yogurt adds creaminess and protein.
  • Maple Syrup: Always have extra maple syrup available for drizzling!

Now that you’re armed with knowledge and enthusiasm, it’s time to get cooking! I hope you enjoy making and sharing these Maple Apple Dutch Babies as much as I do. Remember, cooking is all about having fun and embracing the joy of creating something delicious. Happy cooking, friend!

Maple Apple Dutch Babies

Prep Time 10 minutes
Cook Time 15 minutes
Total Time 25 minutes
Servings 3 pieces
Calories 350
A delightful breakfast treat featuring fluffy Dutch babies topped with warm maple apples and crunchy nuts.

Ingredients

Dough

  • 1/2 cup all-purpose flour (spooned and leveled)
  • 1 Tablespoon cornstarch
  • 1/2 cup milk (at room temperature)
  • 2 large eggs (at room temperature)
  • 1 Tablespoon white granulated sugar
  • 1 Tablespoon butter (melted)
  • 1/2 teaspoon vanilla extract
  • Pinch salt

Apple topping

  • 1 large apple (peeled and thinly sliced)
  • 2 Tablespoons salted butter
  • 2 Tablespoons light brown sugar
  • 2 Tablespoons maple syrup
  • 1/4 teaspoon cinnamon
  • 1 1/2 Tablespoons butter

Toppings

  • chopped walnuts or pecans nuts (for serving)
  • Icing/confectioners' sugar for dusting

Instructions 

  • Preheat oven to 430°F (220°C). Place ramekins on a baking sheet.
  • Mix flour and cornstarch; whisk together milk, eggs, sugar, melted butter, vanilla, and salt. Combine with dry ingredients and let rest.
  • Cook apple slices with butter, brown sugar, maple syrup, and cinnamon until soft and syrupy.
  • Melt butter in ramekins, pour batter into hot ramekins, and bake for 12-15 minutes until puffed and golden.
  • Warm the apple mixture, then spoon into the Dutch babies. Top with nuts and dust with icing sugar. Serve immediately.

Notes

Serve immediately for best puffiness and flavor.
Calories: 350kcal
Cost: $15
Course: Breakfast
Cuisine: American
Keyword: apple, Dutch Baby, Maple

Welcome to Your Next Baking Adventure!

Are you ready to indulge in a delightful baking experience? These Cozy Cranberry Orange Streusel Muffins are here to brighten up your kitchen and satisfy your taste buds! Bursting with the vibrant flavors of fresh cranberries and zesty orange, these muffins are not just a treat for your palate but also a joy to create. Whether you’re preparing for a cozy breakfast, a festive brunch, or simply satisfying your sweet tooth, this recipe will make your kitchen feel like a warm, welcoming bakery.

Why You’ll Love This Cozy Cranberry Orange Streusel Muffins Recipe

This recipe is more than just a delicious muffin. Here are five compelling reasons to whip up a batch:

  • Flavor Explosion: The combination of sweet oranges and tart cranberries creates a heavenly contrast that will wake up your taste buds.
  • Easy to Make: With simple ingredients and straightforward steps, even beginner bakers will feel confident tackling this recipe.
  • Perfect for Any Occasion: Whether it’s a cozy breakfast, holiday gathering, or afternoon snack, these muffins fit any moment beautifully.
  • Freezer-Friendly: Make a double batch and freeze some for later; you’ll have a delightful treat ready whenever the craving strikes!
  • Customizable: With a few tweaks, you can adapt this recipe to suit different dietary needs or personal preferences.

Ingredients You’ll Need

Gather these ingredients to create your scrumptious muffins:


5-Speed Electric Hand Mixer

★ Recommended Kitchen Tool

5-Speed Electric Hand Mixer

Make this recipe even easier with a quality 5-Speed Electric Hand Mixer — a must-have kitchen staple!


🛒 See Deals on Amazon →

As an Amazon Associate, we earn from qualifying purchases.
  • 2 cups (240g) all-purpose flour: The base for a fluffy muffin.
  • 2 tsp baking powder: Gives the muffins their lovely rise.
  • ½ tsp baking soda: Works with the acidity of the buttermilk for extra fluffiness.
  • ½ tsp salt: Balances the sweetness and enhances flavor.
  • 1 tsp ground cinnamon: Adds warmth and depth to the flavor profile.
  • ¾ cup (150g) granulated sugar: Sweetens the batter perfectly.
  • ½ cup (100g) packed brown sugar: Adds a rich, caramel-like flavor.
  • ½ cup (115g) unsalted butter, melted: Ensures moist muffins.
  • 2 large eggs, room temperature: Helps bind the ingredients together.
  • 1 cup (240ml) buttermilk (or milk + 1 tbsp lemon juice): Contributes moisture and tanginess.
  • 2 tsp fresh orange zest: Infuses the muffins with bright citrus flavor.
  • 1½ cups (150g) fresh cranberries: The star ingredient that provides tartness.
  • 1 tsp vanilla extract: Enhances the overall flavor.

For the Streusel Topping

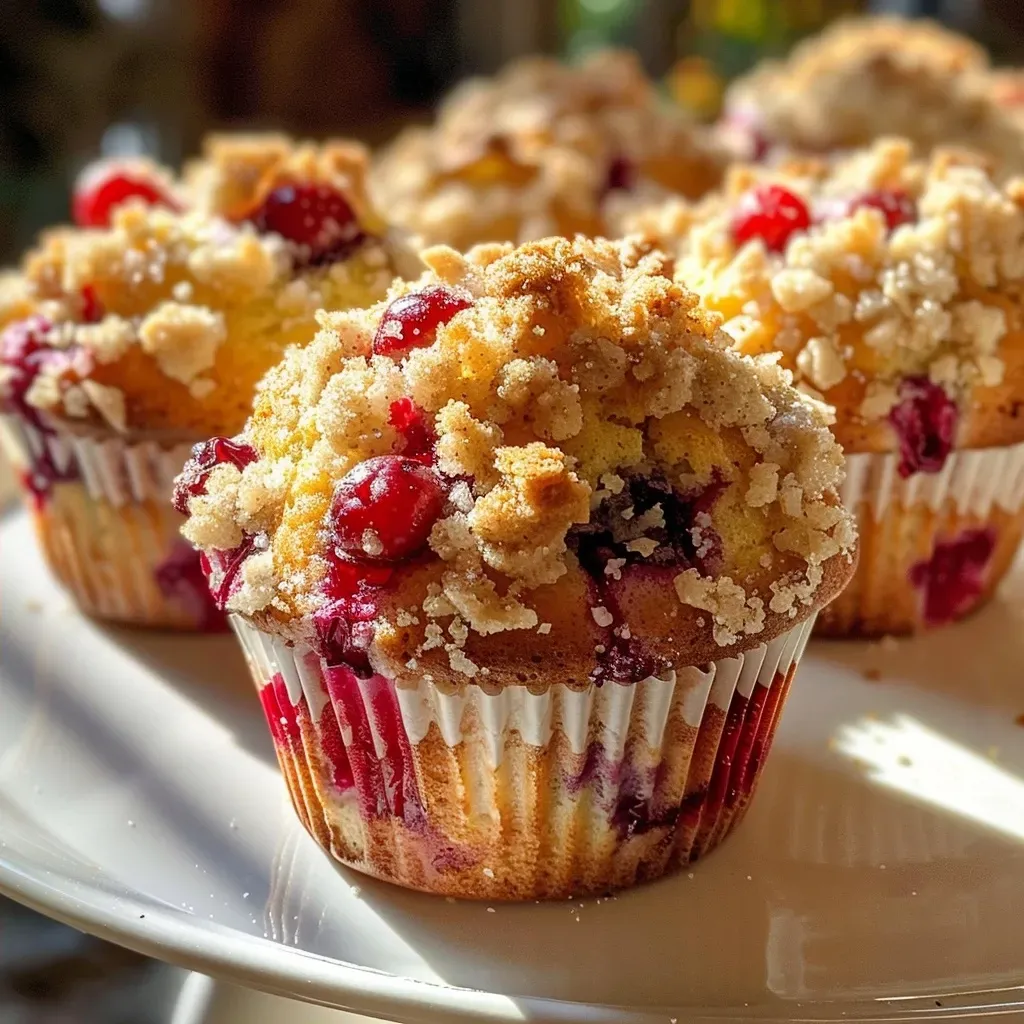
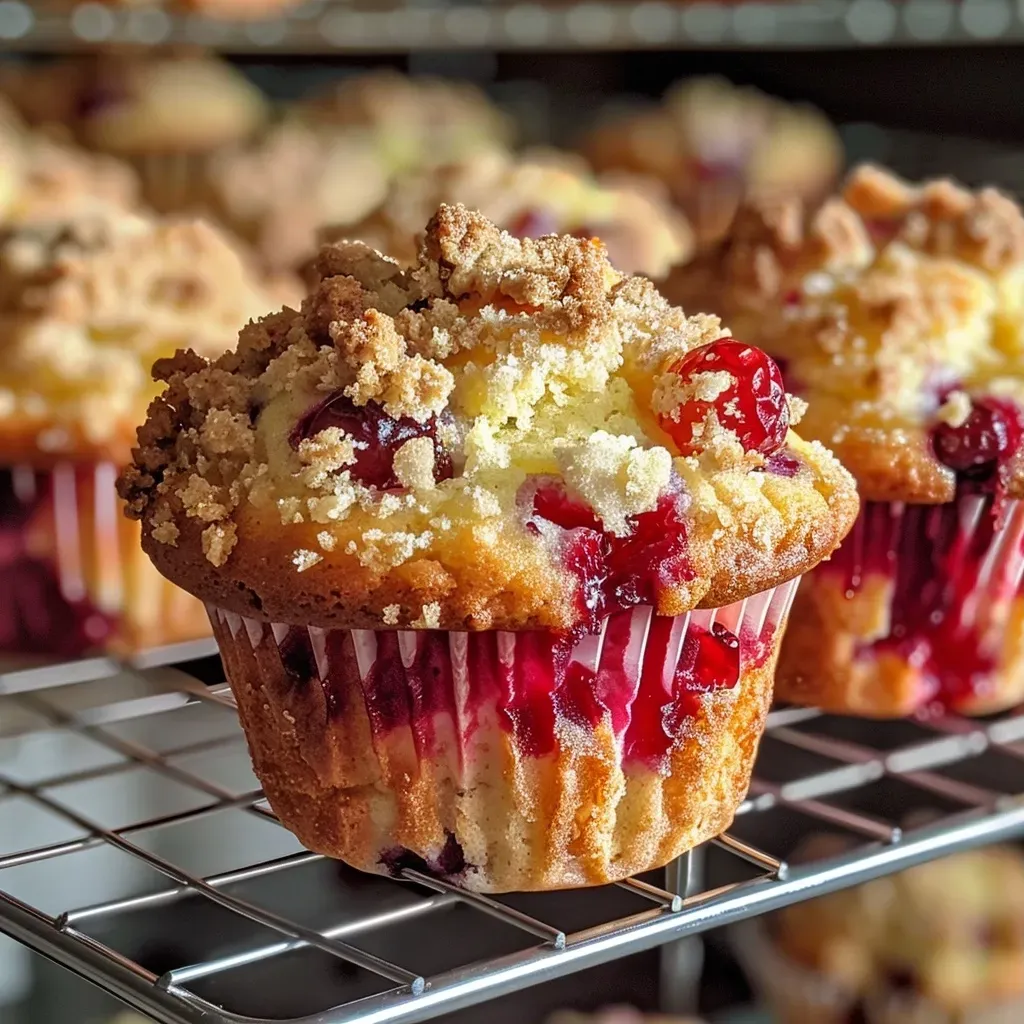
A close-up side view of a cranberry orange streusel muffin with a golden brown topping.

You’ll also need these for the delightful crumbly topping:

  • ½ cup (60g) all-purpose flour: Forms the base of the streusel.
  • ¼ cup (50g) packed brown sugar: Adds sweetness and richness.
  • ½ tsp ground cinnamon: To echo the flavors in the muffin base.
  • ¼ cup (57g) unsalted butter, cold and cubed: Creates that irresistible crumbly texture.

How to Make Cozy Cranberry Orange Streusel Muffins

Let’s get baking! Follow these step-by-step instructions to create your muffins:

  1. Preheat your oven to 375°F (190°C). Line a 12-cup muffin tin with paper liners or lightly grease it.
  2. Make the streusel topping: In a small bowl, combine ½ cup flour, ¼ cup brown sugar, and ½ tsp cinnamon. Add ¼ cup cold, cubed butter and mix with a pastry cutter or your fingers until coarse crumbs form. Chill in the fridge.
  3. Mix dry ingredients: In a large bowl, whisk together 2 cups flour, 2 tsp baking powder, ½ tsp baking soda, ½ tsp salt, and 1 tsp cinnamon.
  4. Combine wet ingredients: In another bowl, whisk ¾ cup granulated sugar, ½ cup melted butter, 2 eggs, 1 cup buttermilk, 1 tsp vanilla extract, and 2 tsp orange zest until smooth and frothy.
  5. Pour wet ingredients into dry ingredients and fold gently with a spatula until just combined; the batter should be thick and slightly lumpy.
  6. Fold in 1½ cups fresh cranberries carefully to avoid crushing them.
  7. Spoon the batter into muffin cups, filling each about ¾ full.
  8. Generously sprinkle the chilled streusel topping over each muffin.
  9. Bake for 20-25 minutes or until a toothpick inserted into the center comes out clean or with a few crumbs; the tops should be golden and slightly crisp.
  10. Let the muffins rest in the pan for 5 minutes, then transfer to a wire rack to cool completely to keep the streusel crunchy.

Pro Tips for Perfect Results

To ensure your muffins turn out perfectly every time, keep these expert tips in mind:

  • Room Temperature Ingredients: Using eggs and buttermilk at room temperature helps create a smoother batter and ensures even baking.
  • Don’t Overmix: Gently fold your batter to avoid dense muffins; a few lumps are okay!
  • Chill Your Butter: For the streusel topping, cold butter is key to achieving the right crumbly texture.
  • Adjust Baking Time: Ovens can vary, so keep an eye on your muffins in the last few minutes of baking.
  • Try Other Fruits: Feel free to substitute cranberries with blueberries or chopped apples for a different flavor twist.
  • Customize Your Toppings: Add nuts or seeds to the streusel for added crunch and nutrition.
  • Make Ahead: Prepare the batter the night before and bake fresh muffins in the morning for a quick breakfast!
  • Store in an Airtight Container: To keep your muffins fresh longer, store them in an airtight container lined with paper towels.

Common Mistakes and Troubleshooting

Even the best bakers encounter hiccups now and then. Here are some common mistakes and how to fix them:

  • Muffins are Dense: This can happen from overmixing the batter. Remember, gentle folds are your best friend!
  • Streusel is Too Wet: If your streusel topping doesn’t hold its shape, you may have added too much butter—adjust accordingly next time.
  • Muffins Domed Too Much: This could result from baking at too high a temperature; ensure your oven is calibrated correctly.
  • Too Sweet: If the muffins are overly sweet for your taste, reduce the sugar in the recipe slightly next time.

Variations to Try

Get creative with these fun variations of the cozy cranberry orange muffins:

  • Nutty Addition: Add chopped walnuts or pecans in the batter for a delightful crunch.
  • Chocolate Lovers: Mix in dark chocolate chips for a decadent twist.
  • Gluten-Free Option: Substitute all-purpose flour with a 1:1 gluten-free baking blend.
  • Vegan Version: Replace eggs with flax eggs and use plant-based milk and butter for a vegan-friendly treat.

Storage and Make-Ahead Instructions

Want to enjoy your muffins later? Here’s how to store them:

  • Room Temperature: Keep muffins in an airtight container at room temperature for up to 3 days.
  • Refrigerate: For longer storage, place muffins in the fridge for up to a week.
  • Freeze: Wrap muffins individually in plastic wrap and place them in a freezer bag for up to 3 months. Thaw at room temperature when ready to enjoy!
  • Make Ahead: You can prepare the batter up to 24 hours in advance and bake fresh muffins in the morning!

Nutrition Tips and Dietary Adaptations

While these muffins are a treat, you can make them even more nourishing:

  • Whole Wheat Flour: Substitute half of the all-purpose flour with whole wheat flour for added fiber.
  • Reduce Sugar: Cut down on the sugar by using applesauce or mashed bananas for natural sweetness.
  • Add Seeds: Incorporate chia or flax seeds into the batter for a boost of omega-3 fatty acids.
  • Less Fat: Use unsweetened applesauce instead of butter to lower the fat content.

Equipment Recommendations

Having the right tools can make your baking experience smoother:

  • Muffin Tin: A non-stick muffin tin ensures easy release of your muffins.
  • Mixing Bowls: Use a large mixing bowl for the batter and a smaller one for the streusel.
  • Whisk: A good whisk is essential for mixing dry and wet ingredients evenly.
  • Spatula: A rubber spatula is perfect for folding the batter gently.

Serving Suggestions

Pair your cozy muffins with delightful accompaniments:

  • Cream Cheese Frosting: A light spread of cream cheese frosting adds a rich flavor.
  • Fresh Fruit: Serve with slices of fresh oranges or a berry medley for a refreshing side.
  • Coffee or Tea: Enjoy these muffins with your favorite warm beverage for a cozy afternoon break.
  • Yogurt: A dollop of Greek yogurt topped with honey complements the muffins beautifully.

FAQs

Let’s tackle some common questions about these cozy muffins:

  • Can I use frozen cranberries? Yes! Just fold them in while still frozen to avoid excess moisture in the batter.
  • How do I know when they are done baking? Insert a toothpick in the center; if it comes out clean or with a few crumbs, they’re ready!
  • What can I substitute for buttermilk? Mix regular milk with a tablespoon of lemon juice or vinegar, let it sit for 5 minutes, and you’ll have a great substitute!
  • Can I make mini muffins? Absolutely! Just adjust the baking time to about 12-15 minutes.
  • How should I store muffins? Keep them in an airtight container at room temperature for 3 days or refrigerate for a week.
  • Can I double the recipe? Of course! Just ensure you have enough muffin tins or bake them in batches.
  • What’s the best way to reheat muffins? Microwave for 10-15 seconds or warm them in the oven at 350°F (175°C) for about 5 minutes.
  • Are these muffins suitable for freezing? Yes! They freeze well for up to 3 months—just wrap them tightly before freezing.

Final Thoughts

Now that you have all the tools and tips to make the best Cozy Cranberry Orange Streusel Muffins, it’s time to get baking! Remember, cooking is all about enjoying the process, so put on your favorite tunes, have fun, and celebrate your delicious creations. Happy baking, and may your kitchen always be filled with love and flavor!

Cozy Cranberry Orange Streusel Muffins

Prep Time 15 minutes
Cook Time 20 minutes
Total Time 35 minutes
Servings 12 muffins
Calories 250
Enjoy these moist and flavorful muffins packed with fresh cranberries and a crunchy streusel topping, perfect for breakfast or a snack.

Ingredients

Main Ingredients

  • 2 cups all-purpose flour
  • 2 tsp baking powder
  • ½ tsp baking soda
  • ½ tsp salt
  • 1 tsp ground cinnamon
  • ¾ cup granulated sugar
  • ½ cup packed brown sugar
  • ½ cup unsalted butter, melted
  • 2 large eggs (room temperature)
  • 1 cup buttermilk (or milk + lemon juice)
  • 2 tsp fresh orange zest
  • 1½ cups fresh cranberries
  • 1 tsp vanilla extract

Streusel Topping

  • ½ cup all-purpose flour
  • ¼ cup packed brown sugar
  • ½ tsp ground cinnamon
  • ¼ cup unsalted butter, cold and cubed

Instructions 

  • Preheat oven to 375°F (190°C). Line a 12-cup muffin tin.
  • Make streusel: Mix flour, brown sugar, cinnamon; cut in cold butter until coarse crumbs. Chill.
  • Whisk dry ingredients. In another bowl, mix wet ingredients until smooth.
  • Combine wet and dry; fold in cranberries. Fill muffin cups ¾ full.
  • Sprinkle streusel on top. Bake 20-25 mins until golden and a toothpick comes out clean.
  • Cool muffins 5 mins in pan, then transfer to wire rack.

Notes

For extra flavor, add a splash of orange juice to the batter.
Calories: 250kcal
Cost: $15
Course: Breakfast
Cuisine: American
Keyword: Cranberry, Muffins, Orange

Welcome to the cozy embrace of fall flavors! If you’re as excited about pumpkin season as I am, you’re in for a treat with these scrumptious pumpkin cheesecake bars. Perfectly spiced and velvety smooth, they bring together the comforting essence of pumpkin pie and the creamy goodness of cheesecake in a delightful bar form. Ready to impress your friends and family? Let’s dive into this joyful baking adventure!

Why You’ll Love This Recipe

Here’s why these pumpkin cheesecake bars will become your go-to fall dessert:

  • Easy to Make: With simple ingredients and straightforward steps, even beginners can whip these up without a hitch.
  • Perfect for Sharing: Cut them into squares and serve at gatherings, potlucks, or family dinners—everyone will want a piece!
  • Rich Flavor Profile: The combination of pumpkin puree and cream cheese creates a rich, creamy texture that melts in your mouth.
  • Customizable: Feel free to explore different crusts or toppings to make this recipe your own.
  • Make-Ahead Friendly: Prep these bars ahead of time and store them for a stress-free dessert option.

Essential Ingredients for Pumpkin Cheesecake Bars

Before we dive into the baking, let’s gather our ingredients. Here’s what you’ll need:


5-Speed Electric Hand Mixer

★ Recommended Kitchen Tool

5-Speed Electric Hand Mixer

Make this recipe even easier with a quality 5-Speed Electric Hand Mixer — a must-have kitchen staple!


🛒 See Deals on Amazon →

As an Amazon Associate, we earn from qualifying purchases.
  • Cooking spray
  • 2 1/4 cups (about 38) crushed gingersnap cookies
  • 1/2 cup (113 g) unsalted butter, melted
  • 2 Tbsp (25 g) granulated sugar
  • 1 tsp pumpkin pie spice
  • 1/2 tsp kosher salt
  • 3 (8-oz. or 680 g total) packages cream cheese, softened
  • 3/4 cup (150 g) granulated sugar
  • 1/2 cup (120 g) sour cream
  • 1 tsp pure vanilla extract
  • 3 large eggs
  • 3/4 cup (170 g) canned pumpkin puree
  • 1 tsp pumpkin pie spice

Got allergies or just want to switch things up? Here are some substitutions:

  • Crust alternatives: Use graham crackers or even Oreos for a different flavor.
  • Dairy-free option: Substitute the cream cheese with a dairy-free cream cheese alternative and use coconut cream instead of sour cream.
  • Sweeteners: Swap granulated sugar for coconut sugar or maple syrup for a healthier option.

Step-by-Step Instructions

Ready to get baking? Follow these steps for pumpkin cheesecake bliss:

  1. Preheat your oven to 350°F (175°C). Line a 13″x9″ baking dish with parchment paper, leaving an overhang. Grease the parchment with cooking spray.
  2. Make the crust: In a food processor, pulse the gingersnap cookies until fine crumbs form. Add melted butter, sugar, spice, and salt. Pulse until combined and press into the prepared dish.
  3. Bake the crust: Bake for 10–12 minutes until golden brown. Let cool slightly. Reduce oven temperature to 325°F (160°C).
  4. Prepare the filling: In a large bowl, beat the softened cream cheese until smooth. Add sugar, sour cream, and vanilla; beat until creamy. Add eggs one at a time, mixing well after each.
  5. Incorporate the pumpkin: Spread pumpkin puree on a plate and blot dry with paper towels. Mix with 3/4 cup of cheesecake batter and 1 tsp pumpkin pie spice until well combined.
  6. Assemble the bars: Pour the plain cheesecake batter over the crust. Dollop the pumpkin mixture on top and swirl with a spoon or fork.
  7. Bake: Bake for 30 minutes or until the center is set but slightly jiggly. Cool for 10 minutes, then refrigerate for at least 1 hour.
  8. Slice and serve: Lift the bars from the pan using the parchment overhang. Slice into squares and enjoy chilled!

Pro Tips for Perfect Pumpkin Cheesecake Bars

Side view of delectable pumpkin cheesecake bars with a crumbly gingersnap crust.

Want to elevate your baking game? Here are some expert insights:

  • Room temperature ingredients: Ensure your cream cheese and eggs are at room temperature for a smoother batter.
  • Don’t overmix: Overmixing can lead to cracks in your cheesecake. Mix just until combined!
  • Cool gradually: Allow the bars to cool in the oven with the door ajar to prevent cracking.
  • Swirl technique: Use a toothpick to swirl the pumpkin mixture into the cream cheese layer for an artistic look.
  • Use high-quality pumpkin puree: Pure pumpkin puree gives you the best flavor—avoid pumpkin pie filling.
  • Chill before serving: For the best texture and flavor, chill your bars for at least an hour before serving.

Common Mistakes and Troubleshooting

Even the best bakers make mistakes! Here’s how to avoid common pitfalls:

  • Cracks in the cheesecake: This can happen if the batter is overmixed or if the cheesecake is baked too quickly. Bake at a lower temperature and avoid overmixing.
  • Too soggy crust: Make sure your crust is baked until golden brown before adding the filling to prevent sogginess.
  • Uneven baking: Rotate your pan halfway through baking to ensure even cooking.

Variations to Try

Feeling adventurous? Here are some fun variations to enhance your pumpkin cheesecake bars:

  • Chocolate Chip Pumpkin Bars: Fold in mini chocolate chips into the cream cheese filling for a sweet surprise.
  • Nutty Crunch: Add chopped pecans or walnuts to the crust for a delightful crunch.
  • Maple Glaze: Drizzle a simple maple glaze over the cooled bars for added sweetness.
  • Spiced Apple Topping: Top with sautéed apples and a sprinkle of cinnamon for a delicious twist.

Storage and Make-Ahead Instructions

These pumpkin cheesecake bars are perfect for making ahead:

  • Storage: Store in an airtight container in the fridge for up to 5 days.
  • Freezing: Freeze the bars for up to 3 months. Just make sure to wrap them tightly in plastic wrap and foil.
  • Make-ahead: Bake them up to a day in advance. Just slice and refrigerate until you’re ready to serve!

Frequently Asked Questions

Let’s tackle some common questions about these delicious bars:

  • Can I use fresh pumpkin instead of canned? Yes! Just make sure to cook and puree it first, then measure it out.
  • What if I don’t have gingersnap cookies? Feel free to use graham cracker crumbs or even vanilla wafers as a substitute.
  • How can I make these gluten-free? Use gluten-free gingersnap cookies or a gluten-free graham cracker alternative.
  • Can I reduce the sugar? You can try reducing the sugar, but it may affect the texture and sweetness of the bars.
  • What spices can I add? Consider adding a pinch of nutmeg or allspice for extra warmth and flavor.
  • How do I know when they are done baking? The edges should be set, but the center will still have a slight jiggle.
  • Can I double the recipe? Absolutely! Just use a larger baking pan and adjust the baking time as needed.
  • What should I serve with these bars? They pair wonderfully with whipped cream or a scoop of vanilla ice cream!

Nutritional Tips and Dietary Adaptations

If you’re mindful of dietary needs, here’s how to adapt this recipe:

  • Low-carb option: Substitute granulated sugar with erythritol or another low-carb sweetener.
  • Vegan option: Use a vegan cream cheese alternative and replace eggs with flax eggs.
  • High-protein twist: Add a scoop of protein powder into the cheesecake batter for an extra protein boost.

Recommended Equipment

Before you start baking, you’ll want to have the following tools on hand:

  • Measuring cups & spoons: Accurate measurements are key to baking success.
  • Food processor: Perfect for crushing cookies and mixing the filling.
  • Baking dish: A 13″x9″ pan is ideal for even baking.
  • Whisk: Essential for mixing the filling until smooth.

Serving Suggestions

Make your serving experience even better:

  • Top with whipped cream: A dollop of whipped cream adds a beautiful finish.
  • Sprinkle with nuts: Chopped pecans or walnuts make for a delightful crunch.
  • Pair with coffee or tea: These bars are perfect with a warm beverage for a cozy snack.

Conclusion

There you have it—your ultimate guide to making pumpkin cheesecake bars that are sure to become a favorite in your home! With their creamy texture and delightful flavors, these bars celebrate the essence of fall in every bite. So gather your ingredients, embrace the joy of baking, and let’s make some memories in the kitchen together. Happy baking!

Pumpkin Cheesecake Bars Recipe

Prep Time 20 minutes
Cook Time 25 minutes
Total Time 45 minutes
Servings 12 bars
Calories 350
Delight in these creamy pumpkin cheesecake bars with a gingersnap crust, perfect for fall gatherings or a cozy treat.

Ingredients

Crust

  • 2 1/4 cups crushed gingersnap cookies
  • 1/2 cup unsalted butter, melted
  • 2 Tbsp granulated sugar
  • 1 tsp pumpkin pie spice
  • 1/2 tsp kosher salt

Filling

  • 3 packages cream cheese, softened
  • 3/4 cup granulated sugar
  • 1/2 cup sour cream
  • 1 tsp pure vanilla extract
  • 3 large eggs
  • 3/4 cup canned pumpkin puree
  • 1 tsp pumpkin pie spice

Instructions 

  • Preheat oven to 350°F (175°C). Line a 13x9-inch baking dish with parchment paper and grease.
  • Pulse gingersnap cookies until fine crumbs. Mix with melted butter, sugar, spice, and salt. Press into dish and bake 10-12 minutes.
  • Beat cream cheese until smooth. Add sugar, sour cream, vanilla, and eggs; mix well. Combine pumpkin with 3/4 cup batter and spice.
  • Pour plain batter into crust. Dollop pumpkin mixture on top and swirl. Bake 30 minutes until set. Cool and refrigerate.

Notes

Chill bars before slicing for best results.
Calories: 350kcal
Cost: $15
Course: Dessert
Cuisine: American
Keyword: pumpkin

Welcome to the World of Apple Dutch Babies!

If you’re on the hunt for a breakfast that feels like a warm hug, look no further than the Apple Dutch Baby. This delightful dish is a fluffy, oven-baked pancake that puffs up beautifully, filled with sweet, caramelized apples and a hint of warm spices. It’s the kind of recipe that makes mornings special and is perfect for family brunches or cozy weekends. And the best part? It’s incredibly easy to make! Let’s dive into the fun and delicious world of the Apple Dutch Baby, and I promise you’ll be smiling as you whip it up in your kitchen.

Why You’ll Love This Recipe

This Apple Dutch Baby recipe isn’t just a treat for your taste buds; it comes with a slew of benefits that will make it a staple in your breakfast repertoire. Here are just a few reasons to get excited:

  • Effortless preparation: With just a few simple ingredients and minimal prep, this dish can be made in under 30 minutes.
  • Impressive presentation: The puffed pancake looks stunning when it comes out of the oven, making it perfect for entertaining guests.
  • Customizable flavors: You can easily swap out apples for your favorite fruits or change the spices to suit your taste.
  • Family-friendly: Kids love the sweet flavor and fluffy texture, making it a hit with the whole family.
  • Healthy options available: With simple substitutions, you can make this recipe gluten-free or dairy-free without sacrificing flavor.

Ingredients Breakdown

Before we get cooking, let’s take a closer look at the ingredients you’ll need to make this decadent Apple Dutch Baby. Each component plays a crucial role in creating that perfect puff and sweet flavor.


Digital Kitchen Scale

★ Recommended Kitchen Tool

Digital Kitchen Scale

Make this recipe even easier with a quality Digital Kitchen Scale — a must-have kitchen staple!


🛒 See Deals on Amazon →

As an Amazon Associate, we earn from qualifying purchases.
  • Butter: 3 tablespoons of butter (divided). This helps in creating a rich flavor while also ensuring your pancake doesn’t stick to the skillet.
  • Apples: 2-3 apples sliced thinly (I love using Gala apples for their sweetness and texture). Feel free to mix varieties for added flavor!
  • Brown Sugar: ¼ cup to caramelize the apples and add depth to the sweetness.
  • Cinnamon: 1 ½ teaspoons for that warm, comforting flavor. Optional: add ¼ teaspoon of nutmeg for a little extra warmth.
  • Granulated Sugar: ¼ cup to sweeten the batter just right.
  • Vanilla Extract: 1 teaspoon to enhance the overall flavor.
  • Eggs: 3 large eggs are essential for achieving that fluffy texture.
  • All-Purpose Flour: ½ cup for the base of the batter. You can substitute with a gluten-free blend if needed.
  • Milk: ½ cup (dairy-free alternatives work well too!).
  • Salt: ½ teaspoon to balance the sweetness.
  • Powdered Sugar: For dusting on top before serving, adding a lovely touch of sweetness.

Step-by-Step Instructions

Close-up of a golden-brown Apple Dutch Baby topped with powdered sugar and sliced apples.

Now, let’s bring everything together and create this delicious Apple Dutch Baby!

  • Preheat your oven to 350 degrees F (175 degrees C).
  • In a blender, combine the sugar, vanilla, eggs, flour, milk, and salt. Blend until smooth and set aside.
  • In a large, oven-safe skillet, melt 1 tablespoon of butter over medium heat. Add the apple slices, brown sugar, cinnamon, and nutmeg. Stir to combine and sauté for about 5 minutes until the apples soften slightly.
  • Remove the apple mixture from the skillet and set aside. Do not wipe out the skillet, as we want those tasty bits to flavor the pancake!
  • Add the remaining 2 tablespoons of butter to the skillet and place it in the oven until melted (about 2-4 minutes).
  • Once melted, quickly arrange the sautéed apples in the skillet (you can dump them in or arrange them in a circle for a beautiful presentation!).
  • Pour the batter over the apples and return the skillet to the oven. Bake for 20-25 minutes until puffed and golden brown.
  • Dust lightly with powdered sugar, slice, and enjoy!

Pro Tips for Perfection

To ensure your Apple Dutch Baby turns out perfectly, here are some expert insights:

  • Use a cast iron skillet: It retains heat evenly, ensuring a perfect puff and golden color.
  • Keep an eye on the oven: Every oven is different, so check for that golden brown color around the edges to know when it’s done.
  • Let it cool slightly: This helps the Dutch Baby set up a bit, making it easier to slice and serve.
  • Experiment with toppings: Try serving it with whipped cream, maple syrup, or fresh berries for added flavor.
  • Make ahead: You can prepare the batter the night before and store it in the fridge for a quick breakfast the next day.
  • Don’t skip the dusting: A light sprinkle of powdered sugar adds a lovely finishing touch.
  • Go for variety: Mix up the apples with pears, berries, or whatever fruit you have on hand!
  • Serve immediately: This recipe is best enjoyed fresh out of the oven while it’s still puffed and warm.

Common Mistakes and Troubleshooting

Even the best cooks make mistakes! Here are some common pitfalls to avoid:

  • Overmixing the batter: This can lead to a dense pancake. Blend just until combined!
  • Skipping the preheating: Ensure your skillet is hot enough before adding the batter to help it puff up.
  • Not using enough butter: Butter is key for both flavor and preventing sticking, so don’t skimp!
  • Opening the oven door frequently: This can cause the pancake to deflate. Keep the door shut until it’s done baking.

Variations to Try

Bored of the classic Apple Dutch Baby? Here are some delicious variations to keep things exciting:

  • Banana Dutch Baby: Substitute apples for ripe bananas and add a splash of rum for a tropical twist.
  • Berry Medley: Use a mix of fresh berries like blueberries, raspberries, and strawberries for a burst of color and flavor.
  • Peach Dutch Baby: Swap apples for sliced peaches, and add a sprinkle of cardamom for a unique flavor.
  • Chocolate Chip Apple Dutch Baby: Fold in some chocolate chips for an indulgent treat that will satisfy your sweet tooth.

Storage and Make-Ahead Instructions

This Apple Dutch Baby is best enjoyed fresh but can be stored if you have leftovers:

  • Refrigerate: Store in an airtight container for up to 2 days. Reheat in the oven for best results.
  • Make-ahead options: Pre-chop your apples and prepare the batter the night before. Keep them in the fridge until you’re ready to bake!

Frequently Asked Questions

Got questions? Here are some common queries about the Apple Dutch Baby:

  • Can I use frozen apples?: Yes! Just thaw and drain any excess moisture before using.
  • What type of skillet is best?: A cast iron skillet is ideal, but any oven-safe skillet will work.
  • Can I make this dairy-free?: Absolutely! Substitute milk with almond, soy, or oat milk and use dairy-free butter.
  • How do I know when it’s done?: Look for a puffed, golden-brown appearance around the edges.
  • Can I double the recipe?: Yes! Just make sure your skillet is large enough to accommodate the doubled batter.
  • What can I serve with it?: Serve with whipped cream, fresh fruit, or maple syrup for a delightful breakfast.
  • Can I reheat leftovers?: Yes! Reheat in the oven for about 10 minutes at 350°F until warmed through.
  • Is it safe to freeze?: While it’s best fresh, you can freeze individual slices wrapped tightly in plastic wrap.

Nutritional Tips and Dietary Adaptations

This recipe can be adapted to suit various dietary needs:

  • For gluten-free: Use a gluten-free flour blend.
  • For paleo: Substitute flour with almond flour and use coconut milk.
  • For reduced sugar: Cut down the sugar in the batter and use ripe fruit for natural sweetness.

Equipment Recommendations

To get the best results from your Apple Dutch Baby, here’s what you’ll need:

  • Cast Iron Skillet: Ideal for even heat distribution and achieving that perfect puff.
  • Blender: For a smooth batter that combines all the ingredients effortlessly.
  • Spatula: To help you carefully lift out and serve your Dutch Baby.

Serving Suggestions

When it comes time to serve, consider these delicious accompaniments:

  • Whipped Cream: A light and airy topping that pairs beautifully with the sweetness of the apples.
  • Maple Syrup: Drizzle on top for a classic breakfast treat.
  • Fresh Fruits: Garnish with seasonal fruit for added color and flavor.
  • Yogurt: A dollop of Greek yogurt can add a creamy element and a boost of protein.

Conclusion

There you have it! Your ultimate guide to making a fluffy and delicious Apple Dutch Baby. Whether you’re looking to impress guests or simply treat yourself to a cozy breakfast, this recipe is sure to bring joy to your kitchen. So grab your ingredients, preheat that oven, and let’s make some magic happen! Remember, cooking is all about enjoying the process and celebrating the little victories. Happy cooking, my friend!

Apple Dutch Baby

Prep Time 10 minutes
Cook Time 25 minutes
Total Time 35 minutes
Servings 4 servings
Calories 250
A delicious and fluffy baked apple pancake that’s perfect for breakfast or dessert. Easy to make and visually impressive!

Ingredients

Butter

  • 3 tablespoons butter (divided)

Apples

  • 2-3 apples sliced apples (thinly sliced, e.g., gala)

Sugar

  • ¼ cup brown sugar
  • ¼ cup sugar

Spices

  • 1 ½ teaspoons cinnamon
  • ¼ tsp nutmeg (optional)

Vanilla

  • 1 tsp vanilla extract

Eggs

  • 3 eggs eggs

Flour

  • 1/2 cup all-purpose flour

Milk

  • 1/2 cup milk (dairy free as desired)

Salt

  • ½ teaspoon salt

Powdered Sugar

  • for dusting powdered sugar (for dusting)

Instructions 

  • Preheat oven to 350°F (175°C).
  • Blend sugar, vanilla, eggs, flour, milk, and salt until smooth.
  • Melt 1 tbsp butter in oven-safe skillet, sauté apples with brown sugar, cinnamon, and nutmeg for 5 minutes. Remove apples and set aside.
  • Add remaining 2 tbsp butter to skillet, melt in oven for 2-4 minutes.
  • Arrange apples in skillet, pour batter over, and bake for 20-25 minutes until puffed and browned. Dust with powdered sugar before serving.

Notes

Serve warm with a dusting of powdered sugar or a drizzle of syrup for extra sweetness.
Calories: 250kcal
Cost: $12
Course: Breakfast
Cuisine: American
Keyword: apple

Unleashing the Magic of Apple Butter Snickerdoodles

Welcome to the delightful world of Apple Butter Snickerdoodles! If you’re looking for a cozy and comforting treat that perfectly blends the rich flavors of apple butter with the beloved classic snickerdoodle cookie, you’ve hit the jackpot! This recipe will fill your kitchen with warmth and smiles, making it the perfect addition to your baking repertoire. Whether you’re a seasoned baker or just dipping your toes into the cookie-making waters, I’m here to guide you through every step with joy and enthusiasm. Let’s get baking!

Why You’ll Love This Recipe

  • Unique Flavor Combination: The mix of warm spices and sweet apple butter creates a comforting flavor profile that’s perfect for fall or any time of year.
  • Soft and Chewy Texture: With this recipe, you can expect cookies that are crispy on the edges but remain wonderfully soft and chewy in the center.
  • Easy to Make: Even if you haven’t tried baking cookies before, this step-by-step guide will make it easy to whip up a batch of these delicious treats.
  • Perfect for Sharing: These cookies are great for gatherings, potlucks, or just to share with family and friends—everyone will be glad you made them!
  • Versatile Treat: Enjoy them as they are, or add a delightful glaze for an extra touch of sweetness!

Ingredient Breakdown for Apple Butter Snickerdoodles

Let’s dive into the ingredients needed for this delightful recipe:

  • All-Purpose Flour: This forms the base of your cookies. You can substitute with a gluten-free blend if needed!
  • Cake Flour: Adds tenderness to the cookies. If you don’t have it, you can use all-purpose flour but the texture may vary slightly.
  • Cream of Tartar: Essential for that classic snickerdoodle tang and chewy texture; don’t skip it!
  • Cinnamon & Nutmeg: These warm spices enhance the fall flavors in your cookies.
  • Cold Unsalted Butter: Cold butter helps create a nice texture. Make sure it’s cut into cubes for easier mixing!
  • Dark Brown Sugar: This adds moisture and a deeper flavor compared to regular sugar.
  • Apple Butter: The star of the show! You can use store-bought or homemade.
  • Egg Yolk: This enriches the dough, making your cookies tender.
  • Vanilla Extract: A splash of vanilla enhances the overall flavor.
  • Granulated Sugar: For rolling the cookies, giving them that classic sugary crust.
  • Powdered Sugar: For the glaze, adding sweetness and a beautiful finish.
  • Milk: Just a splash to thin out the glaze if needed.
  • Pinch of Salt: Balances the sweetness and enhances all the flavors.

Step-by-Step Directions

Close-up view of a golden-brown Apple Butter Snickerdoodle with a sprinkling of cinnamon sugar on top.

Ready to bring the magic to life? Follow these simple steps:


Professional Chef Knife Set

★ Recommended Kitchen Tool

Professional Chef Knife Set

Make this recipe even easier with a quality Professional Chef Knife Set — a must-have kitchen staple!


🛒 Check Price on Amazon →

As an Amazon Associate, we earn from qualifying purchases.
  1. Line two baking sheets with parchment paper or silicone mats and set aside.
  2. In a large bowl, whisk together the all-purpose flour, cake flour, cream of tartar, cinnamon, salt, baking soda, baking powder, and nutmeg. Set this aside.
  3. In a stand mixer fitted with a paddle attachment, cream together the cold butter and dark brown sugar for about 3-4 minutes, starting on low speed and gradually increasing to medium.
  4. Add in the apple butter and mix until combined.
  5. Incorporate the egg yolk and vanilla extract until fully combined.
  6. Gradually add the dry ingredients to the wet mixture, mixing until just incorporated—be careful not to over-mix!
  7. Using a 2-tablespoon cookie scoop, drop the dough onto a plate or baking sheet. Make sure there’s enough room in the fridge if you’re using a baking sheet. Chill the dough for 30 minutes to 1 hour, or up to overnight.
  8. Mix the granulated sugar and cinnamon in a small dish.
  9. Preheat your oven to 350°F (175°C). Roll the chilled cookie dough balls in the cinnamon sugar mixture, ensuring all sides are coated, then place them on the prepared baking sheets.
  10. Bake for 10-11 minutes. The cookies will be soft and puffy at first, so let them cool on the pan for 10 minutes before transferring to a cooling rack.
  11. While the cookies cool, prepare the glaze by whisking together melted butter, powdered sugar, apple butter, vanilla extract, a pinch of salt, and milk until smooth. Adjust the milk for your desired consistency.
  12. Drizzle the glaze over the cooled cookies and sprinkle any leftover cinnamon sugar on top if desired. Enjoy!

Expert Pro Tips for Baking Success

  • Chill the Dough: Chilling is essential for preventing the cookies from spreading too much during baking. It also enhances the flavors!
  • Don’t Skip the Cream of Tartar: This ingredient is key for that classic snickerdoodle taste and texture—trust me!
  • Mixing Techniques: Start slow when mixing in the butter and sugar to prevent splattering, then gradually increase speed.
  • Use a Cookie Scoop: This ensures uniform cookie sizes, which helps them bake evenly.
  • Watch the Baking Time: Ovens can vary, so keep an eye on your cookies. They should be soft but not undercooked.
  • Allow Cooling Time: Let them cool on the baking sheet for a bit to firm up before transferring to a wire rack.
  • Experiment with Spices: Feel free to adjust the spices to suit your taste. A dash of ginger can add a lovely kick!
  • Make it Gluten-Free: Substitute with gluten-free flour for a delightful twist that everyone can enjoy.

Common Mistakes and Troubleshooting

Even the best bakers face challenges; here are some common mistakes to avoid:

  • Overmixing the Dough: This can lead to tough cookies. Mix until just incorporated!
  • Incorrect Oven Temperature: Always preheat your oven to ensure even baking.
  • Not Chilling the Dough: If you skip this step, your cookies may spread too much and lose their shape.
  • Skipping the Glaze: While optional, the glaze adds a delightful sweetness that complements the cookies beautifully!

Delicious Variations to Try

Make this recipe your own with these fun variations:

  • Maple Glazed: Substitute the apple butter with maple butter for a unique twist.
  • Chocolate Chip Addition: Fold in chocolate chips for an indulgent treat.
  • Walnut or Pecan Pieces: Add chopped nuts for a delightful crunch.
  • Frosted Version: Top with cream cheese frosting for an extra sweet layer!

Storage and Make-Ahead Instructions

Want to save some cookies for later? Here’s how:

  • Room Temperature: Store baked cookies in an airtight container at room temperature for up to 5 days.
  • Refrigeration: If you want them to last longer, you can refrigerate for up to a week.
  • Freezing Dough: You can freeze the scooped dough balls for up to 3 months. When ready to bake, simply add a couple of extra minutes to the baking time.
  • Freezing Baked Cookies: Freeze baked cookies in an airtight container with parchment paper between layers for up to 3 months, then thaw at room temperature.

Frequently Asked Questions

Got questions? I’ve got answers!

  • Can I use homemade apple butter? Absolutely! Homemade apple butter will enhance the flavor even more.
  • What if I don’t have cake flour? You can substitute it with all-purpose flour, but the texture may be slightly different.
  • Can I make these cookies gluten-free? Yes, use a 1:1 gluten-free flour blend for a delicious alternative!
  • How do I store leftover cookies? Keep them in an airtight container at room temperature for up to 5 days.
  • Can I freeze the cookie dough? Yes! Freeze scooped cookie dough balls and bake them fresh whenever you crave cookies.
  • What’s the best way to know when my cookies are done? They should be puffed and just set at the edges, but still soft in the center.
  • Can I skip the glaze? Sure! The cookies are delicious on their own, but the glaze adds a lovely finish.
  • How can I make these cookies dairy-free? Substitute the butter with a dairy-free alternative like coconut oil or vegan butter.

Nutritional Tips and Dietary Adaptations

If you’re looking for healthier baking options, consider these tips:

  • Sugar Alternatives: Use coconut sugar or a sugar substitute to reduce calories.
  • Whole Grain Flour: Swap some all-purpose flour for whole wheat flour for added nutritional benefits.
  • Add Fiber: Incorporate oats or flaxseed meal for extra fiber.

Essential Equipment Recommendations

Here’s what you’ll need to whip up these delightful cookies:

  • Stand Mixer: Makes creaming the butter and sugar a breeze!
  • Cookie Scoop: Perfect for uniform cookie sizes.
  • Parchment Paper or Silicone Mats: Ensures easy cleanup and prevents sticking.
  • Baking Sheets: A good quality baking sheet will make all the difference in even baking.

Serving Suggestions

Looking for the perfect way to enjoy your cookies? Try these ideas:

  • With a Glass of Milk: The classic pairing that never disappoints!
  • As Dessert Sandwiches: Spread a little more apple butter between two cookies for a delicious treat.
  • Pair with Tea or Coffee: Enjoy them with your favorite warm beverage for a cozy afternoon snack.
  • On a Dessert Platter: These cookies are perfect for sharing at gatherings or parties!

Now you’re all set to create a batch of Apple Butter Snickerdoodles that will leave everyone wanting more! Don’t hesitate to experiment and make this recipe your own—cooking is all about joy and creativity. Happy baking, and let me know how your cookies turn out!

Apple Butter Snickerdoodles

Prep Time 20 minutes
Cook Time 12 minutes
Total Time 32 minutes
Servings 24 cookies
Calories 150
Delight in these soft, cinnamon-spiced cookies with a rich apple butter glaze, perfect for cozy gatherings or a sweet treat.

Ingredients

Dough

  • 2 cups all purpose flour
  • 2/3 cup cake flour
  • 1 1/2 tsp. cream of tartar
  • 1 1/2 tsp. cinnamon
  • 1 tsp. salt
  • 1 tsp. baking soda
  • 1/2 tsp. baking powder
  • 1/2 tsp. nutmeg
  • 12 Tbsp. unsalted butter, cold, cubed
  • 1 1/4 cup dark brown sugar, packed
  • 1/3 cup apple butter (store-bought)
  • 1 large egg yolk
  • 2 tsp. vanilla extract
  • 2 Tbsp. sugar
  • 1 tsp. cinnamon
  • 2 Tbsp. unsalted butter, melted
  • 1 cup powdered sugar
  • 2 Tbsp. apple butter
  • 1/2 tsp. vanilla extract
  • pinch salt
  • splash milk to thin out glaze

Instructions 

  • Mix dry ingredients; set aside.
  • Cream butter and sugar, add apple butter, egg yolk, vanilla; combine.
  • Gradually add dry ingredients; chill dough for 30-60 minutes.
  • Form dough balls, coat in cinnamon sugar, and bake at 350°F for 10-11 minutes.
  • Make glaze with melted butter, powdered sugar, apple butter, vanilla, and milk; drizzle over cooled cookies.

Notes

Chill the dough well for best results and enjoy the rich cinnamon-apple flavor.
Calories: 150kcal
Cost: $15
Course: Dessert
Cuisine: American
Keyword: apple, cookie