Author

Ava

Browsing

Are you ready to indulge in a deliciously creamy treat that not only satisfies your sweet tooth but also fuels your body? I know I am! Today, I’m excited to share my favorite recipe for a Chocolate Mint Protein Shake. This delightful shake is not only quick to whip up in just 5 minutes, but it’s also packed with protein to help you stay energized throughout your busy day. Plus, it’s a fantastic way to sneak in some nutrition while enjoying a dessert-like drink. If you’re looking for easy pasta recipes or quick family dinners, this shake is the perfect complement to your meal planning!

Why You’ll Love This Recipe

  • Quick and easy to make in just 5 minutes.
  • High in protein, perfect for post-workout recovery.
  • Deliciously creamy with a refreshing minty flavor.
  • Great for satisfying sweet cravings without the guilt.
  • Versatile – can be enjoyed as a breakfast, snack, or dessert!

Ingredients

To make this delightful Chocolate Mint Protein Shake, you’ll need the following ingredients:

  • 1 cup unsweetened almond milk (or your favorite milk)
  • 1 scoop chocolate protein powder
  • 1 tablespoon unsweetened cocoa powder
  • 1/2 teaspoon peppermint extract
  • 1 banana (frozen for extra creaminess)
  • 1 tablespoon honey or maple syrup (optional, for sweetness)
  • Ice cubes (optional, for a thicker shake)

Full ingredient list with measurements is provided in the printable recipe card below.

How to Make the Recipe

Making this Chocolate Mint Protein Shake is as easy as 1-2-3! Here’s how:

  1. In a blender, combine the almond milk, chocolate protein powder, cocoa powder, peppermint extract, frozen banana, and honey or maple syrup if using.
  2. Add a handful of ice cubes if you prefer a thicker shake.
  3. Blend on high until smooth and creamy, about 30 seconds.
  4. Taste and adjust sweetness if necessary, then pour into a glass and enjoy!

Pro Tips for Making the Recipe

Here are some of my favorite tips to ensure your shake turns out perfectly every time:

  • Use a high-quality protein powder for the best flavor and texture.
  • For a richer taste, try adding a tablespoon of nut butter.
  • If you’re not a fan of mint, feel free to skip the peppermint extract and enjoy a classic chocolate shake.
  • Experiment with different types of milk, like coconut or oat milk, for a unique twist.
  • Make it a meal by adding a scoop of oats or chia seeds for extra fiber.

How to Serve

This shake is perfect on its own, but you can elevate it even further! Here are some serving suggestions:

  • Top with whipped cream and a sprinkle of cocoa powder for a dessert-like treat.
  • Garnish with fresh mint leaves for a beautiful presentation.
  • Pair it with creamy garlic pasta for a delightful weeknight dinner idea.
  • Serve it in a mason jar for a fun, on-the-go option!

Make Ahead and Storage

If you want to prepare this shake ahead of time, here are some tips:

  • You can pre-measure the dry ingredients and store them in an airtight container for quick access.
  • Blend the shake and store it in the refrigerator for up to 24 hours. Just give it a good shake before drinking!
  • For longer storage, you can freeze the blended shake in ice cube trays and blend again when you’re ready to enjoy.

Now that you have this delightful Chocolate Mint Protein Shake recipe in your arsenal, you can enjoy a nutritious treat that fits perfectly into your busy lifestyle. Whether you’re looking for 30-minute meals or just a quick snack, this shake is sure to please. So, grab your blender and let’s get shaking!
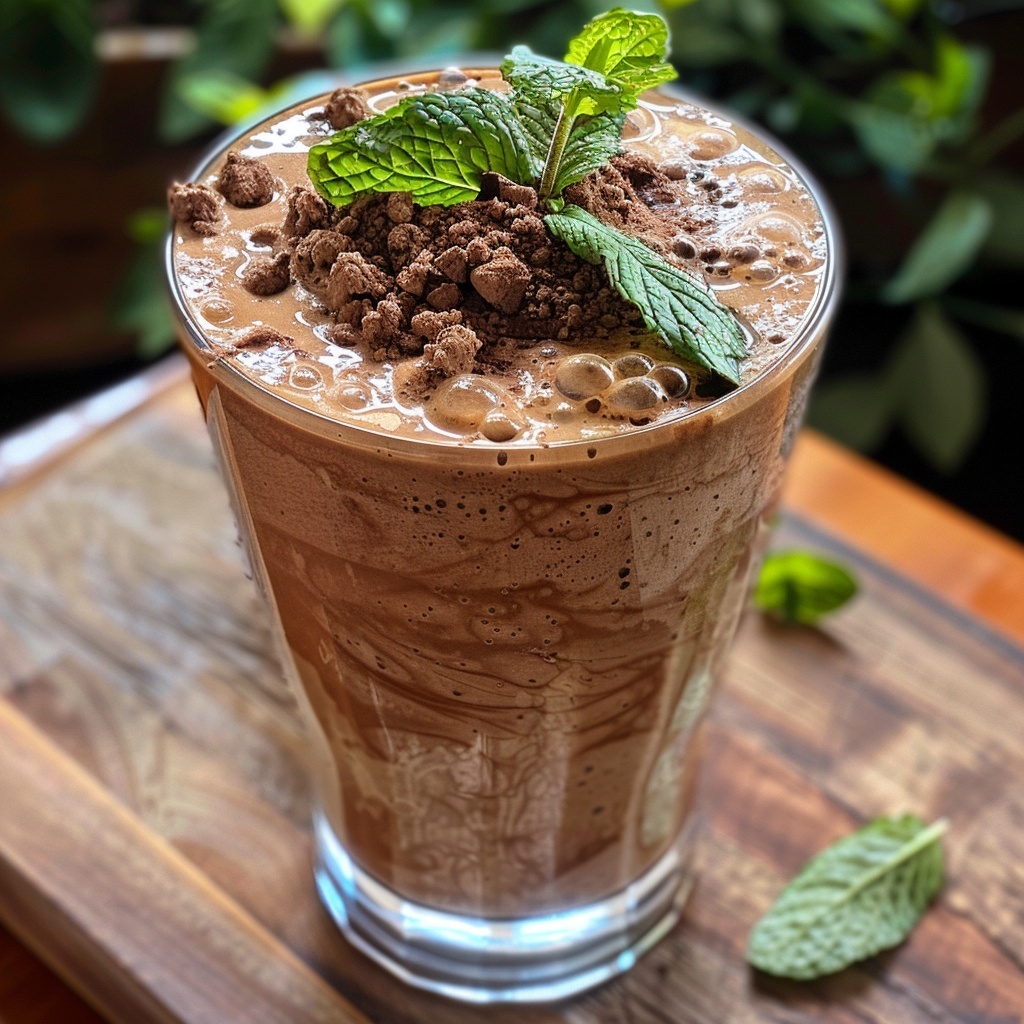
Chocolate Mint Protein Shake

Prep Time 5 minutes
Total Time 5 minutes
Servings 1 shake
Calories 250
A delicious and nutritious shake combining chocolate and mint flavors, perfect for a post-workout boost or a tasty snack.

Ingredients

Liquid

  • 6 ounces Milk Substitute (or Milk)
  • ½ teaspoon Peppermint Extract
  • ½ cup Cottage Cheese (Fat Free)
  • 2 tablespoons Cocoa Powder
  • 1 serving Instant Pudding (Chocolate or Chocolate Fudge Sugar Free Fat Free)
  • 1 scoop Protein Powder (Chocolate)
  • 1 cup Ice

Instructions 

  • Blend everything together

Notes

You can adjust the sweetness by adding a sugar substitute if desired.
Calories: 250kcal
Cost: $8
Course: Beverage
Keyword: chocolate, Mint, Protein

Are you ready to elevate your breakfast game? I know I am! Today, I’m excited to share my recipe for Gingerbread Protein Pancakes. These pancakes are not only delicious but also packed with protein, making them a perfect start to your day. Plus, they’re a fantastic way to enjoy the warm, cozy flavors of gingerbread without the guilt. If you’re looking for a nutritious twist on your morning routine, you’ve come to the right place!

Why You’ll Love This Recipe

  • Quick and easy to make, perfect for busy mornings.
  • High in protein, keeping you full and satisfied.
  • Delicious gingerbread flavor that’s perfect for the holidays or any time of year.
  • Great for meal prep, so you can enjoy them throughout the week.
  • Can be served with a variety of toppings for a fun breakfast experience.

Ingredients

To whip up these delightful pancakes, you’ll need the following ingredients:

  • 1 cup rolled oats
  • 1 scoop vanilla protein powder
  • 1 teaspoon ground ginger
  • 1 teaspoon ground cinnamon
  • 1/2 teaspoon baking powder
  • 1/4 teaspoon salt
  • 1 cup almond milk (or any milk of your choice)
  • 1 tablespoon maple syrup
  • 1/2 teaspoon vanilla extract
  • Optional: chopped nuts or chocolate chips for added flavor

Full ingredient list with measurements is provided in the printable recipe card below.

How to Make the Recipe

Making these Gingerbread Protein Pancakes is a breeze! Just follow these simple steps:

  1. In a blender, combine the rolled oats, protein powder, ginger, cinnamon, baking powder, and salt. Blend until you have a fine flour consistency.
  2. Add the almond milk, maple syrup, and vanilla extract to the blender. Blend again until everything is well combined and smooth.
  3. Heat a non-stick skillet over medium heat. Lightly grease it with cooking spray or a little oil.
  4. Pour about 1/4 cup of the batter onto the skillet for each pancake. Cook for 2-3 minutes until bubbles form on the surface, then flip and cook for another 2 minutes until golden brown.
  5. Repeat with the remaining batter, adjusting the heat as necessary to prevent burning.

Pro Tips for Making the Recipe

Here are some of my favorite tips to ensure your pancakes turn out perfectly:

  • For a fluffier pancake, let the batter sit for a few minutes before cooking.
  • Experiment with different protein powders to find your favorite flavor combination.
  • If you prefer a sweeter pancake, add a bit more maple syrup or a touch of brown sugar to the batter.
  • Don’t overcrowd the skillet; cook in batches to ensure even cooking.
  • For a fun twist, try adding in some chopped nuts or chocolate chips to the batter!

How to Serve

These pancakes are incredibly versatile! Here are some serving suggestions:

  • Top with fresh fruit like bananas, berries, or apples for a burst of flavor.
  • Drizzle with extra maple syrup or honey for added sweetness.
  • Add a dollop of Greek yogurt or whipped cream for a creamy texture.
  • Sprinkle with nuts or seeds for a delightful crunch.
  • Pair with a side of scrambled eggs or turkey bacon for a complete breakfast.

Make Ahead and Storage

If you’re like me and love to meal prep, you’ll be thrilled to know that these pancakes can be made ahead of time! Here’s how:

  • Cook the pancakes and let them cool completely.
  • Store them in an airtight container in the refrigerator for up to 5 days.
  • For longer storage, freeze the pancakes in a single layer on a baking sheet, then transfer them to a freezer bag. They’ll keep for up to 3 months!
  • To reheat, simply pop them in the toaster or microwave until warmed through.

Now that you have this delicious recipe in your arsenal, you can enjoy a nutritious breakfast that’s quick and easy to make. Whether you’re looking for quick family dinners or just a delightful way to start your day, these Gingerbread Protein Pancakes are sure to please! And if you’re ever in the mood for something savory, don’t forget to check out my favorite easy pasta recipes for those busy weeknights. Happy cooking!

Gingerbread Protein Pancakes

Prep Time 5 minutes
Cook Time 10 minutes
Total Time 15 minutes
Servings 2 pancakes
Calories 250
Enjoy these flavorful and nutritious gingerbread protein pancakes perfect for a healthy breakfast.

Ingredients

Dry Ingredients

  • 0.75 cup Rolled Oats
  • 0.5 cup Cottage Cheese (Fat Free)
  • 0.25 teaspoon Butter Extract
  • 1 teaspoon Vanilla Extract
  • 1 large Whole Egg
  • 2 large Egg Whites
  • 0.25 teaspoon Ground Ginger
  • 0.5 teaspoon Ground Cinnamon
  • 1 teaspoon Light Brown Sugar
  • 0.5 tablespoon Molasses
  • 1 scoop Protein Powder (Vanilla)
  • 0.25 teaspoon Salt
  • 1 teaspoon Baking Powder

Instructions 

  • Combine all ingredients in a blender or food processor.
  • Blend until smooth.
  • Heat a non-stick pan over medium heat and coat with cooking spray.
  • Pour batter and cook each side for 2-3 minutes.

Notes

For best results, use a high-quality protein powder.
Calories: 250kcal
Cost: $10
Course: Breakfast
Cuisine: American
Keyword: Pancakes

Are you ready to indulge in a delicious dessert that’s not only quick to make but also packed with protein? I know I am! Today, I’m excited to share my recipe for Microwave Protein Carrot Cake. This delightful treat is perfect for those busy weeknights when you want something sweet but don’t have the time to whip up a full cake. Plus, it’s a fantastic way to sneak in some veggies! If you’re like me and love easy pasta recipes for quick family dinners, you’ll appreciate how this cake can fit into your busy schedule.

Why You’ll Love This Recipe

  • Quick and easy to prepare in just minutes.
  • High in protein, making it a healthier dessert option.
  • Perfect for satisfying sweet cravings without the guilt.
  • Great for meal prep or a last-minute treat.
  • Can be customized with your favorite add-ins!

Ingredients

To make this scrumptious Microwave Protein Carrot Cake, you’ll need the following simple ingredients:

  • 1 medium carrot, grated
  • 1 scoop of your favorite protein powder
  • 1/4 cup of almond flour
  • 1/4 teaspoon baking powder
  • 1/4 teaspoon cinnamon
  • 1 tablespoon honey or maple syrup
  • 1 egg
  • 2 tablespoons unsweetened applesauce
  • Optional: chopped nuts or raisins for added texture

Full ingredient list with measurements is provided in the printable recipe card below.

How to Make the Recipe

Making this Microwave Protein Carrot Cake is as easy as pie (or should I say cake?). Here’s how you do it:

  1. In a microwave-safe bowl, combine the grated carrot, protein powder, almond flour, baking powder, and cinnamon. Mix well.
  2. Add in the honey (or maple syrup), egg, and applesauce. Stir until everything is well combined.
  3. If you’re using nuts or raisins, fold them into the batter now.
  4. Microwave the mixture on high for about 1-2 minutes, or until the cake has risen and is set in the middle. Keep an eye on it to avoid overflow!
  5. Let it cool for a minute before enjoying your delicious creation.

Pro Tips for Making the Recipe

Here are some of my favorite tips to ensure your Microwave Protein Carrot Cake turns out perfectly every time:

  • Use a fine grater for the carrot to ensure it blends well into the batter.
  • Experiment with different protein powders to find your favorite flavor combination.
  • If you prefer a sweeter cake, feel free to add a bit more honey or maple syrup.
  • For a fun twist, try adding a pinch of nutmeg or a splash of vanilla extract.
  • Don’t forget to check your microwave’s wattage; cooking times may vary!

How to Serve

This Microwave Protein Carrot Cake is delightful on its own, but you can elevate it even further! Here are some serving suggestions:

  • Top with a dollop of Greek yogurt for added creaminess.
  • Drizzle with a bit of honey or maple syrup for extra sweetness.
  • Sprinkle with chopped nuts or seeds for a crunchy texture.
  • Pair it with a cup of tea or coffee for a cozy afternoon treat.

Make Ahead and Storage

If you’re planning ahead, this cake can be made in advance! Here’s how to store it:

  • Store any leftovers in an airtight container in the fridge for up to 3 days.
  • Reheat in the microwave for about 15-20 seconds before serving.
  • You can also prepare the dry ingredients in advance and store them in a jar for a quick mix-and-microwave dessert later!

Now that you know how to make this delightful Microwave Protein Carrot Cake, you can enjoy a sweet treat without the fuss. It’s perfect for those busy weeknights when you need a quick dessert after a hearty meal, like one of my favorite 30-minute meals or creamy garlic pasta dishes. So, what are you waiting for? Grab your ingredients and let’s get baking!

Microwave Protein Carrot Cake

Prep Time 10 minutes
Cook Time 2 minutes
Total Time 12 minutes
Servings 2 pieces
Calories 250
A quick and healthy microwave carrot cake packed with protein and flavor, perfect for a nutritious snack or dessert.

Ingredients

Base Ingredients

  • 2 ounces Milk Substitute (or Milk)
  • 1.5 scoops Protein Powder (Vanilla)
  • 3 tablespoons Coconut Flour
  • 0.5 teaspoon Ground Cinnamon
  • 0.25 teaspoon Pumpkin Pie Spice
  • 4.5 tablespoons Liquid Egg Whites (or 1 ½ Large Egg Whites)
  • 1 teaspoon Light Brown Sugar
  • 1 tablespoon Sweetener
  • 4.5 ounces Carrots
  • 0.5 teaspoon Baking Powder
  • 2.65 ounces Greek Yogurt (Fat Free Vanilla)
  • 4 tablespoons Cream Cheese (Fat Free)
  • 1 tablespoon Sweetener

Instructions 

  • Combine all ingredients except carrots in a blender or food processor.
  • Blend until smooth, then add carrots and pulse until shredded but not fully mixed.
  • Divide batter into two microwave-safe dishes coated with non-stick spray.
  • Microwave each for 30 seconds, stir, then microwave for an additional 60-90 seconds until cooked.
  • Prepare frosting by mixing all frosting ingredients until smooth.
  • Top the carrot cakes with frosting and serve.

Notes

This recipe is quick to prepare and perfect for a protein-packed treat.
Calories: 250kcal
Cost: $8
Course: Dessert
Cuisine: American
Keyword: carrot, Microwave, Protein

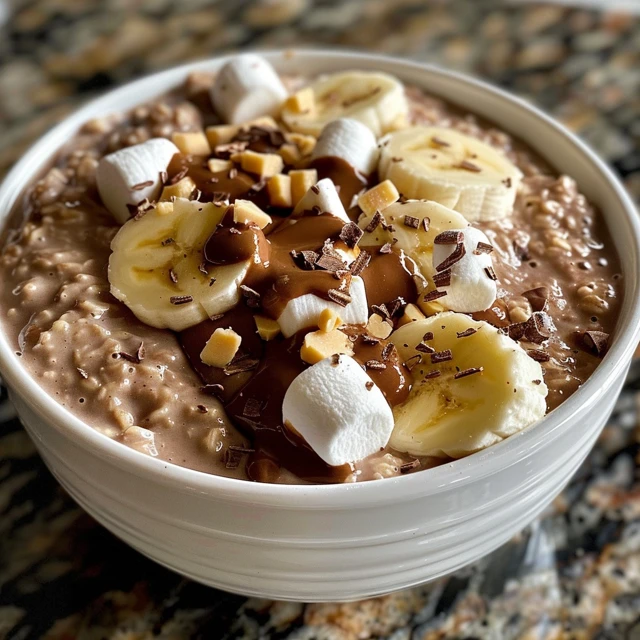
Are you ready to start your day with a warm hug in a bowl? I know I am! Today, I’m excited to share my favorite breakfast recipe: Hot Chocolate Protein Oatmeal. This delightful dish is not only delicious but also packed with protein to keep you energized throughout the morning. Plus, it’s a fantastic way to enjoy a cozy breakfast that feels indulgent without the guilt. If you’re looking for easy pasta recipes or quick family dinners, you’ll love how simple this oatmeal is to whip up!

Why You’ll Love This Recipe

  • Rich chocolate flavor that satisfies your sweet tooth.
  • High in protein to keep you full and energized.
  • Quick and easy to prepare, perfect for busy mornings.
  • Customizable with your favorite toppings.
  • Great for meal prep, making it a smart choice for 30-minute meals.

Ingredients

To make this scrumptious Hot Chocolate Protein Oatmeal, you’ll need the following ingredients:

  • 1 cup rolled oats
  • 2 cups milk (or a non-dairy alternative)
  • 2 tablespoons cocoa powder
  • 1 scoop chocolate protein powder
  • 1 tablespoon maple syrup (or honey)
  • 1/2 teaspoon vanilla extract
  • Pinch of salt
  • Toppings: mini marshmallows, whipped cream, or fresh berries

Full ingredient list with measurements is provided in the printable recipe card below.

How to Make the Recipe

Making Hot Chocolate Protein Oatmeal is as easy as 1-2-3! Here’s how:

  1. In a medium saucepan, combine the rolled oats, milk, cocoa powder, and a pinch of salt. Stir well to combine.
  2. Bring the mixture to a gentle boil over medium heat, then reduce the heat to low and let it simmer for about 5 minutes, stirring occasionally.
  3. Once the oats are cooked and creamy, remove the saucepan from the heat. Stir in the chocolate protein powder, maple syrup, and vanilla extract until well combined.
  4. Serve immediately in bowls and top with your favorite toppings like mini marshmallows or a dollop of whipped cream!

Pro Tips for Making the Recipe

Here are some of my favorite tips to ensure your Hot Chocolate Protein Oatmeal turns out perfectly every time:

  • For a creamier texture, use whole milk or a rich non-dairy milk like coconut milk.
  • Feel free to adjust the sweetness by adding more or less maple syrup based on your taste.
  • If you want to make this a weeknight dinner idea, double the recipe and enjoy leftovers the next day!
  • Experiment with different toppings like sliced bananas, nuts, or even a sprinkle of cinnamon for added flavor.

How to Serve

This Hot Chocolate Protein Oatmeal is perfect for breakfast, but it can also be a delightful dessert! Here are some serving suggestions:

  • Top with a generous amount of mini marshmallows and a drizzle of chocolate syrup for a decadent treat.
  • Pair it with a side of fresh fruit for a balanced meal.
  • Serve it in a cozy mug for a comforting breakfast on the go.

Make Ahead and Storage

If you’re like me and love to meal prep, you’ll be thrilled to know that this oatmeal can be made ahead of time! Here’s how:

  • Prepare the oatmeal as directed, then let it cool completely.
  • Store it in an airtight container in the refrigerator for up to 3 days.
  • To reheat, simply add a splash of milk and microwave until warm, stirring to combine.

Now you have a delicious and nutritious breakfast ready to go! Whether you’re enjoying it on a busy weekday morning or as a cozy weekend treat, this Hot Chocolate Protein Oatmeal is sure to become a favorite in your household. And if you’re ever in the mood for something savory, don’t forget to check out my collection of creamy garlic pasta and other easy pasta recipes for quick family dinners!

Hot Chocolate Protein Oatmeal

Prep Time 2 minutes
Cook Time 2 minutes
Total Time 4 minutes
Servings 1 serving
Calories 350
A delicious and nutritious breakfast combining the richness of hot chocolate with hearty oats and protein for a satisfying start to your day.

Ingredients

Base

  • 0.5 cup Rolled Oats
  • 4 ounces Milk Substitute (or Milk)
  • 2 ounces Water
  • 1 scoop Protein Powder (Chocolate)
  • 1 tablespoon Peanut Butter (Chocolate)
  • 1 tablespoon Cocoa Powder
  • 1 pack Hot Cocoa Mix (Diet)
  • 2 tablespoons Marshmallow Fluff

Instructions 

  • Combine your Milk, Rolled Oats, and Water into a microwavable safe bowl
  • Microwave your oatmeal for around 2 minutes
  • Add in the rest of your ingredients while your oatmeal is hot
  • Mix everything together

Notes

Adjust the sweetness by adding more or less cocoa or marshmallows to taste.
Calories: 350kcal
Cost: $4
Course: Breakfast
Keyword: chocolate, Oatmeal, Protein

As the leaves begin to change and the air turns crisp, I find myself craving all things pumpkin! If you’re like me and love a nutritious dessert that satisfies your sweet tooth, then you’re in for a treat. Today, I’m excited to share my recipe for Pumpkin Protein Custard. This delightful custard is not only creamy and delicious but also packed with protein, making it a perfect choice for a healthy snack or dessert. Plus, it’s a fantastic way to incorporate pumpkin into your diet, especially during the fall season. And if you’re looking for easy pasta recipes to pair with your custard, I’ve got you covered with some quick family dinners that will make your weeknight meals a breeze!

Why You’ll Love This Recipe

  • Rich in protein to keep you feeling full and satisfied.
  • Simple ingredients that you probably already have in your pantry.
  • Quick to prepare, making it a great option for busy weeknights.
  • Versatile enough to enjoy as a breakfast, snack, or dessert.
  • Perfect for meal prep—make a batch and enjoy throughout the week!

Ingredients

To whip up this delicious Pumpkin Protein Custard, you’ll need the following ingredients:

  • 1 cup canned pumpkin puree
  • 1 cup unsweetened almond milk (or any milk of your choice)
  • 1/2 cup vanilla protein powder
  • 1/4 cup maple syrup (or honey)
  • 1 teaspoon pumpkin pie spice
  • 1/2 teaspoon vanilla extract
  • Pinch of salt

Full ingredient list with measurements is provided in the printable recipe card below.

How to Make the Recipe

Making this Pumpkin Protein Custard is a breeze! Follow these simple steps:

  1. In a medium mixing bowl, combine the canned pumpkin puree, almond milk, vanilla protein powder, maple syrup, pumpkin pie spice, vanilla extract, and a pinch of salt.
  2. Whisk the mixture until smooth and creamy, ensuring there are no lumps from the protein powder.
  3. Pour the custard mixture into individual serving cups or a large bowl.
  4. Cover and refrigerate for at least 2 hours, or until set. The longer it sits, the thicker it will become!
  5. Once set, serve chilled and enjoy your delicious, protein-packed treat!

Pro Tips for Making the Recipe

Here are some of my favorite tips to ensure your Pumpkin Protein Custard turns out perfectly:

  • For a creamier texture, blend the ingredients in a blender instead of whisking by hand.
  • Feel free to adjust the sweetness by adding more or less maple syrup according to your taste.
  • If you want to add a little crunch, top your custard with some granola or chopped nuts before serving.
  • Experiment with different spices! A dash of cinnamon or nutmeg can add a lovely twist.

How to Serve

This Pumpkin Protein Custard is incredibly versatile! Here are some serving suggestions:

  • Enjoy it as a healthy breakfast option topped with fresh fruit.
  • Serve it as a dessert after a hearty meal, perhaps alongside some creamy garlic pasta for a delightful contrast.
  • Pair it with a cup of coffee or tea for a cozy afternoon snack.
  • Use it as a filling for a pumpkin parfait layered with yogurt and granola.

Make Ahead and Storage

This custard is perfect for meal prep! Here’s how to store it:

  • Store the custard in airtight containers in the refrigerator for up to 5 days.
  • If you want to make it ahead of time, you can prepare it up to 3 days in advance.
  • For longer storage, consider freezing the custard in freezer-safe containers. Just thaw in the refrigerator before serving.

Now that you have this delightful recipe in your arsenal, you can enjoy a healthy treat that’s not only delicious but also packed with protein! Whether you’re looking for 30-minute meals or just a quick snack, this Pumpkin Protein Custard is sure to please. So, gather your ingredients, and let’s get cooking! And don’t forget to check out my other weeknight dinner ideas for more inspiration!

Pumpkin Protein Custard

Prep Time 10 minutes
Cook Time 55 minutes
Total Time 1 hour 5 minutes
Servings 4 servings
Calories 250
A creamy, protein-packed pumpkin custard perfect for a healthy dessert or snack.

Ingredients

Eggs

  • 3 Large Whole Eggs

Dairy

  • ¾ Cup Greek Yogurt (Your Choice Flavor)
  • 15 Ounces Pumpkin Puree

Flavorings

  • 2 Teaspoons Vanilla Extract
  • 3 Tablespoons Syrup (Sugar Free)
  • 2 Teaspoons Pumpkin Pie Spice

Protein Powder

  • 2 Scoops Protein Powder (Your Choice Flavor)
  • ¼ Teaspoon Salt

Sweetener (Optional)

  • 1-2 Tablespoons Sweetener (*Optional)

Instructions 

  • Add all ingredients into a large bowl and mix until smooth.
  • Coat baking dish with cooking spray if not non-stick.
  • Pour mixture into dish(es) and bake at 350°F (176°C) for 50-55 minutes.
  • Let cool and refrigerate to fully chill.

Notes

Use your favorite flavor of protein powder and yogurt for variety.
Calories: 250kcal
Cost: $15
Course: Dessert
Cuisine: American
Keyword: pumpkin

Are you ready to indulge in a deliciously sweet treat that’s also packed with protein? I know I am! Today, I’m excited to share my favorite recipe for a Nutella Protein Mug Cake. This delightful dessert is not only quick to whip up but also satisfies those sweet cravings without the guilt. Plus, it’s perfect for busy weeknights when you want something sweet but don’t have the time to bake a full cake. And let’s be honest, who doesn’t love a good mug cake? It’s like a warm hug in a cup! So, let’s dive into this easy pasta recipes-inspired treat that will have you smiling with every bite.

Why You’ll Love This Recipe

  • Quick and easy to make in just 5 minutes!
  • High in protein, making it a healthier dessert option.
  • Perfect for satisfying your sweet tooth without the guilt.
  • Customizable with your favorite toppings.
  • Great for a quick family dinner dessert or a late-night snack.

Ingredients

To make this Nutella Protein Mug Cake, you’ll need just a few simple ingredients that you probably already have in your pantry. Here’s what you’ll need:

  • 1 scoop of chocolate protein powder
  • 2 tablespoons of almond flour
  • 1 tablespoon of cocoa powder
  • 1/4 teaspoon of baking powder
  • 1 tablespoon of Nutella
  • 1/4 cup of milk (dairy or non-dairy)
  • 1/2 teaspoon of vanilla extract
  • Optional: a pinch of salt

Full ingredient list with measurements is provided in the printable recipe card below.

How to Make the Recipe

Making this Nutella Protein Mug Cake is as easy as 1-2-3! Here’s how to do it:

  1. In a microwave-safe mug, combine the chocolate protein powder, almond flour, cocoa powder, baking powder, and a pinch of salt (if using). Mix well.
  2. Add the Nutella, milk, and vanilla extract to the dry ingredients. Stir until you have a smooth batter.
  3. Microwave the mug for about 1 minute and 30 seconds, or until the cake has risen and is set in the middle. Keep an eye on it to prevent overflow!
  4. Let it cool for a minute before digging in. You can top it with a dollop of Greek yogurt or a drizzle of extra Nutella if you like!
  5. Enjoy your delicious Nutella Protein Mug Cake!

Pro Tips for Making the Recipe

Here are some helpful suggestions to ensure your mug cake turns out perfectly every time:

  • Make sure to use a large enough mug to prevent overflow while microwaving.
  • Experiment with different protein powder flavors for a unique twist!
  • If you prefer a sweeter cake, feel free to add a little honey or maple syrup to the batter.
  • For a fun texture, mix in some chocolate chips or nuts before microwaving.
  • Don’t forget to adjust the cooking time based on your microwave’s wattage.

How to Serve

This Nutella Protein Mug Cake is perfect on its own, but if you want to elevate it even further, here are some serving suggestions:

  • Top with fresh berries for a burst of flavor.
  • Add a scoop of your favorite ice cream for a decadent treat.
  • Drizzle with caramel sauce for an extra sweet touch.
  • Pair it with a cup of coffee or tea for a delightful afternoon snack.

Make Ahead and Storage

While this mug cake is best enjoyed fresh, you can prepare the dry ingredients in advance and store them in an airtight container. When you’re ready to enjoy, just add the wet ingredients and microwave! If you have leftovers (which is rare!), you can store them in the fridge for up to a day. Just reheat in the microwave for a few seconds before enjoying again.

So there you have it! A quick and easy Nutella Protein Mug Cake that’s perfect for satisfying your sweet cravings while still being mindful of your health. Whether you’re looking for a sweet treat after a busy day of preparing quick family dinners or just need a little pick-me-up, this mug cake is sure to hit the spot. And if you’re in the mood for more delicious 30-minute meals or weeknight dinner ideas, don’t forget to check out my collection of easy pasta recipes like creamy garlic pasta that are sure to please the whole family. Happy baking!

Nutella Protein Mug Cake

Prep Time 2 minutes
Cook Time 2 minutes
Total Time 4 minutes
Servings 1 serving
Calories 250
A quick and delicious high-protein mug cake perfect for satisfying sweet cravings in minutes.

Ingredients

Base

  • 2 tablespoons Nutella
  • 1 teaspoon Vanilla Extract
  • 2.65 ounces Greek Yogurt (Fat Free Vanilla)
  • 3 tablespoons Coconut Flour (or Oat Flour)
  • 4.5 tablespoons Liquid Egg Whites (or 1 ½ Large Egg Whites)
  • ¼ teaspoon Baking Powder
  • â…› teaspoon Salt
  • 1 scoop Protein Powder (Chocolate)
  • 2 tablespoons Cocoa Powder (10g)

Instructions 

  • Coat a mug with non-stick spray and add all ingredients.
  • Mix until smooth.
  • Microwave for 30 seconds.
  • Mix again and microwave for 90 seconds.

Notes

Use a microwave-safe mug and adjust cooking time as needed.
Calories: 250kcal
Cost: $4
Course: Dessert
Cuisine: American
Keyword: mug cake, Nutella, Protein

As the leaves begin to change and the air turns crisp, I find myself craving all things pumpkin! If you’re like me and love a nutritious dessert that satisfies your sweet tooth, then you’re in for a treat. Today, I’m excited to share my recipe for Easy Protein Pumpkin Crisp. This delightful dish is not only packed with flavor but also loaded with protein, making it a perfect addition to your fall menu. Plus, it’s a fantastic way to enjoy a healthy dessert that the whole family will love. And if you’re looking for easy pasta recipes to complement your weeknight dinners, I’ve got you covered there too!

Why You’ll Love This Recipe

  • It’s a nutritious dessert that satisfies your pumpkin cravings.
  • Packed with protein to keep you feeling full and energized.
  • Perfect for fall gatherings or cozy nights at home.
  • Quick and easy to make, fitting perfectly into your busy schedule.
  • Can be enjoyed warm or cold, making it versatile for any occasion.

Ingredients

To whip up this delicious Easy Protein Pumpkin Crisp, you’ll need the following wholesome ingredients:

  • 1 can (15 oz) pumpkin puree
  • 1 cup rolled oats
  • 1/2 cup protein powder (vanilla or unflavored)
  • 1/2 cup almond flour
  • 1/4 cup maple syrup or honey
  • 1 tsp cinnamon
  • 1/2 tsp nutmeg
  • 1/4 tsp salt
  • 1/4 cup melted coconut oil
  • 1/2 cup chopped nuts (optional)

Full ingredient list with measurements is provided in the printable recipe card below.

How to Make the Recipe

Making this Easy Protein Pumpkin Crisp is a breeze! Follow these simple steps:

  1. Preheat your oven to 350°F (175°C).
  2. In a large mixing bowl, combine the pumpkin puree, maple syrup (or honey), and melted coconut oil. Mix until smooth.
  3. In another bowl, mix the rolled oats, protein powder, almond flour, cinnamon, nutmeg, and salt.
  4. Gradually add the dry ingredients to the pumpkin mixture, stirring until well combined. If you’re using nuts, fold them in now.
  5. Pour the mixture into a greased baking dish and spread it evenly.
  6. Bake for 25-30 minutes, or until the top is golden brown and a toothpick comes out clean.
  7. Let it cool for a few minutes before serving. Enjoy warm or chilled!

Pro Tips for Making the Recipe

Here are some of my favorite tips to ensure your Easy Protein Pumpkin Crisp turns out perfectly:

  • For a sweeter crisp, feel free to add a bit more maple syrup or honey.
  • Experiment with different spices like ginger or allspice for a unique flavor twist.
  • If you prefer a crunchier topping, increase the amount of oats or nuts.
  • Pair it with a dollop of Greek yogurt or a scoop of vanilla ice cream for an indulgent treat!

How to Serve

This Easy Protein Pumpkin Crisp is incredibly versatile! Here are some serving suggestions:

  • Serve it warm with a scoop of vanilla ice cream for a comforting dessert.
  • Top with whipped cream and a sprinkle of cinnamon for a festive touch.
  • Enjoy it as a healthy breakfast option with a side of fresh fruit.
  • Pair it with a cup of warm chai tea for a cozy afternoon snack.

Make Ahead and Storage

This recipe is perfect for meal prep! You can make it ahead of time and store it for later. Here’s how:

  • Store leftovers in an airtight container in the refrigerator for up to 5 days.
  • To freeze, cut into portions and wrap tightly in plastic wrap, then place in a freezer-safe bag. It will keep for up to 3 months.
  • Reheat in the microwave or oven before serving for a warm treat.

Now that you have this delightful recipe in your arsenal, you can enjoy a healthy fall treat that’s both delicious and nutritious. And if you’re looking for more weeknight dinner ideas, don’t forget to check out my favorite creamy garlic pasta and other 30-minute meals that are perfect for quick family dinners. Happy cooking!

Easy Protein Pumpkin Crisp

Prep Time 10 minutes
Cook Time 35 minutes
Total Time 45 minutes
Servings 8 servings
Calories 250
A delicious and healthy pumpkin crisp packed with protein, perfect for a cozy fall dessert or breakfast.

Ingredients

Pumpkin Layer

  • 3 large Large Whole Eggs
  • 1 can Pumpkin Puree
  • 1 teaspoon Vanilla Extract
  • 1 teaspoon Pumpkin Pie Spice
  • 0.75 teaspoon Ground Cinnamon
  • 3 scoops Protein Powder (Vanilla)
  • 4 tablespoons Syrup (or Honey) (Brown Rice Syrup, Sugar Free, etc)
  • 0.5 cup Milk (or Milk Substitute)
  • 1 pinch Salt
  • 1.5 cups Rolled Oats (Lower the carbs by using 3/4 Cup (60g))
  • 2 tablespoons Brown Sugar Substitute
  • 0.25 cup Almond Flour
  • 0.75 teaspoon Ground Cinnamon
  • 1 cup Unsweetened Apple Sauce (Lower the carbs by 1/2 Cup (122g))

Instructions 

  • Mix all Pumpkin Layer ingredients until smooth.
  • Mix Crumble Topping ingredients until combined.
  • Spray a 9-inch baking dish or skillet with cooking spray.
  • Pour Pumpkin Layer into dish.
  • Sprinkle Crumble Topping evenly over the pumpkin layer.
  • Optional: Top with crushed pecans.
  • Bake at 350°F (176°C) for 30-35 minutes until edges are golden.

Notes

This pumpkin crisp is high in protein and perfect for a healthy dessert or breakfast.
Calories: 250kcal
Cost: $15
Course: Dessert
Cuisine: American
Keyword: Healthy, Protein, pumpkin

Are you ready to indulge in a deliciously healthy treat that satisfies your sweet tooth without the guilt? I know I am! Today, I’m excited to share my recipe for Pumpkin Nutella Protein Brownies. These brownies are not only packed with protein but also bring a delightful twist of flavor that will have your family asking for seconds. Plus, they’re perfect for those busy weeknights when you need a quick dessert after one of your 30-minute meals or quick family dinners. Let’s dive in!

Why You’ll Love This Recipe

  • Deliciously rich flavor with the perfect balance of pumpkin and Nutella.
  • High in protein, making them a great post-workout snack or dessert.
  • Easy to make, perfect for busy weeknights.
  • Great for sharing with family and friends.
  • Can be made ahead and stored for later enjoyment.

Ingredients

To whip up these delightful brownies, you’ll need the following ingredients:

  • 1 cup pumpkin puree
  • 1/2 cup Nutella
  • 1/2 cup protein powder (vanilla or chocolate)
  • 1/4 cup honey or maple syrup
  • 1/4 cup unsweetened cocoa powder
  • 1/2 teaspoon baking powder
  • 1/4 teaspoon salt
  • 1/2 cup chocolate chips (optional)

Full ingredient list with measurements is provided in the printable recipe card below.

How to Make the Recipe

Making these Pumpkin Nutella Protein Brownies is a breeze! Here’s how you can do it:

  1. Preheat your oven to 350°F (175°C) and grease an 8×8 inch baking pan.
  2. In a large mixing bowl, combine the pumpkin puree and Nutella until smooth.
  3. Add in the protein powder, honey (or maple syrup), cocoa powder, baking powder, and salt. Mix until well combined.
  4. If you’re feeling indulgent, fold in the chocolate chips for an extra treat!
  5. Pour the batter into the prepared baking pan and spread it evenly.
  6. Bake for 20-25 minutes, or until a toothpick inserted in the center comes out clean.
  7. Let the brownies cool in the pan for about 10 minutes before slicing into squares.

Pro Tips for Making the Recipe

Here are some of my favorite tips to ensure your brownies turn out perfectly:

  • Make sure to use pure pumpkin puree, not pumpkin pie filling, for the best flavor.
  • Feel free to experiment with different protein powders to find your favorite flavor combination.
  • If you want a fudgier brownie, reduce the baking time slightly.
  • For a fun twist, add in some chopped nuts or dried fruit!

How to Serve

These brownies are delicious on their own, but here are some fun serving suggestions:

  • Top with a dollop of Greek yogurt for a creamy contrast.
  • Serve warm with a scoop of vanilla ice cream for a decadent dessert.
  • Pair with a cup of coffee or tea for a delightful afternoon treat.
  • Cut them into smaller squares for a perfect addition to your next gathering or potluck.

Make Ahead and Storage

These brownies are great for meal prep! Here’s how to store them:

  • Store in an airtight container at room temperature for up to 3 days.
  • For longer storage, keep them in the refrigerator for up to a week.
  • You can also freeze them! Just wrap each brownie individually in plastic wrap and place them in a freezer-safe bag. They’ll last for up to 3 months.

Now that you have this delightful recipe in your arsenal, you can enjoy a healthy dessert that’s both satisfying and nutritious. Whether you’re looking for a sweet treat after one of your easy pasta recipes or just a quick snack, these Pumpkin Nutella Protein Brownies are sure to please. So, gather your ingredients and get baking! You won’t regret it!

Pumpkin Nutella Protein Brownies

Prep Time 10 minutes
Cook Time 25 minutes
Total Time 35 minutes
Servings 8 pieces
Calories 180
Delicious and healthy brownies packed with protein, pumpkin, and Nutella for a satisfying treat.

Ingredients

Main Ingredients

  • 15 ounces Black Beans (Reduced Sodium)
  • 2 ounces Milk Substitute (or Milk)
  • 4 scoops Protein Powder (Chocolate)
  • 4 tablespoons Coconut Flour
  • 4 tablespoons Cocoa Powder
  • 2 teaspoons Instant Coffee
  • 9 tablespoons Liquid Egg Whites (or 3 Large Egg Whites)
  • 1 tablespoon Chocolate Chips (Sugar Free)
  • 2 tablespoons Nutella
  • 2 teaspoons Vanilla Extract
  • ½ cup Pumpkin Puree
  • â…› cup Syrup (Sugar Free)
  • ¼ teaspoon Salt
  • ½ teaspoon Baking Powder

Instructions 

  • Combine all ingredients in a food processor or blender.
  • Blend until smooth.
  • Grease a baking dish and pour the batter in.
  • Bake at 350F/176C for 20-25 minutes.

Notes

For best results, use a high-powered blender to ensure smooth batter.
Calories: 180kcal
Cost: $15
Course: Dessert
Cuisine: American
Keyword: brownies, Protein, pumpkin

Are you ready to indulge in a deliciously creamy treat that won’t derail your healthy eating goals? I know I am! Today, I’m excited to share with you how to make the best Ninja Creami Protein Ice Cream at home. This delightful dessert is not only a fantastic way to satisfy your sweet tooth, but it also packs a protein punch, making it a perfect addition to your healthy lifestyle. Plus, it’s super easy to whip up, just like my favorite easy pasta recipes for quick family dinners!

Why You’ll Love This Recipe

  • High in protein, perfect for post-workout recovery.
  • Simple ingredients you probably already have at home.
  • Customizable flavors to suit your taste buds.
  • Quick and easy to make, just like my go-to 30-minute meals.
  • A guilt-free dessert that the whole family will love!

Ingredients

To make the best Ninja Creami Protein Ice Cream, you’ll need the following ingredients:

  • 2 cups of your favorite milk (dairy or non-dairy)
  • 1 scoop of protein powder (vanilla or chocolate)
  • 1 ripe banana, mashed
  • 2 tablespoons of honey or maple syrup (optional)
  • 1 teaspoon of vanilla extract
  • Pinch of salt

Full ingredient list with measurements is provided in the printable recipe card below.

How to Make the Recipe

Making this delightful protein ice cream is as easy as pie! Here’s how you do it:

  1. In a mixing bowl, combine the milk, protein powder, mashed banana, honey (if using), vanilla extract, and salt. Whisk until smooth.
  2. Pour the mixture into the Ninja Creami container and freeze for at least 4 hours or until solid.
  3. Once frozen, remove the container from the freezer and let it sit for about 5 minutes to soften slightly.
  4. Place the container into the Ninja Creami machine and select the “Ice Cream” function.
  5. Once the machine has finished, scoop out your creamy protein ice cream and enjoy!

Pro Tips for Making the Recipe

Here are some of my favorite tips to ensure your Ninja Creami Protein Ice Cream turns out perfectly every time:

  • For a richer flavor, try using whole milk or a creamy non-dairy alternative like coconut milk.
  • Experiment with different protein powder flavors to create unique combinations.
  • Add in mix-ins like chocolate chips, nuts, or fruit right before processing for added texture.
  • If you prefer a softer ice cream, let it sit out for a few minutes before serving.
  • For a fun twist, try making a creamy garlic pasta dish to enjoy alongside your ice cream for a complete meal!

How to Serve

This protein ice cream is perfect on its own, but you can also get creative with your presentation! Here are some serving suggestions:

  • Top with fresh berries or sliced bananas for a fruity touch.
  • Drizzle with chocolate or caramel sauce for an indulgent treat.
  • Serve in a waffle cone for a fun, nostalgic experience.
  • Pair it with a slice of your favorite cake or pie for a delightful dessert duo.
  • Enjoy it alongside a hearty meal, like one of my favorite weeknight dinner ideas!

Make Ahead and Storage

This Ninja Creami Protein Ice Cream is perfect for meal prep! Here’s how to store it:

  • Store any leftovers in an airtight container in the freezer for up to 2 weeks.
  • To prevent ice crystals from forming, press a piece of plastic wrap directly onto the surface of the ice cream before sealing the container.
  • When you’re ready to enjoy it again, simply let it sit at room temperature for a few minutes before scooping.

Now that you know how to make the best Ninja Creami Protein Ice Cream, I hope you’re as excited as I am to try it! This recipe is not only a delicious treat but also a great way to incorporate more protein into your diet. So, gather your ingredients, fire up that Ninja Creami, and enjoy a scoop (or two) of this creamy goodness. Happy cooking!

The Best Ninja Creami Protein Ice Cream

Prep Time 10 minutes
Total Time 10 minutes
Servings 4 servings
Calories 600
Enjoy a delicious, high-protein ice cream with customizable flavors using this easy recipe.

Ingredients

Base Ingredients

  • 12 ounces Ready to Drink Protein Shake (Fairlife/Lean Body)
  • 3 ounces Greek Yogurt (Mix & Match Flavors!)
  • 2 tablespoons Powdered Peanut Butter
  • 2 tablespoons Instant Pudding
  • 1.25 cups Greek Yogurt (Mix & Match Flavors!)
  • 2 ounces Milk (or Milk Substitute)
  • 1 teaspoon Vanilla Extract
  • 1.5 scoops Protein Powder (*Optional)
  • to taste optional Sweetener
  • 2 tablespoons Instant Pudding
  • 12 ounces Milk (or Milk Substitute)
  • 2 tablespoons Cocoa Powder (For Chocolate Ice Cream)
  • 1.5 scoops Protein Powder (*Optional)
  • to taste optional Sweetener
  • 1.5 cups Cottage Cheese
  • 4 ounces Milk (or Milk Substitute)
  • 1.5 scoops Protein Powder (*Optional)
  • to taste optional Sweetener
  • 1-2 ounces Milk (or Milk Substitute)
  • Cookies Cookies (for texture and flavor)

Instructions 

  • Blend all ingredients until smooth.
  • Pour into a container and freeze for at least 2 hours.
  • Serve and enjoy!

Notes

Adjust sweeteners and flavors to taste. Using frozen cookies can add texture.
Calories: 600kcal
Cost: $15
Course: Dessert
Cuisine: American
Keyword: ice cream, Protein

As the leaves begin to change and the air turns crisp, I can’t help but get excited about all the delicious fall flavors that come with this season. One of my absolute favorites is pumpkin, and today I’m thrilled to share my recipe for Low Fat Pumpkin Butter. This delightful spread is not only easy to make, but it also fits perfectly into my busy lifestyle, especially when I’m looking for quick family dinners or easy pasta recipes to whip up during the week. So, let’s dive into this scrumptious treat that’s perfect for healthy snacking!

Why You’ll Love This Recipe

  • It’s a guilt-free indulgence with low fat content.
  • Perfect for spreading on toast, pancakes, or even mixing into your favorite creamy garlic pasta.
  • Simple ingredients that you probably already have in your pantry.
  • Great for meal prep, making it a fantastic option for busy weeknight dinner ideas.
  • Brings the warm, cozy flavors of fall right into your kitchen!

Ingredients

To make this delightful Low Fat Pumpkin Butter, you’ll need the following ingredients:

  • 1 cup pure pumpkin puree (not pumpkin pie filling)
  • 1/2 cup apple cider or juice
  • 1/4 cup brown sugar (or a sugar substitute for a healthier option)
  • 1 teaspoon ground cinnamon
  • 1/2 teaspoon ground nutmeg
  • 1/4 teaspoon ground ginger
  • 1/4 teaspoon salt
  • 1 teaspoon vanilla extract

Full ingredient list with measurements is provided in the printable recipe card below.

How to Make the Recipe

Making this Low Fat Pumpkin Butter is as easy as pie! Here’s how you can whip it up in no time:

  1. In a medium saucepan, combine the pumpkin puree, apple cider, brown sugar, cinnamon, nutmeg, ginger, salt, and vanilla extract.
  2. Stir the mixture over medium heat until it begins to bubble gently.
  3. Reduce the heat to low and let it simmer for about 15-20 minutes, stirring occasionally. This allows the flavors to meld beautifully.
  4. Once it thickens to your desired consistency, remove it from the heat and let it cool.
  5. Transfer the pumpkin butter to a jar or airtight container and refrigerate.

Pro Tips for Making the Recipe

Here are some of my favorite tips to ensure your pumpkin butter turns out perfectly:

  • For a smoother texture, you can blend the mixture with an immersion blender after cooking.
  • Feel free to adjust the spices according to your taste. If you love a spicier kick, add a pinch of cloves!
  • This recipe is easily doubled or halved, so you can make just the right amount for your needs.
  • Try adding a splash of maple syrup for an extra layer of flavor.

How to Serve

Now that you have your delicious Low Fat Pumpkin Butter, let’s talk about how to enjoy it:

  • Spread it on whole-grain toast for a nutritious breakfast.
  • Use it as a topping for pancakes or waffles for a fall-inspired brunch.
  • Mix it into your favorite easy pasta recipes for a unique twist on creamy garlic pasta.
  • Serve it alongside cheese and crackers for a delightful snack.
  • Incorporate it into your favorite desserts, like yogurt or oatmeal, for a seasonal treat.

Make Ahead and Storage

This pumpkin butter is perfect for meal prep! Here’s how to store it:

  • Store in an airtight container in the refrigerator for up to two weeks.
  • You can also freeze it in small portions for up to three months. Just thaw in the fridge overnight before using.
  • Consider making a big batch to have on hand for those busy weeknight dinner ideas!

So there you have it! A simple, delicious, and healthy fall treat that you can enjoy in so many ways. I hope you give this Low Fat Pumpkin Butter a try and let it bring a little extra joy to your fall season. Happy cooking!

Low Fat Pumpkin Butter

Prep Time 5 minutes
Cook Time 25 minutes
Total Time 30 minutes
Servings 8 tablespoons
Calories 80
A delicious and healthy pumpkin spread perfect for fall, made with simple ingredients and low fat content.

Ingredients

Main Ingredients

  • 15 ounces Pumpkin Puree
  • 0.5 cup Unsweetened Apple Sauce
  • 0.25 cup Syrup (Maple Flavored Sugar Free)
  • 1 tablespoon Lemon Juice
  • 2.5 teaspoons Pumpkin Pie Spice
  • 1 teaspoon Ground Cinnamon
  • 3 teaspoons Light Brown Sugar
  • 0.5 teaspoon Salt
  • 3 scoops Protein Powder (Vanilla Protein Powder)

Instructions 

  • Heat a large pan over medium-high heat.
  • Add all ingredients except protein powder and stir.
  • Simmer for 20-25 minutes, stirring occasionally.
  • Remove from heat, add protein powder, and mix well.
  • Store in jars once cooled.

Notes

This pumpkin butter is perfect for spreading on toast or adding to yogurt for a nutritious boost.
Calories: 80kcal
Cost: $8
Course: Spread
Cuisine: American
Keyword: Healthy, pumpkin