Author

Ava

Browsing

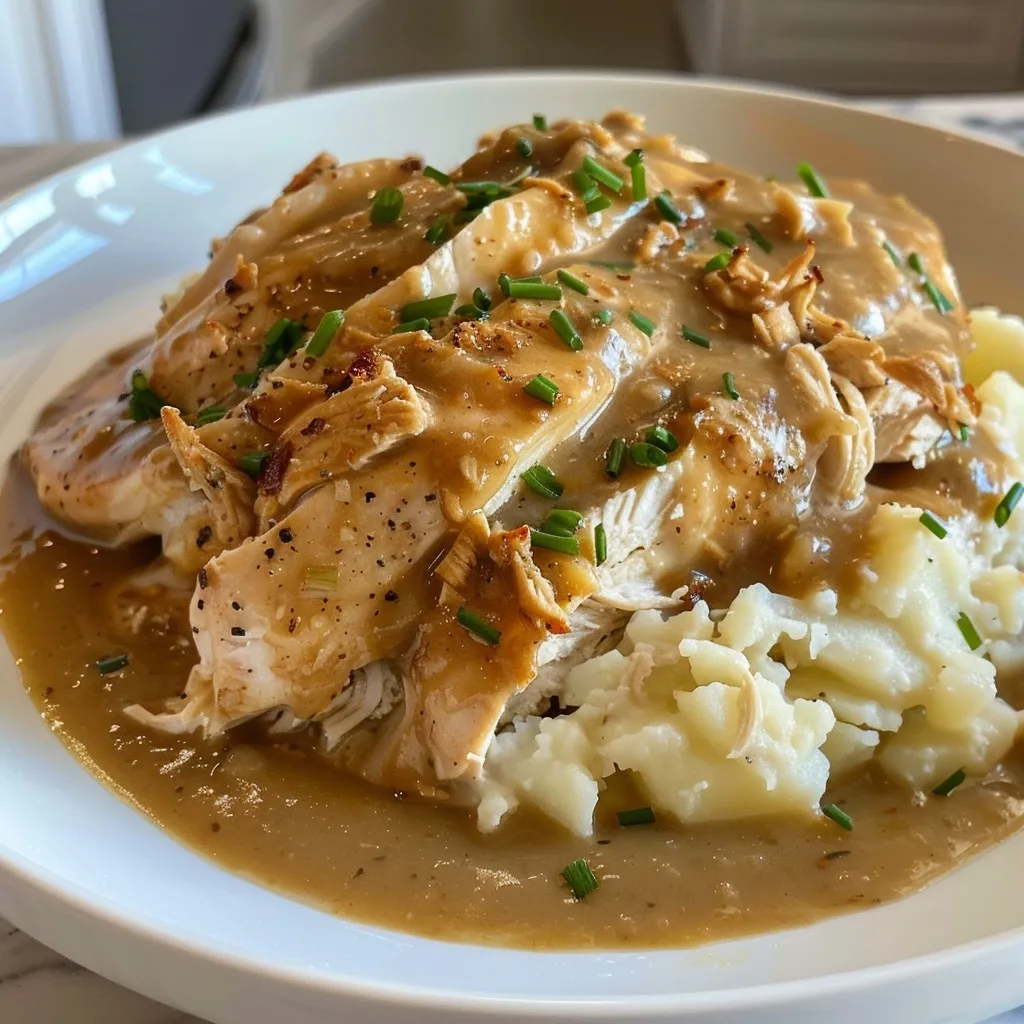
There’s something incredibly comforting about a warm, hearty meal waiting for you at the end of a long day. As a busy mom, I know how challenging it can be to whip up quick family dinners that everyone will love. That’s why I’m excited to share my recipe for Slow Cooker Chicken and Gravy. This dish is not only simple to prepare, but it also delivers that cozy, home-cooked flavor that makes you feel all warm and fuzzy inside. Plus, it’s a fantastic option when you’re looking for easy pasta recipes to pair with your main dish!

Why You’ll Love This Recipe

  • It’s a one-pot wonder that saves you time on cleanup.
  • Perfect for busy weeknights when you need quick family dinners.
  • Rich, creamy gravy that pairs beautifully with mashed potatoes or rice.
  • Great for meal prep—make it ahead and enjoy leftovers!
  • Kid-approved and sure to please even the pickiest eaters!

Ingredients

To make this delicious Slow Cooker Chicken & Gravy, you’ll need the following ingredients:

  • 4 boneless, skinless chicken breasts
  • 1 can (10.5 oz) cream of chicken soup
  • 1 packet (1 oz) ranch dressing mix
  • 1 cup chicken broth
  • Salt and pepper to taste
  • Optional: fresh parsley for garnish

Full ingredient list with measurements is provided in the printable recipe card below.

How to Make the Recipe

Now, let’s dive into the steps to create this mouthwatering dish:

  1. Start by placing the chicken breasts in the bottom of your slow cooker.
  2. In a separate bowl, mix together the cream of chicken soup, ranch dressing mix, and chicken broth until well combined.
  3. Pour the mixture over the chicken in the slow cooker, ensuring the chicken is well coated.
  4. Season with salt and pepper to taste.
  5. Cover and cook on low for 6-8 hours or on high for 3-4 hours, until the chicken is tender and easily shredded.
  6. Once cooked, shred the chicken with two forks and stir it back into the gravy.
  7. Serve hot, garnished with fresh parsley if desired.

Pro Tips for Making the Recipe

Here are some of my favorite tips to ensure your Slow Cooker Chicken and Gravy turns out perfectly every time:

  • For extra flavor, consider adding garlic powder or onion powder to the gravy mixture.
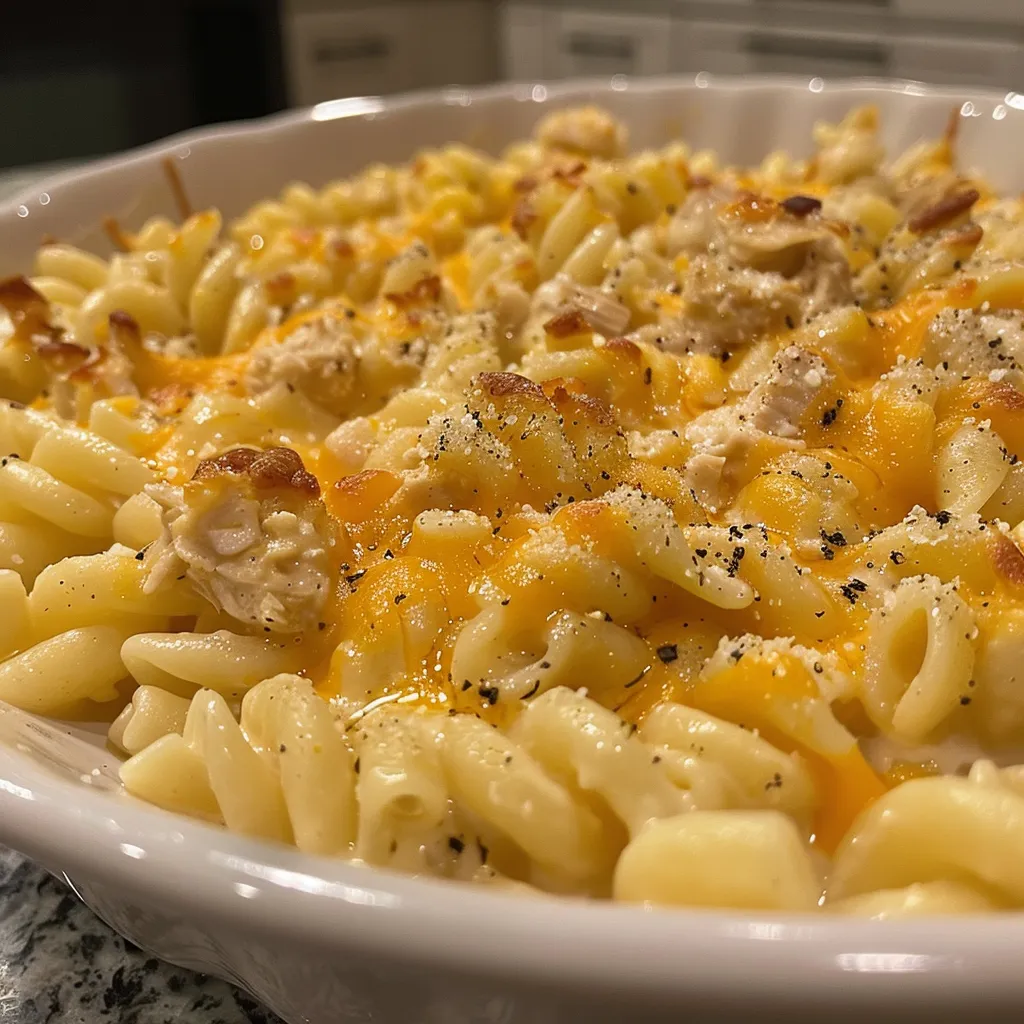
  • If you want to make it a complete meal, serve it over creamy garlic pasta or rice.
  • Feel free to add vegetables like carrots or peas during the last hour of cooking for a nutritious boost.
  • For a thicker gravy, you can mix a tablespoon of cornstarch with a little water and stir it in during the last 30 minutes of cooking.

How to Serve

This dish is incredibly versatile! Here are some serving suggestions:

  • Serve it over mashed potatoes for a classic comfort food experience.
  • Pair it with rice or quinoa for a wholesome meal.
  • For a lighter option, serve it with steamed vegetables.
  • Don’t forget to try it with easy pasta recipes like creamy garlic pasta for a delightful twist!

Make Ahead and Storage

This Slow Cooker Chicken and Gravy is perfect for meal prep! Here’s how to make it ahead and store it:

  • Cook the chicken and gravy as directed, then let it cool completely before transferring it to an airtight container.
  • Store in the refrigerator for up to 3 days or freeze for up to 3 months.
  • To reheat, simply thaw overnight in the fridge and warm it up in the microwave or on the stovetop until heated through.

With this Slow Cooker Chicken and Gravy, you’ll have a delicious, comforting meal that your family will adore. It’s perfect for those busy weeknights when you need quick family dinners that don’t skimp on flavor. I hope you enjoy making this recipe as much as I do! Happy cooking!

Slow Cooker Chicken & Gravy

Prep Time 15 minutes
Cook Time 6 hours
Total Time 6 hours 15 minutes
Servings 4 servings
Calories 600
A hearty and easy slow cooker meal featuring tender chicken in savory gravy, perfect for a comforting dinner.

Ingredients

Protein

  • 3 pounds Chicken Breast (Trimmed and halved)
  • 1 cup Bone Broth (Low Sodium Preferred)
  • 2 packets Gravy Mix (Low Sodium Preferred)
  • 1 can Cream of Chicken (10.5 Ounces) (Low sodium preferred)
  • 2 teaspoons Minced Garlic (Optional)
  • 1 teaspoon Ranch Seasoning Mix (Optional)
  • 1 tablespoon Chives (Optional)
  • 1.5 pounds Potatoes

Instructions 

  • Trim and halve the chicken breasts.
  • Add all ingredients except potatoes into the slow cooker.
  • Mix everything together.
  • Chop potatoes and add to the mixture if not using small potatoes.
  • Cook on low for 6-8 hours or high for about 4 hours.
  • Shred chicken 15 minutes before serving if desired.

Notes

This dish is versatile and can be served over rice or with your favorite sides.
Calories: 600kcal
Cost: $15
Course: Main Course
Cuisine: American
Keyword: Chicken, Gravy

Are you looking for a quick and healthy snack that satisfies your sweet tooth? Well, you’re in for a treat! Today, I’m excited to share my recipe for No Bake Peanut Butter Oat Cups. These delightful little cups are not only delicious but also incredibly easy to whip up in just 10 minutes! Perfect for those busy days when you need a quick pick-me-up or a nutritious snack for the kids. Plus, they fit right in with my love for easy pasta recipes and 30-minute meals that make life a little sweeter!

Why You’ll Love This Recipe

  • Quick and easy to make in just 10 minutes!
  • Healthy ingredients that are kid-approved.
  • Perfect for meal prep or a last-minute snack.
  • Versatile – customize with your favorite add-ins!
  • Great for satisfying cravings without the guilt.

Ingredients

To make these scrumptious No Bake Peanut Butter Oat Cups, you’ll need just a handful of simple ingredients:

  • 1 cup rolled oats
  • 1/2 cup natural peanut butter
  • 1/4 cup honey or maple syrup
  • 1/4 cup chocolate chips (optional)
  • 1/2 teaspoon vanilla extract
  • Pinch of salt

Full ingredient list with measurements is provided in the printable recipe card below.

How to Make the Recipe

Making these No Bake Peanut Butter Oat Cups is as easy as 1-2-3! Here’s how:

  1. In a mixing bowl, combine the rolled oats, peanut butter, honey (or maple syrup), vanilla extract, and salt. Stir until well combined.
  2. If you’re adding chocolate chips, fold them in gently.
  3. Line a muffin tin with cupcake liners and spoon the mixture evenly into each liner, pressing down firmly to pack them in.
  4. Refrigerate for about 30 minutes to set, then enjoy your delicious treats!

Pro Tips for Making the Recipe

Here are some of my favorite tips to ensure your No Bake Peanut Butter Oat Cups turn out perfectly:

  • Use natural peanut butter for a healthier option. It’s creamy and delicious!
  • Feel free to substitute honey with maple syrup for a vegan-friendly version.
  • Add in some chopped nuts or dried fruits for extra texture and flavor.
  • Make sure to pack the mixture tightly in the muffin tin to help them hold their shape.
  • Experiment with different nut butters like almond or cashew for a fun twist!

How to Serve

These No Bake Peanut Butter Oat Cups are perfect for any occasion! Here are some serving suggestions:

  • Enjoy them as a quick breakfast on the go.
  • Serve them as a healthy snack after school for the kids.
  • Pair them with a glass of milk or a smoothie for a balanced meal.
  • Crush them up and sprinkle over yogurt for a delicious parfait.
  • They also make a great addition to lunchboxes!

Make Ahead and Storage

One of the best things about these No Bake Peanut Butter Oat Cups is that they’re perfect for meal prep! Here’s how to store them:

  • Store the cups in an airtight container in the refrigerator for up to one week.
  • You can also freeze them for up to three months. Just thaw them in the fridge before enjoying!
  • For a fun twist, try drizzling some melted dark chocolate over the top before refrigerating.

So there you have it! A quick, easy, and healthy snack that you can whip up in no time. These No Bake Peanut Butter Oat Cups are not only delicious but also a great way to keep your energy up during those busy days filled with quick family dinners and weeknight dinner ideas. I hope you enjoy making and sharing these delightful treats as much as I do!

No Bake Peanut Butter Oat Cups

Prep Time 10 minutes
Total Time 10 minutes
Servings 12 pieces
Calories 180
These delicious no-bake peanut butter oat cups are a quick and healthy snack, perfect for satisfying your sweet tooth on the go.

Ingredients

Dry Ingredients

  • 1 cup Rolled Oats
  • 1.5 scoops Protein Powder (Use a flavor that compliments Peanut Butter)

Wet Ingredients

  • 2 tablespoons Peanut Butter
  • 2 tablespoons Honey (or Maple Syrup/Sugar Free Alternative)
  • 4 ounces Greek Yogurt (Use a flavor that compliments Peanut Butter)
  • 4 tablespoons Peanut Butter
  • 2 tablespoons Powdered Peanut Butter
  • 4 tablespoons Chocolate Chips (Use Chocolate, White Chocolate, Sugar Free, etc.)

Instructions 

  • Mix all dry ingredients in a bowl.
  • Add wet ingredients and combine until well mixed.
  • Form mixture into 12 small cups or balls and refrigerate for at least 30 minutes before serving.

Notes

Store in an airtight container in the refrigerator for up to a week.
Calories: 180kcal
Cost: $10
Course: Snack
Cuisine: American
Keyword: Peanut Butter

Are you ready to elevate your weeknight dinners with a delicious and nutritious twist? I’m excited to share my recipe for High Protein Pasta Sauce that’s not only creamy and flavorful but also packed with protein! This sauce is perfect for those busy evenings when you need quick family dinners that everyone will love. Plus, it’s an easy pasta recipe that can be whipped up in just 30 minutes!

Why You’ll Love This Recipe

  • High in protein, thanks to the cottage cheese!
  • Quick and easy to prepare, making it perfect for busy weeknights.
  • Versatile – pair it with your favorite pasta or use it as a base for other dishes.
  • Rich and creamy texture that satisfies your cravings.
  • Great for meal prep – make a big batch and enjoy it throughout the week!

Ingredients

To make this delightful High Protein Pasta Sauce, you’ll need the following ingredients:

  • 1 cup cottage cheese
  • 2 cups diced tomatoes (canned or fresh)
  • 2 cloves garlic, minced
  • 1 tablespoon olive oil
  • 1 teaspoon dried basil
  • 1 teaspoon dried oregano
  • Salt and pepper to taste
  • Optional: grated Parmesan cheese for serving

Full ingredient list with measurements is provided in the printable recipe card below.

How to Make the Recipe

Now, let’s dive into the steps to create this creamy garlic pasta sauce:

  1. In a medium saucepan, heat the olive oil over medium heat.
  2. Add the minced garlic and sauté for about 1 minute until fragrant.
  3. Stir in the diced tomatoes, dried basil, and oregano. Let it simmer for about 5 minutes.
  4. Reduce the heat to low and add the cottage cheese. Stir until well combined and heated through.
  5. Season with salt and pepper to taste.
  6. Serve over your favorite pasta and sprinkle with grated Parmesan cheese if desired.

Pro Tips for Making the Recipe

Here are some of my favorite tips to ensure your sauce turns out perfectly:

  • For a smoother sauce, blend the cottage cheese before adding it to the tomatoes.
  • Feel free to add vegetables like spinach or bell peppers for extra nutrition.
  • If you like a little heat, add a pinch of red pepper flakes!
  • This sauce can be made ahead of time and stored in the fridge for up to 5 days.
  • Pair it with whole grain or gluten-free pasta for a healthier option.

How to Serve

This High Protein Pasta Sauce is incredibly versatile! Here are some serving suggestions:

  • Serve it over whole wheat spaghetti for a hearty meal.
  • Use it as a sauce for baked pasta dishes like lasagna.
  • Mix it with zoodles (zucchini noodles) for a low-carb option.
  • Top it with fresh basil or parsley for a pop of color and flavor.
  • Pair it with a side salad for a complete meal.

Make Ahead and Storage

This sauce is perfect for meal prep! Here’s how to store it:

  • Let the sauce cool completely before transferring it to an airtight container.
  • Store in the refrigerator for up to 5 days.
  • For longer storage, freeze the sauce in individual portions for up to 3 months.
  • To reheat, simply thaw in the fridge overnight and warm on the stove or in the microwave.

Now that you have this delightful recipe in your arsenal, you can enjoy quick family dinners that are both healthy and satisfying. Whether you’re looking for easy pasta recipes or just a creamy garlic pasta sauce to brighten up your weeknight dinner ideas, this recipe is sure to become a favorite. Try it today, and let me know how it turns out!

High Protein Pasta Sauce

Prep Time 5 minutes
Cook Time 15 minutes
Total Time 20 minutes
Servings 4 servings
Calories 250
A quick and nutritious pasta sauce packed with protein, perfect for a healthy meal.

Ingredients

Oil

  • 1 Tablespoon Oil (Your choice) (Avocado preferred for high smoke point)

Minced Garlic

  • 2 Teaspoons Minced Garlic

Diced Tomatoes

  • 14.5 Ounces Diced Tomatoes (No Salt Added/Fire Roasted)

Lemon Juice

  • 1 Tablespoon Lemon Juice

Cottage Cheese

  • ¾ Cup Cottage Cheese

Bone Broth

  • ½ Cup Bone Broth

Instructions 

  • Heat oil in a pan over medium heat, then add garlic and cook for 1-2 minutes.
  • Add diced tomatoes and lemon juice; cook until juices reduce (7-10 minutes).
  • Remove from heat and blend with cottage cheese and broth until smooth.

Notes

Use fresh garlic for best flavor and consider adding herbs for extra taste.
Calories: 250kcal
Cost: $10
Course: Main Course
Cuisine: American
Keyword: Healthy, High Protein, Pasta

As the leaves begin to change and the air turns crisp, I find myself craving all things pumpkin! One of my absolute favorite fall treats is Stuffed Low Carb Pumpkin Bread. This delightful recipe not only satisfies my sweet tooth but also fits perfectly into my low-carb lifestyle. Plus, it’s a fantastic option for those busy weeknights when I want something delicious without spending hours in the kitchen. If you’re looking for a cozy, flavorful treat that’s easy to whip up, you’re in the right place! And let’s not forget, this recipe is a great addition to your collection of easy pasta recipes for those nights when you want something a little different!

Why You’ll Love This Recipe

  • Perfect for fall gatherings and cozy nights in.
  • Low-carb and guilt-free, so you can indulge without worry.
  • Easy to make, even on busy weeknights.
  • Versatile filling options to suit your taste.
  • Great for meal prep and can be enjoyed throughout the week.

Ingredients

To make this scrumptious Stuffed Low Carb Pumpkin Bread, you’ll need the following ingredients:

  • 1 cup pumpkin puree
  • 2 cups almond flour
  • 1/2 cup erythritol or your favorite low-carb sweetener
  • 3 large eggs
  • 1/2 cup unsweetened applesauce
  • 1 teaspoon baking soda
  • 1 teaspoon baking powder
  • 1 teaspoon cinnamon
  • 1/2 teaspoon nutmeg
  • 1/4 teaspoon salt
  • 1 cup cream cheese (for stuffing)
  • 1/4 cup chopped nuts (optional)

Full ingredient list with measurements is provided in the printable recipe card below.

How to Make the Recipe

Now, let’s dive into the fun part—making this delicious pumpkin bread!

  1. Preheat your oven to 350°F (175°C) and grease a loaf pan.
  2. In a large mixing bowl, combine the pumpkin puree, eggs, and applesauce. Mix until well combined.
  3. In another bowl, whisk together the almond flour, erythritol, baking soda, baking powder, cinnamon, nutmeg, and salt.
  4. Gradually add the dry ingredients to the wet ingredients, stirring until just combined.
  5. Pour half of the batter into the prepared loaf pan.
  6. Spread the cream cheese evenly over the batter, and sprinkle with chopped nuts if desired.
  7. Top with the remaining batter, smoothing it out to cover the filling.
  8. Bake for 45-50 minutes, or until a toothpick inserted into the center comes out clean.
  9. Let it cool in the pan for 10 minutes before transferring to a wire rack to cool completely.

Pro Tips for Making the Recipe

Here are some of my favorite tips to ensure your Stuffed Low Carb Pumpkin Bread turns out perfectly:

  • Make sure your pumpkin puree is pure and not pumpkin pie filling, which contains added sugars.
  • For a richer flavor, consider adding a splash of vanilla extract to the batter.
  • If you prefer a sweeter bread, feel free to adjust the amount of erythritol to your taste.
  • Let the bread cool completely before slicing to prevent it from falling apart.
  • This recipe can easily be doubled for larger gatherings or meal prep!

How to Serve

This Stuffed Low Carb Pumpkin Bread is delightful on its own, but here are some serving suggestions to elevate your experience:

  • Serve warm with a dollop of whipped cream or a drizzle of sugar-free caramel sauce.
  • Pair it with a cup of your favorite coffee or tea for a cozy afternoon treat.
  • Slice it up and serve it as a dessert after a hearty meal, perhaps alongside some creamy garlic pasta for a comforting dinner.
  • Wrap slices in parchment paper for a lovely homemade gift during the fall season.

Make Ahead and Storage

This pumpkin bread is perfect for meal prep! Here’s how to store it:

  • Store leftovers in an airtight container in the refrigerator for up to a week.
  • You can freeze slices for up to three months. Just make sure to wrap them tightly in plastic wrap and then in foil.
  • To reheat, simply pop a slice in the microwave for a few seconds or toast it for a warm treat.

So there you have it! A delicious, low-carb treat that’s perfect for fall and easy to make. Whether you’re looking for a sweet snack or a delightful dessert, this Stuffed Low Carb Pumpkin Bread is sure to please. Enjoy it with your family and friends, and don’t forget to check out my other weeknight dinner ideas for quick family dinners that everyone will love!

Stuffed Low Carb Pumpkin Bread

Prep Time 15 minutes
Cook Time 45 minutes
Total Time 1 hour
Servings 8 pieces
Calories 350
A delicious low-carb pumpkin bread with a creamy filling, perfect for fall or any time you crave a healthy treat.

Ingredients

Bread ingredients

  • 3 Large Whole Eggs
  • 3 Ounces Milk Substitute (or Milk (I like Vanilla))
  • ½ Cup Coconut Flour
  • 1 Cup Almond Flour
  • 2 Scoops Protein Powder (Vanilla)
  • 1 Teaspoon Ground Cinnamon
  • 1 Teaspoon Pumpkin Pie Spice
  • 1 Cup Pumpkin Puree
  • 1 Teaspoon Vanilla Extract
  • ¼ Cup Sweetener
  • 1 ½ Tablespoons Syrup (Sugar Free)
  • 3 Teaspoons Baking Powder
  • 1 ½ Tablespoons Butter (Melted)
  • 1 Pinch Salt

Filling ingredients

  • 4 Tablespoons Cream Cheese (Fat Free or Reduced Fat)
  • 2 Tablespoons Sweetener
  • 1 Large Whole Egg
  • ½ Scoop Protein Powder (Vanilla)
  • 1 Teaspoon Vanilla Extract

Instructions 

  • Mix all bread ingredients in a large bowl.
  • Pour ¾ of the batter into a prepared baking dish.
  • Mix filling ingredients in a bowl.
  • Distribute filling over the batter.
  • Add remaining batter on top and spread evenly.
  • Bake at 350°F (176°C) for 45-50 minutes until golden.

Notes

This pumpkin bread is low in carbs and high in flavor, making it a perfect healthy treat.
Calories: 350kcal
Cost: $15
Course: Dessert
Cuisine: American
Keyword: Low Carb, pumpkin

Are you ready to whip up a dish that will have your family asking for seconds? I’m excited to share my recipe for Healthy Baked Ziti with Cottage Cheese! This delightful meal is not only a hit with the family, but it’s also one of those easy pasta recipes that you can prepare in no time. Perfect for busy weeknights, this dish is a wholesome option that combines the comforting flavors of traditional baked ziti with a nutritious twist. Let’s dive into this deliciousness!

Why You’ll Love This Recipe

  • Quick and easy to prepare, making it ideal for 30-minute meals.
  • Packed with protein from cottage cheese, making it a healthier alternative.
  • Perfect for quick family dinners that everyone will enjoy.
  • Versatile and can be customized with your favorite veggies or proteins.
  • Great for meal prep and leftovers taste even better!

Ingredients

To make this scrumptious Healthy Baked Ziti with Cottage Cheese, you’ll need the following ingredients:

  • 12 oz ziti pasta
  • 2 cups cottage cheese
  • 2 cups marinara sauce
  • 1 cup shredded mozzarella cheese
  • 1/2 cup grated Parmesan cheese
  • 2 cloves garlic, minced
  • 1 tsp Italian seasoning
  • Salt and pepper to taste
  • Fresh basil for garnish (optional)

Full ingredient list with measurements is provided in the printable recipe card below.

How to Make the Recipe

Now, let’s get cooking! Follow these simple steps to create your Healthy Baked Ziti:

  1. Preheat the Oven: Start by preheating your oven to 375°F (190°C).
  2. Cook the Pasta: In a large pot, bring salted water to a boil and cook the ziti according to package instructions until al dente. Drain and set aside.
  3. Mix the Filling: In a large bowl, combine the cottage cheese, minced garlic, Italian seasoning, salt, and pepper. Stir until well mixed.
  4. Assemble the Dish: In a 9×13 inch baking dish, spread a layer of marinara sauce on the bottom. Add half of the cooked ziti, followed by half of the cottage cheese mixture. Repeat the layers, finishing with marinara sauce on top. Sprinkle mozzarella and Parmesan cheese over the top.
  5. Bake: Cover the dish with aluminum foil and bake for 20 minutes. Remove the foil and bake for an additional 10 minutes, or until the cheese is bubbly and golden.

Pro Tips for Making the Recipe

Here are some of my favorite tips to ensure your Healthy Baked Ziti turns out perfectly:

  • Feel free to add in your favorite vegetables like spinach, bell peppers, or mushrooms for extra nutrition.
  • If you prefer a creamier texture, you can mix in a bit of ricotta cheese with the cottage cheese.
  • For a little kick, add red pepper flakes to the marinara sauce.
  • Make sure to let the dish sit for a few minutes after baking before serving; this helps it set and makes for easier slicing.

How to Serve

This Healthy Baked Ziti is perfect for a cozy family dinner. Serve it with a side salad and some crusty bread for a complete meal. You can also pair it with a glass of red wine for a lovely evening treat. If you’re looking for weeknight dinner ideas, this dish is sure to impress!

Make Ahead and Storage

If you want to prepare this dish in advance, you can assemble it a day ahead and store it in the refrigerator. Just cover it tightly with foil. When you’re ready to bake, simply pop it in the oven, adding a few extra minutes to the cooking time if it’s cold from the fridge. Leftovers can be stored in an airtight container in the fridge for up to 3 days, and they reheat beautifully in the microwave or oven.

So there you have it! A delicious and nutritious Healthy Baked Ziti with Cottage Cheese that’s perfect for any night of the week. I hope you enjoy making this dish as much as I do. It’s one of those creamy garlic pasta recipes that will have your family coming back for more. Happy cooking!

Healthy Baked Ziti with Cottage Cheese

Prep Time 10 minutes
Cook Time 50 minutes
Total Time 1 hour
Servings 4 servings
Calories 550
A nutritious and delicious baked ziti recipe featuring cottage cheese for added protein and creaminess. Perfect for a comforting yet healthy meal.

Ingredients

Pasta

  • 8 ounces Pasta (Dry Weight) (Your choice of pasta)

Pasta Sauce

  • 2.5 cups Pasta Sauce (Low sodium/sugar preferred)

Cottage Cheese

  • 1.5 cups Cottage Cheese (Full, Reduced, or Fat Free)

Protein

  • 10 ounces Cooked Protein (Lean Ground Beef, Turkey, Chicken, Vegetarian, etc.)

Mozzarella Cheese

  • 1.5 cups Mozzarella Cheese

Egg

  • 1 large Whole Egg

Seasonings

  • 1 tablespoon Italian Seasoning
  • 2 teaspoons Minced Garlic

Black Pepper

  • to taste Black Pepper (Your choice)

Parmesan Cheese

  • 3 tablespoons Parmesan Cheese

Instructions 

  • Cook pasta 1-2 minutes less than package instructions, drain.
  • Mix pasta sauce, cottage cheese, cooked protein, 1 cup mozzarella, egg, seasonings, garlic, pepper, and spices.
  • Combine cooked pasta with the sauce mixture.
  • Grease a baking dish, layer ½ cup sauce, pasta mixture, ½ cup sauce, ½ cup mozzarella, and Parmesan.
  • Cover with foil and bake at 375°F (190°C) for 45-50 minutes.
  • Uncover and bake for an additional 10 minutes until cheese is golden.

Notes

For a lower sodium option, choose reduced-sodium pasta sauce and cheese.
Calories: 550kcal
Cost: $15
Course: Main Course
Cuisine: Italian-American
Keyword: Baked, Healthy, Pasta

Are you looking for a delicious and nutritious drink that can give you a boost any time of the day? Well, you’re in for a treat! Today, I’m excited to share my recipe for a Protein Strawberry Shortshake. This delightful shake is not only packed with fresh strawberries and protein powder, but it’s also a fantastic way to satisfy your sweet tooth while keeping your health goals in check. Plus, it’s a great addition to your list of easy pasta recipes for those busy weeknights when you need something quick and satisfying!

Why You’ll Love This Recipe

  • Quick and easy to make, perfect for busy mornings or post-workout snacks.
  • Deliciously creamy and sweet, satisfying your cravings without the guilt.
  • Packed with protein to keep you feeling full and energized.
  • Versatile – you can customize it with your favorite fruits or add-ins!
  • A fun way to incorporate more fruits into your diet.

Ingredients

To whip up this delightful Protein Strawberry Shortshake, you’ll need the following ingredients:

  • 1 cup fresh strawberries, hulled and sliced
  • 1 scoop vanilla protein powder
  • 1 cup almond milk (or your preferred milk)
  • 1 tablespoon honey or maple syrup (optional, for added sweetness)
  • 1/2 cup Greek yogurt (for creaminess)
  • Ice cubes (optional, for a chilled shake)

Full ingredient list with measurements is provided in the printable recipe card below.

How to Make the Recipe

Making this Protein Strawberry Shortshake is as easy as pie! Here’s how you can do it:

  1. In a blender, combine the fresh strawberries, protein powder, almond milk, Greek yogurt, and honey or maple syrup if you’re using it.
  2. Add a handful of ice cubes if you prefer a chilled shake.
  3. Blend on high until smooth and creamy, about 30 seconds.
  4. Taste and adjust sweetness if necessary, then blend again for a few seconds.
  5. Pour into a glass and enjoy immediately!

Pro Tips for Making the Recipe

Here are some of my favorite tips to ensure your Protein Strawberry Shortshake turns out perfectly every time:

  • Use ripe strawberries for the best flavor. If they’re in season, you’ll be amazed at how sweet they can be!
  • Feel free to experiment with different protein powders. Chocolate protein powder can add a fun twist!
  • If you want to make this shake even more filling, consider adding a tablespoon of nut butter or a banana.
  • For a thicker shake, use less almond milk or add more Greek yogurt.
  • Don’t forget to clean your blender right after use to avoid any sticky residue!

How to Serve

This Protein Strawberry Shortshake is perfect for any time of the day! Here are some serving suggestions:

  • Enjoy it as a quick breakfast on the go.
  • Serve it as a post-workout recovery drink.
  • Pair it with a light lunch or a side of easy pasta recipes for a balanced meal.
  • Top it with a few extra strawberry slices or a sprinkle of granola for added texture.

Make Ahead and Storage

If you’re like me and love to plan ahead, you’ll be happy to know that this shake can be made in advance! Here’s how to store it:

  • Store any leftovers in an airtight container in the refrigerator for up to 24 hours. Just give it a good shake or stir before enjoying again.
  • If you want to prep it for the week, you can freeze the ingredients (except for the liquid) in a freezer bag. When you’re ready to enjoy, just blend with your choice of milk!
  • For a quick breakfast option, consider making a batch of this shake and pairing it with some 30-minute meals for a complete start to your day.

So there you have it! A delightful Protein Strawberry Shortshake that’s not only delicious but also nutritious. I hope you give this recipe a try and enjoy every sip. It’s a fantastic way to treat yourself while staying on track with your health goals. Cheers to delicious and healthy living!

Protein Strawberry Shortshake

Prep Time 5 minutes
Total Time 5 minutes
Servings 1 cup
Calories 250
A delicious and nutritious strawberry protein shake perfect for a quick breakfast or post-workout boost.

Ingredients

Liquid

  • 6 ounces Milk Substitute (or Milk)

Dry Ingredients

  • 0.25 cup Rolled Oats
  • 5.3 ounces Greek Yogurt (Fat Free Strawberry)
  • 1 cup Strawberries
  • 0.5 teaspoon Vanilla Extract
  • 1 scoop Protein Powder (Vanilla)
  • 4 wafers Wafers (Reduced Fat)
  • 0.5 cup Ice

Instructions 

  • Put all of your ingredients into a blender
  • Blend everything together

Notes

For a creamier texture, add a little more ice or yogurt.
Calories: 250kcal
Cost: $8
Course: Breakfast
Cuisine: American
Keyword: Protein, Strawberry

Are you ready to elevate your weeknight dinner game? I know I am! Today, I’m excited to share my delicious and nutritious Bodybuilding Mac and Cheese recipe. This isn’t just any mac and cheese; it’s packed with protein and flavor, making it a perfect choice for quick family dinners. Plus, it’s one of those easy pasta recipes that you can whip up in just 30 minutes! So, let’s dive in and discover how to make this creamy, dreamy dish that will have everyone asking for seconds.

Why You’ll Love This Recipe

  • High in protein, thanks to the addition of tuna and Greek yogurt.
  • Quick and easy to prepare, making it perfect for busy weeknights.
  • Rich and creamy, satisfying your comfort food cravings.
  • Customizable with your favorite veggies or proteins.
  • A great way to sneak in some extra nutrition for the whole family!

Ingredients

To make this Bodybuilding Mac and Cheese, you’ll need the following ingredients:

  • 8 oz elbow macaroni
  • 1 can (5 oz) tuna, drained
  • 1 cup Greek yogurt
  • 1 cup shredded cheddar cheese
  • 1/2 cup milk (or a dairy-free alternative)
  • 2 cloves garlic, minced
  • 1/2 teaspoon onion powder
  • Salt and pepper to taste
  • Optional: steamed broccoli or spinach for added nutrition

Full ingredient list with measurements is provided in the printable recipe card below.

How to Make the Recipe

Now, let’s get cooking! Follow these simple steps to create your Bodybuilding Mac and Cheese:

  1. Start by boiling a large pot of salted water. Add the elbow macaroni and cook according to package instructions until al dente. Drain and set aside.
  2. In the same pot, reduce the heat to medium and add the minced garlic. Sauté for about 1 minute until fragrant.
  3. Stir in the Greek yogurt, milk, and shredded cheddar cheese. Mix until the cheese is melted and the sauce is creamy.
  4. Add the drained tuna, onion powder, salt, and pepper. Stir until everything is well combined.
  5. Finally, fold in the cooked macaroni and any optional veggies you’d like to add. Mix until the pasta is fully coated in the creamy sauce.
  6. Serve hot and enjoy your delicious Bodybuilding Mac and Cheese!

Pro Tips for Making the Recipe

Here are some of my favorite tips to ensure your Bodybuilding Mac and Cheese turns out perfectly:

  • For a little extra flavor, try adding a pinch of smoked paprika or cayenne pepper.
  • If you prefer a thicker sauce, let it simmer for a few extra minutes before adding the pasta.
  • Feel free to swap out the tuna for shredded chicken or even cooked lentils for a vegetarian option.
  • Don’t forget to taste and adjust the seasoning as needed!

How to Serve

This Bodybuilding Mac and Cheese is perfect as a standalone dish, but you can also serve it with:

  • A fresh garden salad for a light and healthy side.
  • Garlic bread for that extra comfort food vibe.
  • Steamed vegetables to boost the nutrition even further.

It’s a fantastic option for weeknight dinner ideas that the whole family will love!

Make Ahead and Storage

If you want to prepare this dish in advance, you can make it ahead of time and store it in the refrigerator for up to 3 days. Just reheat it in the microwave or on the stovetop, adding a splash of milk to loosen the sauce if needed. You can also freeze leftovers for up to 2 months. Just make sure to store it in an airtight container!

So there you have it! A delightful, protein-packed Bodybuilding Mac and Cheese that’s not only easy to make but also incredibly satisfying. I hope you give this recipe a try and enjoy it as much as I do. Happy cooking!

Bodybuilding Mac & Cheese

Prep Time 10 minutes
Cook Time 10 minutes
Total Time 20 minutes
Servings 2 servings
Calories 550
A high-protein, creamy mac and cheese with tuna, perfect for muscle building and quick meals.

Ingredients

Pasta

  • 6 ounces Pasta

Canned Tuna or Chicken

  • 2 cans Tuna (or Canned Chicken Breast/Cooked Chicken Breast/Lean Ground Beef/Turkey)

Cheddar Cheese

  • ¾ cup Cheddar Cheese (Reduced Fat Sharp)

Parmesan & Romano Cheese

  • 3 tablespoons Parmesan & Romano Cheese (Grated)

Garlic Powder

  • 1 teaspoon Garlic Powder

Onion Salt

  • ¼ teaspoon Onion Salt

Greek Yogurt

  • 5.3 ounces Greek Yogurt (Plain Fat Free)

Instructions 

  • Drain the tuna and place it in a large bowl.
  • Cook the pasta according to package instructions.
  • Drain the pasta and return it to the pot.
  • Add cheddar and Parmesan cheeses, then stir until melted.
  • Mix in garlic powder, onion salt, and Greek yogurt.
  • Stir in the tuna until well combined.

Notes

For extra flavor, add a pinch of black pepper or hot sauce.
Calories: 550kcal
Cost: $12
Course: Main Course
Cuisine: American
Keyword: High Protein

Are you ready to indulge in a delicious treat that’s not only satisfying but also packed with nutrition? I know I am! Today, I’m excited to share my recipe for a Strawberry Cheesecake Protein Shake that you can whip up in just 5 minutes. This shake is perfect for those busy mornings or as a delightful afternoon snack. Plus, it’s a fantastic way to boost your energy while satisfying your sweet tooth. And if you’re looking for easy pasta recipes to complement your meals, I’ve got you covered there too!

Why You’ll Love This Recipe

  • Quick and easy to make in just 5 minutes!
  • Deliciously creamy and satisfying, perfect for a sweet craving.
  • Packed with protein to keep you energized throughout the day.
  • Versatile – enjoy it for breakfast, a snack, or even dessert!
  • Great way to incorporate fruits into your diet.

Ingredients

To make this delightful Strawberry Cheesecake Protein Shake, you’ll need the following ingredients:

  • 1 cup fresh or frozen strawberries
  • 1 cup milk (dairy or non-dairy)
  • 1 scoop vanilla protein powder
  • 1/2 cup Greek yogurt
  • 1 tablespoon cream cheese
  • 1 tablespoon honey or maple syrup (optional)
  • Ice cubes (optional, for a thicker shake)

Full ingredient list with measurements is provided in the printable recipe card below.

How to Make the Recipe

Making this Strawberry Cheesecake Protein Shake is as easy as 1-2-3! Here’s how:

  1. In a blender, combine the strawberries, milk, protein powder, Greek yogurt, cream cheese, and honey or maple syrup if you’re using it.
  2. Blend on high until smooth and creamy. If you prefer a thicker shake, add a few ice cubes and blend again.
  3. Taste and adjust sweetness if necessary, then pour into a glass and enjoy!

Pro Tips for Making the Recipe

Here are some of my favorite tips to ensure your shake turns out perfectly every time:

  • Use frozen strawberries for a colder, thicker shake.
  • Feel free to experiment with different flavors of protein powder to customize your shake.
  • If you want to add a little extra nutrition, toss in a handful of spinach or kale – you won’t even taste it!
  • For a fun twist, add a sprinkle of graham cracker crumbs on top for that cheesecake crust flavor.

How to Serve

This Strawberry Cheesecake Protein Shake is best enjoyed fresh, but you can also serve it in a fun way! Here are some serving suggestions:

  • Top with whipped cream and a few fresh strawberries for a beautiful presentation.
  • Serve it in a mason jar for a cute, on-the-go option.
  • Pair it with some quick family dinners or 30-minute meals for a balanced meal.

Make Ahead and Storage

If you want to prepare this shake ahead of time, you can store the ingredients in the blender jar in the fridge for up to 24 hours. Just blend it when you’re ready to enjoy! However, I recommend consuming it fresh for the best flavor and texture. If you have leftovers, you can store them in the fridge for a day, but keep in mind that the shake may separate, so give it a good stir before drinking.

And there you have it! A delicious and nutritious Strawberry Cheesecake Protein Shake that’s perfect for any time of the day. Whether you’re looking for a quick breakfast, a post-workout snack, or a sweet treat, this shake has got you covered. Don’t forget to check out my other weeknight dinner ideas and creamy garlic pasta recipes for more delicious meals that fit into your busy lifestyle. Enjoy your shake, and happy blending!

Strawberry Cheesecake Protein Shake

Prep Time 5 minutes
Total Time 5 minutes
Servings 1 shake
Calories 250
A delicious and nutritious shake combining strawberries, cheesecake flavor, and protein to energize your day.

Ingredients

Liquid

  • 8 oz Milk Substitute (or Milk)
  • 3 tablespoons Liquid Egg Whites (Pasteurized)
  • 1.5 servings Instant Pudding (Sugar Free Fat Free Cheesecake)
  • 1 cup Strawberries
  • 0.5 cup Cottage Cheese (Fat Free)
  • 1.5 scoops Protein Powder (Strawberry or Vanilla)
  • 0.5 teaspoon Vanilla Extract
  • 1 cup Ice

Instructions 

  • Blend everything together

Notes

You can add a little honey or sweetener if desired.
Calories: 250kcal
Cost: $8
Course: Breakfast, Snack
Cuisine: American
Keyword: cheesecake, Protein, Strawberry

Are you ready to whip up a delicious and nutritious drink that will satisfy your sweet tooth and give you a boost of energy? I know I am! Today, I’m excited to share my favorite recipe for a Peanut Butter & Jelly Protein Shake. This delightful shake is not only quick to make, but it also fits perfectly into my busy lifestyle, especially when I’m juggling quick family dinners and looking for easy pasta recipes to try. In just 5 minutes, you can enjoy a creamy, dreamy shake that tastes just like your childhood favorite!

Why You’ll Love This Recipe

  • Quick and easy to make in just 5 minutes!
  • Packed with protein to keep you energized throughout the day.
  • Perfect for breakfast, a snack, or even a post-workout treat.
  • Deliciously reminiscent of classic peanut butter and jelly sandwiches.
  • Customizable with your favorite protein powder and milk alternatives.

Ingredients

To make this delightful Peanut Butter & Jelly Protein Shake, you’ll need the following ingredients:

  • 1 cup of milk (dairy or non-dairy)
  • 1 banana (fresh or frozen)
  • 2 tablespoons of peanut butter
  • 1 tablespoon of jelly (your favorite flavor)
  • 1 scoop of protein powder (vanilla or unflavored)
  • Ice cubes (optional, for a thicker shake)

Full ingredient list with measurements is provided in the printable recipe card below.

How to Make the Recipe

Making this Peanut Butter & Jelly Protein Shake is as easy as 1-2-3! Here’s how:

  1. In a blender, combine the milk, banana, peanut butter, jelly, and protein powder.
  2. Add a handful of ice cubes if you prefer a thicker shake.
  3. Blend on high until smooth and creamy, about 30 seconds.
  4. Taste and adjust sweetness if needed by adding more jelly or a touch of honey.
  5. Pour into a glass and enjoy immediately!

Pro Tips for Making the Recipe

Here are some of my favorite tips to ensure your shake turns out perfectly every time:

  • For a creamier texture, use frozen bananas instead of fresh ones.
  • Experiment with different flavors of jelly or jam to find your favorite combination.
  • If you’re looking for a post-workout boost, try adding a tablespoon of chia seeds or flaxseeds for extra nutrition.
  • For a fun twist, add a scoop of cocoa powder for a chocolatey version!
  • Don’t forget to check out my other weeknight dinner ideas for a complete meal!

How to Serve

This Peanut Butter & Jelly Protein Shake is perfect for any time of day! Here are some serving suggestions:

  • Enjoy it as a quick breakfast on busy mornings.
  • Pair it with a slice of whole-grain toast for a satisfying snack.
  • Serve it as a post-workout recovery drink to replenish your energy.
  • For a fun family treat, serve it in colorful cups with straws!

Make Ahead and Storage

If you’re like me and love to plan ahead, you can make this shake in advance! Here’s how:

  • Blend all the ingredients except for the ice and store the mixture in an airtight container in the fridge for up to 24 hours.
  • When you’re ready to enjoy, simply add ice and blend again for a refreshing shake.
  • For longer storage, you can freeze the blended shake in ice cube trays and blend again when you’re ready to drink.

And there you have it! A delicious Peanut Butter & Jelly Protein Shake that’s not only quick to make but also packed with flavor and nutrition. Whether you’re looking for 30-minute meals or just a tasty treat, this shake is sure to hit the spot. Don’t forget to check out my other easy pasta recipes for more delightful meal ideas!

Peanut Butter & Jelly Protein Shake

Prep Time 5 minutes
Total Time 5 minutes
Servings 1 serving
Calories 350
A delicious and protein-packed shake perfect for a quick breakfast or post-workout boost.

Ingredients

Liquid

  • 6 ounces Milk Substitute (or Milk)

Dairy

  • ½ cup Cottage Cheese (Fat Free)

Add-ins

  • 2 tablespoons Flaxseed Meal
  • 1 scoop Protein Powder (Vanilla)
  • ¼ cup Rolled Oats
  • 1 tablespoon Peanut Butter
  • 2 tablespoons Jelly (Sugar Free or Fiber)
  • 1 cup Ice

Instructions 

  • Blend everything together

Notes

You can substitute almond milk for a creamier texture.
Calories: 350kcal
Cost: $8
Course: Breakfast
Keyword: Protein Shake

As the leaves start to turn and the air gets a little crisper, I find myself craving all things pumpkin! One of my absolute favorite treats to whip up is a Protein Pumpkin Cheesecake with a crunchy crust. It’s not just delicious; it’s also a healthier option that satisfies my sweet tooth without the guilt. Plus, it’s a fantastic way to sneak in some protein! If you’re looking for a delightful dessert that’s perfect for fall gatherings or just a cozy night in, you’re in the right place. And hey, if you’re also on the hunt for easy pasta recipes for quick family dinners, I’ve got you covered there too!

Why You’ll Love This Recipe

  • It’s a healthier dessert option packed with protein.
  • Perfect for fall gatherings or a cozy night in.
  • Easy to make in just five simple steps!
  • Deliciously creamy with a crunchy crust that everyone will love.
  • Great for meal prep—make it ahead and enjoy it all week!

Ingredients

To make this delightful Protein Pumpkin Cheesecake, you’ll need the following ingredients:

  • 1 ½ cups graham cracker crumbs
  • ½ cup melted coconut oil
  • 2 cups pumpkin puree
  • 1 cup cream cheese, softened
  • 1 cup Greek yogurt
  • ¾ cup protein powder (vanilla or unflavored)
  • ¾ cup maple syrup or honey
  • 2 teaspoons pumpkin pie spice
  • 1 teaspoon vanilla extract
  • 3 large eggs

Full ingredient list with measurements is provided in the printable recipe card below.

How to Make the Recipe

Now, let’s dive into the fun part—making this scrumptious cheesecake! Follow these five easy steps:

  1. Prepare the Crust: Preheat your oven to 350°F (175°C). In a mixing bowl, combine the graham cracker crumbs and melted coconut oil. Press this mixture into the bottom of a 9-inch springform pan to form a crust. Bake for 10 minutes, then let it cool.
  2. Mix the Filling: In a large bowl, beat the softened cream cheese until smooth. Add the pumpkin puree, Greek yogurt, protein powder, maple syrup, pumpkin pie spice, and vanilla extract. Mix until well combined.
  3. Add the Eggs: Beat in the eggs one at a time, mixing well after each addition. This will give your cheesecake that creamy texture we all love!
  4. Pour and Bake: Pour the filling over the cooled crust in the springform pan. Bake for 45-50 minutes, or until the center is set but still slightly jiggly.
  5. Cool and Chill: Once baked, turn off the oven and let the cheesecake cool in the oven with the door slightly ajar for about an hour. Then, refrigerate for at least 4 hours or overnight for the best flavor.

Pro Tips for Making the Recipe

Here are some of my favorite tips to ensure your Protein Pumpkin Cheesecake turns out perfectly:

  • Make sure your cream cheese is at room temperature to avoid lumps in your filling.
  • For a gluten-free option, use gluten-free graham crackers for the crust.
  • Feel free to adjust the sweetness by adding more or less maple syrup based on your taste.
  • Top with whipped cream or a sprinkle of cinnamon for an extra special touch!

How to Serve

This cheesecake is perfect on its own, but you can also serve it with:

  • Fresh whipped cream
  • Chopped nuts for added crunch
  • A drizzle of caramel sauce for a sweet touch
  • Seasonal fruits like cranberries or pomegranate seeds for a pop of color

It’s a delightful dessert that will impress your family and friends!

Make Ahead and Storage

This Protein Pumpkin Cheesecake is perfect for meal prep! You can make it ahead of time and store it in the refrigerator for up to a week. Just make sure to cover it well to keep it fresh. If you want to enjoy it later, you can also freeze individual slices. Just wrap them tightly in plastic wrap and then place them in an airtight container. When you’re ready to enjoy, simply thaw in the refrigerator overnight.

So, whether you’re looking for a sweet treat after a busy week of 30-minute meals or a delicious dessert to serve at your next gathering, this Protein Pumpkin Cheesecake with a crust is sure to be a hit. And if you’re also in need of some weeknight dinner ideas, don’t forget to check out my favorite creamy garlic pasta recipe for a quick family dinner that pairs perfectly with this cheesecake!

Protein Pumpkin Cheesecake with a Crust

Prep Time 20 minutes
Cook Time 1 hour 40 minutes
Total Time 2 hours
Servings 8 pieces
Calories 350
A delicious and healthy pumpkin cheesecake with a crunchy ginger snap crust, perfect for fall or any time you crave a sweet treat with added protein.

Ingredients

Crust

  • 4 pieces Ginger Snaps (Crushed Up)
  • 0.25 cup Almond Flour
  • 3 tablespoons Butter (Melted)

Filling

  • 16 ounces Cream Cheese (Fat Free)
  • 1 large Whole Egg
  • 2 large Egg Whites
  • 0.33 cup Sweetener
  • 1-2 tablespoons Light Brown Sugar (or Brown Sugar Substitute)
  • 1.5 teaspoons Vanilla Extract
  • 0.5 tablespoon Pumpkin Pie Spice
  • 0.5 teaspoon Ground Cinnamon
  • 10.6 ounces Greek Yogurt (Fat Free (Pumpkin or Vanilla))
  • 2 scoops Protein Powder (Vanilla)
  • 0.5 cup Pumpkin Puree

Instructions 

  • Line a 6x2 inch pan with parchment paper.
  • Mix crushed Ginger Snaps, melted butter, and crust ingredients; press into pan.
  • Bake crust at 350°F (176°C) for 8-12 minutes until golden.
  • Mix all cheesecake ingredients except protein powder and pumpkin.
  • Stir in protein powder.
  • Divide batter, add pumpkin to one part, then layer and swirl in pan.
  • Bake at 350°F (176°C) for 30-35 minutes, then reduce to 200°F (93°C) and bake 50-60 minutes.
  • Cool, refrigerate for a few hours or overnight before serving.

Notes

For best results, chill the cheesecake overnight before serving.
Calories: 350kcal
Cost: $15
Course: Dessert
Cuisine: American
Keyword: cheesecake, Protein, pumpkin