Author

Ava

Browsing

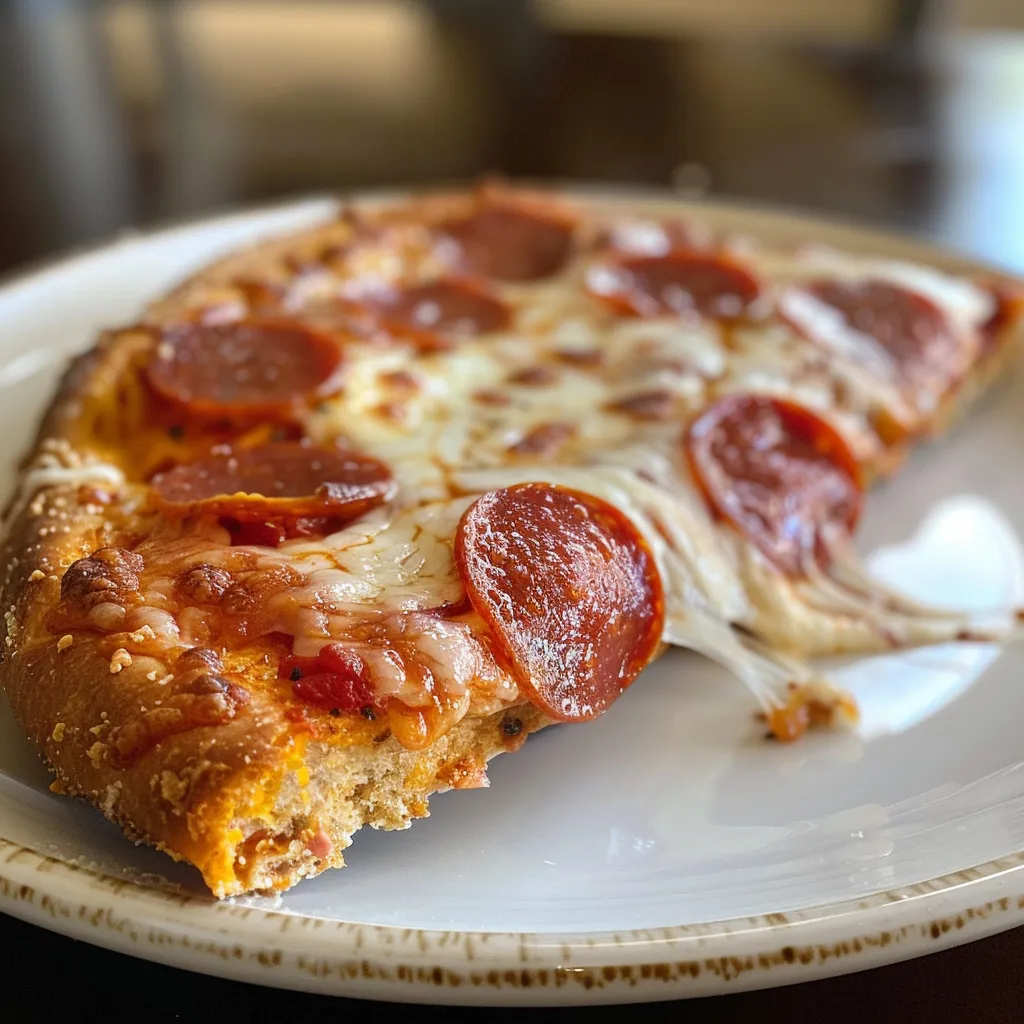
Are you ready to indulge in a delicious, guilt-free treat? I know I am! Today, I’m excited to share my recipe for Mini Low Carb Deep Dish Pizza. This delightful dish is perfect for those busy weeknights when you crave something comforting yet healthy. Plus, it’s a fantastic option for quick family dinners! With just a few simple ingredients, you can whip up this low carb pizza that will satisfy your cravings without the carbs. Let’s dive in!

Why You’ll Love This Recipe

  • Perfect for quick family dinners that everyone will love.
  • Low carb and healthy, making it a great choice for those watching their diet.
  • Easy to customize with your favorite toppings.
  • Ready in under 30 minutes, making it one of those fantastic 30-minute meals.
  • Great for meal prep and leftovers!

Ingredients

To make these delightful mini pizzas, you’ll need the following ingredients:

  • 1 cup almond flour
  • 1/2 cup shredded mozzarella cheese
  • 1/4 cup cream cheese
  • 1 large egg
  • 1 teaspoon Italian seasoning
  • 1/2 teaspoon garlic powder
  • 1/2 cup pizza sauce (low carb)
  • 1 cup assorted toppings (pepperoni, bell peppers, mushrooms, etc.)
  • 1/2 cup additional shredded mozzarella cheese for topping

Full ingredient list with measurements is provided in the printable recipe card below.

How to Make the Recipe

Now, let’s get cooking! Follow these simple steps to create your Mini Low Carb Deep Dish Pizza:

  1. Preheat your oven to 350°F (175°C).
  2. In a mixing bowl, combine the almond flour, shredded mozzarella cheese, cream cheese, egg, Italian seasoning, and garlic powder. Mix until a dough forms.
  3. Grease a muffin tin with cooking spray or olive oil. Press the dough into the bottom and up the sides of each muffin cup to form a crust.
  4. Bake the crusts in the preheated oven for about 10 minutes, or until they are golden brown.
  5. Remove the crusts from the oven and spoon a tablespoon of pizza sauce into each crust.
  6. Add your favorite toppings and sprinkle with additional mozzarella cheese.
  7. Return the muffin tin to the oven and bake for another 10-15 minutes, or until the cheese is bubbly and golden.
  8. Let them cool for a few minutes before removing from the tin. Enjoy your delicious mini pizzas!

Pro Tips for Making the Recipe

Here are some of my favorite tips to ensure your Mini Low Carb Deep Dish Pizza turns out perfectly:

  • Feel free to experiment with different toppings! I love using veggies like spinach and zucchini for added nutrition.
  • If you’re a fan of creamy garlic pasta, consider adding a garlic cream sauce as a base instead of pizza sauce for a unique twist!
  • Make sure to press the dough firmly into the muffin tin to create a sturdy crust.
  • For a fun family activity, let everyone customize their own mini pizza with their favorite toppings.
  • These mini pizzas are also great for meal prep! Make a batch and store them in the fridge for quick weeknight dinner ideas.

How to Serve

These Mini Low Carb Deep Dish Pizzas are perfect for serving at family gatherings or casual weeknight dinners. Pair them with a fresh salad or some roasted vegetables for a complete meal. You can also serve them with a side of low carb dipping sauce for an extra flavor boost. They’re great for kids and adults alike, making them a hit at any table!

Make Ahead and Storage

If you want to prepare these mini pizzas ahead of time, you can make the crusts and store them in the fridge for up to 3 days. Just add the toppings and bake when you’re ready to enjoy! For longer storage, you can freeze the baked mini pizzas. Just wrap them tightly in plastic wrap and place them in an airtight container. They’ll keep well in the freezer for up to 2 months. When you’re ready to eat, simply reheat them in the oven until warmed through.

So there you have it! A delicious, low carb option that’s perfect for quick family dinners and satisfying those pizza cravings. I hope you enjoy making and eating these Mini Low Carb Deep Dish Pizzas as much as I do. Happy cooking!

Mini Low Carb Deep Dish Pizza

Prep Time 10 minutes
Cook Time 25 minutes
Total Time 35 minutes
Servings 4 pieces
Calories 450
A delicious low-carb pizza option with a crispy crust and customizable toppings, perfect for a quick and healthy meal.

Ingredients

Crust

  • 3 large Large Whole Eggs
  • 5 ounces Cream Cheese (Fat Free)
  • ½ teaspoon Oregano
  • 6 tablespoons Parmesan Cheese
  • ¼ teaspoon Garlic Powder
  • 9 ounces Cheese (Your Choice, Reduced/Fat Free)

Toppings

  • to taste Pizza Sauce (Low Sodium/Sugar)
  • to taste Cheese (Reduced/Fat Free Your Choice)
  • to taste Pepperoni (Your Choice)

Instructions 

  • Mix all crust ingredients in a bowl.
  • Distribute the mixture into prepared pans coated with non-stick spray.
  • Bake at 375°F (190°C) for 20-25 minutes.
  • Let cool, add toppings, then bake for another 20 minutes until cheese melts.

Notes

Use a non-stick spray to prevent sticking and ensure even baking.
Calories: 450kcal
Cost: $12
Course: Main Course
Cuisine: American
Keyword: Low Carb, Pizza

Are you ready to indulge in a deliciously healthy snack that will satisfy your sweet tooth without the guilt? I know I am! Today, I’m excited to share my recipe for No Bake Nutella Protein Bars. These bars are not only easy to make, but they also pack a protein punch, making them perfect for a quick pick-me-up during the day. Plus, they’re a fantastic option for those busy weeknights when you need something sweet but don’t want to spend hours in the kitchen. If you’re looking for easy pasta recipes or 30-minute meals, you’ll love how these bars fit right into your busy lifestyle!

Why You’ll Love This Recipe

  • Quick and easy to prepare – no baking required!
  • Nutritious and satisfying, perfect for a post-workout snack.
  • Customizable with your favorite mix-ins.
  • Great for meal prep – make a batch and enjoy all week!
  • Kids love them, making them a hit for family snacks!

Ingredients

To whip up these delightful bars, you’ll need just a handful of simple ingredients that you probably already have in your pantry. Here’s what you’ll need:

  • 1 cup rolled oats
  • 1/2 cup Nutella
  • 1/2 cup protein powder (vanilla or chocolate)
  • 1/4 cup honey or maple syrup
  • 1/4 cup chopped nuts (optional)
  • 1/4 cup chocolate chips (optional)

Full ingredient list with measurements is provided in the printable recipe card below.

How to Make the Recipe

Making these No Bake Nutella Protein Bars is as easy as 1-2-3! Follow these simple steps:

  1. In a large mixing bowl, combine the rolled oats, protein powder, and chopped nuts (if using).
  2. Add the Nutella and honey (or maple syrup) to the dry ingredients. Mix well until everything is combined and sticky.
  3. Fold in the chocolate chips for an extra treat!
  4. Line an 8×8 inch baking dish with parchment paper. Press the mixture firmly into the dish, spreading it evenly.
  5. Refrigerate for at least 30 minutes to set. Once firm, cut into bars and enjoy!

Pro Tips for Making the Recipe

Here are some of my favorite tips to ensure your protein bars turn out perfectly:

  • For a nut-free version, simply omit the nuts or substitute with seeds.
  • Experiment with different flavors of protein powder to change up the taste!
  • If the mixture is too dry, add a splash of milk or more honey to achieve the right consistency.
  • Press the mixture down firmly in the baking dish to ensure the bars hold together well.

How to Serve

These bars are perfect for any time of day! Here are some serving suggestions:

  • Enjoy them as a quick breakfast on the go.
  • Pack them in your kids’ lunchboxes for a sweet treat.
  • Pair them with a cup of coffee or tea for an afternoon snack.
  • Crush them up and sprinkle over creamy garlic pasta for a unique twist!

Make Ahead and Storage

These No Bake Nutella Protein Bars are perfect for meal prep! Here’s how to store them:

  • Store the bars in an airtight container in the refrigerator for up to one week.
  • You can also freeze them for up to three months. Just make sure to wrap them individually for easy snacking!
  • Thaw in the fridge overnight before enjoying.

Now that you know how to make these delicious bars, I hope you give them a try! They’re not only a fantastic snack but also a great addition to your list of weeknight dinner ideas when you need something sweet to finish off your meal. Enjoy your cooking adventure, and don’t forget to share your creations with friends and family!

No Bake Nutella Protein Bars

Prep Time 10 minutes
Cook Time 10 minutes
Total Time 20 minutes
Servings 8 bars
Calories 250
These delicious no-bake protein bars combine Nutella, oats, and protein powder for a quick, healthy snack.

Ingredients

Base Ingredients

  • 4 ounces Milk Substitute (or Milk)
  • 6 tablespoons Coconut Flour
  • ½ cup Rolled Oats
  • 3 scoops Protein Powder (Chocolate)
  • 1 tablespoon Cocoa Powder
  • 1 tablespoon Nutella
  • 3 tablespoons Chocolate Chips (Dark)

Instructions 

  • Combine all ingredients except chocolate chips in a food processor.
  • Process until clumpy, then shape into bars.
  • Melt chocolate chips in a pan over low heat, stirring constantly.
  • Top bars with melted chocolate and refrigerate for 20 minutes.

Notes

Store in the fridge for best freshness.
Calories: 250kcal
Cost: $10
Course: Snack
Keyword: Nutella, Protein

Are you ready to indulge in a sweet treat that won’t send your blood sugar soaring? I know I am! Today, I’m excited to share my recipe for Low Sugar Protein Donuts. These delightful little bites are not only delicious but also packed with protein, making them a perfect healthy snack. Plus, they’re super easy to whip up, just like my favorite easy pasta recipes for quick family dinners. Let’s dive into this scrumptious recipe!

Why You’ll Love This Recipe

  • Low in sugar but high in flavor!
  • Perfect for a quick snack or a post-workout treat.
  • Easy to make with simple ingredients you probably already have.
  • Great for meal prep—make a batch and enjoy throughout the week!
  • Kids love them too, making them a hit for family snacks!

Ingredients

To make these delightful Low Sugar Protein Donuts, you’ll need the following ingredients:

  • 1 cup almond flour
  • 1/2 cup protein powder (vanilla or chocolate)
  • 1/4 cup unsweetened applesauce
  • 1/4 cup almond milk (or any milk of your choice)
  • 1/4 cup honey or a low-calorie sweetener
  • 1 teaspoon baking powder
  • 1 teaspoon vanilla extract
  • 1/2 teaspoon cinnamon (optional)
  • Pinch of salt

Full ingredient list with measurements is provided in the printable recipe card below.

How to Make the Recipe

Making these Low Sugar Protein Donuts is a breeze! Here’s how you can do it:

  1. Preheat your oven to 350°F (175°C) and grease a donut pan.
  2. In a large mixing bowl, combine the almond flour, protein powder, baking powder, cinnamon, and salt.
  3. In another bowl, mix together the applesauce, almond milk, honey, and vanilla extract until well combined.
  4. Pour the wet ingredients into the dry ingredients and stir until just combined. Be careful not to overmix!
  5. Spoon the batter into the prepared donut pan, filling each cavity about 3/4 full.
  6. Bake for 12-15 minutes or until a toothpick inserted into the center comes out clean.
  7. Let the donuts cool in the pan for a few minutes before transferring them to a wire rack to cool completely.

Pro Tips for Making the Recipe

Here are some of my favorite tips to ensure your donuts turn out perfectly:

  • For a fun twist, add chocolate chips or nuts to the batter before baking.
  • If you prefer a sweeter donut, feel free to adjust the amount of honey or sweetener to your taste.
  • Make sure not to overbake; keep an eye on them as they can dry out quickly.
  • Experiment with different flavors of protein powder to find your favorite combination!

How to Serve

These Low Sugar Protein Donuts are delicious on their own, but you can elevate them even further! Here are some serving suggestions:

  • Drizzle with a little melted dark chocolate for a decadent treat.
  • Top with a dollop of Greek yogurt and fresh berries for a nutritious breakfast.
  • Pair them with a cup of coffee or tea for a delightful afternoon snack.
  • Serve them at your next brunch gathering as a healthier alternative to traditional donuts!

Make Ahead and Storage

These donuts are perfect for meal prep! Here’s how to store them:

  • Store cooled donuts in an airtight container at room temperature for up to 3 days.
  • For longer storage, keep them in the refrigerator for up to a week.
  • You can also freeze them! Just place them in a freezer-safe bag, and they’ll last for up to 3 months. Thaw them at room temperature or pop them in the microwave for a quick snack.

Now that you have this fantastic recipe for Low Sugar Protein Donuts, you can enjoy a sweet treat without the guilt! They’re perfect for those busy weeknights when you need something quick and satisfying, just like my favorite 30-minute meals or creamy garlic pasta dishes. So, gather your ingredients and get baking! I can’t wait for you to try these delicious donuts!

Low Sugar Protein Donuts

Prep Time 10 minutes
Cook Time 12 minutes
Total Time 22 minutes
Servings 6 donuts
Calories 180
Enjoy these healthy, low-sugar protein donuts perfect for a quick breakfast or snack. They are easy to make and packed with protein and flavor.

Ingredients

Dry Ingredients

  • 0.5 cup Rolled Oats
  • 4 tablespoons Sweetener
  • 1 teaspoon Ground Cinnamon
  • 0.25 teaspoon Baking Soda
  • 1.5 teaspoons Baking Powder
  • 1 scoop Protein Powder (Vanilla)
  • 1 teaspoon Vanilla Extract
  • 0.5 cup Unsweetened Apple Sauce
  • 0.5 avocado Avocado
  • 1 large Whole Egg
  • 6 tablespoons Liquid Egg Whites (or 2 Large Egg Whites)
  • to taste Chocolate Chips (Sugar Free *Optional)
  • 0.5 scoop Protein Powder (Vanilla)
  • 1 tablespoon Sweetener
  • 2 ounces Cream Cheese (Fat Free)
  • 2.65 ounces Greek Yogurt (Fat Free Vanilla)

Instructions 

  • Combine all ingredients in a blender or food processor.
  • Blend until smooth.
  • Spray donut pan with non-stick spray and fill each cavity.
  • Add chocolate chips on top if desired.
  • Bake at 350°F (176°C) for 10-12 minutes.
  • Mix frosting ingredients until smooth and add to donuts.

Notes

Using a food processor helps achieve a smooth batter. Feel free to add sugar-free chocolate chips for extra flavor.
Calories: 180kcal
Cost: $15
Course: Breakfast
Cuisine: American
Keyword: Donuts, Healthy, Protein

Are you ready to kickstart your mornings with a breakfast that’s not only delicious but also packed with protein? I know I am! Today, I’m excited to share my recipe for White Chocolate Raspberry Protein Oatmeal. This delightful dish is perfect for those busy mornings when you need something quick and nutritious. Plus, it’s a fantastic way to satisfy your sweet tooth without the guilt. And let’s be honest, who doesn’t love a little white chocolate in their life? If you’re looking for easy pasta recipes or quick family dinners, this oatmeal will fit right into your meal rotation!

Why You’ll Love This Recipe

  • Quick and easy to prepare in just 5 minutes!
  • Packed with protein to keep you full and energized.
  • Deliciously creamy with the perfect balance of sweet and tart.
  • Great for meal prep—make it ahead for busy mornings!
  • Versatile—customize with your favorite fruits or toppings.

Ingredients

To whip up this delightful White Chocolate Raspberry Protein Oatmeal, you’ll need the following ingredients:

  • 1 cup rolled oats
  • 2 cups almond milk (or any milk of your choice)
  • 1 scoop vanilla protein powder
  • 1/4 cup white chocolate chips
  • 1/2 cup fresh raspberries (or frozen, if you prefer)
  • 1 tablespoon honey or maple syrup (optional)
  • Pinch of salt

Full ingredient list with measurements is provided in the printable recipe card below.

How to Make the Recipe

Making this scrumptious oatmeal is as easy as 1-2-3! Here’s how:

  1. In a medium saucepan, combine the rolled oats, almond milk, and a pinch of salt. Bring to a gentle boil over medium heat.
  2. Once boiling, reduce the heat to low and stir in the vanilla protein powder. Cook for about 2-3 minutes, stirring occasionally, until the oats are creamy and have absorbed most of the liquid.
  3. Remove from heat and stir in the white chocolate chips until melted. Gently fold in the fresh raspberries.
  4. If desired, drizzle with honey or maple syrup for added sweetness.
  5. Serve warm and enjoy your delicious breakfast!

Pro Tips for Making the Recipe

Here are some of my favorite tips to ensure your oatmeal turns out perfectly every time:

  • For a creamier texture, use a milk with higher fat content, like whole milk or coconut milk.
  • Feel free to swap out the raspberries for other fruits like strawberries or blueberries, depending on your preference.
  • If you’re in a rush, you can prepare the oats the night before and simply reheat them in the morning.
  • For an extra protein boost, add a tablespoon of nut butter on top before serving.
  • Don’t forget to check out my other 30-minute meals for more quick and delicious ideas!

How to Serve

This White Chocolate Raspberry Protein Oatmeal is best served warm, but you can also enjoy it cold if you prefer! Here are some serving suggestions:

  • Top with additional fresh raspberries and a sprinkle of white chocolate chips for a beautiful presentation.
  • Pair it with a side of Greek yogurt for added creaminess and protein.
  • Serve it alongside a cup of your favorite coffee or tea for a complete breakfast experience.
  • For a fun twist, try adding a dollop of whipped cream on top for a special treat!

Make Ahead and Storage

If you’re like me and love to meal prep, this oatmeal is perfect for making ahead! Here’s how to store it:

  • Store any leftovers in an airtight container in the refrigerator for up to 3 days.
  • To reheat, simply add a splash of milk and microwave for 1-2 minutes, stirring halfway through.
  • You can also freeze individual portions for up to a month. Just thaw overnight in the fridge before reheating.
  • For more meal prep ideas, check out my collection of weeknight dinner ideas that are quick and satisfying!

So there you have it! A delightful, protein-packed breakfast that’s ready in just 5 minutes. I hope you enjoy making and eating this White Chocolate Raspberry Protein Oatmeal as much as I do. Happy cooking!

White Chocolate Raspberry Protein Oatmeal

Prep Time 5 minutes
Cook Time 2 minutes
Total Time 7 minutes
Servings 1 serving
Calories 250
A delicious and nutritious oatmeal recipe infused with white chocolate and raspberry flavors, perfect for a quick breakfast or post-workout meal.

Ingredients

Base

  • 0.5 cup Rolled Oats
  • 4 ounces Milk Substitute (or Milk)
  • 1 ounce Water
  • 1 teaspoon Vanilla Extract
  • 1 scoop Protein Powder (Vanilla)
  • 1 ounce Raspberries
  • 1 tablespoon Jelly (Raspberry)
  • 1 teaspoon White Chocolate Chips
  • 1 serving Instant Pudding (Sugar Free Fat Free White Chocolate)

Instructions 

  • Combine milk, oats, and water in a microwave-safe bowl.
  • Microwave for about 2 minutes.
  • Add remaining ingredients while hot and mix well.

Notes

Feel free to top with extra raspberries or white chocolate chips for added flavor.
Calories: 250kcal
Cost: $4
Course: Breakfast
Keyword: Oatmeal, Protein, Raspberry, White Chocolate

Are you looking for a healthy snack that’s not only delicious but also packed with protein? Well, you’ve come to the right place! I absolutely love making my own homemade protein energy bars. They are perfect for a quick boost of energy, especially when I’m on the go. Plus, they’re super easy to whip up, making them a fantastic addition to my collection of easy pasta recipes and 30-minute meals. Let’s dive into this delightful recipe!

Why You’ll Love This Recipe

  • Quick and easy to make, perfect for busy schedules.
  • Customizable with your favorite ingredients.
  • Great for meal prep and on-the-go snacking.
  • Healthy and satisfying, keeping you full longer.
  • Perfect for kids and adults alike!

Ingredients

To make these delicious homemade protein energy bars, you’ll need the following ingredients:

  • 2 cups rolled oats
  • 1 cup nut butter (peanut, almond, or your favorite)
  • 1/2 cup honey or maple syrup
  • 1 cup protein powder (vanilla or chocolate)
  • 1/2 cup dark chocolate chips (optional)
  • 1/2 cup chopped nuts or seeds (optional)
  • 1 teaspoon vanilla extract

Full ingredient list with measurements is provided in the printable recipe card below.

How to Make the Recipe

Making these homemade protein energy bars is a breeze! Here’s how to do it:

  1. In a large mixing bowl, combine the rolled oats and protein powder.
  2. Add the nut butter, honey (or maple syrup), and vanilla extract. Mix until well combined.
  3. If you’re using chocolate chips or nuts, fold them into the mixture.
  4. Line an 8×8 inch baking dish with parchment paper. Pour the mixture into the dish and press it down firmly.
  5. Refrigerate for at least 1 hour to set.
  6. Once set, cut into bars and enjoy!

Pro Tips for Making the Recipe

Here are some of my favorite tips to ensure your energy bars turn out perfectly:

  • Feel free to experiment with different nut butters or sweeteners to find your favorite flavor combination.
  • If you prefer a chewier texture, add a bit more honey or nut butter.
  • For a fun twist, try adding dried fruits like cranberries or apricots.
  • Make sure to press the mixture down firmly in the baking dish to help the bars hold together.

How to Serve

These homemade protein energy bars are incredibly versatile! Here are some serving suggestions:

  • Enjoy them as a quick breakfast on busy mornings.
  • Pack them in your kids’ lunchboxes for a healthy snack.
  • Pair them with a piece of fruit for a balanced snack.
  • Crush them up and sprinkle over your favorite yogurt for a delicious topping.

Make Ahead and Storage

One of the best things about these energy bars is that they are perfect for meal prep! Here’s how to store them:

  • Store the bars in an airtight container in the refrigerator for up to 2 weeks.
  • You can also freeze them for up to 3 months. Just make sure to wrap them individually in plastic wrap before placing them in a freezer bag.
  • When you’re ready to enjoy, simply thaw them in the fridge overnight or at room temperature for a few hours.

Now that you know how to make these delicious homemade protein energy bars, you can enjoy a healthy snack anytime! They’re perfect for those busy days when you need a quick pick-me-up. And if you’re looking for more quick family dinners or weeknight dinner ideas, don’t forget to check out my collection of creamy garlic pasta recipes and other easy pasta recipes. Happy snacking!

Homemade Protein Energy Bars

Prep Time 15 minutes
Cook Time 10 minutes
Total Time 25 minutes
Servings 10 bars
Calories 250
Enjoy these nutritious and delicious homemade protein energy bars, perfect for a quick snack or post-workout boost.

Ingredients

Dry Ingredients

  • 2 cups Rolled Oats
  • 4 tablespoons Cocoa Powder
  • 10 teaspoons Instant Coffee
  • 6 scoops Protein Powder (Chocolate)

Wet Ingredients

  • 4 ounces Milk Substitute (or Milk)
  • 2 tablespoons Brown Rice Syrup (or Honey)
  • 2 teaspoons Vanilla Extract
  • 16 tablespoons Peanut Butter
  • 2 tablespoons Chocolate Chips (Semi-Sweet)

Instructions 

  • Process oats until flour-like consistency.
  • Mix dry ingredients in a large bowl.
  • Heat a pan on low and add wet ingredients, stirring until combined.
  • Gradually add dry mixture, mixing well.
  • Press mixture into a pan and top with chocolate chips, pressing them in.
  • Refrigerate until firm, then cut into bars.

Notes

Store in an airtight container in the fridge for best freshness.
Calories: 250kcal
Cost: $15
Course: Snack
Keyword: Protein Bars

Are you looking for a delicious and nutritious snack that satisfies your sweet tooth while also being packed with healthy ingredients? Well, you’re in for a treat! Today, I’m excited to share my recipe for High Fiber Protein Fudge. This delightful fudge is not only easy to make but also a fantastic way to incorporate more fiber and protein into your diet. Plus, it’s perfect for those busy weeknights when you need a quick pick-me-up or a sweet treat after dinner. And let’s be honest, who doesn’t love a little chocolatey goodness? So, let’s dive into this recipe that’s as simple as my favorite easy pasta recipes!

Why You’ll Love This Recipe

  • It’s packed with fiber and protein, making it a healthy snack option.
  • Quick and easy to prepare, perfect for busy weeknights.
  • Customizable with your favorite nuts or seeds.
  • Great for meal prep—make a batch and enjoy throughout the week!
  • Kids love it, making it a hit for family snack time!

Ingredients

To whip up this delightful High Fiber Protein Fudge, you’ll need the following ingredients:

  • 1 cup nut butter (peanut, almond, or cashew)
  • 1/2 cup honey or maple syrup
  • 1 cup rolled oats
  • 1/2 cup protein powder (vanilla or chocolate)
  • 1/4 cup cocoa powder
  • 1/2 cup dark chocolate chips
  • 1/4 cup chopped nuts (optional)
  • 1/4 teaspoon salt

Full ingredient list with measurements is provided in the printable recipe card below.

How to Make the Recipe

Making this High Fiber Protein Fudge is a breeze! Just follow these simple steps:

  1. In a medium bowl, mix together the nut butter and honey (or maple syrup) until smooth.
  2. Add in the rolled oats, protein powder, cocoa powder, and salt. Stir until well combined.
  3. Fold in the dark chocolate chips and chopped nuts if you’re using them.
  4. Line an 8×8 inch baking dish with parchment paper and pour the fudge mixture into the dish, spreading it evenly.
  5. Refrigerate for at least 2 hours or until firm.
  6. Once set, cut into squares and enjoy your delicious fudge!

Pro Tips for Making the Recipe

Here are some of my favorite tips to ensure your fudge turns out perfectly:

  • For a creamier texture, try using a smooth nut butter.
  • Feel free to experiment with different flavors of protein powder to find your favorite.
  • If you prefer a sweeter fudge, add a bit more honey or maple syrup.
  • Make sure to let the fudge set completely in the fridge for the best texture.
  • Store any leftovers in an airtight container in the fridge for up to a week.

How to Serve

This High Fiber Protein Fudge is versatile and can be served in various ways:

  • Enjoy it as a quick snack between meals.
  • Pair it with a cup of tea or coffee for a delightful afternoon treat.
  • Crush it over yogurt or oatmeal for added texture and flavor.
  • Serve it at family gatherings or parties as a healthier dessert option.

Make Ahead and Storage

This fudge is perfect for meal prep! You can make it ahead of time and store it in the fridge. Here are some storage tips:

  • Keep the fudge in an airtight container to maintain freshness.
  • It can be stored in the fridge for up to a week, or you can freeze it for longer storage.
  • To freeze, cut the fudge into squares and layer them with parchment paper in a freezer-safe container.

Now that you have this delightful recipe in your arsenal, you can enjoy a healthy snack that’s both satisfying and delicious. Whether you’re looking for quick family dinners or easy pasta recipes, this fudge is a fantastic addition to your weeknight dinner ideas. So, gather your ingredients and get ready to indulge in this creamy, chocolatey goodness. Happy cooking!

High Fiber Protein Fudge

Prep Time 15 minutes
Total Time 15 minutes
Servings 8 pieces
Calories 350
A delicious, high-fiber, protein-packed fudge perfect for a healthy snack or dessert.

Ingredients

Base

  • 0.5 cup Pumpkin Puree
  • 1 avocado Avocado
  • 0.25 cup Raisins
  • 2 tablespoons Honey
  • 1 teaspoon Vanilla Extract
  • 4 tablespoons Peanut Butter
  • 4 scoops Protein Powder
  • 2 tablespoons Chia Seeds
  • 0.5 teaspoon Salt
  • 6 tablespoons Cocoa Powder
  • 2 ounces Walnuts
  • 2-3 pieces Chocolate (Sugar Free *Optional)

Instructions 

  • Add Pumpkin, Avocado, Raisins, and Honey into a food processor.
  • Process until combined.
  • Add Vanilla Extract, Peanut Butter, Protein Powder, Chia Seeds, Salt, and Cocoa Powder. Process again.
  • Add Walnuts and lightly process.
  • Line a baking dish with parchment paper and pour the mixture, flattening it.
  • Melt the Chocolate and top the fudge with it.
  • Freeze for 3-6 hours, then cut into pieces.

Notes

Store in the freezer for best texture and freshness.
Calories: 350kcal
Cost: $15
Course: Dessert
Keyword: Fudge, High Fiber, Protein

Are you looking for a delicious way to kickstart your day? I know I am! As someone who loves to juggle quick family dinners and easy pasta recipes, I often find myself in need of a little extra energy. That’s why I’m excited to share my favorite Iced Coffee Protein Shake recipe with you! This shake is not only refreshing but also packed with protein to keep you energized throughout the day. Let’s dive in!

Why You’ll Love This Recipe

  • Quick and easy to make, perfect for busy mornings.
  • Deliciously creamy and satisfying, it feels like a treat!
  • Great source of protein to fuel your day.
  • Can be customized with your favorite flavors and add-ins.
  • Perfect for a post-workout boost or a mid-afternoon pick-me-up.

Ingredients

To whip up this delightful Iced Coffee Protein Shake, you’ll need just a few simple ingredients:

  • 1 cup brewed coffee, cooled
  • 1 scoop of your favorite protein powder
  • 1 banana (frozen works best!)
  • 1/2 cup almond milk (or any milk of your choice)
  • 1 tablespoon of cocoa powder (optional for a chocolatey twist)
  • Ice cubes
  • Sweetener to taste (honey, agave, or stevia)

Full ingredient list with measurements is provided in the printable recipe card below.

How to Make the Recipe

Making this Iced Coffee Protein Shake is as easy as pie! Here’s how:

  1. Start by brewing your coffee and letting it cool. You can even make it the night before and store it in the fridge!
  2. In a blender, combine the cooled coffee, protein powder, banana, almond milk, cocoa powder (if using), and a handful of ice cubes.
  3. Blend until smooth and creamy. If you like your shake a bit sweeter, add your preferred sweetener and blend again.
  4. Pour into a tall glass and enjoy immediately!

Pro Tips for Making the Recipe

Here are some of my favorite tips to ensure your Iced Coffee Protein Shake turns out perfectly every time:

  • For a thicker shake, use a frozen banana instead of a fresh one.
  • Experiment with different protein powders to find your favorite flavor.
  • Add a scoop of nut butter for extra creaminess and healthy fats.
  • If you’re short on time, consider making a batch of this shake and storing it in the fridge for a quick grab-and-go breakfast.
  • Pair it with some 30-minute meals or weeknight dinner ideas for a complete meal!

How to Serve

This Iced Coffee Protein Shake is perfect on its own, but you can also serve it with:

  • A slice of whole-grain toast topped with avocado for a balanced breakfast.
  • Your favorite creamy garlic pasta for a delightful dinner pairing.
  • Some fresh fruit for a refreshing side.
  • As a post-workout snack alongside some easy pasta recipes for a satisfying meal.

Make Ahead and Storage

If you’re like me and love to plan ahead, you’ll be happy to know that this shake can be made in advance! Here are some storage tips:

  • Store any leftovers in an airtight container in the fridge for up to 24 hours. Just give it a good shake or stir before enjoying!
  • You can also prep the ingredients the night before. Just combine everything in the blender and store it in the fridge. In the morning, blend it up for a quick breakfast!
  • For a fun twist, try freezing the shake in ice cube trays. Blend the frozen cubes with a splash of milk for a refreshing treat later!

So there you have it! A delightful Iced Coffee Protein Shake that’s perfect for busy mornings or a quick afternoon boost. I hope you enjoy making this recipe as much as I do. It’s a fantastic way to energize your day and can easily fit into your routine of quick family dinners and 30-minute meals. Try it today, and let me know how you like it!

Iced Coffee Protein Shake

Prep Time 5 minutes
Total Time 5 minutes
Servings 1 cup
Calories 180
A refreshing and protein-packed iced coffee shake perfect for a quick energizing boost.

Ingredients

Beverages

  • 1 cup Coffee (Your choice)
  • 4 ounces Milk Substitute (or Milk)
  • 0.5 teaspoon Ground Cinnamon
  • 2 tablespoons Cocoa Powder
  • 1 scoop Protein Powder (Chocolate or Vanilla)
  • 0.5 cup Ice

Instructions 

  • Combine all of the ingredients into a shaker bottle
  • Shake them together

Notes

Adjust the sweetness or flavor by adding sweetener or vanilla extract if desired.
Calories: 180kcal
Cost: $5
Course: Beverage
Keyword: Coffee, Protein

Are you ready to indulge in a creamy, dreamy dessert that won’t derail your healthy eating goals? I know I am! Today, I’m excited to share my recipe for Cookies & Cream Protein Cheesecake. This delightful treat is not only delicious but also packed with protein, making it a perfect choice for those of us who want to enjoy a sweet indulgence without the guilt. Plus, it’s so easy to whip up, you can even make it while preparing your favorite easy pasta recipes for a quick family dinner!

Why You’ll Love This Recipe

  • Quick and easy to make in just 5 simple steps.
  • High in protein, making it a healthier dessert option.
  • Perfect for meal prep or a sweet treat after a busy day.
  • Great for sharing with family and friends!
  • Can be customized with your favorite mix-ins or toppings.

Ingredients

To make this scrumptious Cookies & Cream Protein Cheesecake, you’ll need the following ingredients:

  • 2 cups of low-fat cream cheese
  • 1 cup of Greek yogurt
  • 1/2 cup of protein powder (cookies and cream flavor works best!)
  • 1/2 cup of sweetener (like stevia or erythritol)
  • 1 teaspoon of vanilla extract
  • 1 cup of crushed chocolate sandwich cookies
  • 1/4 cup of milk (dairy or non-dairy)
  • Optional: whipped cream for topping

Full ingredient list with measurements is provided in the printable recipe card below.

How to Make the Recipe

Now, let’s dive into the fun part—making this delicious cheesecake! Follow these easy steps:

  1. Prepare the crust: In a mixing bowl, combine the crushed chocolate sandwich cookies with a little melted butter. Press this mixture into the bottom of a springform pan to create a crust.
  2. Mix the filling: In another bowl, beat together the low-fat cream cheese, Greek yogurt, protein powder, sweetener, and vanilla extract until smooth and creamy.
  3. Add the milk: Gradually mix in the milk until the filling reaches a smooth consistency.
  4. Combine: Fold in the crushed cookies, reserving a few for topping later. Pour the filling over the crust in the springform pan.
  5. Chill: Refrigerate the cheesecake for at least 4 hours, or overnight for best results. Once set, remove from the pan and top with whipped cream and remaining crushed cookies.

Pro Tips for Making the Recipe

Here are some of my favorite tips to ensure your cheesecake turns out perfectly:

  • Make sure your cream cheese is at room temperature for easier mixing.
  • For a richer flavor, consider adding a tablespoon of cocoa powder to the filling.
  • If you want to make this cheesecake even more decadent, drizzle some melted dark chocolate on top before serving.
  • Feel free to experiment with different flavors of protein powder to suit your taste!

How to Serve

This Cookies & Cream Protein Cheesecake is perfect for any occasion! Here are some serving suggestions:

  • Serve it as a delightful dessert after a family dinner.
  • Pair it with fresh berries for a pop of color and flavor.
  • Enjoy it as a post-workout treat to refuel your body.
  • Slice it into small pieces for a fun addition to a dessert platter at gatherings.

Make Ahead and Storage

This cheesecake is a fantastic make-ahead dessert! Here’s how to store it:

  • Keep it covered in the refrigerator for up to 5 days.
  • You can also freeze individual slices for up to 3 months. Just wrap them tightly in plastic wrap and then foil.
  • To thaw, simply place in the refrigerator overnight before serving.

So there you have it! A delicious, creamy, and protein-packed dessert that’s perfect for any occasion. Whether you’re looking for a sweet treat after a busy day or a delightful addition to your next gathering, this Cookies & Cream Protein Cheesecake is sure to impress. And remember, it pairs wonderfully with your favorite 30-minute meals or creamy garlic pasta for a complete weeknight dinner idea. Enjoy every bite!

Cookies & Cream Protein Cheesecake

Prep Time 15 minutes
Cook Time 1 hour 30 minutes
Total Time 1 hour 45 minutes
Servings 8 slices
Calories 350
A delicious high-protein cheesecake combining cookies and cream flavors for a satisfying treat.

Ingredients

Dairy

  • 2 large Whole Eggs
  • 12 ounces Cream Cheese (Fat Free)
  • 10.6 ounces Greek Yogurt (Fat Free Vanilla)

Sweeteners & Flavors

  • 2 tablespoons Marshmallow Fluff
  • 1 tablespoon Chocolate Chips (Melted Semi-Sweet)
  • 1.5 teaspoons Vanilla Extract
  • 0.5 teaspoon Lemon Juice
  • 0.25 cup Sweetener

Cookies

  • 9 mini cookies Mini Cookies

Instructions 

  • Combine all ingredients except cookies in a large bowl and mix well.
  • Pour mixture into a parchment-lined 6×2 cake pan and crush cookies on top.
  • Bake at 325°F (162°C) for 25-30 minutes, then reduce temperature to 200°F (93°C) and bake for another 50-60 minutes.
  • Cool, wrap, and refrigerate overnight or for a few hours before serving.

Notes

Use fat-free cream cheese and Greek yogurt for a lighter version.
Calories: 350kcal
Cost: $15
Course: Dessert
Cuisine: American
Keyword: cheesecake, cookies, Protein

Are you craving pizza but short on time? I totally get it! As a busy woman juggling family, work, and everything in between, I often find myself in need of quick family dinners that are both satisfying and nutritious. That’s why I’m excited to share my recipe for a Quick Healthy Microwave Pizza that you can whip up in just minutes! This delightful dish is not only delicious but also a fantastic option for those nights when you want something comforting without the guilt. Plus, it’s a great alternative to those easy pasta recipes we all love!

Why You’ll Love This Recipe

  • Quick and easy to make, perfect for busy weeknights.
  • Healthy ingredients that you can customize to your taste.
  • Great for kids and adults alike—everyone loves pizza!
  • Minimal cleanup required, making it a stress-free option.
  • Can be made in under 10 minutes, ideal for 30-minute meals!

Ingredients

To make this Quick Healthy Microwave Pizza, you’ll need just a few simple ingredients that you probably already have in your pantry. Here’s what you’ll need:

  • 1 whole wheat pita or tortilla
  • 2 tablespoons of pizza sauce (store-bought or homemade)
  • 1/2 cup shredded mozzarella cheese
  • Your favorite toppings (pepperoni, bell peppers, mushrooms, etc.)
  • Italian seasoning (optional)

Full ingredient list with measurements is provided in the printable recipe card below.

How to Make the Recipe

Making this Quick Healthy Microwave Pizza is as easy as 1-2-3! Follow these simple steps:

  1. Start by placing your whole wheat pita or tortilla on a microwave-safe plate.
  2. Spread the pizza sauce evenly over the base, leaving a little space around the edges.
  3. Sprinkle the shredded mozzarella cheese generously on top of the sauce.
  4. Add your favorite toppings. I love a mix of bell peppers and mushrooms for a veggie boost!
  5. If you like, sprinkle a pinch of Italian seasoning for extra flavor.
  6. Microwave on high for about 1-2 minutes, or until the cheese is melted and bubbly.
  7. Let it cool for a minute, slice, and enjoy!

Pro Tips for Making the Recipe

Here are some of my favorite tips to ensure your microwave pizza turns out perfectly every time:

  • Use a microwave-safe plate to avoid any mess.
  • Don’t overload your pizza with toppings; it can make it soggy.
  • Experiment with different sauces—try pesto or a creamy garlic pasta sauce for a twist!
  • For a crispier base, microwave for a shorter time and then pop it in a toaster oven for a minute.
  • Make it a family affair! Let everyone customize their own pizza with their favorite toppings.

How to Serve

This Quick Healthy Microwave Pizza is perfect as a quick snack or a light meal. Serve it with a side salad for a complete dinner. You can also pair it with some homemade garlic bread or a refreshing drink. It’s a fantastic option for those busy weeknights when you need something quick yet satisfying. If you’re looking for more ideas, check out my collection of weeknight dinner ideas!

Make Ahead and Storage

If you want to prepare ahead, you can assemble the pizzas and store them in the fridge for a day. Just add the toppings right before microwaving to keep everything fresh. For leftovers, store any uneaten pizza in an airtight container in the fridge for up to 2 days. Reheat in the microwave for a quick snack or meal. It’s a great way to enjoy your favorite pizza without the hassle of making it from scratch every time!

So there you have it! A Quick Healthy Microwave Pizza that’s not only easy to make but also delicious and nutritious. I hope you give this recipe a try and enjoy it as much as I do. It’s perfect for those nights when you want something comforting and quick, and it fits right in with my favorite easy pasta recipes and 30-minute meals. Happy cooking!

Quick Healthy Microwave Pizza

Prep Time 5 minutes
Cook Time 2 minutes
Total Time 7 minutes
Servings 1 serving
Calories 250
This quick and healthy microwave pizza is perfect for a fast snack or meal, using simple ingredients and minimal prep.

Ingredients

Dough

  • 0.25 cup Pastry Flour (Whole Wheat)
  • 0.5 scoop Protein Powder
  • 0.25 teaspoon Baking Powder
  • 0.125 teaspoon Salt
  • 1.5 ounces Milk (or Milk Substitute)
  • 1 tablespoon Olive Oil
  • 1-2 tablespoons Pizza Sauce
  • to taste Oregano (Your Choice)
  • 0.125 cup Cheese (Your Choice Lower Fat)
  • slices Pepperoni (Mini *Optional)

Instructions 

  • Mix flour, protein powder, baking powder, and salt in a bowl.
  • Add milk and olive oil; stir until smooth.
  • Spread batter on a microwave-safe plate, top with sauce, oregano, cheese, and pepperoni.
  • Microwave for 60-90 seconds until bubbling.

Notes

Use low-fat cheese for a healthier option.
Calories: 250kcal
Cost: $3
Course: Main Course, Snack
Cuisine: American
Keyword: Healthy, Microwave, Pizza

As the holiday season approaches, I find myself dreaming of cozy mornings filled with the delightful aroma of pancakes wafting through the air. This year, I decided to put a festive twist on a classic breakfast favorite by creating Protein Eggnog Pancakes. These pancakes are not only delicious but also packed with protein, making them a perfect start to your day. If you’re like me and love to whip up easy pasta recipes for quick family dinners, you’ll appreciate how simple and satisfying these pancakes are!

Why You’ll Love This Recipe

  • Festive flavor that captures the essence of the holiday season.
  • High in protein, perfect for a nutritious breakfast.
  • Quick and easy to make, ideal for busy mornings.
  • Great for the whole family, even the picky eaters!
  • Can be made ahead and stored for a quick breakfast option.

Ingredients

To make these delightful Protein Eggnog Pancakes, you’ll need the following ingredients:

  • 1 cup all-purpose flour
  • 1 scoop vanilla protein powder
  • 1 teaspoon baking powder
  • 1/2 teaspoon baking soda
  • 1/4 teaspoon salt
  • 1 cup eggnog
  • 1 large egg
  • 1 tablespoon vanilla extract
  • 1 tablespoon melted butter or coconut oil
  • Optional: nutmeg and cinnamon for extra flavor

Full ingredient list with measurements is provided in the printable recipe card below.

How to Make the Recipe

Making these Protein Eggnog Pancakes is a breeze! Here’s how to do it:

  1. In a large mixing bowl, whisk together the flour, protein powder, baking powder, baking soda, and salt.
  2. In another bowl, combine the eggnog, egg, vanilla extract, and melted butter. Mix well.
  3. Pour the wet ingredients into the dry ingredients and stir until just combined. Be careful not to overmix; a few lumps are okay!
  4. Heat a non-stick skillet or griddle over medium heat. Lightly grease with butter or cooking spray.
  5. Pour 1/4 cup of batter onto the skillet for each pancake. Cook until bubbles form on the surface, about 2-3 minutes.
  6. Flip and cook for another 2-3 minutes until golden brown.
  7. Repeat with the remaining batter, adjusting the heat as necessary.

Pro Tips for Making the Recipe

Here are some of my favorite tips to ensure your pancakes turn out perfectly:

  • For fluffier pancakes, let the batter rest for about 5 minutes before cooking.
  • Feel free to add chocolate chips or chopped nuts to the batter for extra flavor and texture.
  • If you want to make these pancakes even more festive, sprinkle some nutmeg or cinnamon into the batter.
  • Keep your pancakes warm in a low oven while you finish cooking the rest.

How to Serve

These Protein Eggnog Pancakes are delicious on their own, but you can elevate them even further! Here are some serving suggestions:

  • Top with whipped cream and a sprinkle of nutmeg for a festive touch.
  • Drizzle with maple syrup or honey for added sweetness.
  • Serve with fresh fruit like berries or banana slices for a pop of color and flavor.
  • Pair with a side of crispy bacon or sausage for a hearty breakfast.

Make Ahead and Storage

If you’re looking for 30-minute meals that can be prepped in advance, these pancakes are perfect! Here’s how to make them ahead of time:

  • Prepare the batter the night before and store it in the refrigerator. Just give it a good stir before cooking.
  • Cook the pancakes and let them cool completely. Store them in an airtight container in the fridge for up to 3 days.
  • To reheat, simply pop them in the toaster or microwave for a quick breakfast option.

These Protein Eggnog Pancakes are not just a breakfast treat; they can also be a delightful addition to your holiday brunch table. Whether you’re hosting family or just enjoying a quiet morning at home, these pancakes will surely bring a smile to your face. And if you’re looking for more weeknight dinner ideas, don’t forget to check out my favorite creamy garlic pasta recipes for those busy evenings!

So, what are you waiting for? Grab your ingredients and let’s make some festive pancakes that will warm your heart and fill your belly!

Protein Eggnog Pancakes

Prep Time 5 minutes
Cook Time 10 minutes
Total Time 15 minutes
Servings 2 servings
Calories 250
Enjoy a festive and protein-packed twist on classic pancakes with this quick and easy recipe.

Ingredients

Dairy & Eggs

  • 1 large Large Whole Egg
  • 2 large Large Egg Whites
  • 4.5 teaspoons Ground Cinnamon (½ teaspoon)
  • 1 scoop Protein Powder (Vanilla)
  • 3 tablespoons Coconut Flour
  • 2 ounces Eggnog (or Eggnog Substitute)
  • 4 ounces Cream Cheese (Fat or Reduced Fat Preferred)
  • 1.5 teaspoons Baking Powder

Instructions 

  • Combine all ingredients in a bowl, blender, or food processor.
  • Mix until smooth.
  • Heat a non-stick pan over medium heat, coat with cooking spray, and pour batter.
  • Cook each side for 2-3 minutes until golden.

Notes

For extra flavor, add a splash of vanilla extract or nutmeg.
Calories: 250kcal
Cost: $8
Course: Breakfast
Cuisine: American
Keyword: Eggnog, Pancakes, Protein